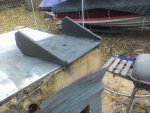
Just acquired a 170 Horizon. Assembly required.

chevymaher

Commander
Joined
Mar 29, 2017
Messages
2,924
No Title

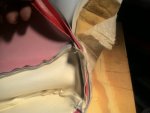
Here is the seam giving me grief. I got about 6 inches left and it is off to the next one. It is a 1/4 inch thick got corners in it. Multiplier difficulty target LOL. As long as it looks factory it is worth it to me. I got all winter to do 3 more of these and the back seat which is cake it is all flat. Compared to the seats the side panels are a joke. Much much easier.

Just sit and watch TV and sew. Very time consuming but not that bad. Fingers get a little sore.
 

Attachments

  • photo280817.jpg
    photo280817.jpg
    47.7 KB · Views: 3

Woodonglass

Supreme Mariner
Joined
Dec 29, 2009
Messages
25,928
Yeah Now that you mention it dual colors is gunna be a problem with the double piping foot.!!! One thing I've discovered when it comes to corners and multiple layers is to use a plier stapler!!
71rUwqGrHvL._SY463_.jpg

this holds everything in place, and allows you to concentrate on stitch placement and following the curve precisely without worrying about keeping the pieces aligned properly. Once it's stitched you can easily remove the staples.
 

chevymaher

Commander
Joined
Mar 29, 2017
Messages
2,924
No Title

I need to pick up a piece of 3/4 plywood tomorrow on my run. I planned on 1/2 inch on the seat sides before it came apart. Well sides are thicker. It all good.

I also found out the seat I started on was a redone in the past seat. That is unfortunate. Because the pieces were not exactly right. Had some straight spots where it should have had a curve. Resulting in hard to get out wrinkles. It looks fine I am sure the next will be better. My butt wont care sitting on it.

I found out starting the next seat. I compared it to the rest and it was the same. Only that one was completely redone. Like in the bow section the starboard side was different.

I started the back of the first seat and got a cap done. Sewing is improving now I was rusty starting out.

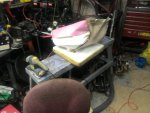
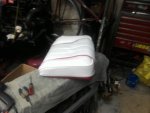
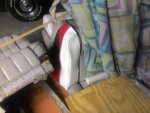
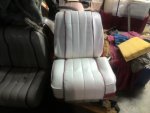
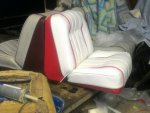
First pic stapling the hidden parts. Second the seat. Third the cap for the back.
 

Attachments

  • photo280882.jpg
    photo280882.jpg
    81.3 KB · Views: 1
  • photo280883.jpg
    photo280883.jpg
    51.2 KB · Views: 1
  • photo280884.jpg
    photo280884.jpg
    64.9 KB · Views: 1

chevymaher

Commander
Joined
Mar 29, 2017
Messages
2,924
Looking very nice dude!!
Thank you Chuck. I looked at it this morning already. It is stretching and smoothing out already. It be just fine.

The admiral has to work in the childrens center in the next town over today, So on the way back I will pick up the piece of 3/4 plywood. I got the back marked on a piece of 1/2 inch already. Once I get the 3/4 I will mark the sides and cut sand and glue it together. Go back to work on the seat. I am burning up that thread I got it is about time to recop on that.

I found and modified the other half crows foot for the white machine. I changed sewing stratagies on this one. Sew the piping to one side. Switch crows foot then sew the other side to that. Much easier to keep the material lined up and keep it from bunching up.

I think on the double piping this time I will try that. Sew one piece to one side and the other to its side. Then see it is is possible to sew them both together using the new crows foot that should arrive here monday or so. That would be a great time and finger saver.

Learn as I go. All I know is sewing through 9 layers and piping itself in spots is rough. My fingers are sore. I now have done each operation needed to complete the interior. That makes me feel more at ease I know I can get it done without any catastrophes now.

I got a hold up today to. My buddies grand daughter. Miss I always check my oil. Well then why is it completely empty girl. She followed status quo. Got a new car and checked the oil when it was overheating and knocking. This was a year ago when she got it. Well the poor car is showing the abuse now. It is running rough. So I got to go over and see what she destroyed and if it can be milked along a while.

One day she called us it was smoking. We went to her work. No biggie it had a bad heater hose it was leaking. She lives only 2 miles from home flat ground on the way home. It only leaked when it was hot. Cold it held water. Told her to just go easy and bring it home and we would fix it the next day. It didn't matter if we took it then and drove it or she did. Wrong move. She drove 30 miles out of her way to take her boyfriend home and it was puking when she got back. Same car as the out of oil incident. So this is what we are dealing with here. What has she done now.

I keep telling him as long as he keeps buying her cars and fixing them for nothing. She isn't going to learn. Make her get her own and walk next time she does this.
 

chevymaher

Commander
Joined
Mar 29, 2017
Messages
2,924
No Title

Got the wood 3 more spools of thread. Cleaned another wal mart out of it. Apparently they only keep 3 in stock.

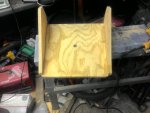
Got the wood cut. Pre drilled and countersunk the screw holes. Glued and screwed it.
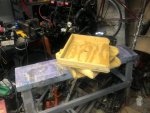
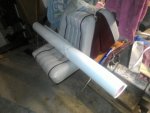
Got the rest of the materials separated. Parts cut out.

Ready to sew in the morning.

Pics the seat back, next 2 the old and new parts and separated piping and foam. Last the scrap pile of growing material after I cut the pieces
 

Attachments

  • photo280933.jpg
    photo280933.jpg
    69.2 KB · Views: 1
  • photo280934.jpg
    photo280934.jpg
    51.6 KB · Views: 1
  • photo280935.jpg
    photo280935.jpg
    60.5 KB · Views: 1
  • photo280936.jpg
    photo280936.jpg
    56.9 KB · Views: 1

chevymaher

Commander
Joined
Mar 29, 2017
Messages
2,924
I was a needle snapping fool today. Little to much experimenting going on. The thread wrapped on the pillar it goes on and it pulled tight. Bent the needle and jammed it into the walking foot. I had that machine apart for hours cleaning and adjusting things. It works again but you can't nail it doing piping. It hit that rubber in the piping SNAP.

I got the other cap done and the pleats. I did sew the piping to each side. That was where some of the needles went. I bought 10 today. Machine does not like climbing over piping coming in at a right angle at all. So I went to the piping. Stopped and went to the other side and started.

I started hand sewing the double piping together. It made a big difference in how fast I can sew it. Now I only got to line up 2 things. Press the piping down on the wood in my lap. And just jam the needle through. Still not easy by any means but a improvement.
 

chevymaher

Commander
Joined
Mar 29, 2017
Messages
2,924
No Title

The experiment of sewing the piping to their respective sides and then hand sewing it together helped alot. Only took one day to do it as opposed to 3 for the bottom. In the pic it is just laying againt the other seat it isn;t on anything. Just kinda floppin there.

Got the seat back sewn and the wood shaped sanded and painted. Only 3 more to do of this non sense.
 

Attachments

  • photo281003.jpg
    photo281003.jpg
    90.8 KB · Views: 2
  • photo281004.jpg
    photo281004.jpg
    56 KB · Views: 2

Woodonglass

Supreme Mariner
Joined
Dec 29, 2009
Messages
25,928
With the double piping I'm calculating you're trying to sew thru 8 layers of vinyl. My singer 15-91 will to that but...With help. On a straight run where I can put the power to it it works fine..Corners....Uhmmm NO. I have to turn the hand wheel for every stitch, but it's still faster than hand sewing.
 

chevymaher

Commander
Joined
Mar 29, 2017
Messages
2,924
With the double piping I'm calculating you're trying to sew thru 8 layers of vinyl. My singer 15-91 will to that but...With help. On a straight run where I can put the power to it it works fine..Corners....Uhmmm NO. I have to turn the hand wheel for every stitch, but it's still faster than hand sewing.
When the new crows foot arrives it fits the more powerful machine of the 2 I have. I will be trying what your talking about. Now that I am sewing one of the piping to each side first it is alot easier. Now can I keep the 2 parts controlled and straight with a machine. By the time I figure this out I will be done tho. As long as it all gets done by warm glassing weather it is all good.

I can see the rear seats getting done with the machine tho. They don't have the curves and the piping coming into the double piping at right angles. That is 12 layers and the rubber in the piping at that junction. The crows foot literally wont open that far. And I adjusted both machines to open all the way. With the crows foot in the up position the needle is hitting it. And the crows foot wont let it pass even it I open it as that point arrives. I just went down and measured the thickness. After sewing it is 5/8 inch thick at that joint.
 

Woodonglass

Supreme Mariner
Joined
Dec 29, 2009
Messages
25,928
The more you stitch the more you learn. It gets easier as you go. Don't be afraid to ask before you jump. Lot's of good "Stitchers" here on the forum that can give you tips and tricks to make your stitchin' easier.
 

chevymaher

Commander
Joined
Mar 29, 2017
Messages
2,924
The more you stitch the more you learn. It gets easier as you go. Don't be afraid to ask before you jump. Lot's of good "Stitchers" here on the forum that can give you tips and tricks to make your stitchin' easier.

I am listening to. I got the new crows foot on the way. I got some yard work needing done. Last load of leaves need raked and mulched and some plants cut back bulbs dug up and brought in for the winter after this seat back is done. Then the yard is caught up till spring plantings.

I am going to make up some piping with the scraps and use the old seat material and practice on the double piping operation when the new foot arrives. So I don't ruin the new parts like I did on the one seat and got to start over. That set me back a bunch. It folded on the corner and that was it for that one cut it back apart.

It is alot different than the blue jeans I used to make. I am getting better as time goes by. And unlike when I did this as a job there is no one to show this is how you are supposed to do it. It is a learn the hard way deal. I am sure there was a special machine like a surge machine this is supposed to be done with and we just doing it with the wrong one. But got to do what you got to and get er done.

As always I appreciate all the help I can get.

The admiral says in the spring we should get a new bigger machine with the tax returns because I do this stuff periodically. Make motorcycle seats and such. I want one like the white I got. A stand up one. All the attachments. Poor ol white is just a antique. I got it because I thought it was cool not to use. It is a 1930's machine at least. I was filling the bobbin yesterday and the rubber on the wheel literally exploded and fell off. I got that rigged and working again tho.

The JC Penny one is in good shape just not a heavy enough machine for what this needs. And it doesn't have all the attachments the white does.

Well my smoke break is over time to get some shut eye so I am ready to work in the morning.
 

Woodonglass

Supreme Mariner
Joined
Dec 29, 2009
Messages
25,928
keep and eye out on craigslist for Industrial Sewing Machines. You can find them occasionaly for 3-400 bucks.
 

chevymaher

Commander
Joined
Mar 29, 2017
Messages
2,924
No Title

Okay got the back done. I looked at the remaining seats and the same wrinkles in the same places so I am good with it. Stop beating myself up with the U Sucs. If they did it doing it everyday it can't be that easy. So I give myself a pass as a newby. They do seem to form to it better as the days go by. The seat bottom already looks a million times better just sitting there.

Then I did my yard work and got that handled. Then back to the salt mines.

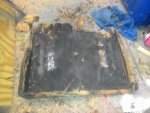
Second pic wow I can't believe i ever thought this boat was in good shape when I got it. Nothing is once it comes apart. Kudos to CrazyFinn for basically saving my life LOL. Again buzz of the new boat over rode common sense. Actually it did feel and look solid. I was kinda amazed taking it apart. They seats seemed good handling them bringing them in. But proof is in the pic wasted. No wonder it struggled to open into the bed. Screws had no threads and were breaking off. Wood well there was a little left. Vinyl was holding that together.

I ended up taking a second seat bottom apart for the pattern. I am shifting into mass production now. Practice is over. I cut the 3 remaining seat bases and the side pieces. Those I sill got to cut to length but the width is done.
 

Attachments

  • photo281057.jpg
    photo281057.jpg
    71.1 KB · Views: 3
  • photo281058.jpg
    photo281058.jpg
    70.1 KB · Views: 3

chevymaher

Commander
Joined
Mar 29, 2017
Messages
2,924
Looks good and you are kickin some butt Chevy!
Thank you.

All I know is this looks so much better than what was there. It was all so wet believe it or not. I had 2 splits and one place where the seams was coming apart so it looked pretty good when I got it. Now that it is drying out. The seats are literally falling apart in the dry garage. The one seat bottom has split end to end on all the pleats.

I am getting coffeed up now. Then go finish making these 3 seat bottoms. Drill glue and screw them. Let them dry before shaping and sanding. Then start separating all the pieces I need to use out. Foam in the pleats and the rubber inside the piping. Then start cutting the pieces.

I am running low on white vinyl. Once I run out I need to make measurements and go get some more red and white vinyl from Joannes fabric to finish this up.

My poor chevelle is getting full now. It is the storage place for all these boat parts. Back seat is filling with finished seat parts. Front seat is full of engine bay deck parts. Trunk is full of anchors prop skii and various other ropes. Skii locker cover and life jackets.

Garage is getting full now of boat. Stuff keeps coming in and nothing ever goes out. Garbage can is full yet again of the old interior. Wood and vinyl going to the big boat dock in the sky.

I have made preliminary arrangements and cleared them with the admiral now. Where the boat is now it will be a major pain to get out around the house. But for working on it. It is perfect being next to the door. My back yard is basically a cliff once you get past the paved section of driveway.

So I am going to get some retaining wall block and make a 2-3 foot wall in one spot. Fill that with rock and gravel. There is a quarry to get it from a mile away that is a 100 bucks a truck load. So the boat has a straight shot out of the driveway. And isn't in the way of the main garage door blocking the van and chev. Move the carport dealy over there. Then start the foundation for the outside Garage/paint booth I been planning for about 5 years but never get around to doing.

Things like the boat keep popping up and distracting me. Now there will be a additional bay separate for the boat. Can't be getting overspray on my baby now can we LOL.
 

chevymaher

Commander
Joined
Mar 29, 2017
Messages
2,924
No Title

We having a little storm here right now. It is supposed to be thunder rain and wind. But it is sunny and just incredible wind so far. Ol car port is hangin tough I am impressed. looked out during one good gust. It was trying to rip the boat cover off pretty good but the car port so far was a rock.

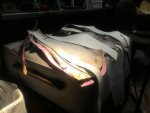
Now on to regional news. I got the seat bases all 3 of them assembled. I forgot a picture of them stacked so I guess that happened tomorrow when I got the pic. Right now there a ton of crap on top of them form the next stage of work.

I disassembled the parts. That takes a while. I made patterns for the parts and am cutting them all until i ran out of white. I got all the red for the bases. And I had enough white to finish this seat.

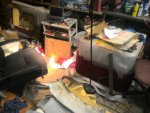
Pics the disassembled part in the mess that is the work station for this in the man cave. Before i bring the part up to sew.

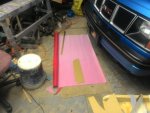
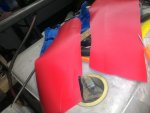
marking the red parts then the stack of them cut.

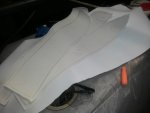
The white parts ready.

I am wore out start to sew in the morning. I got my real life adventures and responsibilities to deal with now. Hate that when life gets in the way of playing.
 

Attachments

  • photo281079.jpg
    photo281079.jpg
    83.5 KB · Views: 1
  • photo281080.jpg
    photo281080.jpg
    69.6 KB · Views: 1
  • photo281081.jpg
    photo281081.jpg
    54.5 KB · Views: 1
  • photo281082.jpg
    photo281082.jpg
    41.2 KB · Views: 1

chevymaher

Commander
Joined
Mar 29, 2017
Messages
2,924
No Title

Well didn't really get much done today been playing family taxi. I got one cap done.

Here are the seat bases so they did happen now.

But I did spend another 200 bucks on the boat. That roll of vinyl in the pic. I got all 3 colors in that roll. We should be good for a while working now.

I got more family stuff to do now. So I guess it is a boat break day as far as working.
 

Attachments

  • photo281127.jpg
    photo281127.jpg
    81.8 KB · Views: 2
  • photo281128.jpg
    photo281128.jpg
    69.2 KB · Views: 2
Top