Intex Mariner 4 modifications and Tips

eclipse3gen

Seaman
Joined
Dec 8, 2013
Messages
53
Re: Intex Mariner 4 modifications and Tips

I now see the interest in C channel edges. Took my boat out for the first time last night and had a blast! A friend and I landed 4 small rainbow trout an had a blast going around the lake silently with the 55lb Minn Kota. There is a bit if movement at the seams of the floor, so I think I'll join the group looking for some C channel. My only concern would be the hard metal edges being rough on the boat material.
My only other disappointment is that my keel valve hole ended up being just a little off target, but I still think it will work out fine. I'll be going out on the lake again in about an hour with my 3yo son. I'll try to take more pics with my phone. I think I'll use some nymphs or streamers to see if I get any larger fish than last night. We were both using little dry fly mosquitos.

Oh... I was going to post a couple pictures from last night, but I guess I can't do that from my phone. Pictures from last night and any I take today will be up later tonight or tomorrow then.

if you are not able to get the hole location right, use the original floor hole to get the measurements. It worked out just great for me.


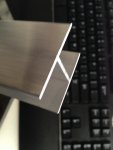
I received the H-Channel today. I probably would have like it bit stronger but I am quite sure this will do just fine. Perhaps 1/8 or 1/4 thickness if you can get hold of one. if anyone wondering, I got one 6ft panel and it was $13. Shipping was $11. Ended up costing almost double with shipping but this is the cheapest i could find anywhere.
 

Attachments

  • h-connector.jpg
    h-connector.jpg
    32.7 KB · Views: 7
Last edited:
flukesofnature

Petty Officer 2nd Class
Joined
Mar 9, 2014
Messages
122
Interesting development on wood floor installation. As I have said. I Have M3 ...this is mid second season of its use.Developed a small water leak about a month a go, which left some..not too much, water in the rear of the boat after a day of fishing. At first, I thought it might have been wind chop, or perhaps water run off from lifting the anchor. Last week , same thing only more,and noticed water would shift from rear to front when I shifted board /seat a tad forward to row better( I Know ..what is this word row???..Yes I use a trolling motor..wanted to row..I"m fat OK?) The board is supported by 2 three inch PVC posts with flanged supports at the floor and under the seat, and two bungy chords attached to floor with eye-bolts..to prevent tipping fore /aft of the seat...Any way more water. All air chambers were full all day. So I deducted it was some sort of a seam failure between the floor and the side tube connection.
Turned M3 over and noticed some stitching undone at the seam between floor and side tubes. maybe 1/8 inch of area where stitching was frayed.
Here's the rub...that stitching is directly under the first angle inward of the floor I built. I had given thought a few weeks ago that my exact measurements, to include the thickness of the pipe insulation , and how "snug" the installation was.
My feeling is that there is extreme pressure exerted by the wood floor at certain points...and thus the seam failure, and water.
My point is ....perhaps we do not need exact measurements...maybe a slightly less snug floor would still provide support, and not over strain the seams at the floor/side junction.
Anybody else sloshing around in water from unknown source......? Check the seams on the bottom..either inside or outside on the flip side,upside down on the very outside bottom of boat.
BTW.....coated entire seam all the way around with 2 layers Loc-tite Plastic/ PVC liquid cement(with 24 hour dry time)..will let you know how leak intervention worked. It did form a nice new "vinyl" seam..painted.about 1/2 inch wide all the way around. With a double layer....it shoujld prevent water from entering. Strength added , for above weight/pressure problem??????remains to be seen
I doubt that the pvc floor would lose its integrity by having the seam pull out and you or I fall through into the deep blue..and this may have been a bad stitch...but water in the boat is not optimal.
 
Last edited:

CopperFox

Petty Officer 2nd Class
Joined
Jan 13, 2012
Messages
169
Flukes: A very timely piece there. I have had an M4 for about a year now and I made a wooden floor (15/32") from day 1. I've never used piping. The last 3-4 trips I've noticed a little water in the boat after I remove the floor boards. Not much. Not even a cup worth. But it never used to be there. I've suspected a puncture or tear but just not looked into it yet. I'll check the seams as you did. Please let us all know how your patch job worked. Thanks.
 

flukesofnature

Petty Officer 2nd Class
Joined
Mar 9, 2014
Messages
122
Copper
Decreased noticeable water by 90 %....very pleased with results of Loctite Vinyl cement...will continue to monitor....I was actually rowing against the wind with a small chop...so water may (in this case actually have been spill over from waves)...at any rate..my wooden floor was not soaked, or even noticeably wet underneath after 4 hours of fishing..Inflatable boat parts.com suggests a top coat for inflatables...old ones with pin holes etc... but the paintable aspect of this type of liquid may also serve on the seams as a sealant. My next move was to use the same or similiar substance on the inside of the seams , ( approx 1 inch over lap on the inside bottom of M3 ( and M4 I assume) to create an inside water barrier...might not have to at this point. I have also checked out a product called HH-66 ( through "sail-rite" that looks promising..although the great reviews state that the cost of shipping is as much as the cost of 8 ozs of the cement. The Loc-Tite I used was 4.00 at home depot, and I used two tubes for the entire perimeter of the seam I sealed...so 8.oo ish.....almost same as HH-66 less shipping.
 

flukesofnature

Petty Officer 2nd Class
Joined
Mar 9, 2014
Messages
122
Where have all the Mariner Mod posts gone?????Not a word even after they ruined everything until May 30....
Note to all floor builders....after a year of use----20-25 times....I decided to remove about 1/2 inch off all sides of the OSB floor I built. I had noted a leak, found it was the outside bottom seam where the floor and the tubes are joined,repaired and decided that the exact dimensions were too tight...and thus the retro fit.....
But when I examined the floor closely..after wondering ...gees this seems to weigh more, my 15/32 OSB had swelled to near 3/4 inch..and was soggy from the small leak,above mentioned., Decide to follow through with the removal of 1/2 inch on each side and subsequent angles and length.
Said all that to say this.....DO NOT USE OSB.....with all the potential for water around an inflatable boat.....OSB loves water too much....
 

NanoLT

Recruit
Joined
May 12, 2014
Messages
1
Hello everyone,

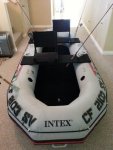
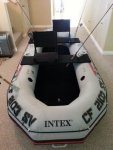
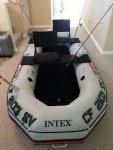
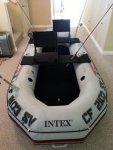
Just wanted to chime in on the modding. Thanks for the tips and very helpful pictures. I, too, did a few things different but anyways I thought I would share as well. I used 1/2" plywood leftover from another project. With the wood (8ft cut into two 3ft pieces, two 1ft pieces): I routed the sides, notched a few edges to add plates to solve uneven problems with floor, put several holes with forstner bits and permanently glued/tightened down one side and left the other for lake set up (so far I haven't tightened the other side on the lake and it works fine with two people on board), waterproof/watersealed, then finally carpeted. Summer is around the corner and I plan to complete my mods soon (custom bimini, better rod holding system, and add a cleat for easier anchoring). My opinion on the wood thickness is if you are over 200lbs maybe going with the 3/4 will be better. Other minor things I've done is spray painted (I know I'm not the best tagger) my tags with Duplicolor Vinyl and Fabric, put on some decal holders so my registration stickers doesn't keep peeling off when I fold it up, and added 4ft bench seats with mounted fish finder. After I was done with the custom floor, I weighed it to see how much more weight it added to the boat. It roughly added 8 lbs compared the 23lbs original floor. Personally I thought it would be heavier, but hey I will take that. When I have time again I will drop in to show my final mods.

P.S. for anyone having leaks from small punctures or lure punctures buy some from Coghlan airstop from Amazon or wherever you can. I almost decided to get rid of the boat after having it since last year in September. However, it saved my boat and now I can't stop modding and I'm definitely enjoying my fishing trips to the local lakes in SoCal.

Happy Modding and here are some pics,
Nano

boat 1.jpg

boat 2.png floor.png
 

Attachments

  • boat 1.jpg
    boat 1.jpg
    56.9 KB · Views: 39
  • boat 1.jpg
    boat 1.jpg
    56.9 KB · Views: 39
  • boat 1.jpg
    boat 1.jpg
    56.9 KB · Views: 34
  • boat 2.png
    boat 2.png
    2.1 KB · Views: 35
  • boat 2.png
    boat 2.png
    2.1 KB · Views: 35
  • boat 2.png
    boat 2.png
    2.1 KB · Views: 32
  • boat 2.png
    boat 2.png
    2.1 KB · Views: 24
  • boat 2.png
    boat 2.png
    2.1 KB · Views: 21
  • boat 2.png
    boat 2.png
    2.1 KB · Views: 24
  • boat 2.png
    boat 2.png
    2.1 KB · Views: 32
  • floor.png
    floor.png
    1.3 KB · Views: 43
Last edited:

eclipse3gen

Seaman
Joined
Dec 8, 2013
Messages
53
thank god i could log in again.

some of my posts are missing since so are from some others! are they coming back?
 

AKTrout

Cadet
Joined
Apr 10, 2014
Messages
28
Ahhh, I see my last few posts are missing too, including the pics I posted. Lame lame lame. Well, I'm going out this evening and will take some new pictures. This has been a rough ride on the forums for the last month: outages, disappearing posts, uncertainty of the future...
 

AKTrout

Cadet
Joined
Apr 10, 2014
Messages
28
Sorry to hear about the water damage to your floor flukes! I guess the tight fit and swelling would explain the ripped seam. In one of my posts that got lost in the recent black hole I had mentioned I thought I had a leak in chamber 3. Turns out I don't... The valve just wasn't screwed all the way in. Phew! Don't have to worry about patching yet.
Still think the Minn Kota 55lb motor is awesome. Like I said before, I LOVE my modded M4.
I am going to place an Amazon order today for that boat dolly you shared with me flukes (from yet another deleted post). Not sure how well it will support the M4, but I figure it's worth a try. I'll post my findings when it arrives. Seems the only negative reviews are in regards to a strong rubber odor from the tires.
 

mrdrh99

Senior Chief Petty Officer
Joined
Feb 1, 2013
Messages
756
Hey guys, I love the mariner 4 and will still use it from time to time with my Johnson 2hp on small lakes but I've upgraded to the 12ft Saturn mini cat. I wanted a large platform for the family to be cruise around and since I'm back down towards the coast I wanted something to take out into the sounds and inlets... Maybe even the icw. I'll still be frequenting the board.. I have more mods esp since the m4 will now be a one man boat!
 

mrdrh99

Senior Chief Petty Officer
Joined
Feb 1, 2013
Messages
756
I've read many posts about the bow riding really high and I've experienced this myself using a Minn Kota 45. I want to start using my evinrude 4hp, not at WOT though. Would getting one of these http://www.amazon.com/attwood-9400-..._sbs_sg_1?ie=UTF8&refRID=18HXC86Z9SSZYK17NGJ3 stop the stern from going into the water?. If so, is there another brand or model you guys recommend?
Post that question out in a new thread so some of the other guys with other outboards can see it, you're much more likely to get a good answer out there
 

danro

Recruit
Joined
Jun 16, 2014
Messages
3
Hey everyone,

i just recently bought a mariner 4 to supplement my fly fishing up here in vermont, and i have a couple questions regarding modifications. i basically got this thing to get me into some lakes and bigger river floats where i can't wade in while fly fishing. looks like MrDr is the only one ive seen using this thing for fly fishing, so since that will be my primary use for it (i.e. standing and casting) i wanted to know what method generates the most stable flooring for standing up in the boat. (for example is it better to cut the floor to the full width, or is the 27" width laid over top of the factory slat floor stable enough, etc.) im also trying to keep this thing pretty spartan (light) since my hope is to use this thing on my own to get away for a while, and since im planing on switching from trolling through the lakes and rowing during a river float, im hoping to put together some form of pedestal seat that can be moved between the two positions. im pretty new to this whole thing and ive been reading this thread page by page studying up, and im feeling a little paralyzed with choices, i was hoping if i outline what im looking to do with it the wizards on this thread can make suggestions on how to outfit the thing. id appreciate any help you guys would be willing to give. thanks in advance.
 

flukesofnature

Petty Officer 2nd Class
Joined
Mar 9, 2014
Messages
122
Danro
I built a floor from two pieces so that I could fly fish, and modified to use as drift..on rivers and float lakes with attached minn kota. In post 1018... I mentioned how I built the seats to sit on the tubes, off the floor, to be moved as need for whatever day of fishing I was planning. I used 3 inch PVC for support and used Butterfly nuts etc to make the set up and tear down more flexible....I/E troll or fly fish. Look at that post and see if you get the drift of the set up. I have the Mariner 3..so you would have to modify your floor length and width. A simple set up is a board , covered or padded to protect the tubes( Indoor outdoor carpet works well) and the pvc tubes I described under that seat. I would also suggest bungy chords attached from floor( eye bolts) to seat on front and back( fore and aft) of the board you use....prevents sudden shifts....or you can go with the standard pedestal seat w/swivel (all available from W A L L M A R T dot C O M) with a quick release mechanism..like butterfly bolts if you want to change the configuration.
 
Last edited:

mrdrh99

Senior Chief Petty Officer
Joined
Feb 1, 2013
Messages
756
I like the way I did my seats, it gives the most options in moving around and has been plenty stable. The only thing about my rig is it's a bear to transport. I have a 2 piece 1/2" floor over the slats but it's 24" wide so it doesn't tuck under the tubes. Remember the more mods the more chances of getting your leader and fly hung on something. Tough call to balance strength vs portability
 

flukesofnature

Petty Officer 2nd Class
Joined
Mar 9, 2014
Messages
122
Danro the biggest step is to realize what a difference a solid floor makes..do that and your motivation, if still needed, will show you what will be the best mod for you. Once you stand on the floor ..you will be hooked. Just Do it. There really isn't a best way. Lots of great ideas that all work well. There is a tendency to overthink. The biggest problem occurs when you think more floor is better, and the resultant weight gain makes portability a long loud "groan", and a huge Pain in the......A natomy........when setting up and tearing down
 

Ffclaws

Cadet
Joined
Apr 14, 2014
Messages
12
I did a three piece floor. One large piece in the center with two tapered pieces on the ends where the boat arches up.
 

Ffclaws

Cadet
Joined
Apr 14, 2014
Messages
12
I did a three piece floor. One large piece in the center with two tapered pieces on the ends where the boat arches up.
 
Top