I swear...

Sea Rider

Supreme Mariner
Joined
Sep 20, 2008
Messages
12,345
800 Hour Preventive Maintenance.-

Taking advantage that lower leg and powerhead were down decided to strip middle section, it?s a matter of removing shift rod and 4 bolts that secures it to swivel bracket. Removed upper and lower steering shaft?s bushings, wiped old grease, lubed with fresh grease and assembled back lower leg. Lower gasket cane out in one piece due to sitting powerhead on top of a well greased gasket done on previous restoration.


Lower powerhead was found very clean due to periodic CRC decarbon spray application through carb, all water paths were found clean, a long water flush with fresh water after salt water use accounts for this.


Thermostat was removed and polished along a new gasket lightly greased and bolted back.


Head gasket & exhaust cover bolts were removed individually, cleaned, lightly greased, put back and torqued to specs. This will assure fast removal next time and forget all about unwanted thread seizures due to salt formations around internal head gasket's bolt bodies. New head gasket didn?t made it on time for the 800 hour full maintenance, so current one is sill good to go for next 100 hours.


Impeller housing was removed, liner was well polished to smooth finger tip perfection. This is the original impeller that came with OB, looks mint. Water pressure is outstanding, impeller keeps peeing for 15 seconds after OB has come to a stop.


Changed gear oil, now with Amalie 80-90 High Viscosity grade, a new alum 3 blade 8.5 pitch will power combo, replaces a 8 pitch prop.


All grounds and electrical components terminals were polished to shinny condition, this assures that all electrical components will do their homework right, don?t fail any time soon and last long. Two new NGK spark plugs well gaped were added.


Lower leg anodes & trim tab were polished to perfection, were extremely salted and pitted.


Powerhead was flushed for 15 min with high water pressure with hose through upper flushing port, should get rid of any salt formation building up inside.


A Dremel 700 rotary tool along my fab 5 allies helped removing gaskets leftovers, polishing & shinning with toothpaste different metal parts to new condition. Total time invested : 14 hours. Cost $ 10.00 and some cold ones...


Happy Boating
 
Last edited:

Pack Rat

Petty Officer 2nd Class
Joined
Jan 18, 2011
Messages
186
Sea Rider......"Impeller housing was removed, liner was well polished to smooth finger tip perfection. This is the original impeller that came with OB, looks mint. Water pressure is outstanding, impeller keeps peeing for 15 seconds after OB has come to a stop."

Boys up here telling me to replace every three years due to dry out. Do yours last longer due to have access to water year round and or keeping out of sand the trick?
 
Last edited:

Sea Rider

Supreme Mariner
Joined
Sep 20, 2008
Messages
12,345
Pack Rat,

Pics appears and disappears, don't know why, did you happen to check the 800 hour impeller pic condition ?

To understand :

-Not all impeller brands last that long (Tohatsu outlast all)

-Not all impeller brands use same materials when manufacturing their impellers, some use rubber which is stiffer, other use elastomers, way more flexible and long lasting than rubber, Also deforms way less when sitting for long time periods with compressed vanes inside liners. Will fully expand vanes when taken out of liner, rubber won't, that's a plus.

-Impeller duration will depend entirely where you go boating, say clean fresh/salt water, fresh/salt water with too much sand, dust, whatever suspended, clean/muddy rivers. The latter besides shortening the impeller life will inevitably ruin the impeller liner, for those situations there are SS liners that last way longer than the standard ones.

Now you have a better vision about what's going on with impellers and their life span. It's up to each one if going for a full water pump change, just the impeller or even a new impeller with polished liner..

Happy Boating
 
Last edited:

Sea Rider

Supreme Mariner
Joined
Sep 20, 2008
Messages
12,345
8.5 Pitch Prop / Hardline Hour/Tach Updates.-

Same Fixed 500 KG.
1 Up ; 5950 Wot revs : + 150 rpm over max range.
2 Up : 5850 Wot revs : + 50 rpm over max range.

Faster hole shot has decreased more than a bit as achieved with a 8 pitch, although gained slight more top end speed.

Screams much less at full throttle and fuel economy has increased more than before.
Combo cruises nicely while maintaining full plane at 4700 rpm.

Impossible to ask for more, runs already at its max. Luckily bought an extra 8.5 prop for just in case unexpected issues. My quest for top boating perfection running a very underpowered OB to achieve its full wot range as usually loaded has ended successfully...

Notes to consider.-

OB's factory delivered with usually medium pitch props should be propped right soon after break end period has ended, same applies to second hand OB's as won't know if previous owner prop it right for his application which probably does not match yours.

Although it's recommended that OB revs inside min to max wot rpm range, ideal is to rev as currently loaded between middle to max wot rpm range. At min OB is being lugged, which is bad.

We all know that if any OB is propped right to achieve max wot rpm range, boat will achieve excellent hole shot sacrifying slight top end speed. On the contrary if middle wot rpm is dialed, hole shot will be decreased with slight more top speed increase. Which mode is preferred ? it's entirely up to each boater.

Before going for a prop maximization to get all the ponies out of any OB fast must consider being 101% healthy, sitting at the sweet OB/Transom height well trimmed and with weight evenly distributed on deck. Although 3-5 % over revving over max wot is allowed to plane combo faster, don't play with prop pitches without a induction tach if wanting as the Brits say, Long live the OB

Happy Boating
 
Last edited:

Sea Rider

Supreme Mariner
Joined
Sep 20, 2008
Messages
12,345
Throughout my extensive boatingl life have only been left stranded at sea 4 times, 3 times by impeller overheat due to lower water intakes blockage while running full wot on kelpy sea cond and recently last Sunday. Scenario :

While running full wot OB came to a sudden stop as if with fuel starvation, bah, probably tank’s air valve closed or fuel connectors came off during operation. Wrong, all 3 working as they should.

My excellent taken care horse usually starts at first rope pull, so after 5 pulls dropped the towel, as OB won’t be revving any time soon was useless insisting on a frustrating restart tries. Being very near shore, headed to the marina, lifted the combo out of water straight onto its trailer. If not a mechanical issue, then it’s an electrical related problem, time for electrical troubleshooting which had very little experience. As stock all 4 electrical parts for OB to fire and run, was only a matter of swapping individual components to find the culprit fast, well that was what I erroneously thought

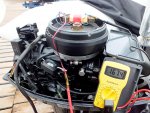
Swapped new kill cord switch, 0 avail, followed an Ignition Coil with O avail, next was a CDI swap, again 0 avail, deduction indicated that the culprit must be found under flywheel. Measured exciter’s resistance, a new one or one in excellent working order should read anywhere 130 to 195 Ohms.

DSCF7250.JPG

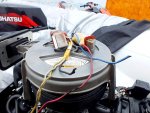
Current one had 0, assumed had shot internal winding. Removed flywheel and both exciter and alternator coils along harness and guess what, found a terrible shorting inside the circular clamp that protrudes out of plate which holds and secures plastic sleeve along wires to plate. This issue will show over time of constant flexing heated hardened cables when throttling extensively during boating time.

DSCF7252.JPG

Cleaned plate and flywheel’s magnets, the 18 HP has 4 huge ones, sends min 100 DVA volts to CDI. Installed a new Exciter Coil, both cables have been conveniently wrapped with 3M electrical tape to form a false sleeve. Have removed Alternator Coil from plate, it’s useless to count with one if you don’t use or plan using a battery on board to power gadgets

DSCF7251.JPG

Replaced back old parts previously taken out except new Exciter Coil, why put new parts if oldies are doing their respectively homework spot on and strong. Shot Exciter Coil was found unaltered has 167 Ohms resistance within specs, a matter or rebuilding both cables to their original length, insert a plastic sleeve over cables and save it as a refurbished spare.

DSCF7257.JPG

Installed a spark tester, the one with the translucent bulb, right in middle of spark plug boot and spark tip. IC output is so strong that lighted a small dark room at first pull when testing both plugs sparks individually. So it’s no wonder for ignition coils to produce such high 20-30 K volts low amps outputs.

DSCF7234.JPG

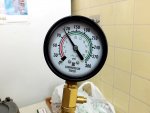
With spark plugs removed, took advantage to measure cylinder compression with a new meter, with cold OB and 5 vigorous pulls each read 120 PSI on upper cylinder and 118 PSI on lower one. Incredible that with 820 metered run hours maintains such an even and high compression, definitely carbon tune up sprayed periodically through carb, clean water paths to cool down OB right along well gapped spark plugs changed periodically each 100 worked hours , accounts for this.

Connected fuel connectors, primed bulb firm, hooked flush muffs, opened water faucet and Bingo, started first pull, OB runs much smoother and stronger than before, seems has been losing electricity under flywheel for quite a time. Tomorrow is open sea water trail, have plain confidence in the work done that all lights will be green and good to go…

Bottomline, if you don’t stock shelf electrical parts to swap and find culprit right on would recommend to acquire an analog or digital multimeter with DVA Volt reading capabilities to efficiently troubleshoot exciter, ignition coils and CDI voltage outputs which won’t read accurate while using a non DVA meter. Meter will pay for itself in the first electrical troubleshooting savings by not paying three shaded mechanics, outboard shops or marinas by the hour. It’s productive money wisely invested..

Happy Boating
 

Sea Rider

Supreme Mariner
Joined
Sep 20, 2008
Messages
12,345
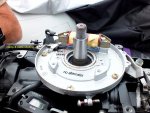
Was pending the final arrangement of the exciter coil cable that shorted some time ago due to excessive bending stress while throttling. Now counting with a 24 mm flywheel nut socket and small puller decided to do the job myself and not resort to third party mechanics. Removing nut was real easy, a hard bang with a heavy hammer on socket extension did the trick.

DSCF7583.JPG

Installed the flywheel puller, while tightening the 3 long screws that secures to upper flywheel it popped out smoothly. Didn’t have to twist center large bolt with wrench.

DSCF7580.JPG

Wrapped several turns of 3M electrical tape to both cables that powers exciter coil to make a very thick cable arrangement.

DSCF7581.JPG

Happy Boating
 

Attachments

  • DSCF7582.JPG
    DSCF7582.JPG
    190.4 KB · Views: 2

Sea Rider

Supreme Mariner
Joined
Sep 20, 2008
Messages
12,345
Finally finished preparing the Rib for what’s left of summer which has been dramatically extended to my content. Hull has been pressure washed with a Karcher washing machine while hanging on a crane which is ideal.

Karcher Machine 1.JPG

Mold, algae build ups around keel protector, lower inflatable tubes and rear of transom has been wiped cleaned to perfection using a higher water pressure setting.

Karcher Machine 2.JPG

Once dry, hull has been hand polished to perfection with CIF cream and latter waxed with FW1 cleaning wax which has the property of displacing water, so theoretically Rib at wot should gain slight more top end speed,

Polishers-Protectors.JPG

Powerhead has been flushed at low pressure for 20 minutes with same Karcher machine used previously. This 18 OB amazes me more and more, can be flushed through any of the following methods : Barrel, muffs, exhaust cover port or lower leg port, for the last two will need a Tohatsu adapter to hook a water hose there. Still 100 more hour use to go for same general overhauling done previously at 600 worked hours

Happy Boating
 

Attachments

  • Hull Polish.jpg
    Hull Polish.jpg
    427.8 KB · Views: 2

Sea Rider

Supreme Mariner
Joined
Sep 20, 2008
Messages
12,345
When my beloved 18 OB completes 900 run metered hours, that's only 6 more to go, was planing removing powerhead and have a look under exhaust chamber cover. On previous 600 hour restoration excessive salt build ups were found and that was flushing with fresh water for 5 minutes soon after combo returned from its sea outing.

But seems will be tearing the cylinder head too to have a look and clean all the salt and carbon build up on internal watherpaths and cylinder head area, take advantage to clean bolts internal threads and bolt threads as well. As all bolts have been perfectly cleaned and slightly greased with triple guard grease on previous 600 hour restoration should expect 0 bolt salt seizure whatsoever and consequently comming out in one piece as expected.

As an experiment have extended the flushing time from previous 5 to 10 minutes, will see if this contributes to have a much less salt formation than before inside Pandora powerhead. Will post results as to have in mind how much salt formation any OB can collect when is properly flushed. Now imagine when not properly flushed..

Happy Boating
 
Last edited:

Sea Rider

Supreme Mariner
Joined
Sep 20, 2008
Messages
12,345
900 Hour Scheduled Restoration :


Click image for larger version  Name:	01.JPG Views:	1 Size:	206.6 KB ID:	10600663

Extending the muff flushing time from 5 to 10 minutes including counting with much better water pressure than before has done incredible wonders. On previous restoration had lightly greased with triple guard all head and exhaust cover bolts, all came out very easily in one piece, no rust formation or seizure whatsoever on threads. Breaking any bolt on powerhead is a nightmare as many boaters have found out when trying to remove them.

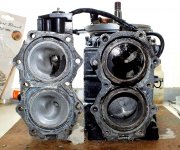
Combustion Chamber/Piston Heads/Exhaust Port polished before to smooth condition were found with thin carbon layer build ups, spraying short overdose intervals of CRC Engine Tuner Decarbonizer for 5 minutes each 50 run hours through carb with OB-ON while running geared forward on muffs at 2000 rpm accounts for it.


Click image for larger version  Name:	02.JPG Views:	1 Size:	195.7 KB ID:	10600664

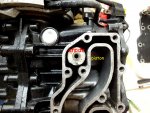
Cylinder head and exhaust cover water passages were found with slight thin salt layer formations, the internal anode under exhaust cover was found more salty, seems this area is a natural salt accumulator due to extreme heat that develops there. If this area clogs, cooling water passing through will stop, consequently will end overheating the area adjacent to lower piston badly and bluing the piston as well.

Click image for larger version  Name:	03.JPG Views:	1 Size:	204.9 KB ID:	10600665

Will add a flat washer under anode to raise it a bit and widen the water passage between anode sides and adjacent close walls to achieve better cleaning and cooling capabilities while water passes through entire exhaust chamber.

Click image for larger version  Name:	04.JPG Views:	1 Size:	189.4 KB ID:	10600666

The dedicated water flushing port right in middle of exhaust cover which flushes and cleans directly that trouble area very conveniently also made its outstanding contribution as well. Will need to remove bolt and screw a Tohatsu flushing adapter which is available as a spare part.

Click image for larger version  Name:	05.JPG Views:	1 Size:	195.9 KB ID:	10600667


Salt layers and carbon build ups are being slowly removed to near factory perfection by rubbing/scraping them off with Dremel’s rotating polishing bits soaked in carbon remover, carb spray, acrylic thinner, toothpaste, green pads. Short, long different diam cotton swabs wooden sticks are being used to poke small water holes, narrow water passages, powerhead’s bolt threads and hard to reach areas. All these toolings contributes to make the tedious and long boring cleaning task more efficient and way faster than by bare hand, 2 strokes OB’s are definitely not clean ones compared to 4 strokes ones.

In the previous restoration committed the stupidity of sealing with a light coat of UHU glue both exhaust cover gaskets, the front one broke when removed, was badly stuck and burnt so useless, the rear one came out in good shape. Will order 2 gasket sets from a Tohatsu US dealer, better is to apply a light coat of grease on both gasket’s sides and torque cover to specs, that way on next future restoration will come out easily in one piece.

All for the moment till new gaskets arrives…

Happy Boating
 

Sea Rider

Supreme Mariner
Joined
Sep 20, 2008
Messages
12,345
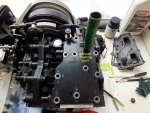
As summer is around the corner decided to finish all what was long time pending such as : Internal anode height modification, New head gasket and exhaust cover gaskets install, repairing crankcase's side thread with issues.


Click image for larger version  Name:	05.JPG Views:	1 Size:	195.4 KB ID:	10674311

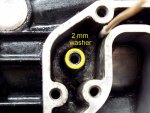
A 2 mm height plain SS washer was added under anode, rising anode inside chamber will benefit from collecting much less salt formation under anode and will widen the available space between the anode’s circumference and adjacent side walls. for proper cooling.

I
Click image for larger version  Name:	06.JPG Views:	1 Size:	211.7 KB ID:	10674312

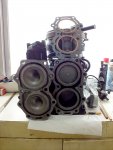
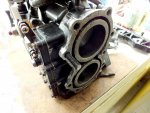
Crankcase, cylinder head, exhaust mating surfaces and covers were polished with a Dremel rotating tool and a metal brush to smooth perfection, a high quality cylinder gasket made locally will be used this time.

Click image for larger version  Name:	07.JPG Views:	1 Size:	210.2 KB ID:	10674313

On last restoration a crankcase bolt was seized severely, when finally removed several threads were compromised and a new bolt was not going to bolt tight same as all others. As my last option was reluctant to Install a Heli-Coil or a Timesert, but occurred to me that going for a headless bolt was a much nicer, less invasive and faster option.

Bought a larger one, chopped head off, mixed well a 2 part alum filling and epoxy putty, placed a large amount on tip of a thin sushi wooden stick and paste covered the whole internal threads with product, placed a bit on bolt’s threads, screwed it fully in and let dry for 24 hours.

Click image for larger version  Name:	08.jpg Views:	1 Size:	210.8 KB ID:	10674314

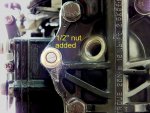
A thin coat of Super Gray High Torque Gasket Maker was applied to both sides of gasket to achieve a perfect combustion chamber and head seal. 2 plain SS washers and a ½” nut were added. Head bolts were torqued to 25 NM while sealer cured for 24 hours.

Click image for larger version  Name:	10.JPG Views:	1 Size:	179.9 KB ID:	10674315


The head gasket sealer once cured has made an astonishing job, compression on both cylinders is 110 PSI even, not bad for an engine with 900 metered worked hours.

The engine will be run for 5 hours. all head and exhaust cover bolts retorqued back to specs with a UK Norbar 8-50 NM state of the art aviation torque wrench along new spark plugs.

Happy Boating
 

Sea Rider

Supreme Mariner
Joined
Sep 20, 2008
Messages
12,345
1050 Hour Restoration.-

Used to sell my fully restored 18 HP motors when they hit 1000 clocked hours of use, due to Pandemia these motors are no longer locally available, the international shipping rates have rocketed to out of this world amounts which will exponentially increase the local customs fees and taxes. So have decided to keep this nice well cared motor which has been working flawlessly since out of the box and go for a 1K hour full restoration while keeping the same internal components. In reality it’s a Preventive Manual Cleaning Maintenance done on all internal water passages located inside the crankcase and full decarbonization done on the entire exhaust chamber, piston heads, pistons rings and cylinder head without tearing the crankcase open. New OEM gaskets install will assure a 100% operational motor which has nothing to envy to a new one.

1,050 K Hour Run Motor.JPG

What was found : salted layers on the entire water passages and heavy salt crust formation on top anode located inside the exhaust’s cover main water passage as in previous restorations, as this anode it’s a natural salt accumulator which protects nothing as was intended to work have decided to remove it to allow more water flow to pass thru this wider unrestricted passage and cool much better the adjacent area.

Exhaust Cover Overall State.JPG
Upper piston was found with slight carbon build up while the lower one with none, the upper cylinder was found working with a NGK/BR7HS-10 spark plug whereas the lower one with a NGK/B7HS-10 non resistor type, both well gaped tight to 1.0 mm. Don’t know if that accounts for such strange looking scenario, as don’t want to get into false technical assumptions will leave it there.

Combustion Chamber Overall State.JPG

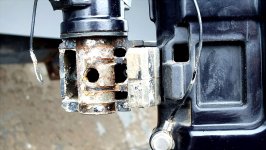
With removed crankcase from pan managed to remove the extremely salted lower steering shaft out, no matter how well its impeccable cleaned and greased, it's a natural salt collector to watch out for.

Salted Lower Steering Shaft.JPG

with a hard bristle bottle brush dampened in thinner removed the dried grease and salt layer formation inside the swivel’s bracket interior which was previously well cleaned and greased not long ago.
Swivel's Bracket Clean Out.JPG

As the steering shaft used to lock itself at wot on to the swivel bracket and made the steering bit harder no matter the steering shaft being adjusted with 0 load; with everything well cleaned and greased was proper time to install 2 new shaft’s bushings which wears over time, now can tiller steer smoothly with just three fingers.

Still working in the long and tedious internal manual hand cleaning along repairing other parts, will post final results when the crankcase is fully restored along some tech conclusions acquired during the 700-900-1050 metered run hours restorations...

Happy Boating
 

Sea Rider

Supreme Mariner
Joined
Sep 20, 2008
Messages
12,345
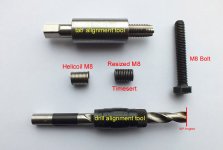
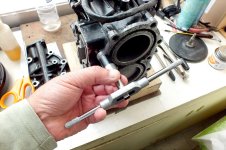
Had to take a long forced stop, was not clear if needed to install an M8 Helicoil or a Timesert on a medium deep blind hole with stripped thread. Although have drilled deep enough the new non threaded hole, the drill being pointy has made a deep internal cone shape which will be filled with a special 2 part welding putty for the blind hole to have a flat wall ending.

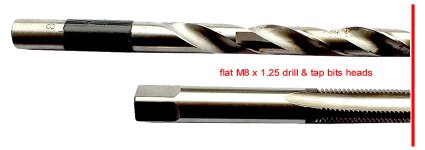
To drill new future blind bolt holes have shaved the current pointy shaped drill bit that comes in the kit in order to count with a flat head. As the hole is only 15 mm deep have decided to install a resized Timesert with removed upper cone to sit flat on the crankcase's edge once installed.

Drilling Tools.JPG

Once the putty has dried out flat will measure the hole's depth to check if matches the resized Timesert length, if need to drill bit deeper will use the modified drill. As don't want to take second chances when tapping the new hole, my machine shop techie has made a state of the art tab alignment tool for just $ 2.50 peanuts cost. Now ready to DIY installing Helicoils or Timserts with the appropriate drilling and tapping tools that's imperative to count with.

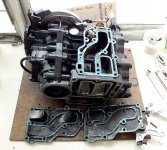
The powerhead it's one step away from final completion, both exhaust covers, engine base, crankcase and head mating surfaces were finished to a smooth condition for new gaskets to sit well and avoid unwanted water intrusion in the combustion chamber.

Happy Boating
 
Last edited:

Sea Rider

Supreme Mariner
Joined
Sep 20, 2008
Messages
12,345
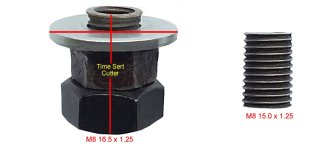
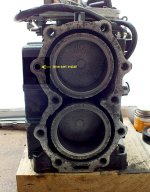
Was pending to fill with alum putty the pointy end finish the drill bit previously made, with a modified flat headed drill bit gently hand flattened the previously inserted fresh putty way before drying, now sits hardened flat at bottom orifice. With oiled tap and centering tool while screwing 2 full turns in, one turn out till tap stopped threading managed a pefect aligned new bolt’s inner thread.

Inner Threading.JPG

Time Sert Cutter.JPG
A 16.5 mm Time Sert insert was the way to go, with a TS cutter previously made chopped the head 1.5 mm to fill the required 15 mm deep bottom/upper edge threaded depth.

Time Sert Install.JPG

No need to order several sizes, just order a large size and resize to needed depth if plan installing them headless along saving money. It's a one for all, all for one musketeers sort thing.
Reshapped Tools.JPGTo drill in perfect blind depth orifices need a flat headed drill and tap bits. First one is to avoid pointy end finishes, the latter for deep threading which a standard tap won’t thread deep due to having a pointy non threading end. Now count with four bits for next perfect blind hole drilling and taping.

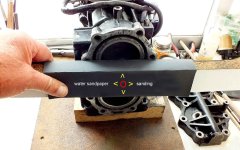
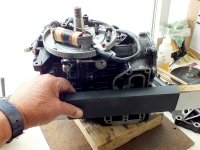
Exhaust cover, cylinder head and lower crankcase threads which will house 10 new M6 & 14 M8 bolts have been cleaned to mint cond, crankcase’s mating surfaces were gently sanded with medium grade and finished with low grade water sandpaper to achieve a smooth pairing for new gaskets to sit evenly firm well torqued to 30 NM.

Water Sand Paper Sanding.JPG

Cylinder and exhaust mating surfaces areas were mission impossible to clean deeper to achieve a much nicer visual look, the good thing is that both surfaces doesn't have metal pittings, just exhibits highly rusted areas which are impossible to remove.


Exhaust Cover Pairing.JPG

To lessen that cond specially with motors run in salt water a complete crankcase's gasket retorque is mandatory way before the 10 hour break-in ends or when removing old gaskets to install new ones in. Will avoid bolt's salt seizures along head breaks which every boater fears when its time to tear their beloved motor's powerheads down. Down issue is that naughty salt water will always find its way to screw gaskets the sooner ort latter and will need to deal and live with it.

Just about to install the new OEM cylinder head gasket, debating if to install the 2 sided pre glued coated gasket by itself or include a two sided previous coats of Aviation Forming Gasket to the pre glued gasket ?

Happy Boating


Sea Rider

Supreme Mariner
Joined
Sep 20, 2008
Messages
12,345
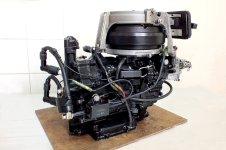
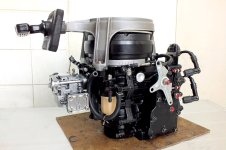
Applied a thin coat of Permatex Aviation on both exhaust covers and on front block and cylinder head mating surfaces edges. The PM had to be previously thinned with thinner as this stuff is very thick if applied directly, a 5 minutes air dry was needed to become tacky. Now both exhaust covers and cylinder head gaskets sits firm torqued to their individual torque settings.

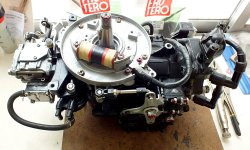
Restored Tohatsu-1.JPG

Restored Tohatsu-2.JPG

Installed a new throttle cam, the old one was highly worn and achieving a near linear acceleration over the whole extension of the cam.

New Throttle Cam Install.JPG

The roller now stops next to the high hill cam portion which corresponds to 3/4 throttle cruising speed. If wanting going full wot just throttle the grip fully while burning more fuel...

Happy Boating
 
Last edited:

SoCalPescador

Seaman
Joined
Feb 21, 2018
Messages
50
Nice work and detailed photos! Thanks for sharing.

I love this type of work.....messing with engines. I'm new to outboard repair.....recently rebuilt the triple carbs on my 1998 Honda 50hp 4 stroke. They came out great! This engine is on my 1988 Arima Sea Sprinter fishing boat.
 
Top