Gipsy - 1996 Sea Ray 210 Bowrider restomod

biasbilt

Seaman
Joined
Aug 13, 2010
Messages
53
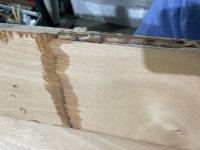
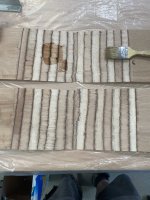
Another successful day! Couldn’t wait for an answer on the stringers so went ahead and joined then with a scarf joint 1:12 joint so about 8x8 = 64sq“ of bonding area with epoxy
IMG_5975.jpeg
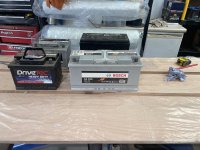
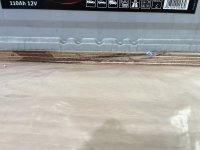
Clamped with the old favourite battery trick to get a nice ooze of epoxy out of the joint.
IMG_5976.jpeg

IMG_5977.jpeg
I reckon that’ll be okay bearing in mind the original was a butt joint with a 2x1 stapled on to join the wood before it was glassed together 🤦‍♂️
 
Last edited:

biasbilt

Seaman
Joined
Aug 13, 2010
Messages
53
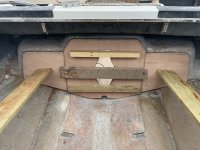
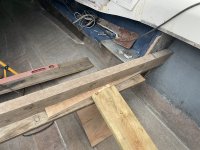
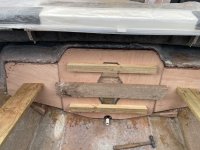
Then i got on with getting prepped for bonding in the transom - I’m working on my own so have to be well prepared. To clamp the transom I’m doing the following.
IMG_5978.jpeg
Put a cross brace in the boat to push against and then used the 1:12 wedges from the scarf joint jig to apply pressure to the outer wings.
IMG_5980.jpeg
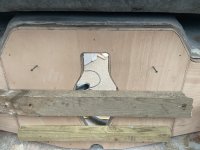
For the middle, I’m just going with clamps through the keyhole onto pieces of wood either side to spread the load evenly. Screws on the inside are just there to act as a shelf for the cross beams while I get the clamps on
IMG_5979.jpeg
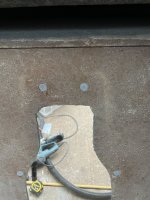
Put blue tack in the bolt hole to prevent them completely filling with pb
IMG_5981.jpeg
Finger crossed for a dryish evening tomorrow…
 

biasbilt

Seaman
Joined
Aug 13, 2010
Messages
53
Another successful day! Couldn’t wait for an answer on the stringers so went ahead and joined then with a scarf joint 1:12 joint so about 8x8 = 64sq“ of bonding area with epoxy
View attachment 385487
Clamped with the old favourite battery trick to get a nice ooze of epoxy out of the joint.
View attachment 385488

View attachment 385493
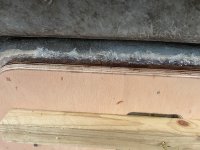
I reckon that’ll be okay bearing in mind the original was a butt joint with a 2x1 stapled on to join the wood before it was glassed together 🤦‍♂️
Scarf joint turned out well, happy with that!

IMG_5986.jpeg
 

biasbilt

Seaman
Joined
Aug 13, 2010
Messages
53
Got the transom in tonight. Well prepared with all tools ready to go. Mixed a batch of resin and let that soak into the wood. Then mixed 1.5kg (just over 1 quart) of resin, added chopped fibres and then thickened with cabosil. That was trowled straight onto the hull, spread out to get it even thickness and wood clamped in place.
IMG_5982.jpeg
Plenty of ooze from between the wood and hull around the outside of the wood right round the edge and in the keyhole so smoothed and tamped down the ooze to get the fibres and resin well consolidated. Will build the fillet in when the mat goes on
IMG_5983.jpeg

IMG_5985.jpeg
Could have made a slightly better mix as too much chopped fibre to spread easily but I’ll correct that next time. Nice thing about the chopped strand is that you can’t over compress the joint due to the solids in there. Now just got wait for the resin to kick overnight…
 

Andy74

Cadet
Joined
Jul 12, 2023
Messages
13
Another successful day! Couldn’t wait for an answer on the stringers so went ahead and joined then with a scarf joint 1:12 joint so about 8x8 = 64sq“ of bonding area with epoxy
View attachment 385487
Clamped with the old favourite battery trick to get a nice ooze of epoxy out of the joint.
View attachment 385488

View attachment 385493
I reckon that’ll be okay bearing in mind the original was a butt joint with a 2x1 stapled on to join the wood before it was glassed together 🤦‍♂️
What epoxy did you use?
 

biasbilt

Seaman
Joined
Aug 13, 2010
Messages
53
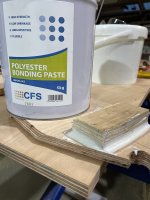
Just experimenting with this:
IMG_5988.jpeg
Sold as a high strength adhesive so will use it to save me making PB.

Also lays down a nice fillet so could work well for gap filling and inside corner radiuses when laminating. It nice and thick so I’m hoping that I’ll be able to make a slow mix, spread it in roughly and then glass straight over the top and use the radius of the roller to shape the fillet.
 

flashback

Captain
Joined
Jun 28, 2002
Messages
3,963
Just experimenting with this:
View attachment 385777
Sold as a high strength adhesive so will use it to save me making PB.

Also lays down a nice fillet so could work well for gap filling and inside corner radiuses when laminating. It nice and thick so I’m hoping that I’ll be able to make a slow mix, spread it in roughly and then glass straight over the top and use the radius of the roller to shape the fillet.
That's a good concept but be sure it doesn't absorb water like bondo.. I've seen bondo turn to mush in below waterline applications..
 

biasbilt

Seaman
Joined
Aug 13, 2010
Messages
53
That's a good concept but be sure it doesn't absorb water like bondo.. I've seen bondo turn to mush in below waterline applications..
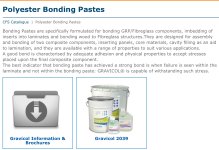
Good point. The seller’s website say this
IMG_0222.jpeg
but the data sheet shows different products for boats but they may all have the same base product. Lots of sellers to the marine sector are selling it so probably okay but II’ll check with the manufacturer tomorrow as I prefer fact rather than guesswork. If there’s an issue, I’ll go back to making PB. That’s said, if water gets to it I’ve got a bigger problem as it means water’s got through the fibreglass….
 
Last edited:
flashback

Captain
Joined
Jun 28, 2002
Messages
3,963
You have a good start and don't want to compromise with someone so simple as filler..if you have the coin you might consider using full epoxy.
 

biasbilt

Seaman
Joined
Aug 13, 2010
Messages
53
Good point. The seller’s website say this
View attachment 385787
but the data sheet shows different products for boats but they may all have the same base product. Lots of sellers to the marine sector are selling it so probably okay but II’ll check with the manufacturer tomorrow as I prefer fact rather than guesswork. If there’s an issue, I’ll go back to making PB. That’s said, if water gets to it I’ve got a bigger problem as it means water’s got through the fibreglass….
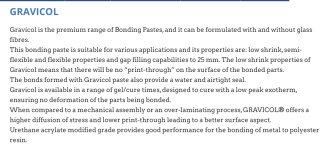
Just found this: ‘forms a water and airtight seal’ on the maker’s website. Result!

IMG_0223.jpeg
 

biasbilt

Seaman
Joined
Aug 13, 2010
Messages
53
You have a good start and don't want to compromise with someone so simple as filler..if you have the coin you might consider using full epoxy.
Cheers for the compliment.

I considered epoxy but on the advice of a naval architect went for poly as more than good enough. I could afford it (epoxy’s nearly 4 times more expensive here) but think if the lamination is done properly plus gel coat to seal the surfaces it’ll be okay. Plus, I don’t like the longer cure time of epoxy and can control poly to do a lot of wet on wet.

It lasted nearly 30 years with **** build quality so it’ll do a lot better this time round and in 30 years time the green eco-warriors won’t let us use boats any more anyway.

Most importantly, I’d prefer to put the money saved towards a 300hp 5.7 vortec and be able to run at 50+! We’ll get to the pub quicker 🚤 💪
 

biasbilt

Seaman
Joined
Aug 13, 2010
Messages
53
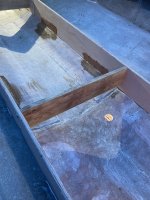
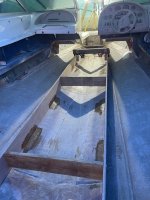
Bit more done - stringers are in place. I started by getting them in the right position and height and added temporary cross members to hold them the right distance apart and square. Main reason for this approach is to tie the transom and stringers together as a single structure and to use the stringers as a level table for pre-wetting glass inside the boat rather that trying to pass wet dripping glass over the side….
IMG_5999.jpeg

IMG_5997.jpeg

IMG_5998.jpeg

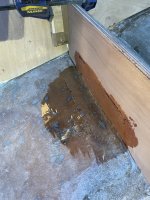
Started by trying to push the bonding paste under but it didn’t really go under properly with just a spreader and tongue depressers so I also tabbed them in with some csm just to hold them and the hull in the right place while I’m moving around. I also think the end grain of the ply sucks too much resin out of the bonding paste so it use that for fillets were I can put neat resin on and still wetter PB under the stringers as I glass

Plan is to glass round the edge of the transom with csm and PB or bonding paste (to form the radius) and then 2 layers of 1708, followed by the same on the stringers. Only going to wrap the top layer as it’s more efficienuse of the glass and easier to handle. I’ll try to do each one wet on wet but reckon I’ll need a resin fairy to keep mixing for me.
 

flashback

Captain
Joined
Jun 28, 2002
Messages
3,963
A resin fairy will be very helpful! Your stringers used as a temporary work bench is outstanding..
 

flashback

Captain
Joined
Jun 28, 2002
Messages
3,963
I see a big difference between your stringers and the ones in my boat. Mine are approximately 3 inches thick and my engine is hung on 1/4 thick ss z brackets rather than wooden beds. I've only had the boat 2 years so maybe someone changed things who knows, but it looks good enough to be factory and seems like a good idea..
 

biasbilt

Seaman
Joined
Aug 13, 2010
Messages
53
I see a big difference between your stringers and the ones in my boat. Mine are approximately 3 inches thick and my engine is hung on 1/4 thick ss z brackets rather than wooden beds. I've only had the boat 2 years so maybe someone changed things who knows, but it looks good enough to be factory and seems like a good idea..
What make/age is yours. Original ones were 1/2” crap quality ply with a 1 1/2” x 3/4” cleat stapled on before the chopper gun, pretty standard for Sea Rays of that era.

these are 3/4” marine ply enclosed in 1708 and will have the cleat added after glassing th stringers in
 
Last edited:
Top