Formula 27PC Transom Work

Status
Not open for further replies.

alldodge

Moderator
Staff member
Joined
Mar 8, 2009
Messages
42,054
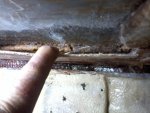
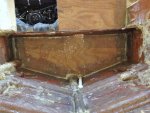
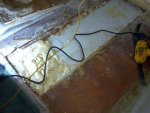
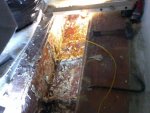
Got back into the transom and after many hours I managed to get the starboard side down to mostly glass. It has been a real bear to get the wood off the glass, it's stuck real good. Rad into screws about every 6 or 8 (both sides) inches which Formula used to hold all the layers together. Once I get the port side down to the same level I'll start trying to sand and clean of the edges. I'm thinking of using a router to step the layers down with maybe 1/2 at a time. From what I understand from listening to you guys this would be a plan. Over in the far corner the moisture reading was 16, not bad.
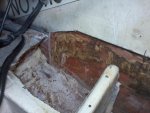
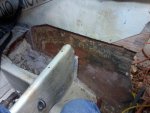
Photo425.jpg

Photo426.jpg
 

tpenfield

Moderator
Staff member
Joined
Jul 18, 2011
Messages
18,040
Looks like 'fun' . . . you won't be short of projects this winter.
 

alldodge

Moderator
Staff member
Joined
Mar 8, 2009
Messages
42,054
Looks like 'fun' . . . you won't be short of projects this winter.

Fun,.... oh yea I'm having a ball :(
I wanted a couple projects, now I have way to many. Still working on the deck, Engine stuff, picked up a set of chains and sprockets for my track loader, and a couple more honey do and also Mom wants some things. Oh well keeps me out of trouble, I think :D
 

alldodge

Moderator
Staff member
Joined
Mar 8, 2009
Messages
42,054
There is The Good, The Bad and The Ugly
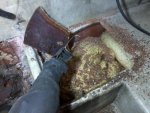
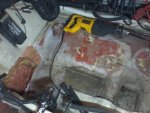
The Bad--- Started cutting into the port side and found the top plywood under the floor soaking wet, and a black from rot.

Photo427.jpg

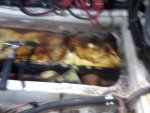
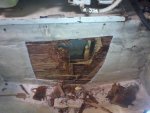
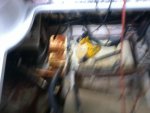
The Ugly --- Continued to cut out the floor and find more water and rot. This pic is real fuzzy but it shows rot on top of the foam.

Photo429.jpg

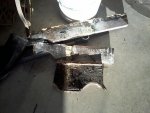
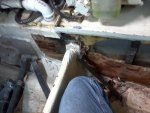
Some of the rotting soaked wood.
Photo432.jpg

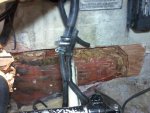
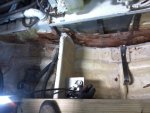
The good --- While the wood inside all needs replaced, everything thing else is encapsulated in glass.
Photo430.jpg

Photo431.jpg

Still plan in drilling some holes into the bulk head just to check moisture, but the only discoloration is where the water was sitting. Cleaning a spot off were the black was looks pink after it is removed under the glass. I think this was caused by me and my dogs. When we go out and float the dogs go up and down as they want. When they come back aboard (which happens often) they shake the water off and some of it makes it through the hatch. Many times I opend the hatch and saw some water on each side but didn't pay much attention to it figuring it drains away. Well this is also where the batteries, hoses and cables are screwed into the deck. Over time the water made it's way though those screw holes. There was about a gallon of standing water.

Now time for some clean up and a plan to put it all back together.
 

tpenfield

Moderator
Staff member
Joined
Jul 18, 2011
Messages
18,040
Been there, done that. Best to scope it out and see what your best approach would be.

I have a feeling that the 'short shots' on the foam fills contributed to the moisture & rot. I found the same sort of thing in the mid-cabin sub floor of my boat last year.
 
Last edited:

alldodge

Moderator
Staff member
Joined
Mar 8, 2009
Messages
42,054
Been there, done that. Best to scope it out and see what your best approach would be.

I have a feeling that the 'short shots' on the foam fills contributed to the moisture & rot. I found the same sort of thing in the mid-cabin sub floor of my boat last year.

Be looking for your input on the way to go. If all checks out when it goes back together I want to figure a way of increasing the angle so any water goes into the bilge. May be easier said then done because, I don't want to raise the outboard side to much. Trying to figure out the level of a floating boat could be an issue. How much water in the tank PORT, and how much is in the holding tank STBD, different variables.
 

tpenfield

Moderator
Staff member
Joined
Jul 18, 2011
Messages
18,040
I think in rebuilding the 'mounting boxes', you could plan about 1/2" of pitch towards the centerline of the boat so water will run off into the bilge. Formula often has the stringer raised slightly above the surface of those 'boxes' and that also traps water.

I got to repair some rotted sidewall coring on the port stern side of my boat, that has probably soaked up standing water where the batteries and hot water tank live. I may do something to pitch the mounting surface to promote run-off

Since boats rarely sit perfectly level in the water, you should figure a steep enough pitch to compensate for the way the boat could sit in the water. I think 1/2 (or so) of pitch over the 12' (or so) of flat surface should give you enough.

Is there a small stringer on the very outer most part of the mounting boxes (near the chine)? You could elevate up off of that a bit to get the pitch.
 
Last edited:

alldodge

Moderator
Staff member
Joined
Mar 8, 2009
Messages
42,054
I think in rebuilding the 'mounting boxes', you could plan about 1/2" of pitch towards the centerline of the boat so water will run off into the bilge. Formula often has the stringer raised slightly above the surface of those 'boxes' and that also traps water.

I got to repair some rotted sidewall coring on the port stern side of my boat, that has probably soaked up standing water where the batteries and hot water tank live. I may do something to pitch the mounting surface to promote run-off

Since boats rarely sit perfectly level in the water, you should figure a steep enough pitch to compensate for the way the boat could sit in the water. I think 1/2 (or so) of pitch over the 12' (or so) of flat surface should give you enough.

Is there a small stringer on the very outer most part of the mounting boxes (near the chine)? You could elevate up off of that a bit to get the pitch.

No, only stringer is the two main ones which look like 2x8's. At the very rear next to the transom the glass dips down to the outer floor level. This was when the boat list it can dump the water into the bilge. Only issue is in each far back corner is a lower spot that can and does hold water.

Now for some more bad news:
Ted, your thought was right on, I tested the engine to fuel tank bulkhead and it's soaked (50% moisture). The same bulkhead on the starboard side shows 18 to 22% moisture. Currently cutting the engine area out and taking pics, will post some later. Only good thing about the moisture is cutting the wood out is much easier, not easy just easier. For the most part the transom was dig and hammer for every inch. The bulkhead is stiff but doesn't take near as much to remove.
 

alldodge

Moderator
Staff member
Joined
Mar 8, 2009
Messages
42,054
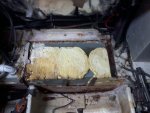
Looks like there are dips in the stringers front and rear to allow water to drain into the bilge. Appears the more moisture there is the easier the fiberglass and wood comes off. It's even easier to cut through the wood. The pics today all happened today and the previous post were several days of major work just to chip away at it.

Started with the center
Photo433.jpg

Worked my way over on the port side and found where it appears the water has been getting in. The top of the water tank is to the left and water can just ease it's way down the side.


Photo434.jpg

Formula put a piece of 3/4 inch plywood between the fuel and water tank and that's how the water go in. They also only ran fiberglass up about half way, why I don't have a clue. In the center of the bilge where the wrecking bar is, is a tube which goes to the drain in the back. It's hollow and plugged at the tank side, or appears it is. Another one of those things as I don't understand why.
Photo436.jpg

From what I'm seeing it looks like I'm going to have to pull the water tank back out to get to the rotted wood, oh goodie :(

The stringer appears to stop at the engine bulkhead. Plan to go slow at easy because I thought it would go clear up.
 

tpenfield

Moderator
Staff member
Joined
Jul 18, 2011
Messages
18,040
Oh boy . . . .

What do you have supporting the boat underneath the work area? It will be important to provide enough support while you are repairing the bulkhead, etc.
 

alldodge

Moderator
Staff member
Joined
Mar 8, 2009
Messages
42,054
Oh boy . . . .

What do you have supporting the boat underneath the work area? It will be important to provide enough support while you are repairing the bulkhead, etc.

Nothing right now, but looks like I'm going to have to remove the generator. Don't know what it weights but believe it is above 150 pounds. So need to hook the truck back up to the trailer and move it under the chain hoist so I can pull it out
 

alldodge

Moderator
Staff member
Joined
Mar 8, 2009
Messages
42,054
Started chiseling away at the wood between the stringer on the port side and have made it more then half way through and no glass. So it looks like the stringer stops at the lower bulkhead. Guess this is a good and bad thing. When I pull the water tank out I'll also be able to get to the other side. The bad is without removing the fuel tank I'll need to figure out a way of re-glassing the new wood to the stringer. This will also be an issue on the starboard side but I'm leaning toward not doing that side (Don't yell to loud). While the wood is moist it is not wet. Percentage on the starboard side is around 20%.
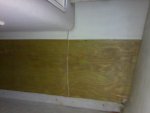
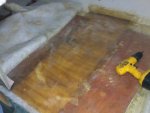
When I started to dig this morning there was water standing in the bottom, not a lot but enough to make a small puddle seen under the fuel tank. You can also see the foam didn't come up very high between the glass and tank. I had sucked out the water prior to taking pic.
Photo437.jpg
 
Last edited:

tpenfield

Moderator
Staff member
Joined
Jul 18, 2011
Messages
18,040
Formula lifts their stringer/bulkhead grid a 1/2" up off of the hull prior to tabbing it in. So, that is the 'channel' shown in your picture. This is done to reduce contact distortion in the mold, but it does leave a channel for water to accumulate and possibly propagate through to other parts of the structure.

When I did my bulkhead work last year, I made the same 1/2" gap, but 'filled' it with expanding foam so it would tend not to trap/contain water. Here is a photo of the bulkhead with the foam around the perimeter (white along the hull) IMG_4121.JPG


So, structurally, it is the same as original, but no air gap.
 
Last edited:

alldodge

Moderator
Staff member
Joined
Mar 8, 2009
Messages
42,054
Just as you say and before the drain plug the pipe is open. Just ahead of the fist hump going forward there is a hole on each side of it, I guess to help it drain when it comes out of the water on a trailer. Think I'll look close into what Tommy said on OSO about building it up so less water will stand
 
Last edited:

alldodge

Moderator
Staff member
Joined
Mar 8, 2009
Messages
42,054
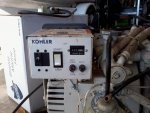
A twenty year old boat and it has 544 hours, while the Gen only has 90 hours.
Photo439.jpg

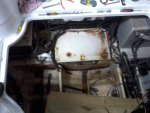
Pulled the Gen and all they did was mount a 3/4 piece of plywood with three pieces of 3/4 on the sides and then tried to put foam under it. There were some staples used on the port side next to the wood between the two tanks but this is one of those who the heck thought this plan up. In a utopia world every bit of water which landed on the hatch would follow the channel and out, but this was bound to happen. Sure could have fended off some of this when I replaced the water tank a few years ago and thought more about sealing the edges, but never thought about it. Figured Formula builds such a well made boat they would know how to do it, yea right

Photo440.jpg

Photo441.jpg
 
Last edited:

tpenfield

Moderator
Staff member
Joined
Jul 18, 2011
Messages
18,040
I'm still trying to figure out from your pictures where the main stringers are located. Based on your last photo it looks like they are either side of the fuel tank. . . But isn't that where you said there was rotted wood?
 

alldodge

Moderator
Staff member
Joined
Mar 8, 2009
Messages
42,054
I'm still trying to figure out from your pictures where the main stringers are located. Based on your last photo it looks like they are either side of the fuel tank. . . But isn't that where you said there was rotted wood?

Looking at the pics in post 75, the stringers are on each side of the fuel tank which is in the center. On the port side of stringer is where the water tank is and there is a 3/4 piece of plywood running forward just left of the stringer.. The stringers butt up against the plywood which use to separate the engine room from the fuel and water tanks. I still need to remove the water tank but I think there is another stringer which butts up against the other side on the 3/4 running perpendicular. Don't think Formula used a continuous stringer bow to stern. Will call Formula tomorrow and see if they can provide any insight
 

tpenfield

Moderator
Staff member
Joined
Jul 18, 2011
Messages
18,040
You know AllDodge, I was just thinking that this now makes you a member of the "Big Boy Boat Restoration Club" :D Other members are GWPSR, BigDirty, Zool, Tboner7864 and myself. I hope I have not forgotten anyone.

It may actually more of a support group than a club, but welcome.
 

alldodge

Moderator
Staff member
Joined
Mar 8, 2009
Messages
42,054
You know AllDodge, I was just thinking that this now makes you a member of the "Big Boy Boat Restoration Club" :D Other members are GWPSR, BigDirty, Zool, Tboner7864 and myself. I hope I have not forgotten anyone.

It may actually more of a support group than a club, but welcome.

Thanks, the support is welcomed and needed for this guy
 

alldodge

Moderator
Staff member
Joined
Mar 8, 2009
Messages
42,054
Took the water tank out, only good thing is since I just did replace it a few years ago it came out a bit easier the second time around. This is inside the aft cabin with the mirror removed. I used a saw last time to cut up through the fist layer because other wise it could not be removed. Used scres to put it back in place and white tape to cover the cut

Photo442.jpg


You can see were I replaced the wood and covered it with glass and resin. My glass job isn't very good but in this case it works to my advantage making it easier to remove. Only wrong thing I did was use screws, screw heads get filled with resin and the bit won't go in to remove. Note to self, use nails or staples
Photo443.jpg
Now to start digging the foam out
Photo444.jpg

Tank and foam removed
Photo449.jpg


There was some water in the area. Vacuumed it out and will see what shows up tomorrow. Started to think my new tank had a crack but I filled it up and let set for a few hours and nothing. Guess the water is coming from somewhere else. Either hot water tank or water lines is next on the list
 

Attachments

  • Photo448.jpg
    Photo448.jpg
    93.8 KB · Views: 7
Status
Not open for further replies.
Top