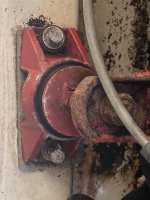
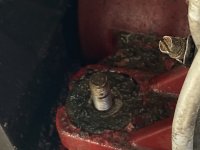
First time pulling an engine questions

MalibuMike

Petty Officer 2nd Class
Joined
Dec 29, 2020
Messages
137
I found oil in my bilge and reached under to feel where it might be coming from. I had heard about the dreaded rust blisters that can form on the oil pan and found one. I'll do one more check to make sure the leak isn't from the dipstick gasket or nut or the bottom of the timing chain cover, but I could use some advice on how to pull the engine and what to do while it's out. I'll have access to a forklift so that solves a major issue. I'll add my question below. Even if you can only answer one, I'd be very grateful! Engine is a VP 5.7 from 2007 ( Vortex Heads, Crab cap distributer)

1) I see two adjustable forward motor mounts and two rear mounts that I think are on the bell housing. Assuming I've disconnected everything else that should come off prior to an engine pull, what do I disconnect at the back to free the engine? Is it just the bell housing? Or does that come up with the engine once the driveshaft is out? I'll have about 6-8 inches forward travel to slide the engine forward. Does the outdrive always have to come off or is that figured out with how much room I have to slide the engine forward?

2) Once it's pulled, what other maintenance items should I tackle? Bearings or gaskets? I think I'll have access to the flex plate and a rear main seal. Any gaskets on the inside of the transom where the outdrive mounts? Y pipe gaskets? I'd like to replace anything easy and relatively inexpensive.


3) My Front motor mounts look rusty and I should probably change them while out. Will this trigger an alignment even if I am careful with setting the same heights? I think I understand the basic of an alignment. The driveshaft needs to go thru the carrier bearing and be straight when it inserts in to the back of the motor. The alignment tool just helps you figure out if everything is lined up if it feels like it spins nicely in the bearing without binding. Hope that is right.
 

Attachments

  • IMG_7581.jpg
    IMG_7581.jpg
    154.3 KB · Views: 10

1985 Century Mustang

Chief Petty Officer
Joined
Mar 9, 2023
Messages
525
Firstly, I'd continually spray the heck out of all the motor mount bolts using some penetrating oil - Kroil, Liquid Wrench or PB Blaster a few times a day before the removal.

*Your outdrive has to be removed to remove your engine, no doubt.

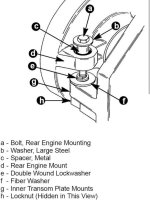
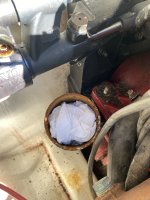
I'm not sure how your Motor Mount design is on your engine. But on my engine/application Merc A1 G1 removal, on the flywheel or bell housing the rear Motor Mount bolts has a hidden lock-nut that you can't see in the lower part of the rear transom mount where the MM bolts threads into. Yours may be different. *Photo below.

If you can't get the rear MM bolts out you may have to try other ways of removing them. Mine were a real Byatch, I had to cut the heads off the bolts, drill a lot of holes into the top bushing with a small bit, and then I had to heat the bushing up with MAPP gas to remove the bolts and get to that hidden lock nut.

However later I learned, There was another way of removing my engine without taking off the rear motor mount bolts, by removing the starter, the rear flywheel housing and inspection plate and sliding it out on the hoist. You would still need to remove the front mount bolts however.

*Anytime you remove an engine, you should most definitely re-check the alignment, that's a given. Definitely purchase the alignment tool if you don't have one. They sell them on eBay for about $32. That's where I purchased mine, and it worked like a charm for me.

Good luck 🤞

Screenshot_20230520_173403_Chrome.jpg
 
Last edited:

1985 Century Mustang

Chief Petty Officer
Joined
Mar 9, 2023
Messages
525
I wonder what preventive measures one can take to keep that oil pan rust free in the future, maybe perhaps a coat of marine grease, some WD 40 etc. I'm gonna look into that, I suppose nobody does any preventive maintenance on it, or do they. It's not rocket science. 😃🤣😃
 

kenny nunez

Captain
Joined
Jun 20, 2017
Messages
3,290
Your description about the rear mounts is correct along with the front. It is the opposite of the #2 posting describing the Mercruiser set up. The 2 1/2” 13 nuts come off and of course the lag screws on the front mounts. Disconnect the fuel, battery cables, power steering, wire harness plug, throttle cable, water supply and exhaust. While the engine will come up and out the alinement still needs to be checked. Mainly over time the rubber mounts settle and in some cases the hull may change enough to effect alignment. So just pull the drive. The front mounts can be sand blasted, painted and the threads chased and greased. When using a fork lift be sure to put a good clamp over the end of the blade so the chain will not slip off.
With the engine out use a hammer to sound the lower area of the transom. If it is still solid and the stringers are the same then you are in good shape.
Also plan on replacing the timing cover along with the pan. If you are not in a hurry throughly clean the bilge. On several boats I have owned I painted the bilge white so that it is easy to clean and if something falls in there it can be found. Be sure to coat the pan and timing cover with either bed liner or 3M under coat.
 

MalibuMike

Petty Officer 2nd Class
Joined
Dec 29, 2020
Messages
137
Thank you all for the help. On my way to the boat now and going to take a few pictures to asses what I will do for disassembly. Also bringing borescope cable to see if it's the rust blister or the dipstick tube.
 

MalibuMike

Petty Officer 2nd Class
Joined
Dec 29, 2020
Messages
137
I wanted to add to this and see if I've got this right since I am a bit nervous about tackling something new like pulling a motor.
1) Drain oil and remove rubber exhaust couplers to free the exhaust. Possibly remove risers and manifolds to reduce weight and check gaskets. Remove fuel lines, grounding wire at back of block, undo lag bolts in the stringers at the front motor mounts, loosen back motor mounts, remove hydraulic lines from power steering pump and trim lines, disconnect wire harness, disconnect throttle cable, and finally pull outdrive. Remove hose that brings water to circulation pump. Mine comes from the outdrive thru the transom.
2) Lift engine on to engine stand. Remove oil pan and timing chain cover if I want to check chain tension and do the seal on the timing cover. With 570 hours on engine installed in 2007, would you change the oil pump? Do the rear main seal?
3) Prepare gaskets surfaces with cleaning. Dab RTV at 4 spots shown in most videos that gives the gasket some extra protection.Let it dry for an hour then add gaskets and tighten to torque specs.
4) Clean bilge while its out.
5) Who reinstalling, buy alignment tool and check before install of outdrive.
 

Scott Danforth

Grumpy Vintage Moderator still playing with boats
Staff member
Joined
Jul 23, 2011
Messages
49,537
no need to worry about chain, oil pump or RMS your motor is just a puppy....... let it grow old before you worry about those things. you dont change oil pump on your car when you only have 20,000 miles. no need to worry on a motor that only has 570 hours

before removing pan, inspect it. may just need wire brush and paint.

many times you can simply unbolt power steering pump and simply pull aside (leaving lines connected)
 

MalibuMike

Petty Officer 2nd Class
Joined
Dec 29, 2020
Messages
137
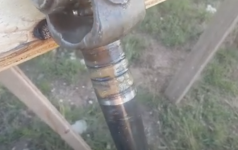
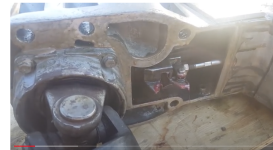
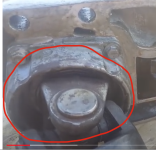
Just watched a vide on installing the outdrive. What is the "gasket material" that is painted on to the metal surface in picture two and is it correct to spread gasket material around the o rings in picture one?

Does the liquid gasket keep the water out of the bellow and u joint or is the bellow that keeps the joint dry? Ive never quite understood how this area is sealed.
 

Attachments

  • Screen Shot 2023-07-12 at 10.32.55 AM.png
    Screen Shot 2023-07-12 at 10.32.55 AM.png
    947.2 KB · Views: 17
  • Screen Shot 2023-07-12 at 10.33.05 AM.png
    Screen Shot 2023-07-12 at 10.33.05 AM.png
    1.7 MB · Views: 17
Last edited:

kenny nunez

Captain
Joined
Jun 20, 2017
Messages
3,290
The outer leading edge of the bearing retainer compresses against the bellows. The bellows is easy to change if you want to by just removing the worm clamp, with a screwdriver pry the rear inner lips inwards, raise
up the pivot housing then tie it so it will stay up and remove the bellows.
 

MalibuMike

Petty Officer 2nd Class
Joined
Dec 29, 2020
Messages
137
The outer leading edge of the bearing retainer compresses against the bellows. The bellows is easy to change if you want to by just removing the worm clamp, with a screwdriver pry the rear inner lips inwards, raise
up the pivot housing then tie it so it will stay up and remove the bellows.
Thanks! So this area in red slides in with enough pressure within the bellow that keeps water out? Bellows are two year old. Time to change?
 

Attachments

  • Screen Shot 2023-07-12 at 1.00.14 PM.png
    Screen Shot 2023-07-12 at 1.00.14 PM.png
    895.6 KB · Views: 6
Last edited:

Donald0039

Chief Petty Officer
Joined
Jun 11, 2022
Messages
402
I would definitely remove the exhaust manifolds and exhaust elbows/risers. They should be inspected every few years. More often in salt water.

Most boat engines die from water ingestion.
 

MalibuMike

Petty Officer 2nd Class
Joined
Dec 29, 2020
Messages
137
Thanks everyone. Started tonight. The blister is the source of the leak. If I cant find a good used pan for sale, I think that a patch could be welded on. The entire pan is solid except for one blister the size of a silver dollar.
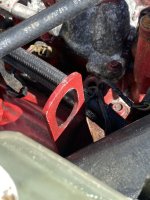
Lag screws in stringers holding front motor mounts were very snug but coming out nicely. Rear mounts were very easy. I'm starting to believe that if you really knew what you were doing, you could have an engine out in about an hour!
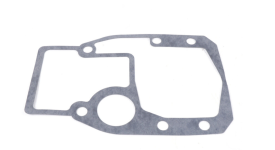
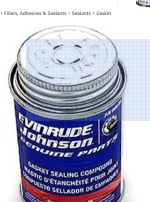
What is the liquid gasket material in the question from earlier today? Is this what you paint on to the metal surface before reinstall?
Correction......It looks like there is an actual gasket and some people use this adhesive with it. Is this the gasket and is it called a "mounting gasket"Screen Shot 2023-07-12 at 9.23.40 PM.png?
 

Attachments

  • Screen Shot 2023-07-12 at 9.12.25 PM.png
    Screen Shot 2023-07-12 at 9.12.25 PM.png
    953.1 KB · Views: 4
Last edited:

BRICH1260

Lieutenant
Joined
Jul 6, 2011
Messages
1,371
Volvo does not use a gasket in the area that you are referencing. The video you watched appears to be of a different drive. I just usually apply a good coating of marine grease between the two mating surfaces to keep them from seizing together making it more difficult to separate the next time.
 

Horigan

Senior Chief Petty Officer
Joined
Jun 12, 2016
Messages
673
On the O-rings on the splined shaft lube with motor oil. On the larger area around the U-joints that you have marked, apply Triple Guard grease, or Volvo grease. No sealant. The pressure of the six nuts holding the drive on creates the seal on the aft end of the bellows. A mounting gasket is not used on Volvo drives, just the earlier OMC drives. You can coat the interface with a light coating of grease, but I don't bother. If you pull the drives annually, like you should, you won't have an issue with the drive getting stuck.
 

Scott06

Admiral
Joined
Apr 20, 2014
Messages
6,424
Thanks everyone. Started tonight. The blister is the source of the leak. If I cant find a good used pan for sale, I think that a patch could be welded on. The entire pan is solid except for one blister the size of a silver dollar.
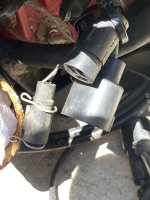
Lag screws in stringers holding front motor mounts were very snug but coming out nicely. Rear mounts were very easy. I'm starting to believe that if you really knew what you were doing, you could have an engine out in about an hour!
What is the liquid gasket material in the question from earlier today? Is this what you paint on to the metal surface before reinstall?
Correction......It looks like there is an actual gasket and some people use this adhesive with it. Is this the gasket and is it called a "mounting gasket"View attachment 384366?
yes it takes about an hour if you are reasonably familiar.

yes you can weld a patch over the rust hole. just completely check it out as you may have small pitting and not worth messing with it.
 

Donald0039

Chief Petty Officer
Joined
Jun 11, 2022
Messages
402
Given the hassle with pulling the engine why not ger a new oil pan.

An hour to pull the engine probably does not include the time to pull the outdrive.
 
  • Like
Reactions: KJM

MalibuMike

Petty Officer 2nd Class
Joined
Dec 29, 2020
Messages
137
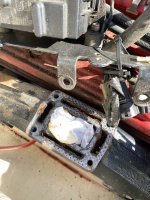
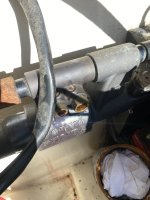
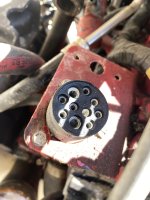
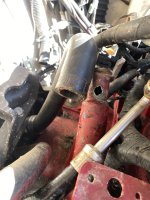
OK I’m making progress and here are some pictures from everything that has been detached. I think the only thing left is are the negative ground at the back of the block and the positive cable on the starter.

There are still a few things I don’t fully understand if you can help.

We are going to pull the engine out using the two engine mounts that are at opposing corners. Once it’s in the air I will remove the bell housing at the back. I don’t know what size bolts to have ready to put on the engine stand. Do people normally use the bell housing bolts?

Quick Internet search produced these type of bolts in the length depends on the engine mount. 4 3/8-16 x 3.0" bolts or 4 3/8-16 x 3.5"
 

Attachments

  • 51D188AA-8AFD-4579-96A1-6846B89E765A.jpeg
    51D188AA-8AFD-4579-96A1-6846B89E765A.jpeg
    1.7 MB · Views: 6
  • 36E41127-FB61-46BE-88BC-808120319458.jpeg
    36E41127-FB61-46BE-88BC-808120319458.jpeg
    2.5 MB · Views: 6
  • 0286355C-7AAA-456C-B358-687B75BD5963.jpeg
    0286355C-7AAA-456C-B358-687B75BD5963.jpeg
    1.5 MB · Views: 6
  • F4932E56-18D2-4A46-A134-0A63BC9718D3.jpeg
    F4932E56-18D2-4A46-A134-0A63BC9718D3.jpeg
    1.3 MB · Views: 7
  • D7A98354-9401-4E51-97B8-41D848417DEF.jpeg
    D7A98354-9401-4E51-97B8-41D848417DEF.jpeg
    1.6 MB · Views: 7
  • 0CA25E07-ED3B-419A-BB32-42EC19470BDF.jpeg
    0CA25E07-ED3B-419A-BB32-42EC19470BDF.jpeg
    1.1 MB · Views: 7
  • C19224B1-1ED7-4888-8C5B-C10F0A239AF9.jpeg
    C19224B1-1ED7-4888-8C5B-C10F0A239AF9.jpeg
    1.2 MB · Views: 7
  • 7B2991E0-3D66-401D-B29B-CCCFF6A7BBDF.jpeg
    7B2991E0-3D66-401D-B29B-CCCFF6A7BBDF.jpeg
    1.3 MB · Views: 7
  • D41C223E-3935-4A39-AE16-F0119FA058FE.jpeg
    D41C223E-3935-4A39-AE16-F0119FA058FE.jpeg
    1.3 MB · Views: 7

Scott Danforth

Grumpy Vintage Moderator still playing with boats
Staff member
Joined
Jul 23, 2011
Messages
49,537
You need 4 grade 8 3/8-16 bolts 3/4 inch longer than the tubes on your engine stand. You also need 4 hardened washers
 
Top