Engine Removal on 1988 Sylvan

kenny nunez

Captain
Joined
Jun 20, 2017
Messages
3,290
By using the hydraulic rams and the block of wood as has been said there is one thing to keep in mind, too much force could break the gimbal ring. Too bad that you cannot use the rams, the system on your boat is the lower pressure than before the Alpha series which developed 3k psi. If you know any auto body people maybe a Porta Power between the bottom of the transom and the front of the drive may push the drive off with the block of wood wedge. Good luck tomorrow.
 

Rivergator

Petty Officer 1st Class
Joined
May 7, 2013
Messages
224
Thanks Kenny. I tell y'all. Looks like Murphy has made this his pet project. I was going to disconnect the steering arm from the P.S. linkage which normally should be a 10 minute endeavor. You pull the cotter pin from the bottom of the clevis pin and push the pin up. Ok, I grant you, after some years it may be a little stuck so you tab it from the bottom and pull it out. No, no, no, not on my boat. Even something as simple as a clevis pin is fused solid to the P.S. arm and I couldn't even press it out. Btw PB Blaster has been a huge disappointment so far. It hasn't done diddly squat for me so far. Anyway I wound up cutting the pin above and below the steering arm with a hacksaw, which took me 2 hours of blood sweat and tears, but now I was able to do the horizontal test to see if I could detect any motion in the coupler. Nothing - 2 people looked at it. We moved the drive all the up and down and swung from right to left, no visible motion on the coupler. That still does not mean that the spline shaft is not frozen to the coupler. I need to find out exactly where it is that stops the drive from separating. Gimbal bearing or coupler before I go on a guessing trip and destroy things that need not be destroyed. Tomorrow I will try to insert a tiny remote camera at the location where the spline shaft enters the coupler with the hopes to see if the spline shaft moves in the coupler or not. Keep you posted.
 
Last edited:

Rivergator

Petty Officer 1st Class
Joined
May 7, 2013
Messages
224
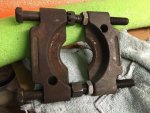
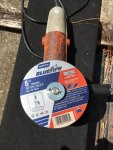
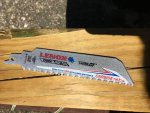
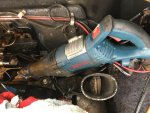
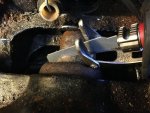
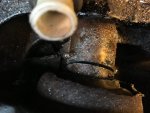
Well, I am not getting anywhere with my drive so I have to face my 3 options. 1) to apply brutal force between the drive and the gimbal housing with a tool (see picture 1) that I am sure will do something. It's the same method as applying force with a wooden wedge between the drive and the housing and applying power with the trim rams or some other force. Only this tool will kill something for sure. It is very efficient because you can apply incremental force by just turning the 2 nuts, until either the drive pops or breaks or the gimbal ring or housing or transom breaks. And that was too much of a gamble and if the latter happens a price too high to pay. The second option was to find a very competent welder who knows how to handle a cutting torch and cut the drive shaft and the coupler. Another scary thought and therefore I pass on that one too. The third option was to cut the spline shaft and the coupler, so I concentrated on that. At first I thought of using a 4 1/2" angle grinder, but the disc was too small to make it all the way through the coupler. So I put a 6" disc on it, but in order to do that I had to remove the safety shroud to accommodate the 6" disc (picture 2), which would turn this grinder in to a very risky and dangerous instrument. With the lack of space to work in and not having a solid grip on the grinder I was afraid that if I loose control of the grinder for whatever reason it would become a loose cannon, especially since it had a solid ON/OFF switch and not a paddle switch. So I tossed that idea as well. So I went to Lowe's and bought a serious carbide tipped thick steel cutting blade (pictures 3,4,5) for my no-nonsense Bosch reciprocating saw (that thing will cut a Sherman tank open) and went to work. 2 hours later of the most uncomfortable labor, success became a reality. The drive shaft and the coupler were cut and separated (picture 5). Needless to say that I stripped the engine already in preparation for removal, removed carburetor, remote control linkage, removed exhaust manifolds and risers etc. That gave me the needed space to work on behind the engine and me laying on top of the V-6. I still think separating Siamese Twins would have been easier, but what do I know, it's done. There is a light at the end of the tunnel. Now I will have to deal with the rear motor mounts which should be a piece of cake in comparison and out goes the engine. And then I can deal with the cut off drive shaft, clear it, and remove the drive (if Murphy has no objections LOL). But this will have to wait until after hurricane Laura is done with our Gulf Coast here. I am expecting a couple of rough days here in Mobile on Tuesday and Wednesday. - Keep y'all posted.
 

Attachments

  • photo338390.jpg
    photo338390.jpg
    151.1 KB · Views: 1
  • photo338391.jpg
    photo338391.jpg
    212.5 KB · Views: 1
  • photo338392.jpg
    photo338392.jpg
    145 KB · Views: 1
  • photo338393.jpg
    photo338393.jpg
    129.5 KB · Views: 1
  • photo338394.jpg
    photo338394.jpg
    146.2 KB · Views: 1
  • photo338395.jpg
    photo338395.jpg
    99.9 KB · Views: 1

nola mike

Vice Admiral
Joined
Apr 22, 2009
Messages
5,364
So, was it the coupler that was holding the drive on? Were you able to remove it?
 

Searay205

Chief Petty Officer
Joined
May 27, 2018
Messages
468
Do not ever mount a 6" disc on a 4.5" grinder. The larger wheel isnt rated for the rpm of the smaller grinder and will come apart and launch projectiles. Many industrial fatalities have resulted mostly in thrid world countries from doing the aforementioned. In this country if you remove a gaurd have your resume ready.
 

Rivergator

Petty Officer 1st Class
Joined
May 7, 2013
Messages
224
Hi Searay205, you are right. There was a reason why I abandoned the idea, you know that little voice in your head telling you, don't do it, not a good idea.
Hi Nola Mike, no, after the cut I called it a day, buttoned up and secured everything in anticipation of hurricane Laura. My next move will be the removal of the engine. Once I have done that I will have all the room I need to remove the remnants of the cut coupler from the spline shaft, because I am pretty sure that it will not pass through the gimbal bearing opening the way it is. As of now I still don't know why it was impossible to remove the OD the easy and normal way. But I will know by the end of the week. Keep y'all posted!
 
Last edited:

kenny nunez

Captain
Joined
Jun 20, 2017
Messages
3,290
The tool I loaned you should push the drive off without damaging the gimbal ring now that the coupler is not holding the shaft from coming out. My friend’s shop has enough used parts where you will not have to buy anything new. The other thing I am thinking about is the wire harness on your engine may be corroded at all the connections he also has a good harness on the engine in his shop.
 

thedinz

Petty Officer 2nd Class
Joined
Jun 29, 2014
Messages
151
i am a fellow barritz owner, any more pictures of the boat? some outside pictures and the interior, the person I bought my boat off of rebuilt it and I know its not setup exactly how it was out of the factory.
 

Rivergator

Petty Officer 1st Class
Joined
May 7, 2013
Messages
224
Hi Kenny, I had such a great afternoon visiting with you and getting to know you. The tool you loaned me will definitely help me to get that drive out when I get to it after I take the engine out. I really appreciate you helping me finding good parts for my boat. The minute the drive is out I will make another trip to Kenner to bring your tool back and maybe meet your friend Mark. I hope he is feeling better.
Rick
 

Rivergator

Petty Officer 1st Class
Joined
May 7, 2013
Messages
224
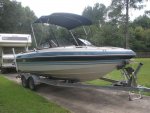
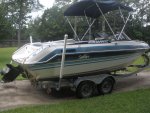
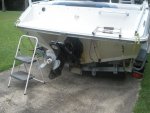
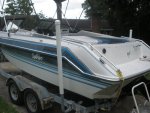
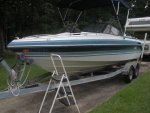
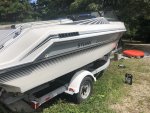
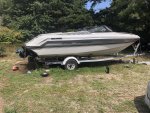
thedinz, here are some pictures of my 209. That's all I have for right now. The bow seating has been restored already, but the aft section has been stripped of all seating etc., so I have some fighting room dealing with all the mechanical stuff in the engine bay. Good to know that there are other Barritz owners out there. What year is yours? You can post a few pictures too.
 

Attachments

  • photo338475.jpg
    photo338475.jpg
    124.2 KB · Views: 0
  • photo338476.jpg
    photo338476.jpg
    139.7 KB · Views: 0
  • photo338477.jpg
    photo338477.jpg
    120 KB · Views: 0
  • photo338478.jpg
    photo338478.jpg
    106.3 KB · Views: 0
  • photo338479.jpg
    photo338479.jpg
    113.6 KB · Views: 0

thedinz

Petty Officer 2nd Class
Joined
Jun 29, 2014
Messages
151
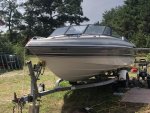
Looking good man, mine is an 89, rebuilt about 8 years ago, floors engine compartment, rebuilt 5.7 Mercruiser. You got one of the cooler paint jobs, I got basic black and white. I will say, I love this boat, isn't a very common boat but I dig it.
 

Attachments

  • photo338481.jpg
    photo338481.jpg
    328.5 KB · Views: 0
  • photo338482.jpg
    photo338482.jpg
    1.4 MB · Views: 0
  • photo338483.jpg
    photo338483.jpg
    1.9 MB · Views: 0
  • photo338484.jpg
    photo338484.jpg
    2.8 MB · Views: 0

Rivergator

Petty Officer 1st Class
Joined
May 7, 2013
Messages
224
Dinz, nice boat. I haven't had the pleasure yet to actually enjoy my boat because I bought it in 2016 with the intent to restore it, which I am finally getting around doing now. It hasn't seen any water yet. I bought the boat because I thought it was very appealing, spacious and good looking in general. My previous boat was a 1986 24' Bayliner Cabin Cruiser with a 5.0 ltr GM engine and a Volvo Penta 275 OD. I always wanted to know more about the MerCruiser world but did not figure on messing with every nut and bolt between the engine water pump and the propeller. But with all these MerCruiser Gurus here on iboats who know this stuff in and out it will get done. Come spring time this baby will go on its maiden voyage. By your tag I can see you are up in NH. You got the 5.7 ltr engine. Mine is only 4.3 ltr. but everybody says its a good power plant for this boat.
 

Rivergator

Petty Officer 1st Class
Joined
May 7, 2013
Messages
224
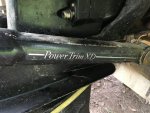
Kenny, you asked me what trim rams I have. That's what it says on it.

Trim Rams.jpg
 
Last edited:

thedinz

Petty Officer 2nd Class
Joined
Jun 29, 2014
Messages
151
Dinz, nice boat. I haven't had the pleasure yet to actually enjoy my boat because I bought it in 2016 with the intent to restore it, which I am finally getting around doing now. It hasn't seen any water yet. I bought the boat because I thought it was very appealing, spacious and good looking in general. My previous boat was a 1986 24' Bayliner Cabin Cruiser with a 5.0 ltr GM engine and a Volvo Penta 275 OD. I always wanted to know more about the MerCruiser world but did not figure on messing with every nut and bolt between the engine water pump and the propeller. But with all these MerCruiser Gurus here on iboats who know this stuff in and out it will get done. Come spring time this baby will go on its maiden voyage. By your tag I can see you are up in NH. You got the 5.7 ltr engine. Mine is only 4.3 ltr. but everybody says its a good power plant for this boat.

The boat was originally from NH, i am from MASS, it was just easier to register it with NH.

I think your engine will be fine, i have no idea if my boat came with this engine or if the previous owner (rebuilder) upgraded, i will tell you its very heavy in the back so it makes me wonder, i get A LOT of bow rise before it planes out. Not the end of the world but something I've noticed its a bowrider so big heavy engine in the back, not much weight in the front. I try to make people sit up there ha!

Unless it turns out to be a money pit due to the previous neglect I wouldn't give up on it, as previously mentioned i love this boat, and I get a lot of compliments on it, which always shocks me for some reason because it's older and not super fancy but I have had multiple people at the boat ramp say "nice boat"
 

Searay205

Chief Petty Officer
Joined
May 27, 2018
Messages
468
wonder if your outdrive is stuck on the driveshaft housing, housing the input shaft to outdrive goes into. I was watching you tube and a guy indicated to put grease on the big opening in the gimbal ring and on the outdrive driveshaft housing because if water gets in between the two and corrosion forms you won't get it off. Nice trim cylinders the XD stands for extended. Please don't get hurt working on your boat. I lift weights wear gloves (prevent caluses) i couldn't care about them but wife don't want me scratching her rear when slapping (LOL). wear weight lifting belt. Then when picking up an award unbalanced outdrive covered with sharp edges no weight lifting belt or gloves. Wear eye protection had two small pieces ground out of my eye in emergency room over the years. You seam smarter than me, i get tunnel vision and i just keep going until i break something or i break.
 

kenny nunez

Captain
Joined
Jun 20, 2017
Messages
3,290
Those rams are the same diameter as the ones we looked at. Just yours may have a longer stroke.
 

Rivergator

Petty Officer 1st Class
Joined
May 7, 2013
Messages
224
wonder if your outdrive is stuck on the driveshaft housing, housing the input shaft to outdrive goes into. I was watching you tube and a guy indicated to put grease on the big opening in the gimbal ring and on the outdrive driveshaft housing because if water gets in between the two and corrosion forms you won't get it off.

Since I cut the spline shaft and the coupler and the outdrive is now no longer connected to the engine I did a quick test to see if I can remove the OD now, but to my disappointment no success. It is still as stuck as it was before. I may have done all that coupler cutting for nothing. Today I ground off the head from the other rear engine mount bolt and tomorrow I will drill away all the rubber of the rear mounts and then the big moment arrives when my brother and I will try to lift out the engine from hell. Once this is done I will then direct my full attention to the OD and why it is stuck. Searay205 can you be a little more specific what you mean by your above quote. I don't know exactly what area you are talking about.
 

Searay205

Chief Petty Officer
Joined
May 27, 2018
Messages
468
take a look at a picture of an outdrive. At the top you will see the round housing the driveshaft comes out of. That housing fits in the gimbal. There isn't much clearance between the two when assembled, they should both be greased when assembled to allow disassembly if corrosion tries to form. I know one time on mine even though greased i had a biatch getting it apart to the point i was raising out drive and dropping it on a 2x4 placed across the bottom. I didn't know at time but i busted up the gimbal ring. That was due to misalignment. I imagine that is what yours is hanging up on, what else could it be with the driveshaft cut. Manually pick up your outdrive, in the raised position you will see where you can place a 2x4 at bottom where the outdrive usually rest. Pick your outdrive up and drop it so it smacks into 2x4 and it tries to force it off, again i did damage to mine but I was beating sheet for 25 hits?

I still use same technique except i only raise outdrive 5 inches and drop against 2x4 and it just pops right off.
 
Top