Thanks guys :thumb: I am doing a bit of catching up on 'resin viscosity' and 'rheology' (which I didn't even know as a word until now

)
Anyway, . . . Note to self: pay more attention to resin viscosity specs going forward. Thinner (lower viscosity) resins work better with infusion techniques. Of course, I knew that going in. . . but did not give it too much consideration in sourcing the resin.
What I have is medium viscosity resin, which is OK, but not great. I think I can compensate with a slight bit of thinning (like about 3%) and promoting the flow into the mold ( lots of resin runners, gravity feed, etc. ) I'm also thinking if I could put a bit a pressure into the resin pot . . . :noidea:
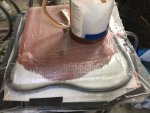
Polyester resin is the most difficult to work with IMO, because it begins to cure so quickly. Yesterday, on my second trial run making the second ladder hatch mold, the resin stopped flowing after a while, which then I realized that it was gelling in the pot and tube. That is why I don't like to use poly resin and have preferred VE or EEEEpoxy in my prior projects.
I can probably compensate for the quick curing of Poly by lowering the resin temp to about 50 F and keeping the catalyst a tad below 1.5%
I have also come to realize that gelcoats need at least 2% catalyst, otherwise it sits there and laughs at you.
My working temperatures have been in the 68 F degree range, but I have been able to put the small molds in my utility room where the furnace is located, which is about 80 F.
The actual parts that will be made from the molds are going to be VE resin, which in my experience has about 45 minutes open time, vs. 15-20 mins of poly resin. VE is better at stress and strain than poly resin BTW . . . which will be important for the swim platform.
Anyway, it is a good thing that I started small with the hatch molds, as it has given me some real-life experience with resin flow.
At the end of the day, I'm still thinking infusion is the way to go, as I don't see myself doing hand layup of 40 +/- square feet of CSM and/or 1708 in any efficient manner. My thinking is that its better to get the resin into the mat/cloth all in one shot, then use a resin roller to push the resin around as needed.


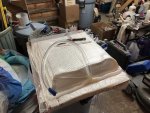
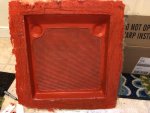
 The plug also survived . . .
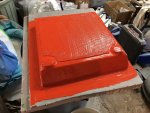