Capri 1950 Resto and Modernization

AShipShow

Lieutenant Commander
Joined
Jul 8, 2016
Messages
1,792
Looks good. Thats an interesting jig you got there for the relief cuts.
 

kcassells

Fleet Admiral
Joined
Oct 16, 2012
Messages
8,718
Hey they are good for the environment!

4802dc5e49c35576dc15abd09c06abf6--scary-spiders-scary-stuff.jpg


rofl_spiders_640_11.jpg


SPIDER-funny-30702047-720-705.jpg


Fun+facts+0005.jpg
 

Capriupgrade

Seaman Apprentice
Joined
Jan 24, 2019
Messages
33
Hey Everyone!
It's been a long time since I posted. Way too long. I took a hiatus due to declining temperatures and increasing day-job needs. But now that it is getting warm again, its time to get back at it!

I have poked at the boat over the last 6 months, but this past week I spent a good amount of time making progress on the console.
IMG_6506 copy.jpg
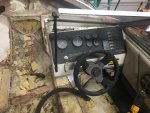
As promised, this is a modernization of the Bayliner, so that ugly console has to go!

Screen Shot 2020-04-21 at 10.11.19 PM.png
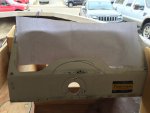
First things first, I had to design a new look. I 3D printed a pen holder for my vinyl cutter and turned it into a plotter, so I could easily print and test my design!
IMG_8967.JPG
Test fit looks good! Now its just a matter of laying out the new design removing everything "not the console". Easy, right? pretty much what sculptors do?
IMG_8970.JPG
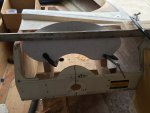
got the bulk of it removed and have settled on the position of the instrument cluster.
IMG_8972.JPG
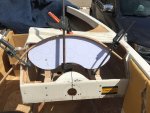
More old console removed and starting adding in new console details.
IMG_8974.JPG
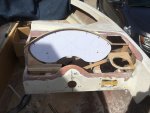
Now, all the supports are installed, which will become the underlying support structure for the fiberglass. None of this will have any structural value, they are just supports to layup the fiberglass. I am using what I refer to as the "speaker box method". where you layup the major control surfaces of your speaker box and then stretch felt between the surfaces to get nice curves. Then you just coat it in resin and you now have a nice curvy speaker box. I am sure others have done this on their boats before, but I haven't seen it. Very common technique for making custom car interiors too.
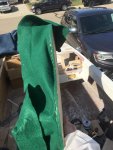
IMG_8975.JPGIMG_8976.JPG
I removed the instrument cluster panel and used my upholstery stapler to attach the felt to the panel.
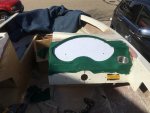
IMG_8979.JPG
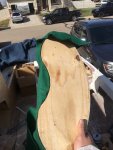
Then I just stretched and stapled, stretched and stapled, then stretched and stapled some more! I couldn't be happier how smooth all the contours turned out! The upholstery stapler somewhat penetrates fiberglass with T50 5/16 staples, in case any one is curious. At least enough to hold the felt, lol.
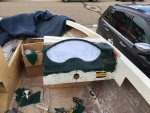
IMG_8982.JPG
And lastly, resin it up! Tight as a drum and surprisingly strong considering it is just felt. After feathering (sanding) the edges into the existing fiberglass, this will then get 2+ layers of 1.5 oz CSM to cap it off and ensure it is actually strong since I assume there is some structural value in the the console for transferring forces from the gunwale to the deck - especially since there will be a wake tower installed immediately fore of the console.
 

kcassells

Fleet Admiral
Joined
Oct 16, 2012
Messages
8,718
Hey Welcome back! I like that approach to the console. Keep posting. :joyous:
 

AShipShow

Lieutenant Commander
Joined
Jul 8, 2016
Messages
1,792
Not sure how I missed this thread, but just read through it and its looking awesome!

Just a quick note about your transom flatness.. I think I read that you were able to flatten it out when gluing in the new transom wood... But just in case its still a little off, the flatness/thickness/and parallelism spec only apply to the area the size of the transom plate. So measuring over 24" is potentially making it look out of spec when it might not be.
 

Capriupgrade

Seaman Apprentice
Joined
Jan 24, 2019
Messages
33
Thanks kcassells! Good to be back at it and ready to get her done! My target is to splash this thing before July, so I think committing myself to posting every day or so ought to keep me on task to get it done. My rough estimate has about 160 hours left to do on it...so, maybe feasible? lol. we shall see though! The big motivator is I have 10 gallons of resin and 5 gallons of gel coat that are close to expiring, so the race is on!
 

Capriupgrade

Seaman Apprentice
Joined
Jan 24, 2019
Messages
33
Hey Mad Props! Good to have you aboard! I have been working my way through your project and videos the past few months. Wealth of knowledge there!

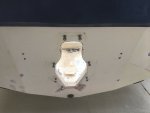
Ah, that is good to know! I did successfully straighten it, but at the cost of some cracks in the lower corners of the cutout. So, in hindsight, probably a wash in effort? Especially considering I may have not have had to fix it based on what you are saying. You can see where I ground out the cracks in the below picture. they were about an inch or so long in each corner and about an eighth deep. I ground them out, and then a little extra so that I will have plenty of area for the patch to bite. I found some other damage in the bigger one on the right due to delamination around the bolt hole, so I just kept grinding till it was all gone!

Since we are on the topic of transoms, what is the recommended method for encapsulating the cut edge of the cutout?

If the weather holds out tomorrow I may tackle this step. My though is to cut a 3" strip of CSM or 1708 and lay it up on the cut edge, but not wrap it around the inside corner. That way I can sand it flush with the inside surface of the transom so that when I do the inside sheet of 1708 it is a flat layup and I don't have to try and level the inside surface by sanding away valuable 1708. I don't like the idea of those two surfaces not being feather into each other, but does it matter? Alternatively, I could taper the inside wood corner, wrap the edge in CSM, and then sand it flat so that there is a little bite between the 1708 and the CSM edge wrap.

IMG_9004.JPG
 

Chris51280

Ensign
Joined
Jan 24, 2018
Messages
932
I used lots of resin and a layer of csm. Should be ok. I believe the builders did nothing other than leaving it bare or maybe just paint it white
 

Capriupgrade

Seaman Apprentice
Joined
Jan 24, 2019
Messages
33
Thanks Chris51280! That's simple. I do recall when I tore out the old transom that there was a 1/8" layer of glass on the cut edge, so you are probably right - they just laid up a layer of CSM in there and then gel coated. So that's what I will do!

IMG_9044.JPG
I went ahead and prepped the 14 holes in the back to be patched while I was at it. Then I put a slight tapper on the inside so that the CSM will wrap the edge without a much trouble. Lastly, I drilled out and filled all the holes with hairy PB.
IMG_9045.JPG
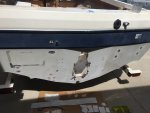
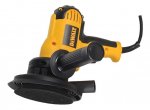
3 batches of resin later, all patched and encapsulated! Probably this weekend, I will do the hard part - sanding! I probably should have taken more care to fit the CSM patches to each hole to make sanding easier, but the dewalt sander I primary use is awesome at knocking down glass fast. Highly recommend it! So, once I knock down the bulk of it, I get out the straight line sander to ensure everything flat on both sides and then layup the inside 1708. Getting close to gel coat on the transom!
dewalt.jpg
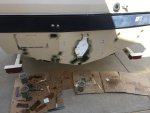
Oh, if anyone is curious about the bolts sticking out of the transom, I had drilled out the new wood to 3/4" and then filled them with hairy PB. The bolts are to preserve the original holes in the fiberglass so that I can use the old holes to re-drill the transom. In theory at least! The bolts are inserted only about 1/2".
 

PC on the Bayou

Petty Officer 1st Class
Joined
Apr 27, 2020
Messages
234
I like the idea of using csm on the end grains in the keyhole.
What are you doing about the bolt holes? I'm thinking about drilling the out oversized (before installing the transom) and then filling the back in with peanut butter so when I re-drill them out they will be through the glass rather than leaving any exposed wood.
 
Top