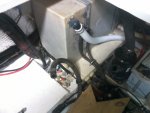
Bought a 1998 Sea Ray Sundancer 270 wide beam with rot...

alldodge

Moderator
Staff member
Joined
Mar 8, 2009
Messages
42,056
Heck I put almost 40K in my 20K boat during the rebuild, because I like the boat. I'm behind the OP all the way :thumb:
 

shaw520

Chief Petty Officer
Joined
Aug 27, 2009
Messages
634
For sure, my conscience won't let me do that to an unsuspecting buyer. I think I'm going to press on and fix it. I am young, I have the time, the admiral is fully on board and supportive, and I have the money to fix anything that may rear its head. We do like this boat for a cruiser!

Wise decision,..the added reward will come in the pride of knowing you did it yourself and that alone will deepen the future relationship you have with this boat.
 

drewm3i

Petty Officer 1st Class
Joined
Dec 31, 1969
Messages
288
Thanks guys! I have a history of flipping boats...This is my 4th boat in as many years. On every boat I've made money on the resale. The first was a Regal boat that was rotten. I was very inexperienced at this point and made a mistake. This boat I parted out. The next boat was a 21' Chaparral bowrider. The boat was immaculate, but mechanically needed love as it sat in a barn for 11 years unused. Bought it for 3k, put in 4-5k, and sold for 11.2k. Next boat was a 24' Chaparral cuddy. Bought it for 10k, put in 5k and sold for 17k. This boat, I bought for 17k. Although I'm very experienced and knowledgeable about boats now, I missed the hidden aft bulkhead. I have about $500 into this boat right now. The trailer doesn't count as I will easily end up making money on it at the end of this resto. Also, the hard part was getting a place to work and getting the engines pulled. Guess what? That's all done! Now begins the fun and the more I probe, the more I realize the rot isn't as bad as I once thought.
 

tpenfield

Moderator
Staff member
Joined
Jul 18, 2011
Messages
18,040
Thanks guys! . . . Now begins the fun and the more I probe, the more I realize the rot isn't as bad as I once thought.

Don't speak to soon . . . at least not until you have the fuel tank out :)
 

drewm3i

Petty Officer 1st Class
Joined
Dec 31, 1969
Messages
288
Don't speak to soon . . . at least not until you have the fuel tank out :)

I'm speaking of everything I've gotten too...I was worried about the transom, but it seems okay. I was worried about the entire aft bulkhead, but it's only the middle. I was worried about the swim platform, but the core is solid with the exception of two little tiny 5/16" holes confirmed by drilling other holes. Also, the foredeck is solid. The forward bulkhead is solid. The outward motor mounts are solid. So I'm pretty optimistic. I know there's rot near the fuel tank, so no surprises there...
 

drewm3i

Petty Officer 1st Class
Joined
Dec 31, 1969
Messages
288
Update: Got a lot of work done this weekend. I pulled the transom assemblies off (had to use a car and strap to yank them off as they were seized in the transom) and they are pretty much shot. No real surprise here: tons of corrosion and bad bellows. I am going to be buying newer ones for $450 today as I just don't feel like messing with these old units. For this restore, time is money and less is more. If I can spend a few hundred to avoid weeks of work, I'm going to do it. Anyways, I also removed the generator platform and next up is the fuel tank.

Thinking about replacing these risers, but I'm not entirely sure. My buddy thinks they're good for a year or two.


Old transom assemblies:


New cover:


Transom:


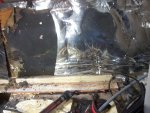
A few minor spots that are soft. Some moisture. My plan is to removed bad wood and then fill with a thickened resin. This is after going at it with a screwdriver and chisel trying to scrape off the gel. There is also a lot of debris on the openings at the moment:


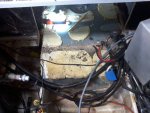
Port side, under generator platform:


Starboard side, under generator platform (rot):


Center portion (rot):


Roady68

Seaman Apprentice
Joined
Sep 17, 2016
Messages
38
Looks like some good progress. I'll be back at mine on Friday. Taking a half day to do some more work.
 

tpenfield

Moderator
Staff member
Joined
Jul 18, 2011
Messages
18,040
I'd patch the transom and treat it with E.G. seal up the exposed edges really good before putting the transom assemblies back on.

Probably best to take the fuel tank out before you do much more cutting. The rot looks to be low in the structure.
 

drewm3i

Petty Officer 1st Class
Joined
Dec 31, 1969
Messages
288
I'd patch the transom and treat it with E.G. seal up the exposed edges really good before putting the transom assemblies back on.

Probably best to take the fuel tank out before you do much more cutting. The rot looks to be low in the structure.

Yep, I agree with you completely.
 

drewm3i

Petty Officer 1st Class
Joined
Dec 31, 1969
Messages
288
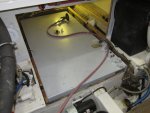
Update: I cannot figure out a way to remove the fuel tank. I removed the aft cabin floor panel, all the brackets holding the tank down, and have begun to chip away at the structure. Still I can't get the tank to budge more than a few inches as it is wedged in so tightly. I am beginning to think I may need to cut the aft bulkhead. Any ideas? There is some clearance, but not much. I could cut out the lower aft bulkhead, but I assume I will have to completely repair the structure when I want to reinstall the tank. I will post some pics.

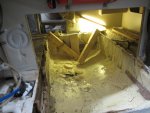
What's left of the starboard stringer. Prying the tank broke the stringer:


Current progress:


Bulkhead almost gone:


Aft cabin:


Last edited:

alldodge

Moderator
Staff member
Joined
Mar 8, 2009
Messages
42,056
Looks like you need to do what I had to do to remove mine. Need to cut above the tank to get enough room to get it out
 

alldodge

Moderator
Staff member
Joined
Mar 8, 2009
Messages
42,056
A couple of pics
Before the bulk head was removed

Photo456.jpg

After bulk head was removed

Photo457.jpg

Here is other pics

tank installation (1).JPG

tank removal (1).JPG
 

tpenfield

Moderator
Staff member
Joined
Jul 18, 2011
Messages
18,040
Drew,

In the drawings that you got from SeaRay, it shows a panel that can be removed from the aft bulkhead (i.e. the back wall of the aft berth). It seems that the removable panel is there to provide the clearance needed to lift the tank up over the engine mount stringers, etc.

In order to access that panel, the lining of the back wall would have to be pulled up a bit, but perhaps you can leave the upper portions intact.

Anyway, take a look at the drawings and the back wall again and see if that is the case.

SeaRay270bulkhead1.png

It is a similar thing that AllDodge had to do, except he had to cut the back wall.
 

alldodge

Moderator
Staff member
Joined
Mar 8, 2009
Messages
42,056
How did you reattach that aft bulkhead?

I fiber glassed it back into place. The inside has a full length mirror which went back in once glassed, so that took care of the inside. The engine compartment has the heat and sound shield which is glued in on that side.

You can see the shield used

Photo615.jpg
 

drewm3i

Petty Officer 1st Class
Joined
Dec 31, 1969
Messages
288
Okay good info guys, I'm really nervous though about using power tools around the tank as the plastic tanks leach some vapor. I've also taken all the lines out, so the tank is quite the bomb in its current state...If there is a removable panel I will find it. If not, I may use a hand saw. I'm not worried about cutting the bulkhead for looks...Both sides are covered, but the gas vapor presents a problem.
 

tpenfield

Moderator
Staff member
Joined
Jul 18, 2011
Messages
18,040
+1 to the hand saw, if you have to do some cutting. Once you have the tank out and vapors are no longer present, then you can break out the power tools.
 

drewm3i

Petty Officer 1st Class
Joined
Dec 31, 1969
Messages
288
+1 to the hand saw, if you have to do some cutting. Once you have the tank out and vapors are no longer present, then you can break out the power tools.

Okay, hopefully removing that panel will fix the problem and then everything is moot anyways.
 
Top