At the gelcoat stage - help needed!!!

Status
Not open for further replies.

morebass 17

Petty Officer 1st Class
Joined
Mar 25, 2011
Messages
223
Re: At the gelcoat stage - help needed!!!

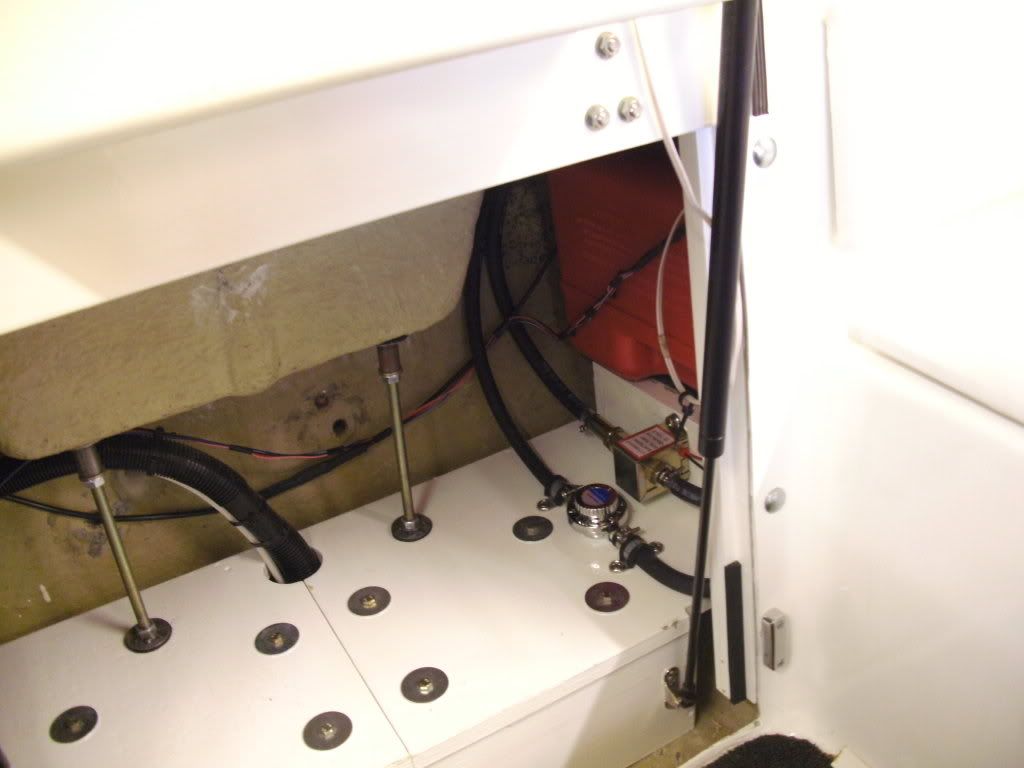
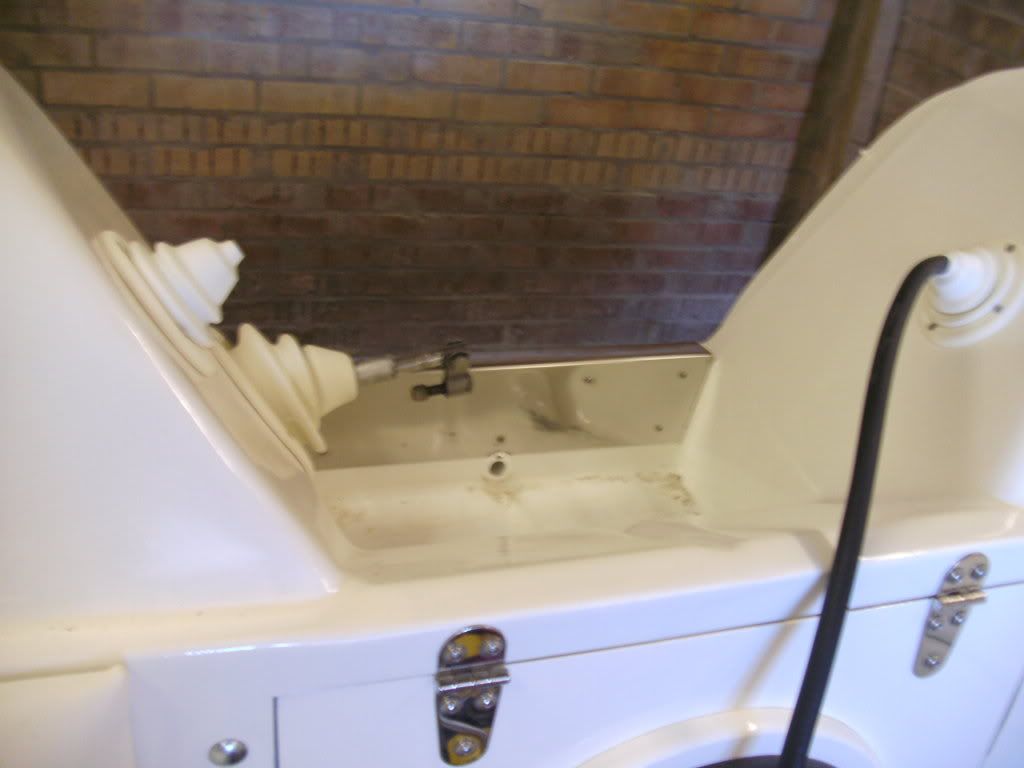
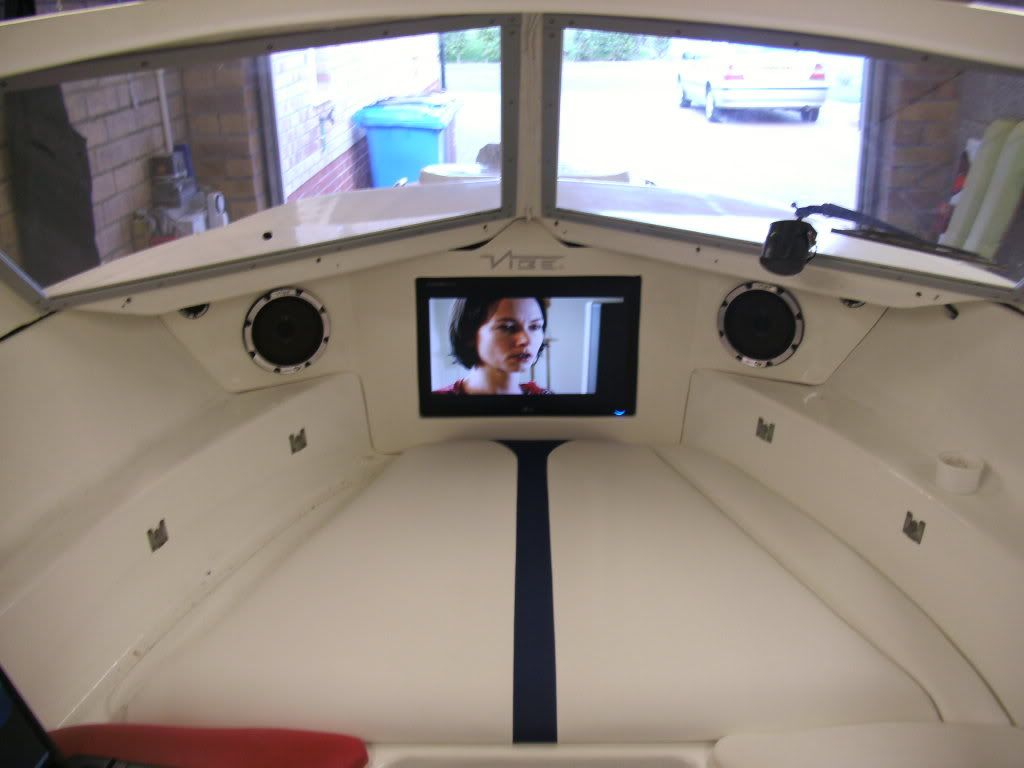
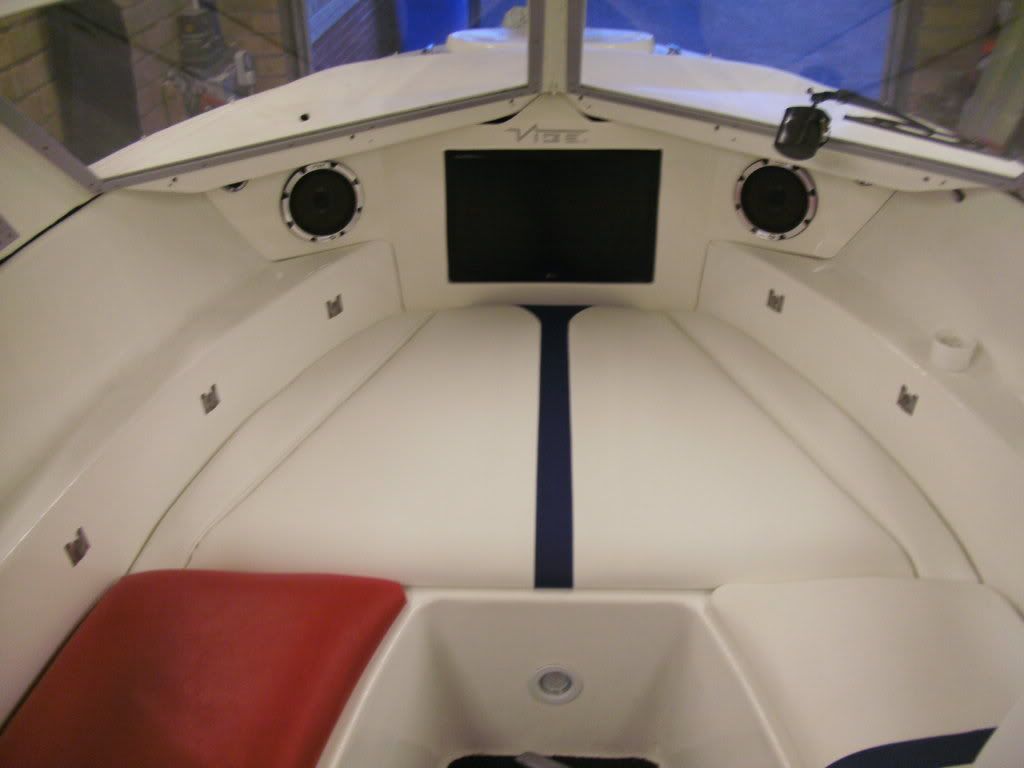
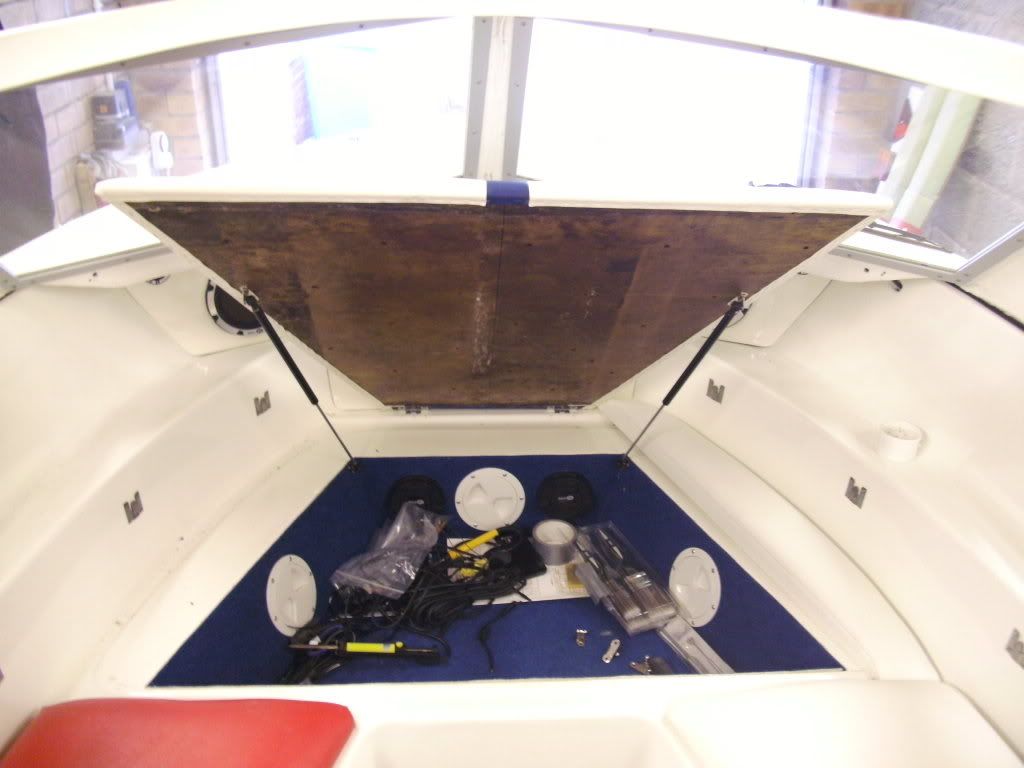
Once again, very little has been done to the boat since my last update, but I didn't want to leave it as long as i did the last time so here is a couple of pic's of where I'm at.

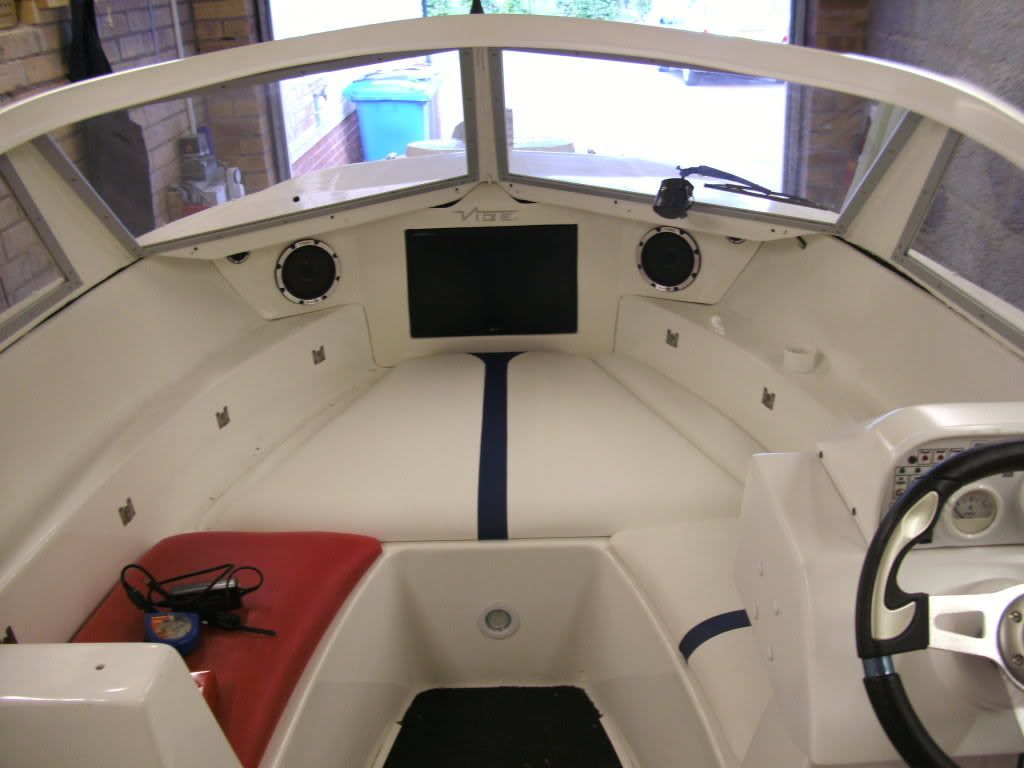
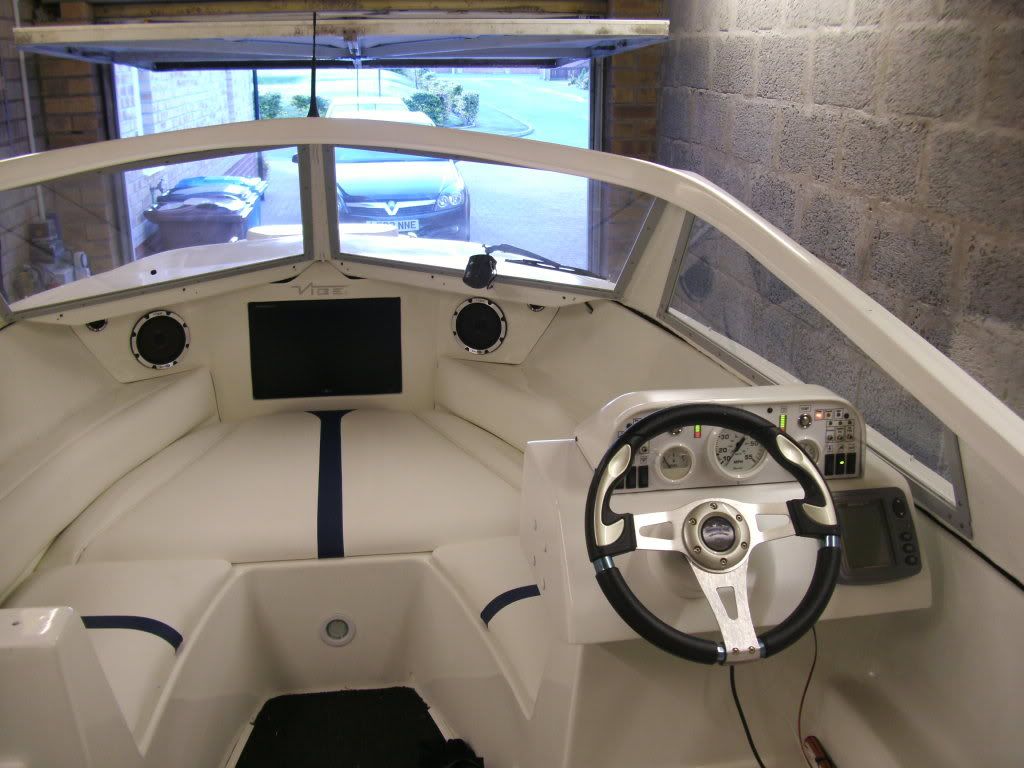
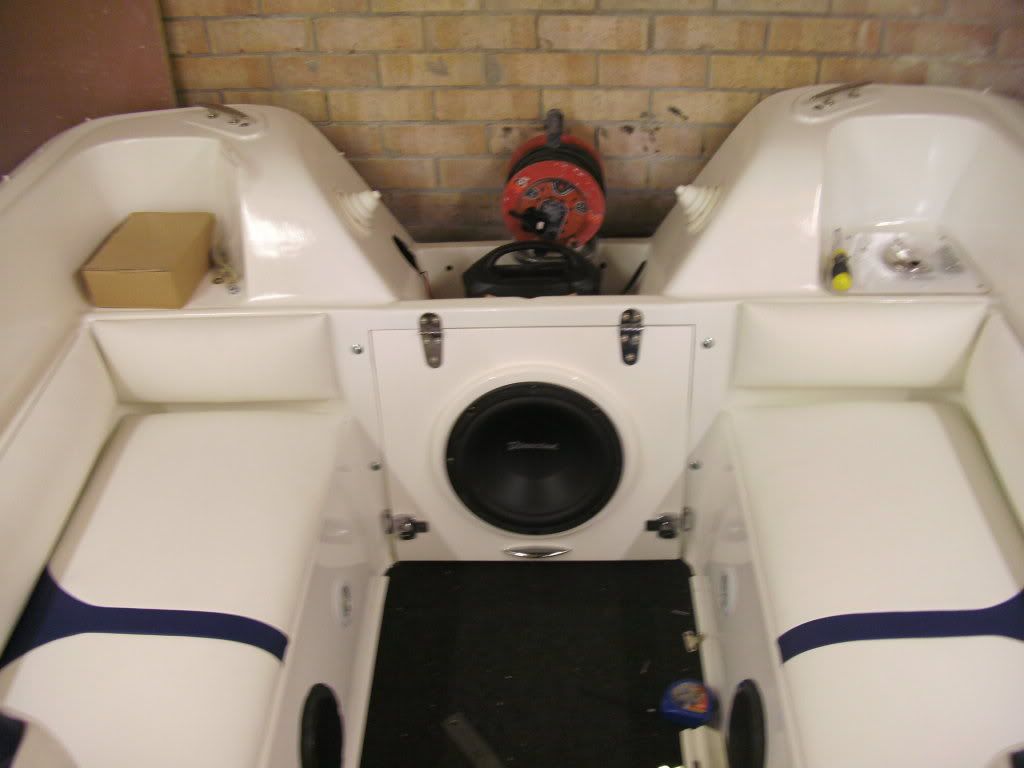
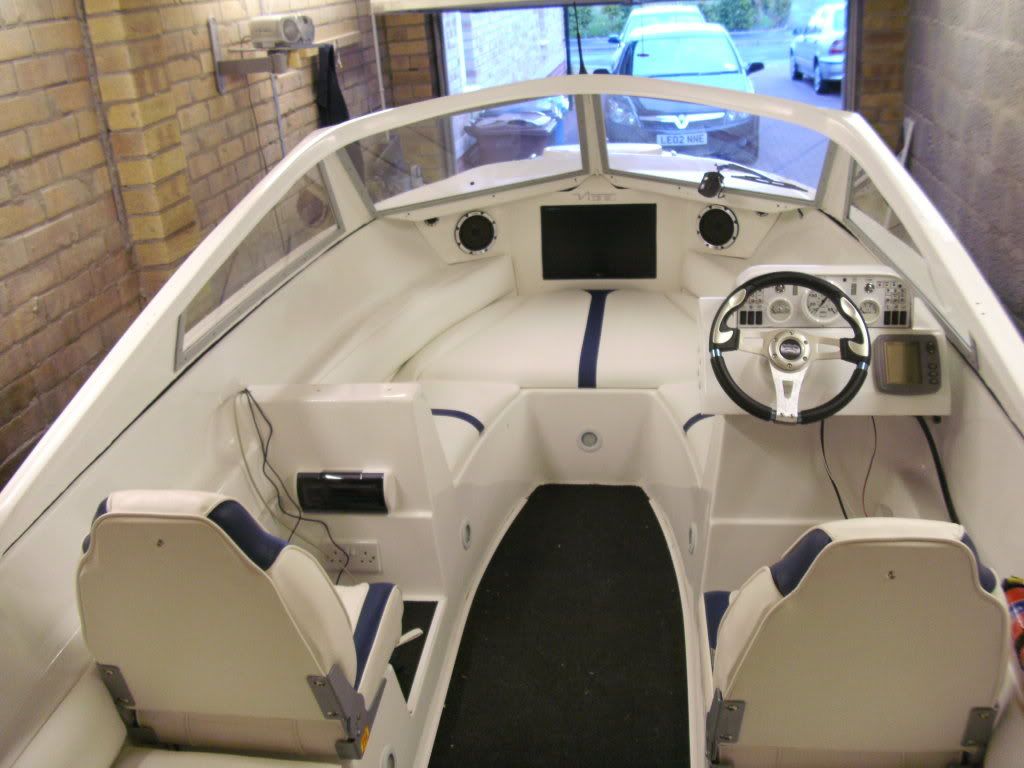
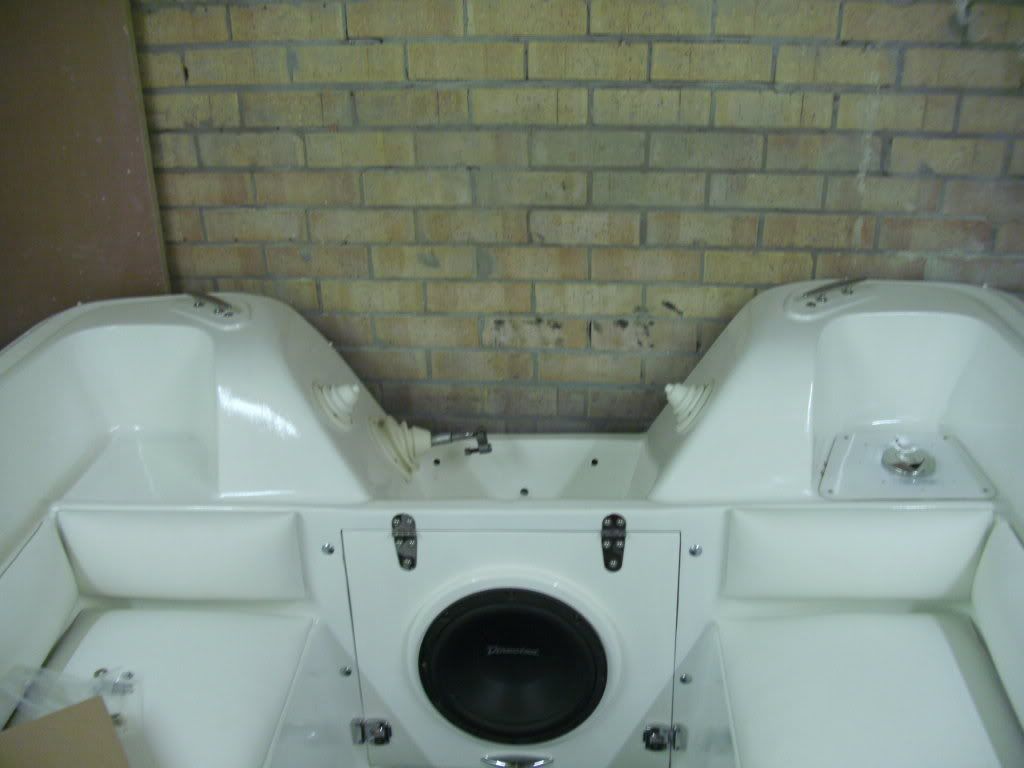
I finished the front seat upholstery and fitted it to hinges and a couple of gas struts, Im really happy with the way it turned out, and its now so much easier to get to the storage compartment, I still have the centre seats to finish but the vinyl is all stiched up and ready to be stapled on, then I just have to wrap the front backrests and that will be the upholstery complete.

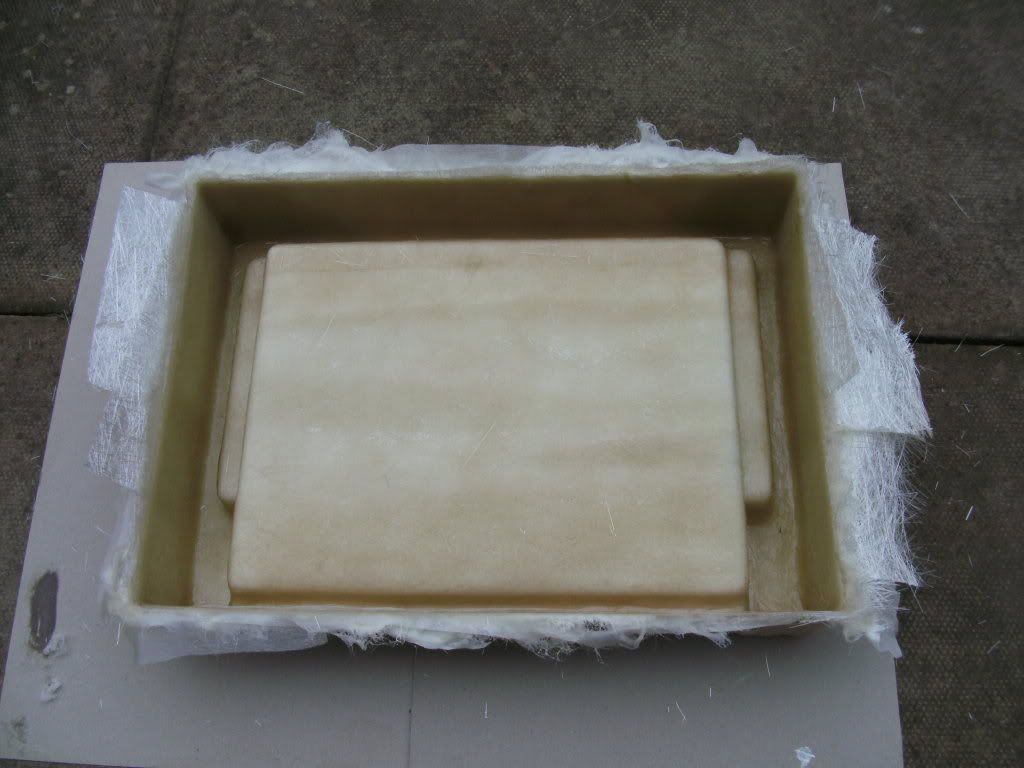
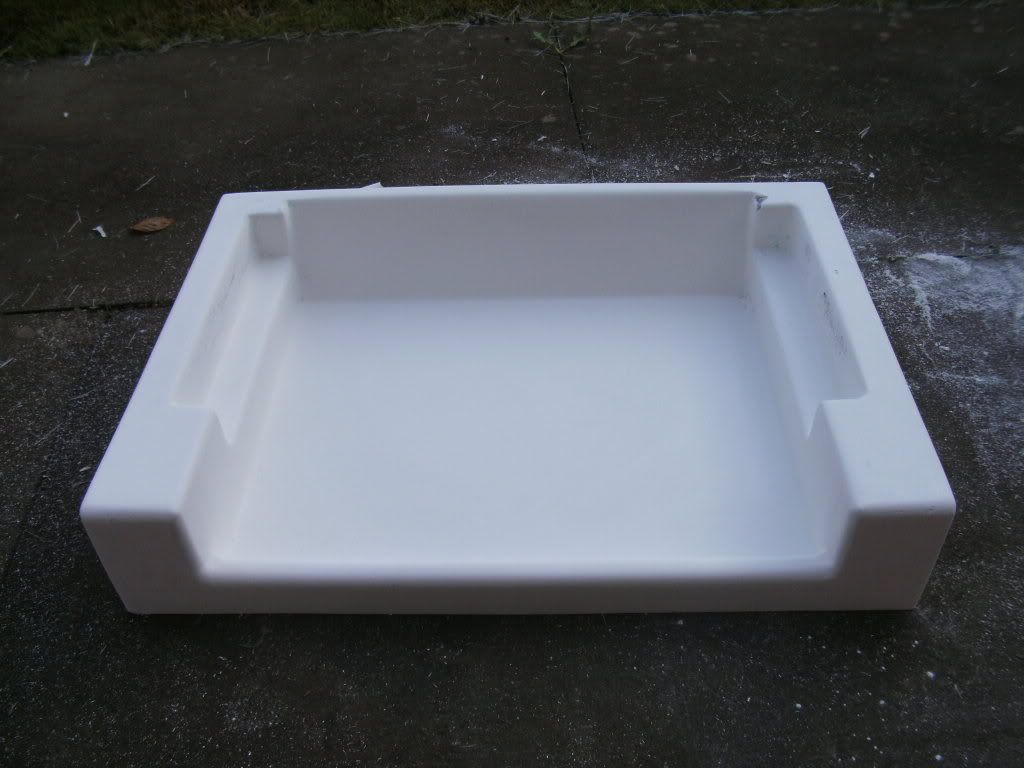
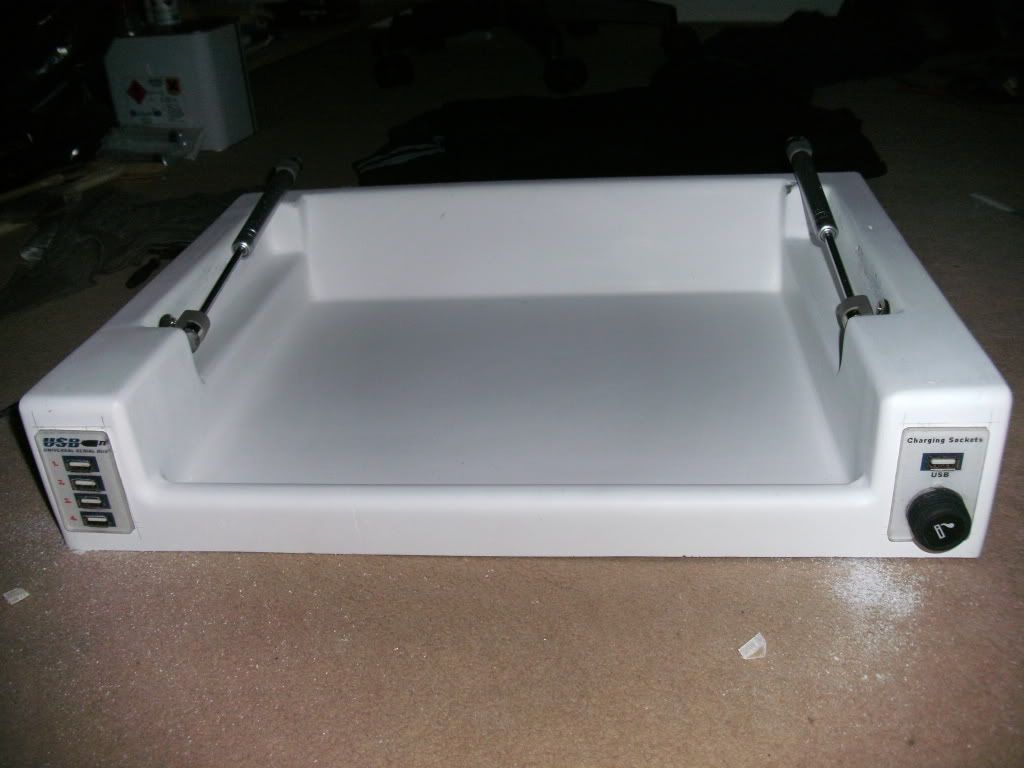
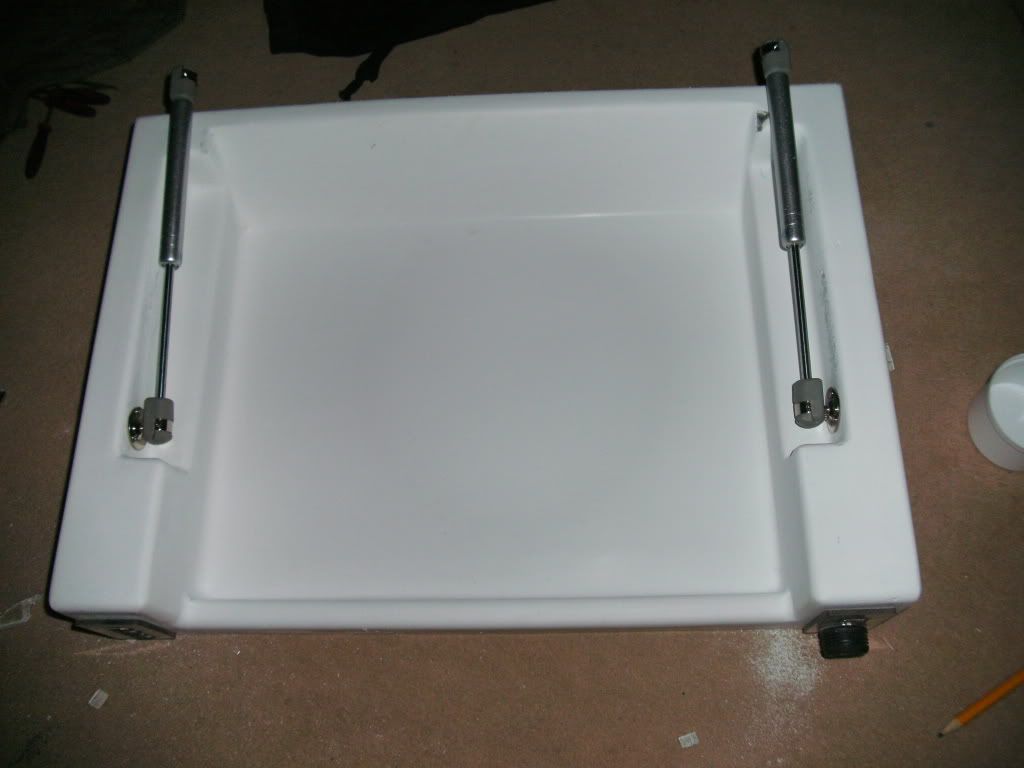
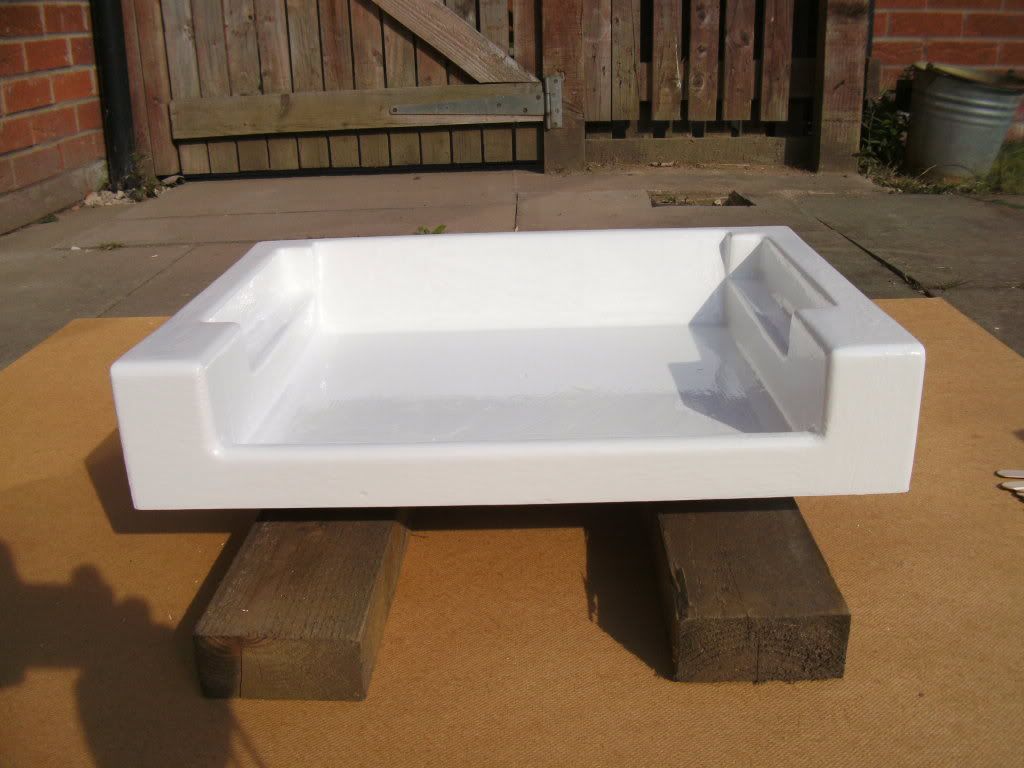
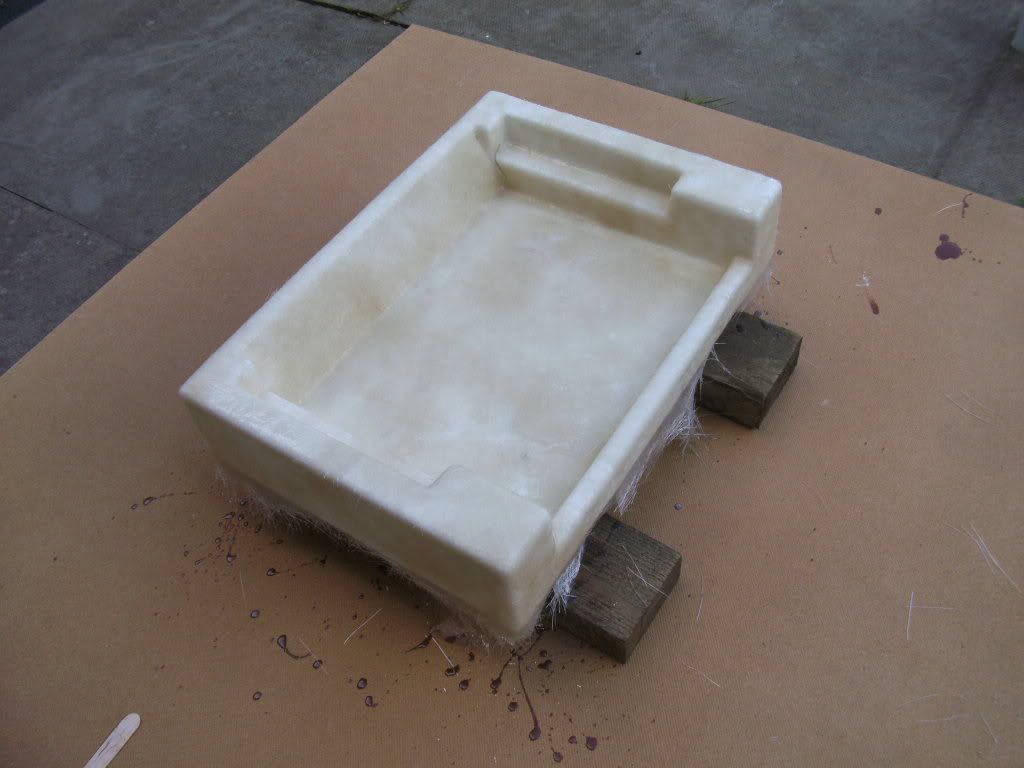
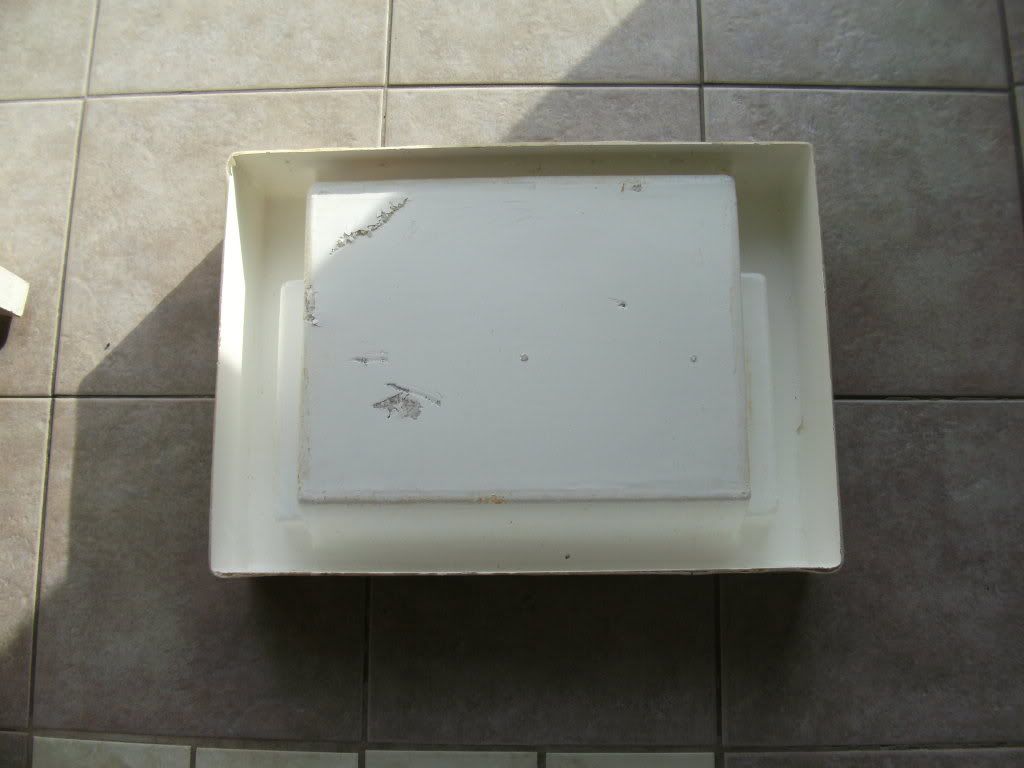
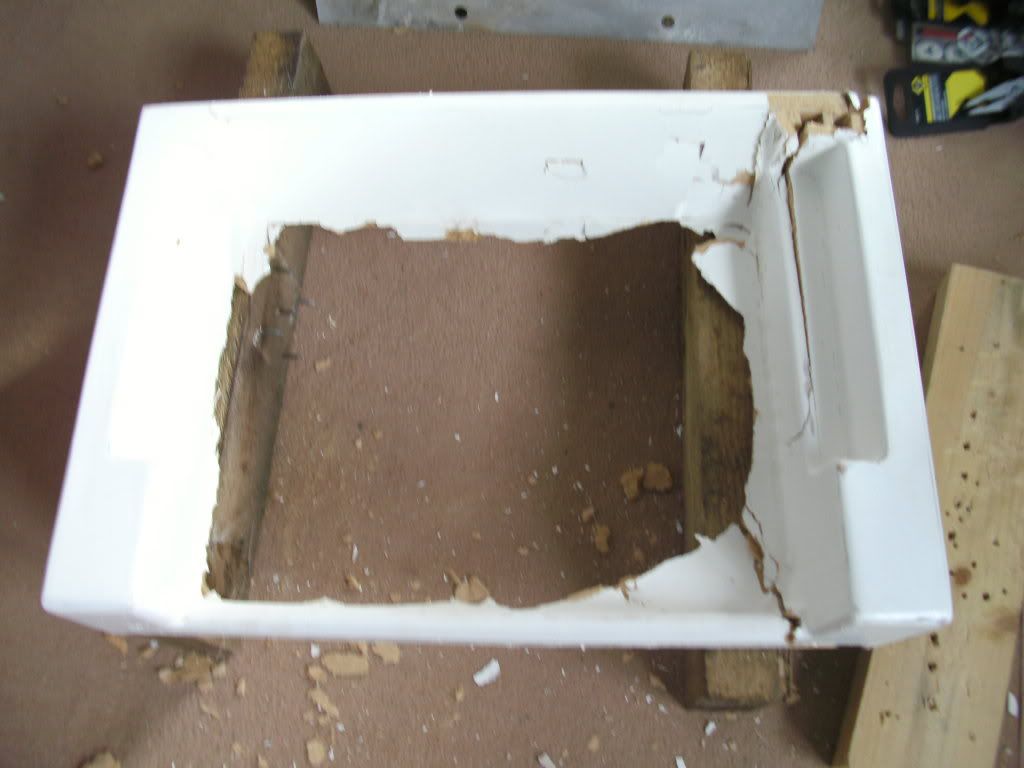
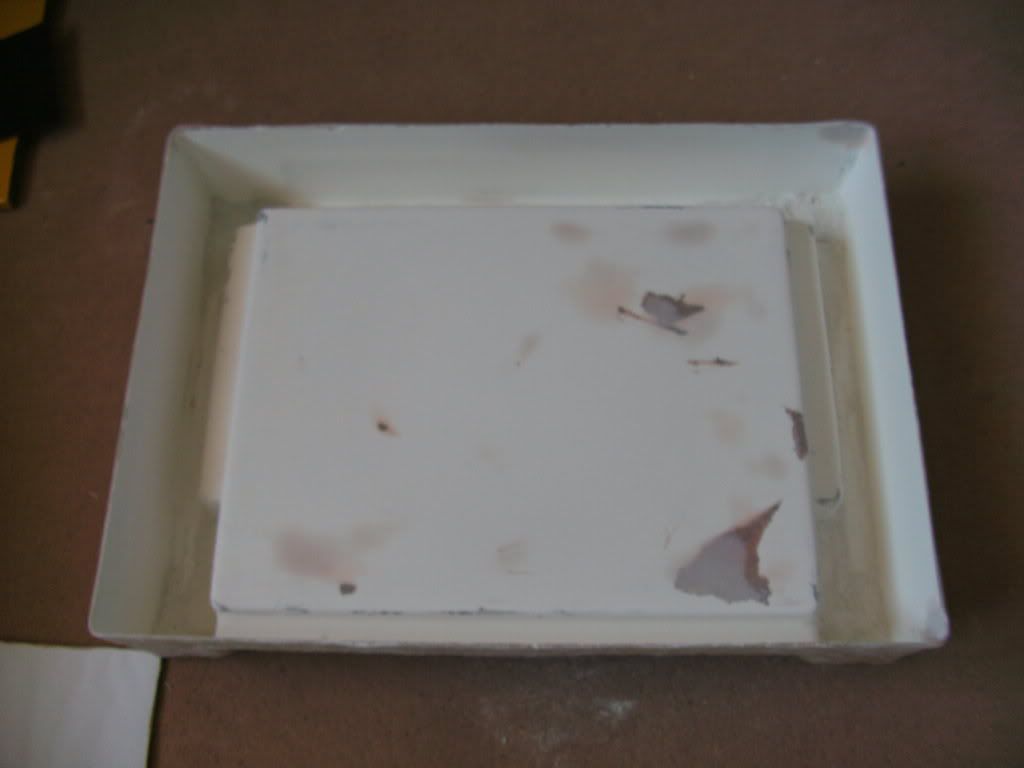
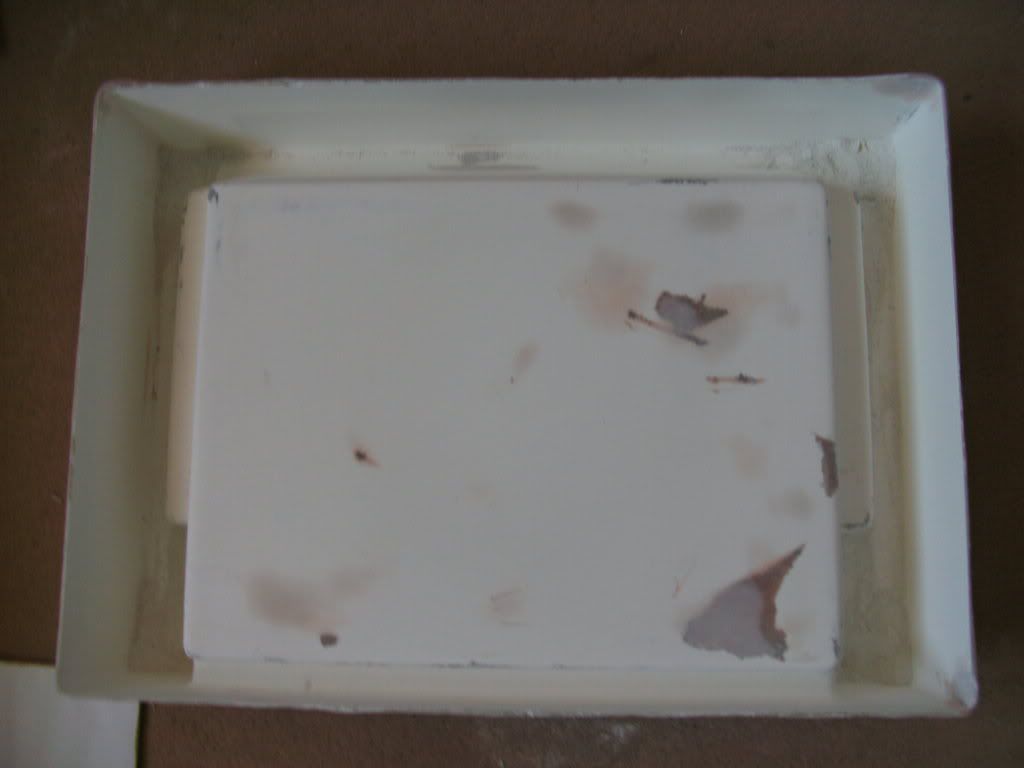
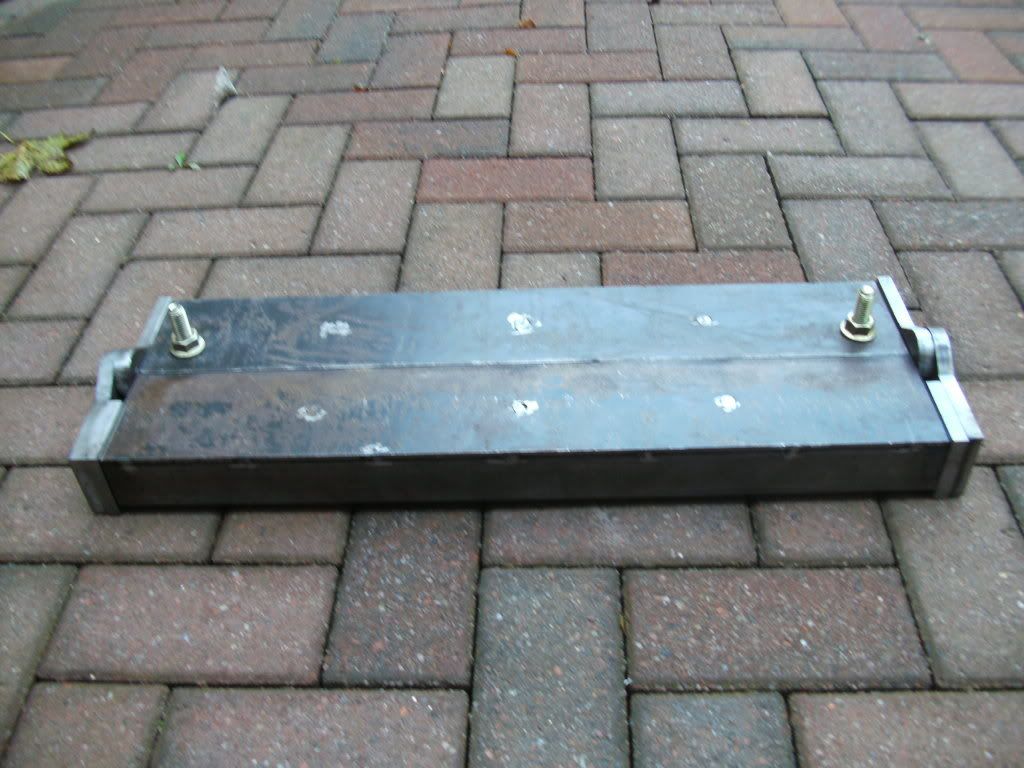
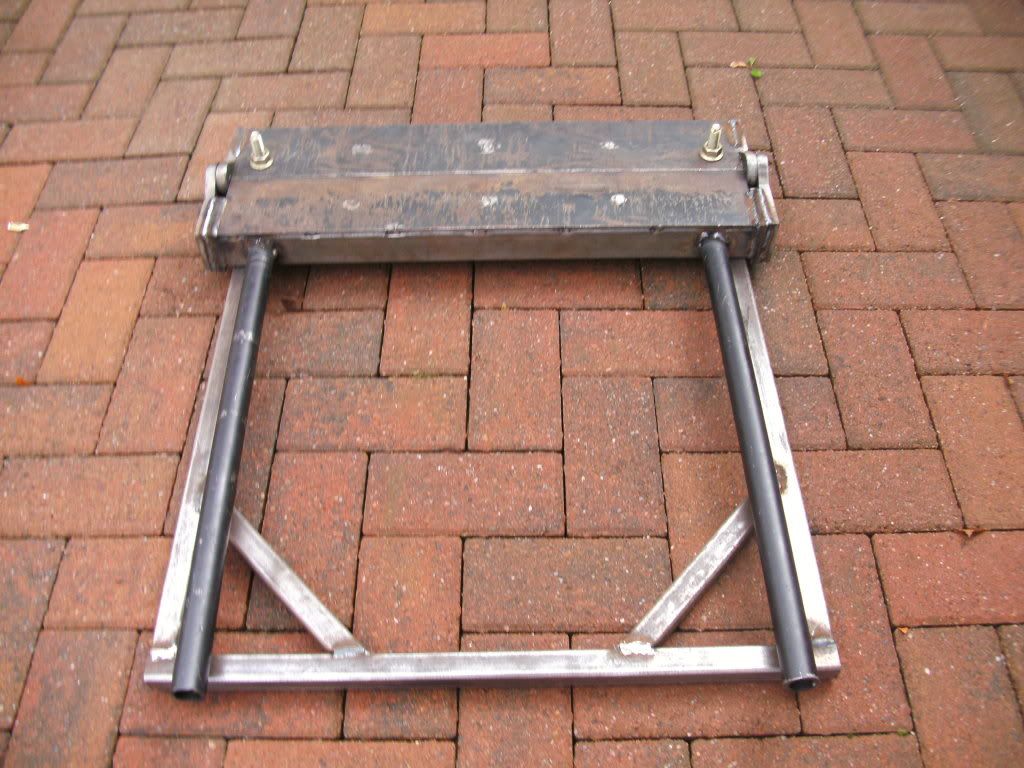
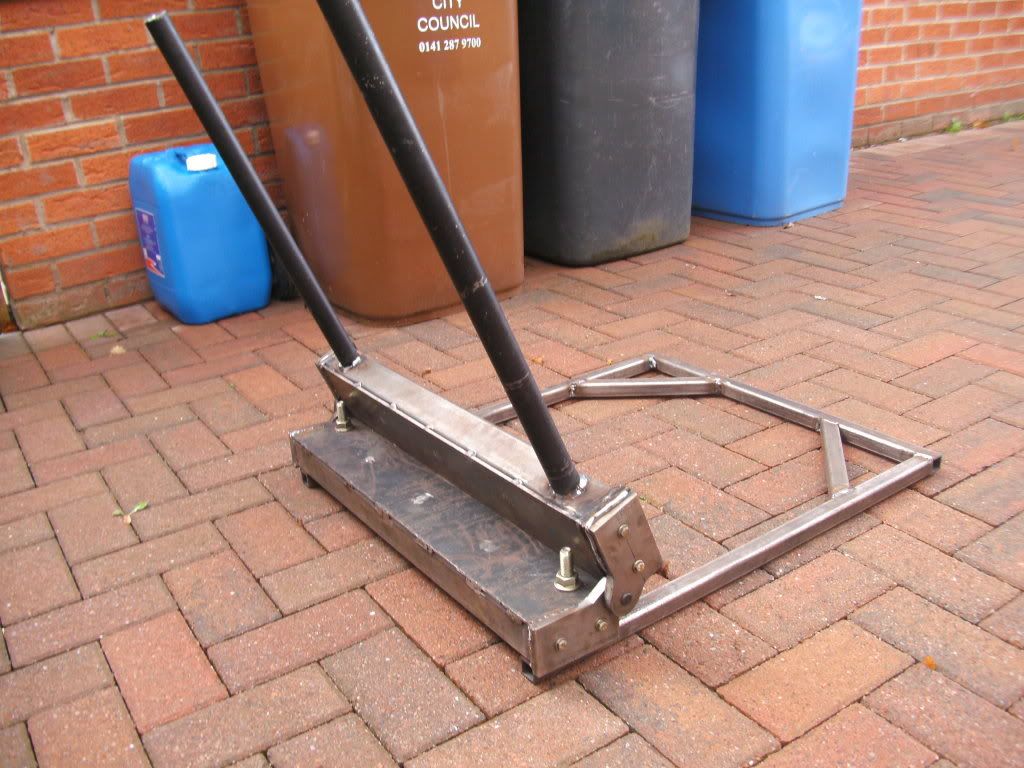
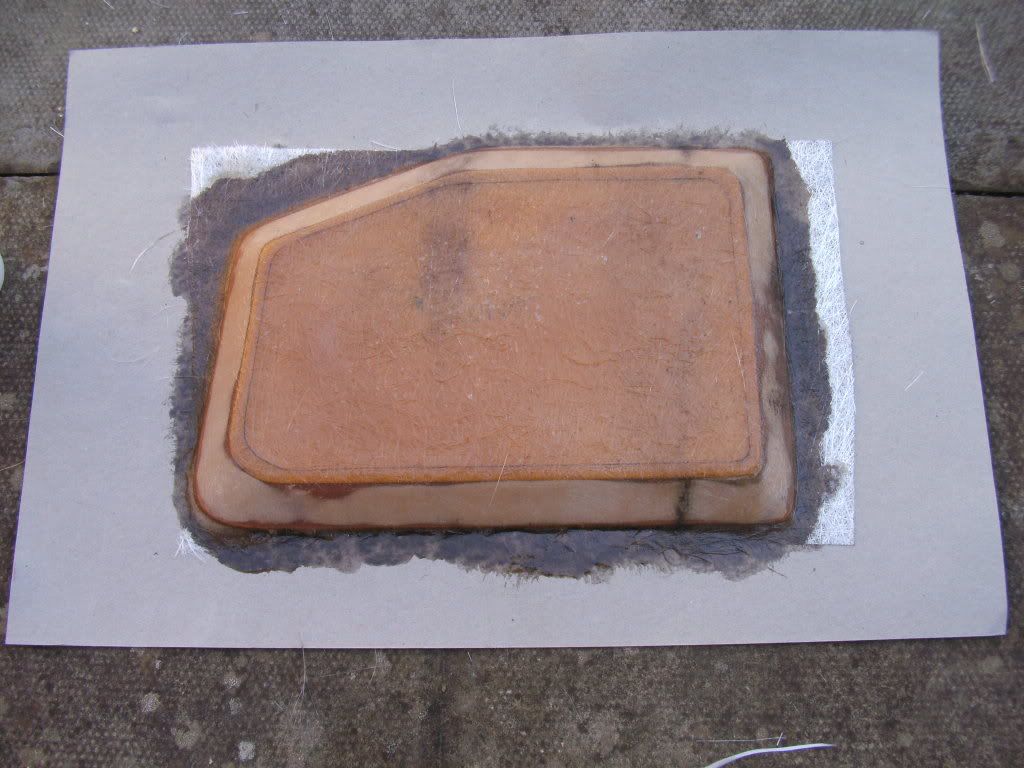
I'm also working on a base just now for the laptop to sit on. I built it the way I wanted it from mdf. I then filled and painted the mdf to give a smooth finish that I could aspply the mould release wax to. I applied 2 coats of gelcoat and approx 4 layers of 320g/ csm.
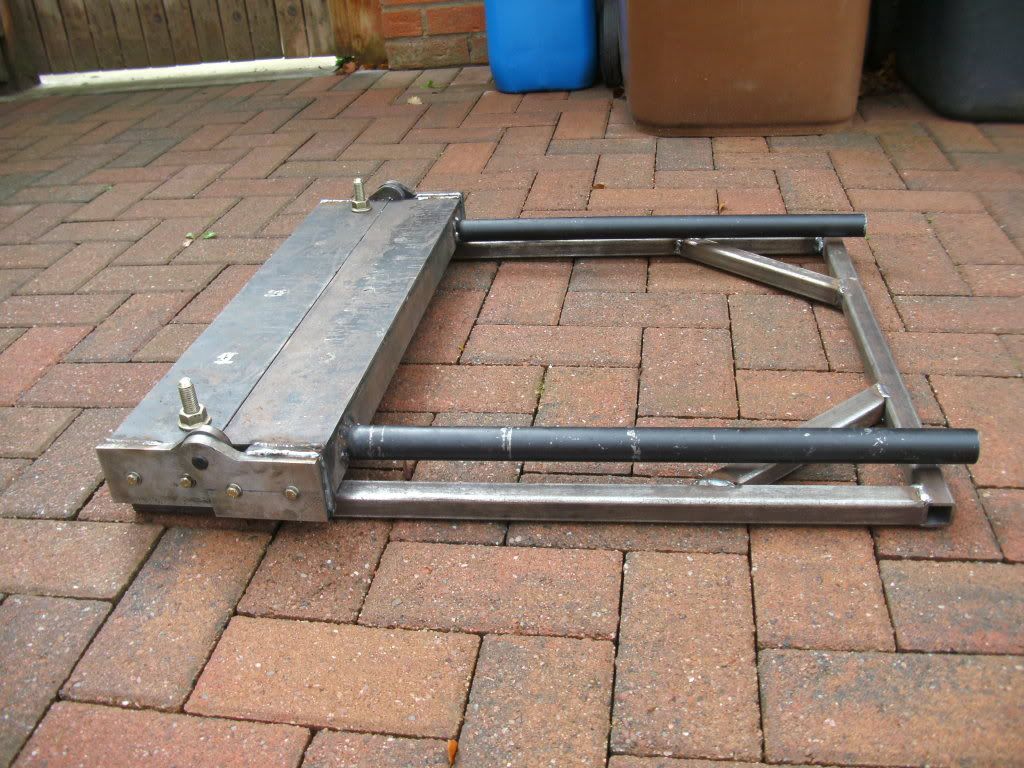
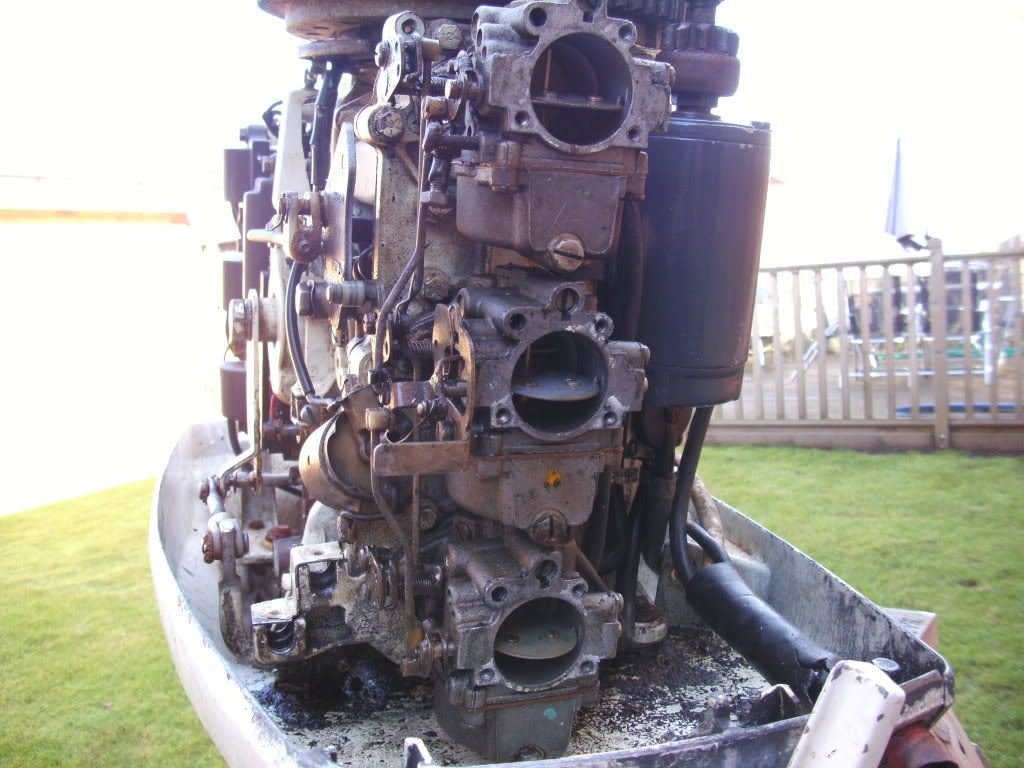
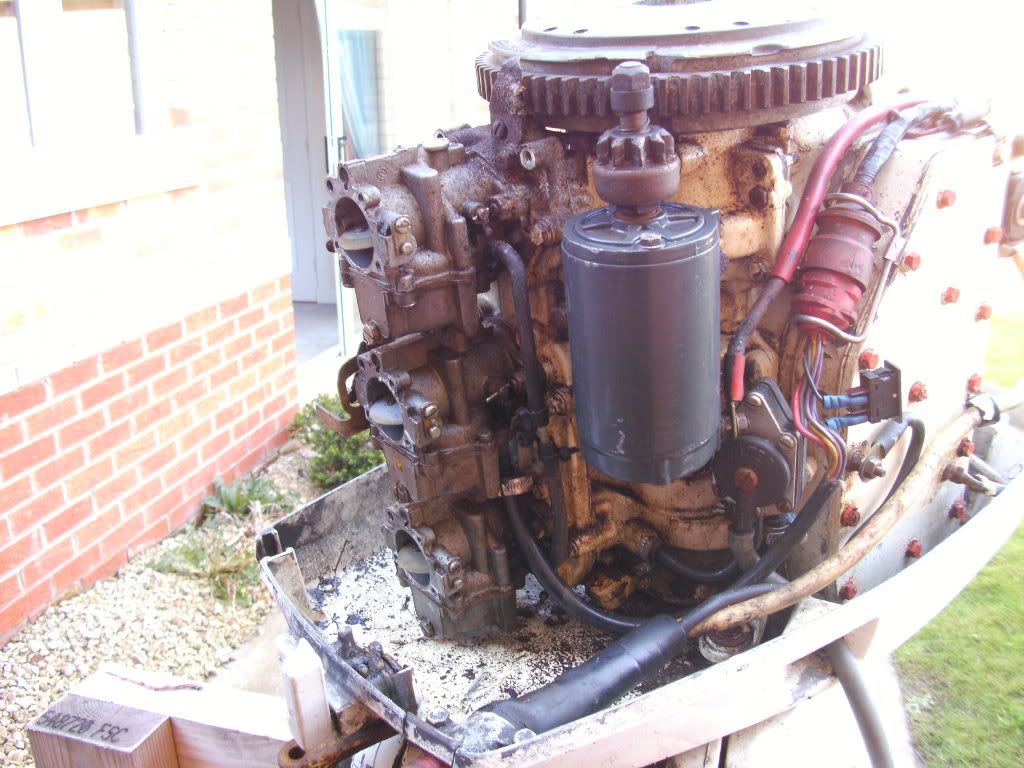
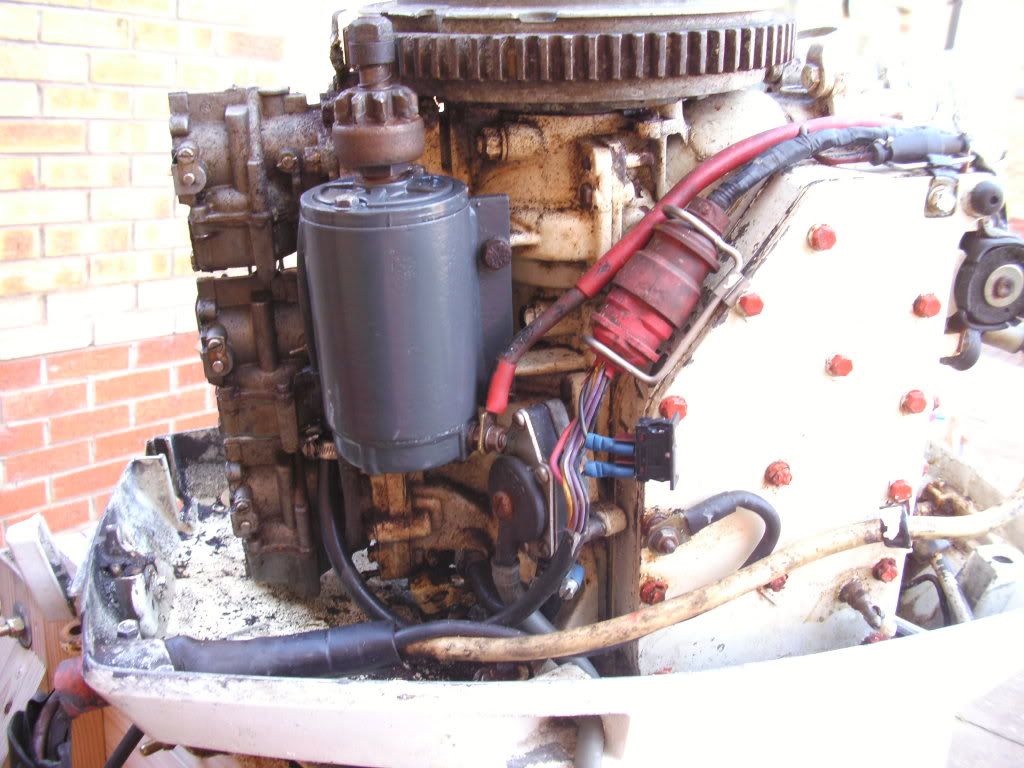
Its not easy seperating this female mould though due to the shape of it, I'm going to take it into my work and use compressed air to help me release it. Not much else happening just now but hopefully still on target for the boat to be finished in 2 months time so I can then start work on the outboard.

PICT1437.jpg


PICT1440.jpg


PICT1442.jpg


PICT1438.jpg


PICT1486.jpg


PICT1489.jpg
 

morebass 17

Petty Officer 1st Class
Joined
Mar 25, 2011
Messages
223
Re: At the gelcoat stage - help needed!!!

THE UPHOLSTERY IS FINISHED !!! Its not perfect but for my first attempt at sewing I am pretty happy with the results. Just a few bits and pieces to finish off, then I can get the boat outside and start work on the outboard.

The first job on the outboard is to fit a car alternator to it. For those of you who have just started reading from here - its not a typo, I seriously plan on fitting a 90A Toyota Yaris alternator to my Johnson 75hp 1979 outboard. This idea is almost unheard of but its my only realistic option of keeping all my power hungry equipment happy. Its gonna involve a few modifications which include bolting a pulley to the flywheel and fabricating some brackets to mount the alt. I will also have to take a mould of my outboard hood and reshape it slightly to accommodate the alt. under the hood. The only tricky part will be to work out the gearing so the alternator is running efficiently at idle and throughout the rpm range. It will be roughly a 2:1 pulley ratio so the alternator will be spinning at twice the engine rpm, but I will source the datasheet for the alt. to get exact figures. Wish me luck, (I'm gonna need it)

PICT1498.jpg


PICT1499.jpg
 

Trooper82

Commander
Joined
Nov 21, 2011
Messages
2,648
Re: At the gelcoat stage - help needed!!!

morebass...most excellent work!!! I really like the laptop surface you made...where is that getting mounted? I also really like the idea of gas struts on the storage compartment...with your skills..the alternator should turn out just fine...looking forward to how you get that accomplished....
 

morebass 17

Petty Officer 1st Class
Joined
Mar 25, 2011
Messages
223
Re: At the gelcoat stage - help needed!!!

morebass...most excellent work!!! I really like the laptop surface you made...where is that getting mounted? I also really like the idea of gas struts on the storage compartment...with your skills..the alternator should turn out just fine...looking forward to how you get that accomplished....

Thanks Trooper82, the laptop compartment will be getting fitted to the port side, my "co-captain" most likely my girlfriend!! will be in control of that, I however will have a wireless mouse/hand held remote that will also control it, Just in case we disagree on music choice, which will most likely happen on our first outing.

Yeah the gas struts ,I thought were a nice touch too, really simple to install and makes life a hell of lot easier, and less bruises with no more doors falling down on me while trying to get something from the compartments.

The alternator should be easy enough, it will be a challenge but im sure i'll manage it. I'll keep you all posted.
 

jbcurt00

Moderator
Staff member
Joined
Oct 25, 2011
Messages
24,871
Re: At the gelcoat stage - help needed!!!

Great work!

Looking forward to the alternator/OB mods
 

morebass 17

Petty Officer 1st Class
Joined
Mar 25, 2011
Messages
223
Re: At the gelcoat stage - help needed!!!

Great work!

Looking forward to the alternator/OB mods

Thank's jbcurt00, Yeah I'm looking forward to the alternator mod as well, just hoping I can pull it off without making the motor hood look really bad once I add the "bulge" that's required to accommodate the alt.
 

morebass 17

Petty Officer 1st Class
Joined
Mar 25, 2011
Messages
223
Re: At the gelcoat stage - help needed!!!

Only little things done to the boat again, I'm only getting a couple of hours a week on the boat due to work, I really need a month off work so I can get this boat finished, maybe I should just ask for 1 month off with full pay, I'm sure my employer will be fine about it!!!! lol.

I managed to separate the laptop mold eventually although I demolished the plug and caused a little damage to the mold in the process, The damage is in an area though that can be easily repaired so I wasn't too bothered about it. Now that I have the female mold I can make a start on making the finished product after a little more work.

I've also made a start on making a sheet metal bender to bend the stainless steel sheet for the transom plate and also to make up a few brackets for the alternator and a light bar that I plan to fit.

I've installed the steering cable and made a start on reconditioning the O/B control box. I'll send the box away to get powder coated and then I can fit it to the boat.

That's really all that's been happening. I'm behind target once again, to be sure of a summer launch I may have to postpone the outboard rebuild. I was planning on replacing the piston rings and head gasket among other things, the O/B runs OK just now it's just the compression was a little low on one of the cylinders compared to the other 2. And compression on all 3 was a bit lower than it should be. But as I said it runs pretty well, well enough for a season of water trials anyway. I will still paint the outside of the O/B though and the prop, starter motor and the tilt pump & cylinder has been reconditioned.

I am also going to do away with the mechanical fuel pump and install an electric one, there wont be any need for the squeeze/primer bulb either as the pump self primes the system too. Although the pump is suitable for carburetor use I will also install a regulator to keep the pressure within specs, approx 1 - 2 psi.

PICT1500.jpg


PICT1502.jpg


PICT1507.jpg


PICT1508.jpg


PICT1505.jpg


PICT1513.jpg
 

FFScott6

Petty Officer 2nd Class
Joined
Aug 2, 2007
Messages
136
Re: At the gelcoat stage - help needed!!!

I really enjoy tinkering and learning new things in the process but you are tops. Been following along since your first page of this project and WOW! You have inspired several posters including myself, to begin our projects.

I honestly missed serveral pages of recent posts to get a good look at the work. Great attention to detail and your ability to keep on point even when things seemed to not go your way. Awsome Job!

I need to make a couple of reverse molds for things I want to do. maybe I'll re-read your lessons learned. My project is a 1979 GradyWhite 204C Overnighter with twin Mercury 115hp I6. It will not be a complete redo as yours but I've picked up allot from your work.

Enjoy your prize!
 

morebass 17

Petty Officer 1st Class
Joined
Mar 25, 2011
Messages
223
Re: At the gelcoat stage - help needed!!!

FFScott6,

Thanks for the compliments mate, I just try and not let anything beat me, although there has been times I have felt like giving up, when you feel you are going backwards and just making a mess of it, but with all the extra motivation people like you have given me i have got to where I am now, The finish line is in sight now thanks to all you guys, when I say "finish line" that 's a small lie as you all know as well as me that a boat is never finished, there are always new ideas and improvements not to mention general maintenance that needs done. No doubt I will still be adding to this thread in 5 years time!!!

I'm glad this thread has inspired some people (including me!!) to get on with their projects. I keep saying it but If it wasn't for this forum and all you guys I would have given up a long time ago and cut my losses.

Good luck with your molds and if you have any questions, feel free to post them here, I may be able to answer them but if not the pro's are never far away, they are like superheroes - when you need them most they come to save the day.
 

morebass 17

Petty Officer 1st Class
Joined
Mar 25, 2011
Messages
223
Re: At the gelcoat stage - help needed!!!

This question will probably be more suited to the engine section of this forum, but I will post it here for now so you guys know where I am at.

Would it be possible to swap out the air silencer cowling for some kind of filter system to keep the intake noise down, or would this likely cause more problems down the line, I cant think of any immediate problems doing this but just in case I am missing something.

The reason I ask is I could really be doing with the space the cowling takes up to fit my alternator in the space it will leave after removing it.

Outboard details : -

Johnson 1979 75hp 3cyl - Model 75ELR79R
 

jbcurt00

Moderator
Staff member
Joined
Oct 25, 2011
Messages
24,871
Re: At the gelcoat stage - help needed!!!

I can't answer your question, but this pix showing the silencer (part #28 & 41) may help someone else:
43642.gif


Maybe a high flow filter system that mounts directly to the top of each carb, like a 30-40's open hood roadster:

135_0502_11s+1929_Custom_Roadster+No_Hood_No_Top_Passenger_Side_Front_View0.jpg
 

morebass 17

Petty Officer 1st Class
Joined
Mar 25, 2011
Messages
223
Re: At the gelcoat stage - help needed!!!

Thanks for posting the diagram and pic for me, that helps explain it a lot better. I was thinking of individual K&n style filters or similar for each carb, exactly as you have suggested. I can get a hold of ones small enough for a reasonable price, I just have to make up base plates for them so they can be mounted directly to the carbs. I'll not be attempting it for another few weeks, so gives me time for more research.

If I could do away with the air silencer housing it would be the perfect place to mount the alt. as I could use the starter mounting bolts to mount the alt. bracket too, and there is also a suitable mounting location for the adjuster mechanism close by, and as an added bonus I would only have to add a small amount of space to the hood to accommodate the alt. So I'll make a start on mocking up some brackets to see if this will work but I'm 95% sure it will be perfect.

Here is a pic of my almost completed metal bender that I will use to make up the brackets and that will also be used for bending the transom plate.

PICT1521.jpg


PICT1522.jpg


PICT1524.jpg
 

Trooper82

Commander
Joined
Nov 21, 2011
Messages
2,648
Re: At the gelcoat stage - help needed!!!

That is pretty ingenious! I like it...
 

morebass 17

Petty Officer 1st Class
Joined
Mar 25, 2011
Messages
223
Re: At the gelcoat stage - help needed!!!

Not sure if I'm cut out for this mold making !!!.... I'm doing a bit more work to the laptop base/compartment. I applied two coats of gel and 3 layers of surface tissue, tomorrow I will start the reinforcement layers (320g CSM)

It was easy enough glassing the plug but now that the mold is reversed it is really tricky getting the brush into all the crevices. I am sure I am going to have air voids but i'm just hoping the finished mold is repairable.

I'm also making a panel for the O/B control box to raise it out slightly from the boat. A layer of filler & 2 coats of gelcoat it will be finished.

I also took off the air silencer I was talking about , and as you can see it frees up loads of space. The only problem is on the bottom of the housing there is a hose that connects to the crankcase, im pretty sure this is a vaccum hose that sucks in any fuel that may escape from the carbs. Correct me if I'm wrong. This hose is obviously for saftey and efficiency so I will have to incorporate a way of keeping this function without the silencer assembly.

PICT1525.jpg


PICT1526.jpg


PICT1527.jpg


PICT1528.jpg
 

chasin-tails

Cadet
Joined
Aug 9, 2012
Messages
17
Re: At the gelcoat stage - help needed!!!

morebass 17, I have a carb set up just like this, I know what you are dealing with here. I have never considered taking my air box off but if I was to do what you are trying here's my idea:You could take some measurments and find the right size PVC caps, cut out the center and trim till you like it, then add some of those lawn mower filter that looks kinda like a bowl that you zip-tie on. Just a idea here but you might like it. The air box is a hard thing for me to concieve removing. I do understand your thoughts but the air box usually does not have a filter. I know if you remove it, you will have to have something there.
Oh, I just finnished your thread to this point. I will be starting a complete rebuild of my 83 Dynatrak when I get home. You got alot of helpful stuff here. After reading your stuff here, I'm going with gel myself. I had asked Trooper what he thought was best and he refered me to your thread. Thanks for having this info on here and thanks to Trooper for sending me your way......
 

morebass 17

Petty Officer 1st Class
Joined
Mar 25, 2011
Messages
223
Re: At the gelcoat stage - help needed!!!

morebass 17, I have a carb set up just like this, I know what you are dealing with here. I have never considered taking my air box off but if I was to do what you are trying here's my idea:You could take some measurments and find the right size PVC caps, cut out the center and trim till you like it, then add some of those lawn mower filter that looks kinda like a bowl that you zip-tie on. Just a idea here but you might like it. The air box is a hard thing for me to concieve removing. I do understand your thoughts but the air box usually does not have a filter. I know if you remove it, you will have to have something there.
Oh, I just finnished your thread to this point. I will be starting a complete rebuild of my 83 Dynatrak when I get home. You got alot of helpful stuff here. After reading your stuff here, I'm going with gel myself. I had asked Trooper what he thought was best and he refered me to your thread. Thanks for having this info on here and thanks to Trooper for sending me your way......


Hi chasin-tails, thanks for the info mate, Thats pretty much what I was thinking, I was gonna take a template of each carb opening including the mounting bolt holes and make up an adaptor that will bolt to the carbs and also accept a filter. I know that these outboards dont normally have an air filter, much the same as most outboards,to my understanding the reason for this is that out on the water dust levels are extremely low if any at all. The only reason I am thinking of filters is to reduce the intake noise from the carbs, and also restrict the air flow ever so slightly. This is basically all that the silencer housing does, it diverts the airflow which inturn makes the induction a little less noisy. (well thats my understanding anyway) its just a bonus that the filters would eliminate any particles that might find thier way inside the motor hood.

My only concern as stated is the fuel leak off hose attached to the bottom of the silencer, I will have to accomodate this function which will not be too difficult. All of the mod's I am planning are completely reversible, so if something does not work the way it should I will start from the drawing board once again. Thats the thing with boat restoration, most of it is custom so its trial and error.

Glad you have decided to go with gel, you WONT be dissapointed. A big thanks to Trooper from me too, for adding another follower to my thread.

*** Update to follow ***
 

morebass 17

Petty Officer 1st Class
Joined
Mar 25, 2011
Messages
223
Re: At the gelcoat stage - help needed!!!

Fuel pump, regulator and hoses fitted.

Laptop base seperated.

Made a start on installing the "Docking" lights.

As you can see not much been happening here folks. The fuel pump and pressure regulator have been fitted, This is a pretty straight forward job, The pump was mounted below the fuel level, this ensures a smooth constant supply of fuel and the pump doesn't need to work as hard as gravity is on its side. The regulator is an adjustable one ( 1 - 5 psi ) I will probably be running it between 1.5 & 2 psi. But i'll determine this more accurately on the water trials. The hose is marine grade and is rated to ISO7840. Which is required for marine use.

I managed to seperate the laptop mold with a little help from nearly every tool I own but finnaly the hammer and a chisel saved the day. A couple of small repairs needed then I can start adding all the little peices (front panel connectors, a lid fitted with struts, and a laptop lol.)

I made a start making some brackets for my front docking lamps and brackets for my horns. Hopefully be finished the brackets and the laptop base in the next week or so hopefully. (i've said that before :D)

PICT1530.jpg


PICT1534.jpg


PICT1532.jpg


PICT1538.jpg


PICT1537.jpg
 

morebass 17

Petty Officer 1st Class
Joined
Mar 25, 2011
Messages
223
Re: At the gelcoat stage - help needed!!!

Well the transom plate is now made and fitted, the pitot assemble and depth sender fitted too. The stainless sheet was a nightmare to drill into. Although the sheet is only 1.5mm thick it is really tough stuff to drill into. I broke numerous bits in the process, but got there eventually. Not much else happening folks apart from work on the laptop base and light brackets. Hopefully have a decent update soon.

PICT1539.jpg


PICT1545.jpg


PICT1547.jpg


PICT1548.jpg


PICT1556.jpg


PICT1557.jpg


Done a little more work to the laptop base, as you can see from these pics, i have a couple of repairs to do, no biggie though most repairs can be done with gel alone. Only one of the repairs require a bit of reinforcement work.
 

Trooper82

Commander
Joined
Nov 21, 2011
Messages
2,648
Re: At the gelcoat stage - help needed!!!

You are doing some mighty fine work MoreBass..Hope my gelcoat comes out as good as yours has. I'm spraying tomorrow...any suggestions? I plan on thinning with MEK...
 
Status
Not open for further replies.
Top