Advice on transom , stringers and floor rebuild

carlos515

Petty Officer 2nd Class
Joined
Aug 23, 2020
Messages
167
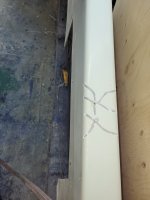
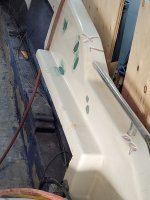
More grinding of the gelcoat. Chasing the spider cracks on the cap. I used a die grinder to follow the cracks , then used a flap wheel to feather out the sharp edges.
 

Attachments

  • spider cracks opened up.jpeg
    spider cracks opened up.jpeg
    385.4 KB · Views: 9
  • spider cracks feathered.jpeg
    spider cracks feathered.jpeg
    447.6 KB · Views: 9

carlos515

Petty Officer 2nd Class
Joined
Aug 23, 2020
Messages
167
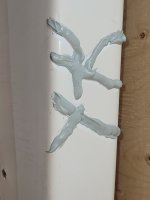
Any idea what works to remove old caulk from the gelcoat? I tried vinegar and mineral spirits. No luck. There is a thin layer of caulk left from the vinegar.
 

Scott Danforth

Grumpy Vintage Moderator still playing with boats
Staff member
Joined
Jul 23, 2011
Messages
49,570
Any idea what works to remove old caulk from the gelcoat? I tried vinegar and mineral spirits. No luck. There is a thin layer of caulk left from the vinegar.
Plastic putty knife
 

carlos515

Petty Officer 2nd Class
Joined
Aug 23, 2020
Messages
167
I tried a plastic putty knife with no results. This caulk must have been a modified type ?
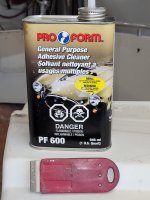
I decided to go to my automotive painting cabinet and tried Pro Form PF 600. This softened the remaining silicone caulk. Then with a fresh razor , it peeled off with little effort. Now I sprayed and wiped with acetone to clean any residue from the adhesive remover.
 

Attachments

  • PF 600.jpeg
    PF 600.jpeg
    523.4 KB · Views: 0

Baylinerchuck

Commander
Joined
Jul 29, 2016
Messages
2,726
Well I am like a squirrel , all over the place. LOL. While patching holes in the fiberglass cap I tried some mineral spirits on the Roberts 6700 carpet glue . After 20 minutes of soaking the glue just scrapes off.
I also found an industrial walking foot Pfaff sewing machine to reupholster my interior for a great price. Had the sewing machine tuned and timed today,ready for attempting the new interior.
I’ve seen a couple of these pfaff machines and some others like a Mitsubishi that can be had for cheap. I just worry about parts, and the fact that most are clutch motors. A servo motor is about $150 to $200.
 

carlos515

Petty Officer 2nd Class
Joined
Aug 23, 2020
Messages
167
My Pfaff came with some spare parts. I bought a servo motor for $135 off ebay. I put a smaller pulley on the servo motor to slow the machine even slower. The guy I took it to for a tune up and timing has parts for it also. The machine itself is all gear driven. If oiled properly with synthetic oil will last a long time. My machine is from 1965. Built like a tank.
 

tpenfield

Moderator
Staff member
Joined
Jul 18, 2011
Messages
18,040
My Pfaff came with some spare parts. I bought a servo motor for $135 off ebay. I put a smaller pulley on the servo motor to slow the machine even slower. The guy I took it to for a tune up and timing has parts for it also. The machine itself is all gear driven. If oiled properly with synthetic oil will last a long time. My machine is from 1965. Built like a tank.
Yes, the industrial sewing machines have long life spans. You will probably want to learn to do the maintenance on the machine yourself. Timing of the needle vs. bobbin hook is one of the more critical things to be able to check & adjust.

Will this be your first go at upholstery sewing? (not sure if you covered that earlier in your posts)
 

zool

Captain
Joined
Aug 19, 2012
Messages
3,432
Ted's right, they arent that bad to work on, mostly a bunch of gears, rods, cams and pulleys as opposed to the thousand stitch style home machines with tight tolerances.

it took me a bit to get mine dialed in, because i had to do some mixing of parts to get the server motor and monster wheel i bought to all play well together. Then it was all smooth sailing. I look forward to sewing now!
 

carlos515

Petty Officer 2nd Class
Joined
Aug 23, 2020
Messages
167
Yes, the industrial sewing machines have long life spans. You will probably want to learn to do the maintenance on the machine yourself. Timing of the needle vs. bobbin hook is one of the more critical things to be able to check & adjust.

Will this be your first go at upholstery sewing? (not sure if you covered that earlier in your posts)
Yes. I figured that I will try doing my own upholstery . Can't be that difficult. There are lots of instructions on you tube .
I will try to learn how to service my machine....$135 for a tune up and timing gets expensive.
 

carlos515

Petty Officer 2nd Class
Joined
Aug 23, 2020
Messages
167
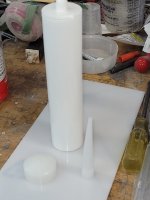
The patching of the spider cracks has begun . I mixed up some polyester filler and used and empty caulk tube to fill the cracks. Then cheese grated the filler before it hardened . Will sand down the filler and apply the thickened gelcoat over top.
 

Attachments

  • empty caulk tube.jpeg
    empty caulk tube.jpeg
    53.4 KB · Views: 6
  • filled spider cracks.jpeg
    filled spider cracks.jpeg
    305.7 KB · Views: 6
  • cheese grated filler.jpeg
    cheese grated filler.jpeg
    530.4 KB · Views: 6

carlos515

Petty Officer 2nd Class
Joined
Aug 23, 2020
Messages
167
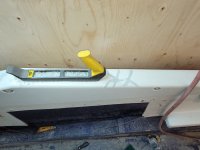
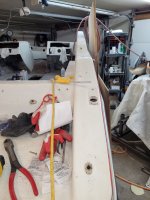
I removed the grab rails from the bow and stern. Looks like I will be spraying the cap with gelcoat and Duratec 904. My white gelcoat is a bright white. Not an off white like the original.
Would it be possible to spray 1 coat of gelcoat with no additives first , just mekp. Then the final 2 coats with the Duratec 904 in at 1:1 ratio ?
 

Attachments

  • rails removed.jpeg
    rails removed.jpeg
    543.6 KB · Views: 6

zool

Captain
Joined
Aug 19, 2012
Messages
3,432
I dont see the benefit of the straight gel base. It will go on wavy and by the time you fair that all even, u will have removed most of it and be back where u started. If ur looking for build, an additional layer of the 50/50 904/gel would be a better route for the cap.

as for color, black, yellow and brown are the tint colors you will have to experiment with to get off white shades. A tiny bit goes a long way

I did the same repair as you on my CC and the 50/50 mix out of a 2.0 tip worked the best.
 

zool

Captain
Joined
Aug 19, 2012
Messages
3,432
This is 4 coats of the tinted 50/50 mix as sprayed, held up fine all season at the dock.
1668871180760.jpeg
 

carlos515

Petty Officer 2nd Class
Joined
Aug 23, 2020
Messages
167
Nice zool. Did you polish or sand the final coat?
I kind of like the polar white . Looks nice and clean . I only have part of the cap and the hull bottom to gelcoat white.
 

zool

Captain
Joined
Aug 19, 2012
Messages
3,432
Nice zool. Did you polish or sand the final coat?
I kind of like the polar white . Looks nice and clean . I only have part of the cap and the hull bottom to gelcoat white.
I just cut and buffed afterwards, except for a few spots where there were runs, I wet sanded them, then cut/buff.
 

Scott Danforth

Grumpy Vintage Moderator still playing with boats
Staff member
Joined
Jul 23, 2011
Messages
49,570
I removed the grab rails from the bow and stern. Looks like I will be spraying the cap with gelcoat and Duratec 904. My white gelcoat is a bright white. Not an off white like the original.
Would it be possible to spray 1 coat of gelcoat with no additives first , just mekp. Then the final 2 coats with the Duratec 904 in at 1:1 ratio ?
Only if you want to sand the orange peal out of the first coat.
 

carlos515

Petty Officer 2nd Class
Joined
Aug 23, 2020
Messages
167
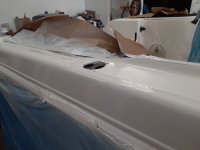
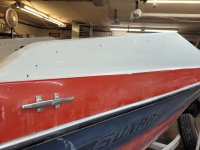
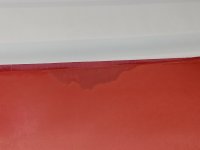
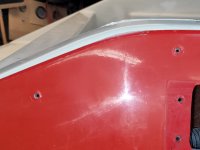
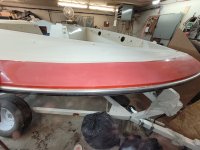
I started the sanding of the cap. After 2 hours of heating and scraping the sun bleach pin striping . Followed by a wipe down with adhesive remover.
I am not sure if there was a clear coat put over the old gel from someone before. The red pigment is sanding off , but not sure what the coating is. I can dissolve some of the red pigment with lacquer thinner as well as acetone.
The boat was all red before , and over time the cap was gel coated white. I havent decided if the cap will go white and blue , where the red is now. I still have to remove the cleats.
 

Attachments

  • decals removed.jpeg
    decals removed.jpeg
    460.7 KB · Views: 6
  • clear coat.jpeg
    clear coat.jpeg
    1.4 MB · Views: 6
  • high gloss.jpeg
    high gloss.jpeg
    351.1 KB · Views: 6

carlos515

Petty Officer 2nd Class
Joined
Aug 23, 2020
Messages
167
I started the sanding of the cap. After 2 hours of heating and scraping the sun bleach pin striping . Followed by a wipe down with adhesive remover.
I am not sure if there was a clear coat put over the old gel from someone before. The red pigment is sanding off , but not sure what the coating is. I can dissolve some of the red pigment with lacquer thinner as well as acetone.
The boat was all red before , and over time the cap was gel coated white. I havent decided if the cap will go white and blue , where the red is now. I still have to remove the cleats.
Still not sure what the gloss coating is but it comes off easy with 80 grit.
 

Attachments

  • sanded.jpeg
    sanded.jpeg
    744.1 KB · Views: 5
Top