97 SeaRay 175 project boat hull weeping question

Scott Danforth

Grumpy Vintage Moderator still playing with boats
Staff member
Joined
Jul 23, 2011
Messages
48,085
When you say pull the cap, do you mean remove the bumper thing on the outside that goes all the way around the boat and remove the entire upper part of the boat, bow to stern? I don't think I have that in me.
Is that necessary
Yes, to do it right and safe, pull the cap

While it seams daunting, it is actually quite easy
 

komby

Cadet
Joined
May 30, 2023
Messages
27
Thanks again. The cap is going to be a hard one. I don't have anywhere to put it while I do the fix on the floor. Ill have to figure our those logistics. Fully disassembling everything connected to the cap including taking off the windshield is the right way to go?
 

ScottinAZ

Senior Chief Petty Officer
Joined
Jun 25, 2009
Messages
759
Thanks again. The cap is going to be a hard one. I don't have anywhere to put it while I do the fix on the floor. Ill have to figure our those logistics. Fully disassembling everything connected to the cap including taking off the windshield is the right way to go?
pulling the cap sounds worse than it really is. Drill out the rivets holding on the rub rail, and then get a friend or two to help lift it off. Support it on sawhorses (even if its outside, just throw a tarp over it) and you have full access to the interior of the boat. Trying to work around it is 4x the work and 1/4 the quality. if you find any issues with the transom (and you likely will), it MUST come off to replace it. Most of the wiring has or should have a disconnect close by, Mercruisers typically have a plug somewhere near the engine that isolates the engine and hull side wiring. cables are easy, and the trim electricals can stay with the engine usually (if doing it with the engine in-situ, its a bit to move around, but its easier than crawling under the cap)
 

Scott Danforth

Grumpy Vintage Moderator still playing with boats
Staff member
Joined
Jul 23, 2011
Messages
48,085
Thanks again. The cap is going to be a hard one. I don't have anywhere to put it while I do the fix on the floor. Ill have to figure our those logistics. Fully disassembling everything connected to the cap including taking off the windshield is the right way to go?
Hang it from the garage ceiling with ratchet straps.
 

komby

Cadet
Joined
May 30, 2023
Messages
27
Hang it from the garage ceiling with ratchet straps.
Ha! I wish. I can't even stand up inside the boat as it is without watching my head in the garage @ 6'4". I am thinking I might have to make a temp stand for it and set it on a 8x4 utility trailer in the driveway. Driveway is super short and the access to the back yard too narrow to get it back there.

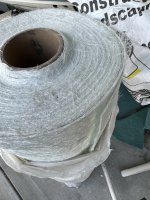
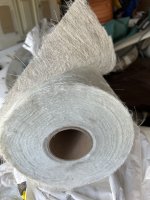
I got some glass today that popped up on marketplace. Think this will be enough? IMG-5046.jpgIMG-5045.jpg

I cut one sqft off each roll and weighed it. The partial roll weighed .8oz and the full roll weighed 3.5 oz. Since the recommendation in the pinned threads was to use 1.5oz it should be ok to just double up the thinner w/ two layers?
 

ScottinAZ

Senior Chief Petty Officer
Joined
Jun 25, 2009
Messages
759
Ha! I wish. I can't even stand up inside the boat as it is without watching my head in the garage @ 6'4". I am thinking I might have to make a temp stand for it and set it on a 8x4 utility trailer in the driveway. Driveway is super short and the access to the back yard too narrow to get it back there.

I got some glass today that popped up on marketplace. Think this will be enough? View attachment 380671View attachment 380670

I cut one sqft off each roll and weighed it. The partial roll weighed .8oz and the full roll weighed 3.5 oz. Since the recommendation in the pinned threads was to use 1.5oz it should be ok to just double up the thinner w/ two layers?
that ought to work. In a pinch I have used the stuff from WallyWorld or the auto parts store. As long as you get enough layers, it will work just fine.
 

komby

Cadet
Joined
May 30, 2023
Messages
27
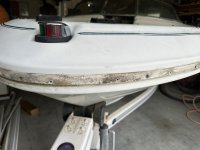
I got the motor off and the rub rail removed. The cap was secured with stainless screws and not rivets, YAY! Behind the motor there was a gap between the cap and the transom which was filled with resin so I am grinding that out to free it up. For the rest, most of the cap was secured with some sealant. I was able to get a putty knife between it in the long sections but the bow is really stuck.
CapSeal.jpg

Any ideas about how to get this area to separate? I can't get the putty knife in there because it is so curved.

Also assuming I get it apart, fix the floor, and it comes time to put it back together what sealant should I be using? 3M 5200?
 

todhunter

Canoeist
Joined
Sep 15, 2020
Messages
1,270
My cap was attached to my hull with clear silicone, and that's what I put it back together with. After removing all the screws, go around and make sure nothing else on the cap is glassed to the hull. I had to cut tabbing between the floor and the rear bench seat (which is part of the cap). After that, find a place to get SOMETHING between the cap and hull, and just work outward from there. I used blocks of 2x4, then eventually slid 2x4's all the way across, and that's what we used to lift the cap off with. Pics and stuff in the link in my signature. It's a long thread....you'll have to dig.
 

airshot

Rear Admiral
Joined
Jul 22, 2008
Messages
4,581
Hope you are wearing some serious resperators, those glass shards and dust particles will tear up your lungs in short order!!! No need to end up in the hospital before your done !!
 

komby

Cadet
Joined
May 30, 2023
Messages
27
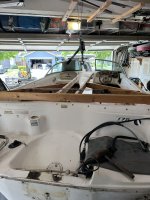
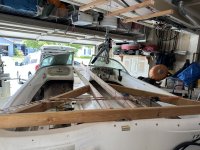
Made some progress today. Built up some supports to support the top when it is off and resting on the makeshift stand, and got part of the top to release.

IMG-5086.jpgIMG-5087.jpg

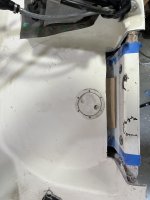
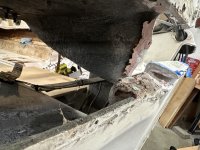
The transom was completely glassed in, like they plopped a huge amount of peanut butter or just resin and cabosil and let the top sit down on it. I had to cut it from the outside. Was pretty bummed about this but it was impossible to do from inside the boat. The entire section I cut was completely full of it.
I guess I'll be learning how to color match gel coat as part of this project also.

IMG-5092.jpgIMG-5093.jpg

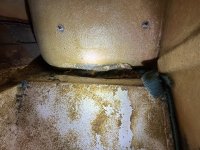
Unfortunately that wasn't the only area they did this. This picture is taken from under the dash where the bow seats hit the floor. I didn't get to it today because my cutoff wheel was too small. I'll give it a go tomorrow. Hopefully those are the last two hurdles to get the top off.

IMG-5094.jpg
 

komby

Cadet
Joined
May 30, 2023
Messages
27
Hope you are wearing some serious resperators, those glass shards and dust particles will tear up your lungs in short order!!! No need to end up in the hospital before your done !!
Absolutely! Thanks for the reminder. It's time for the safety announcement.
I always wear the 3m respirator with the P100 filter cartridges. When generating dust I use the shop vac with mini cyclone separator (to protect the shop vac filter) and dust pickup while using the tools. I also have a pretty good cross ventilation that pulls dust out the side door of the garage/shop. Woodworking has been a hobby and I can't stand dust for that, this dust is miserable. Eye and ear protection is a must also. I will use the organic vapor cartridges on the respirator when doing the resin work also.
 

airshot

Rear Admiral
Joined
Jul 22, 2008
Messages
4,581
Absolutely! Thanks for the reminder. It's time for the safety announcement.
I always wear the 3m respirator with the P100 filter cartridges. When generating dust I use the shop vac with mini cyclone separator (to protect the shop vac filter) and dust pickup while using the tools. I also have a pretty good cross ventilation that pulls dust out the side door of the garage/shop. Woodworking has been a hobby and I can't stand dust for that, this dust is miserable. Eye and ear protection is a must also. I will use the organic vapor cartridges on the respirator when doing the resin work also.
Glad to hear !! Now you will be able to enjoy the fruits of your labor !!
 

komby

Cadet
Joined
May 30, 2023
Messages
27
Pop the cap they say, its easier than it sounds they say....

Well after about 10 hours last weekend I have this to show.
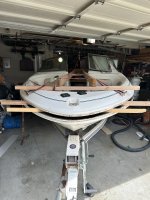
IMG-5117.jpg

It took a lot of work for this one man team. With the supporting boards on top I used a come along attached to the beam in the garage to get the back to separate. I posted about that earlier. Turns out the stern was the easy part.

In the bowrider section the factory used PB to glue the cap to the deck in multiple places. For the sections I could see under the dash I managed to cut those part way with the die grinder and got them to release the rest of the way using a negotiating hammer and a lot of negotiating sticks. (2x4 cut with taper). Once I got that part done I thought I had it BUT of course I was not. I found that the one stringer that was glassed in at the bow was secured with PB.
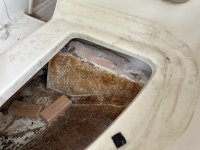
IMG-5119.jpg That one popped "easier" with a few minutes of intense negotiating. The real hard part turned out to be the bottom the bow area. On my cap the entire bow is part of the cap. By the feet area it has a 1" step up into the bow from the decking connected to the hull. That area had been laid down on a few giant plops of resin.
It took me a long time to figure out what was holding it. Lots of flashlight and phone cameras into the areas that were still hard to get to finally revealed it. Once found I had to use a 6" wide sheet of ply cut with a taper and some intense negotiations with a large hammer. Eventually the resin gave and the glass all remained intact. Pop, it was free.
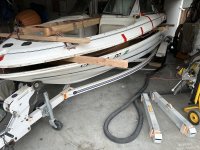
IMG-5118.jpg

If there was one highlight to the weekend its that there is now officially NO MORE of this hideous carpet in the boat.
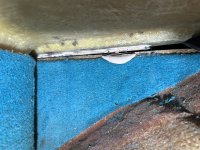
IMG-5099.jpg

After I removed the carpet I noticed that some of the tabbing in the bow area looks pretty questionable. While the top is off I am going to reinforce those I think.

So its in two pieces, the wires all secured with tape to dangle while still connected to the cap. This week I need to go get some beer to lure over the muscle to get this thing picked up and moved.
 

airshot

Rear Admiral
Joined
Jul 22, 2008
Messages
4,581
Whew...making me tired just reading about all your work !! Now I know why I prefer aluminum boats....keep up the good work !!!
 

flashback

Captain
Joined
Jun 28, 2002
Messages
3,821
Good start, you have a lot more 10 hrs stretch's ahead but your on your way. Guess you could pull the boat out from under the cap then set the cap on some rollers and push it out of the way for later..
 

komby

Cadet
Joined
May 30, 2023
Messages
27
Good start, you have a lot more 10 hrs stretch's ahead but your on your way. Guess you could pull the boat out from under the cap then set the cap on some rollers and push it out of the way for later..
Wow I didn't think about that option. I actually have a utility trailer that I was planning on resting it on. If I can find a place I can secure a come along to in the nose area of the garage without ruining my garage door it would totally work. Lift, remove the hull, roll the trailer in, lower, move it out. Thanks for this idea.
 

komby

Cadet
Joined
May 30, 2023
Messages
27
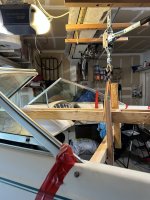
Well, It was sketchy but we got it done. Following the suggestion of suspending it and rolling the hull out from underneath. I re-positioned the boat to have a 2 ton come along in the midpoint of the boat and connected it to the bracing. I really should have used more than 2x4 and 2x3 for this because on my first lift I snapped the 2x3 that was in the middle. I sistered another one on and went for it again.
IMG-5126.jpg

I got the help two of my trusty neighbors who normally just laugh at the weird stuff I get up to and we started playing musical boats.
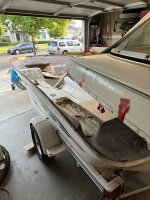
Slid the hull out.
IMG-5125.jpgIMG-5123.jpg

It took some pushing here and there to clear the bow section on the stern when sliding it out.
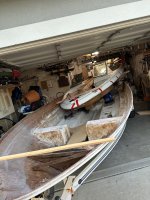
We rolled the HF trailer in and got it strapped on to it in the most kitchen sink way we could. Used a HF dolly and screwed/strapped it to the tongue of the trailer. I wish I had a pic of that phase in the garage but here it is resting in it's new home until I get the floor fixed.
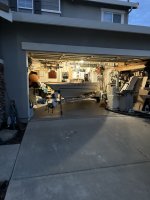
IMG-5127.jpg
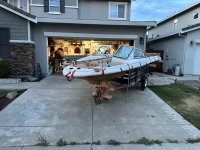
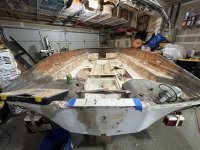
We got the hull back in too.
IMG-5129.jpg
Everyone who stopped by to see what we were up to kept asking why? It looks dry. It had me questioning myself but once I got it back in the garage it started crying again and in some weird way seeing that there is still hidden soaked foam and stuff to fix under that was a relief.
It's going to be way easier to do this work now since I can reach a lot of it from the outside. That was it for the night, it was time for a refreshment.
IMG-5135.jpg

Now the clock has started ticking, it's a race against the neighbors getting fed up and calling code enforcement on me (it won't be the first time) and me getting the floor fixed. Fingers crossed!
 

flashback

Captain
Joined
Jun 28, 2002
Messages
3,821
Glad it went well for you. Be mindful of distortion of the hull during the rebuild or you may have problems putting the lid back on the box.
 

komby

Cadet
Joined
May 30, 2023
Messages
27
Glad it went well for you. Be mindful of distortion of the hull during the rebuild or you may have problems putting the lid back on the box.
I cut some strips of plywood and made story sticks along the length of the hull for their current measurements in a few areas I thought were key. I marked the total hull width, the step on the side width, the location of the storage areas. I did that for 4 spots along the length of the hull. Hopefully that will be enough to detect if something is out before it goes back together.
 
Top