93 Crownline 250; she 'was' dirty, but now shes clean and SPLASHED!!

Mikeopsycho

Senior Chief Petty Officer
Joined
Feb 6, 2014
Messages
738
Hi ya BD, welcome back! Looking forward to the pix, you'll figure it out :).
 

bigdirty

Senior Chief Petty Officer
Joined
Oct 4, 2013
Messages
652
IMG_20150320_181157_zpsyrjmm2ch.jpg
ok.. think I got it now :laugh:

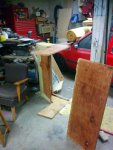
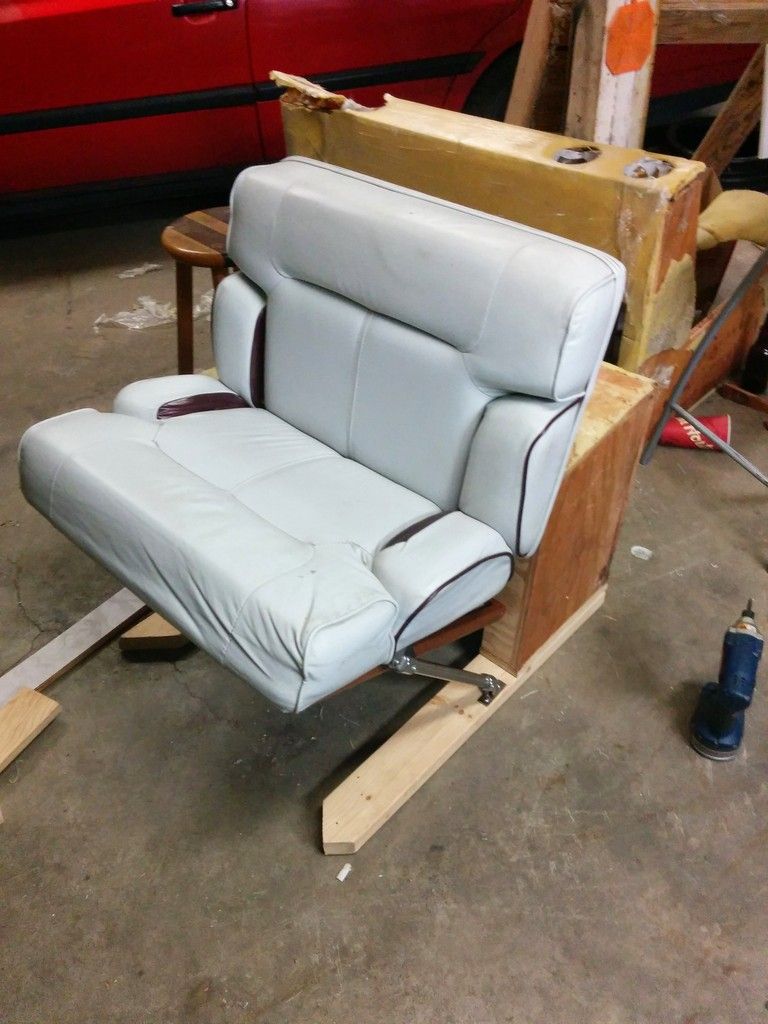
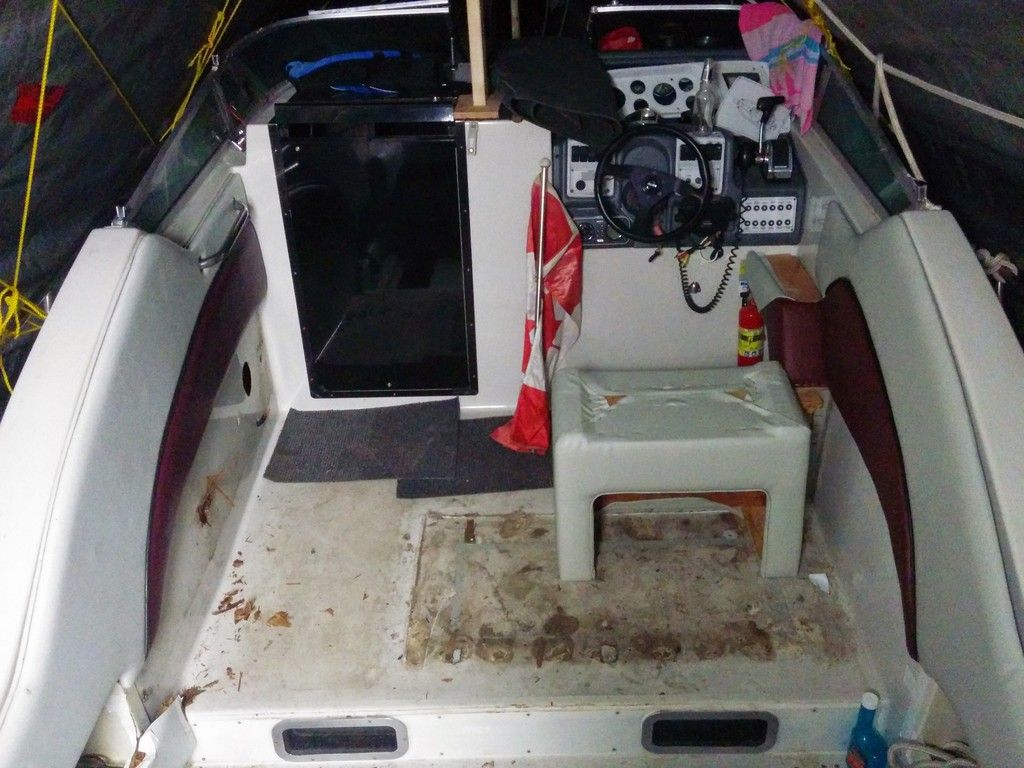
I only started taking pics after most of the destruction had taken place.. that's the remains of the old helm bench seat, that housed a flip out rear bench facing aft. It was pretty much useless, as it took up way too much room on the front and back deck, and was about 8" off the floor.. good for midgets, and maybe kids I suppose..

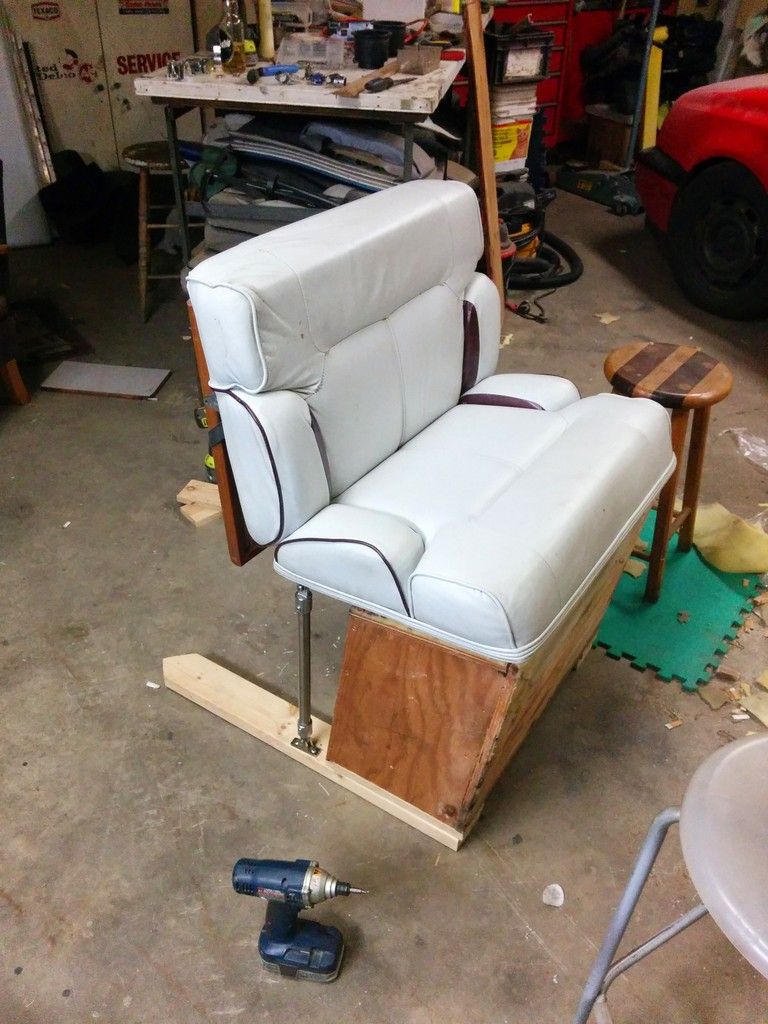
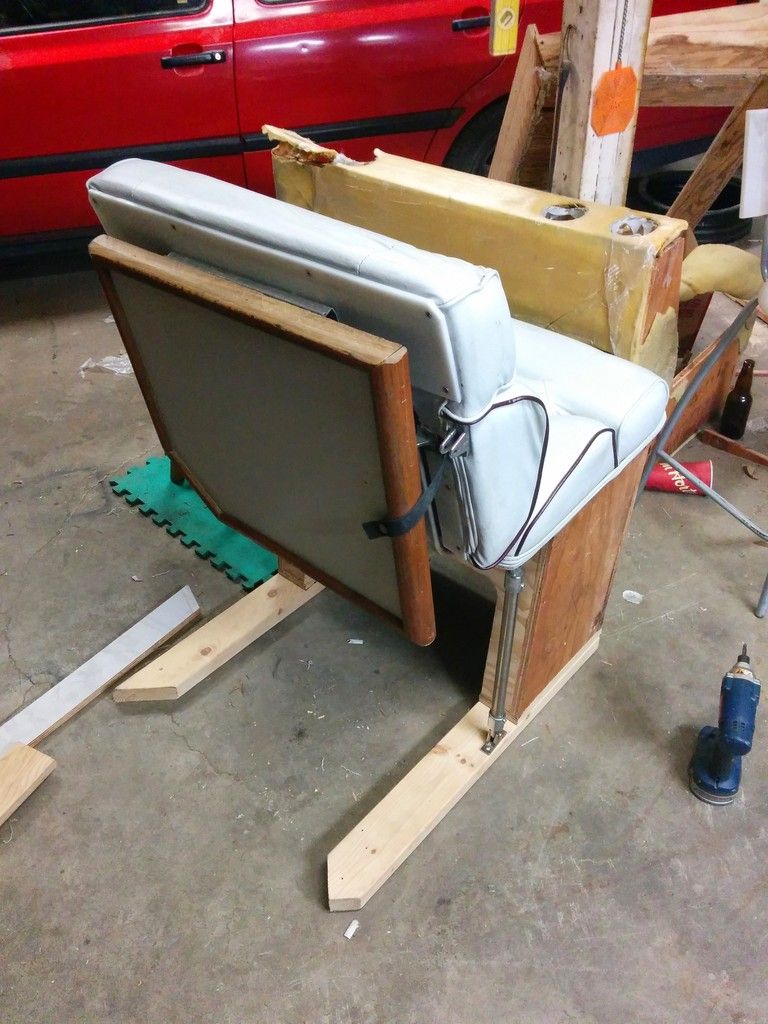
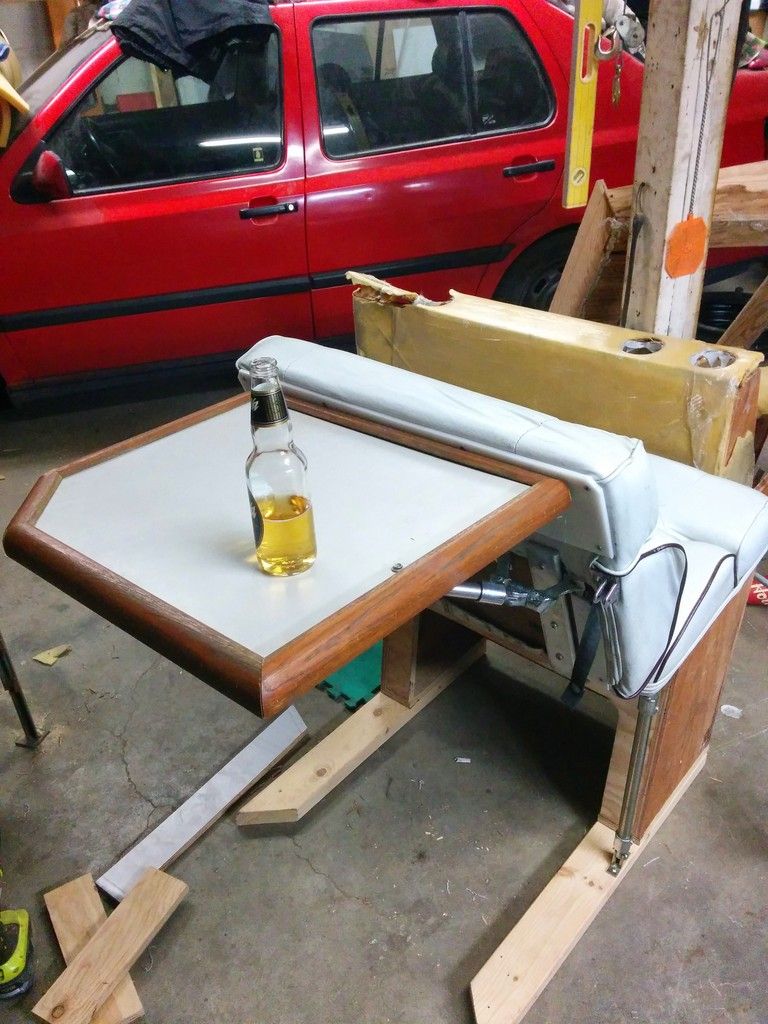
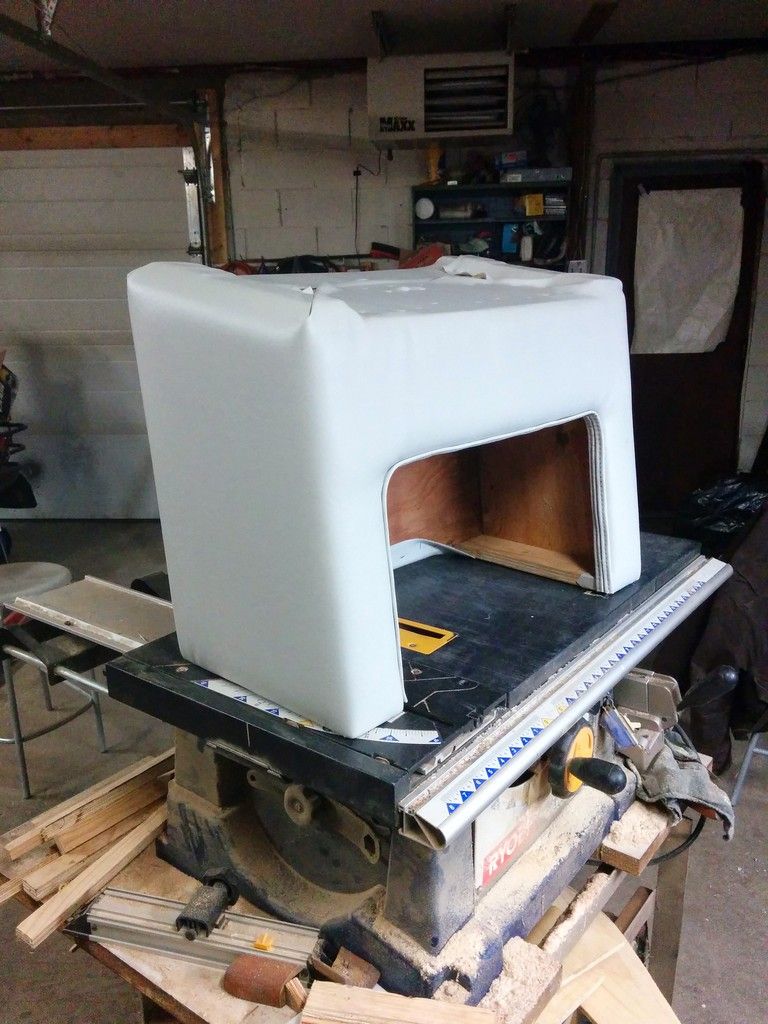
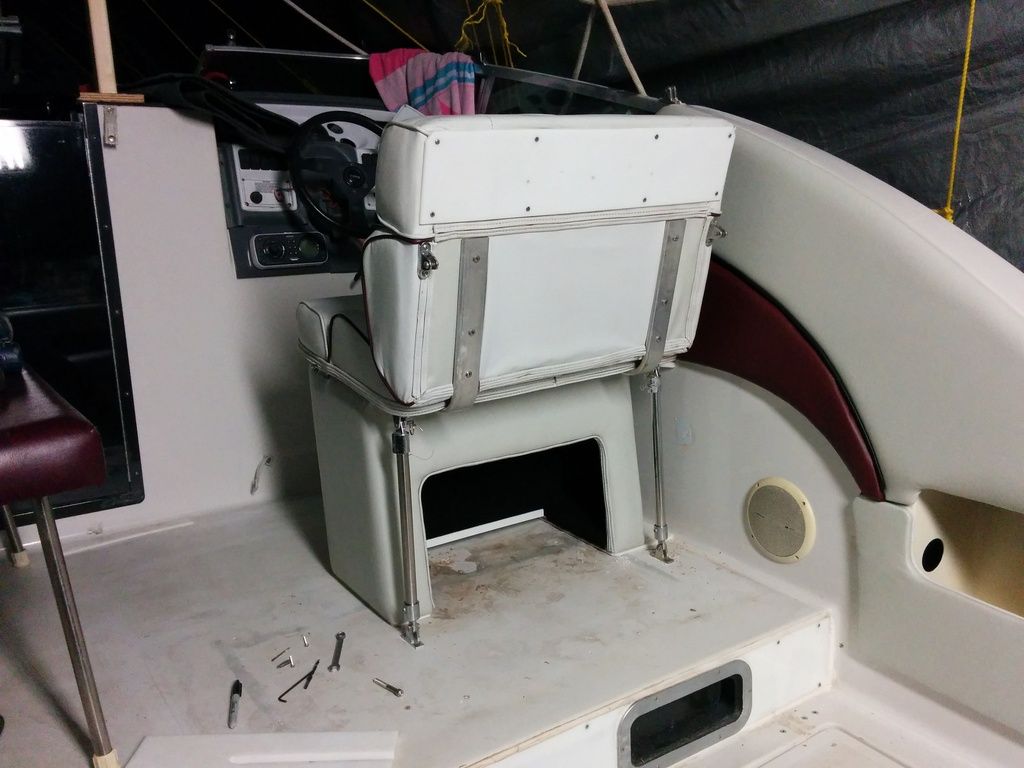
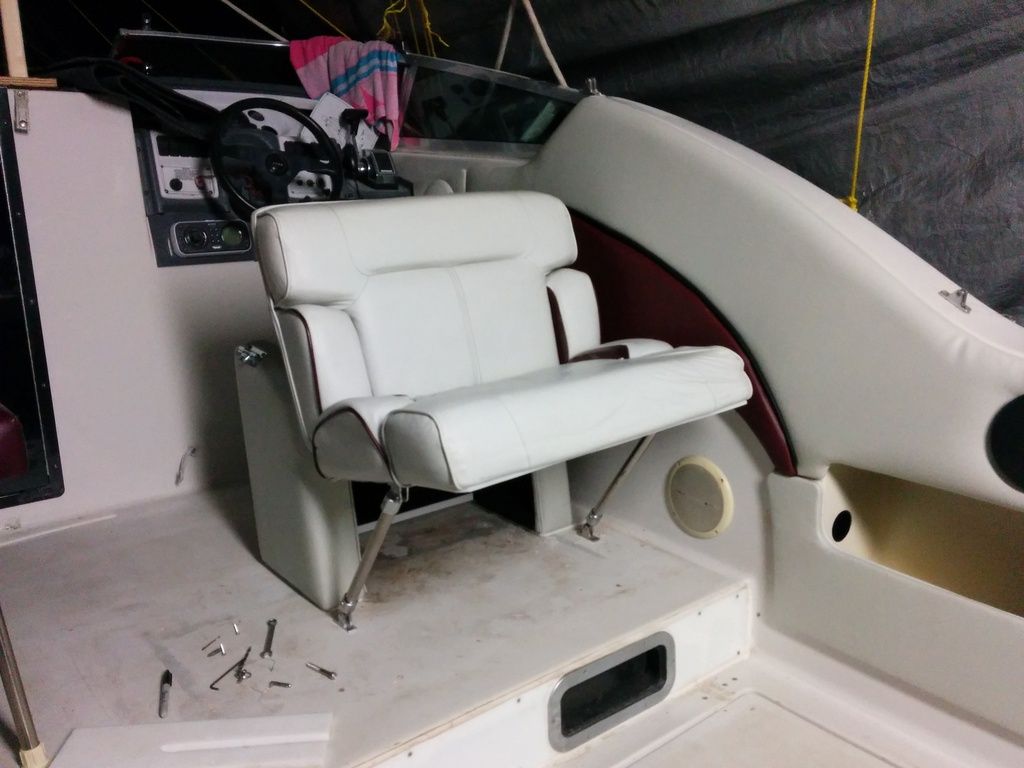
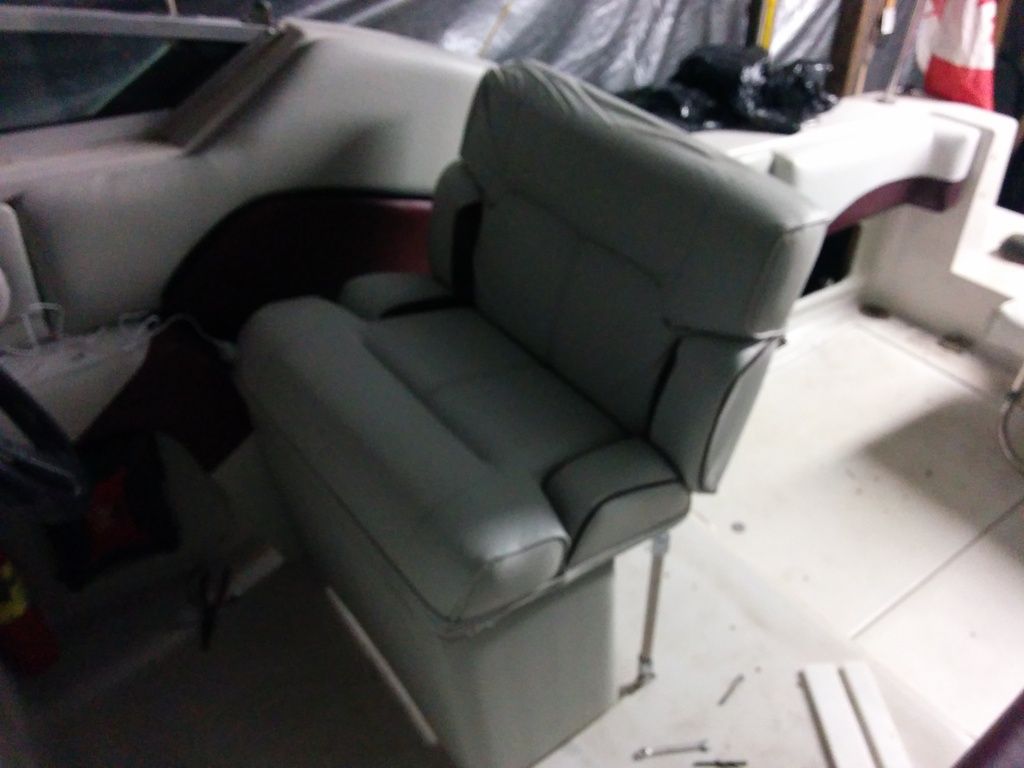
So I stripped it down, cut it down, salvaged bits and pieces, and built a 'new' (smaller) captains seat base, and re-used the larger of the two front seats as the single helm seat.. .. of course, I couldn't stop there.. :lol: and decided to add a drop down table to the back of it...
IMG_20150322_194845_zps9elx5ghp.jpg

IMG_20150322_194854_zps5c9qeatd.jpg
IMG_20150322_195020_zpspfgxx8ju.jpg


oh... and make it a flip back seat, so I can face it to the rear and watch the girls in bikinis whilst I drink beer :)

IMG_20150322_195130_zpsdijyewlw.jpg
 
Last edited:

bigdirty

Senior Chief Petty Officer
Joined
Oct 4, 2013
Messages
652
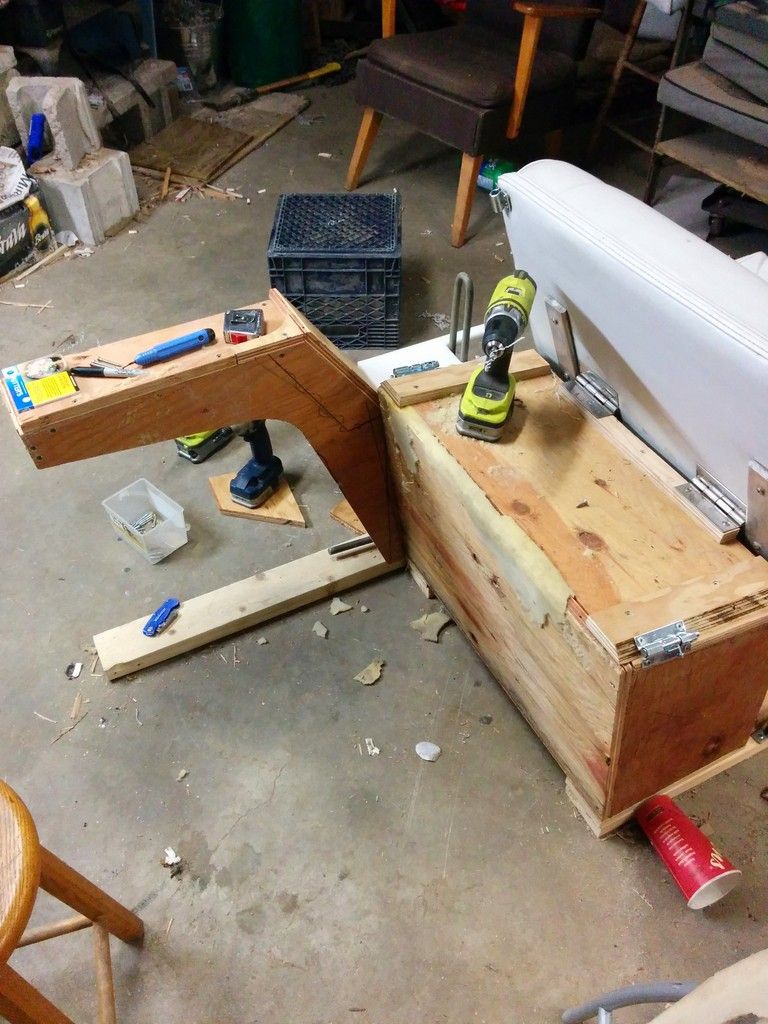
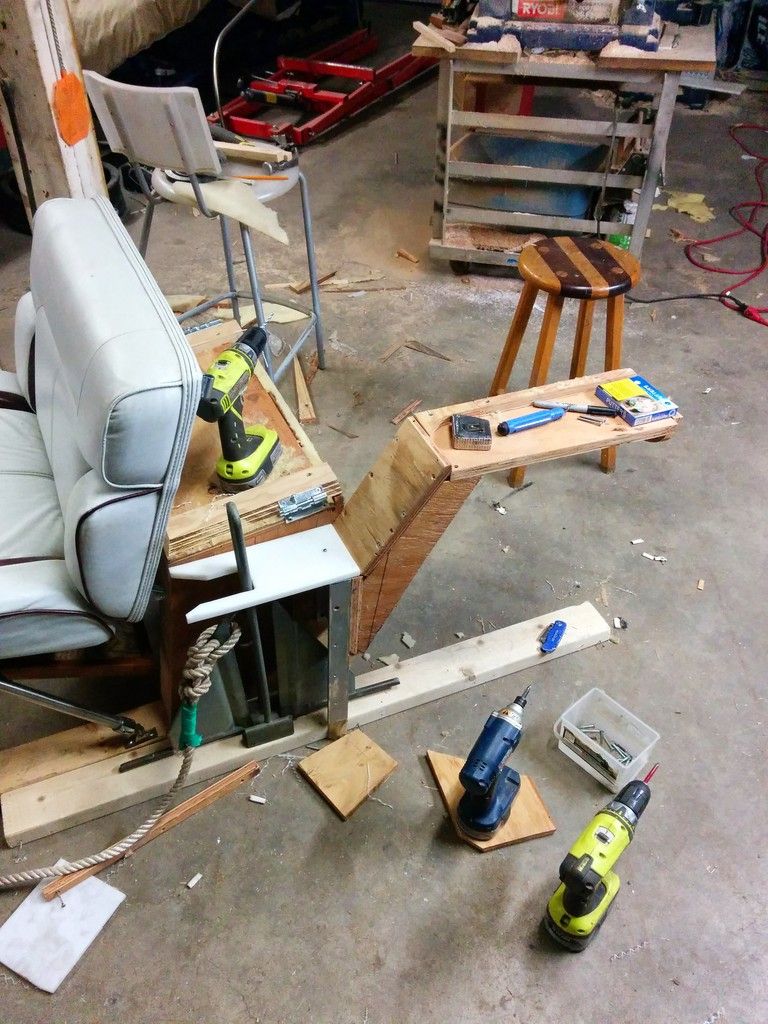
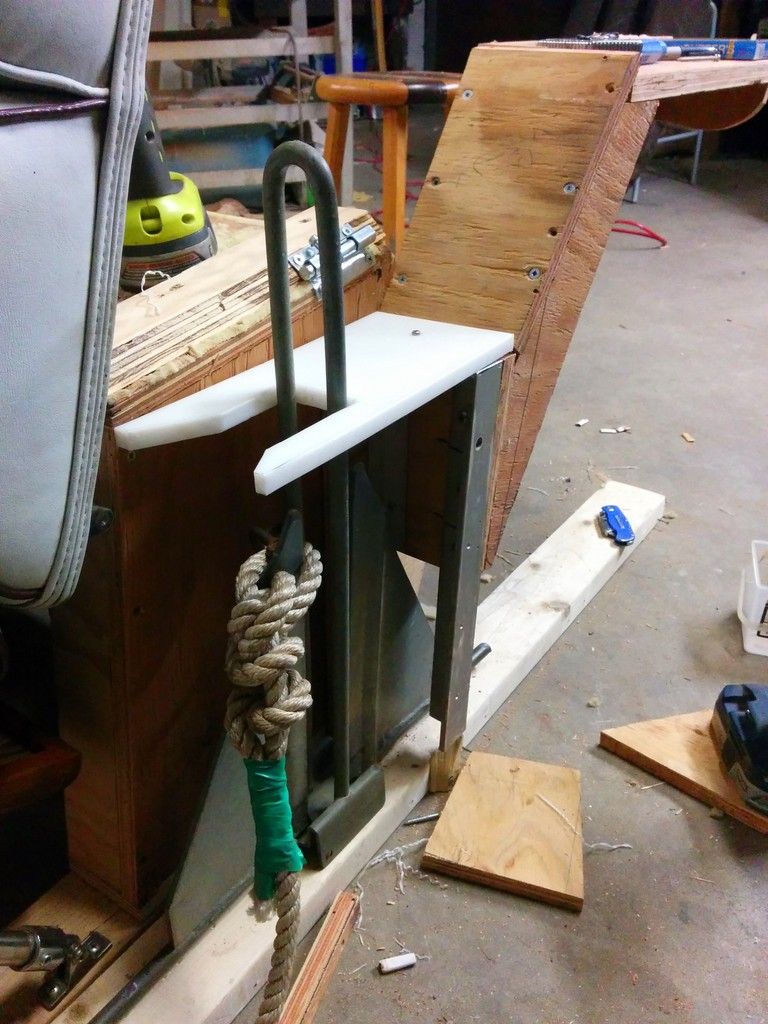
Then it got me thinking, there is going to be some serious physics acting on this seat in the rear facing position.. so it needed more support than just 4 screws/bolts throught the floor.. so I threw together a small console/shelf of sorts, that then evolved into the stern anchor storage as well.. :lol:
IMG_20150325_205150_zps65sbipi3.jpg


IMG_20150325_205205_zpsezbgcsjg.jpg

the white plastic is from my work, its nylon off cuts that are about 1/2" thick and were almost the right width, just needed some slight shaving and tweeking with my trusty table saw..
IMG_20150325_205217_zpszufy7tte.jpg
 

bigdirty

Senior Chief Petty Officer
Joined
Oct 4, 2013
Messages
652
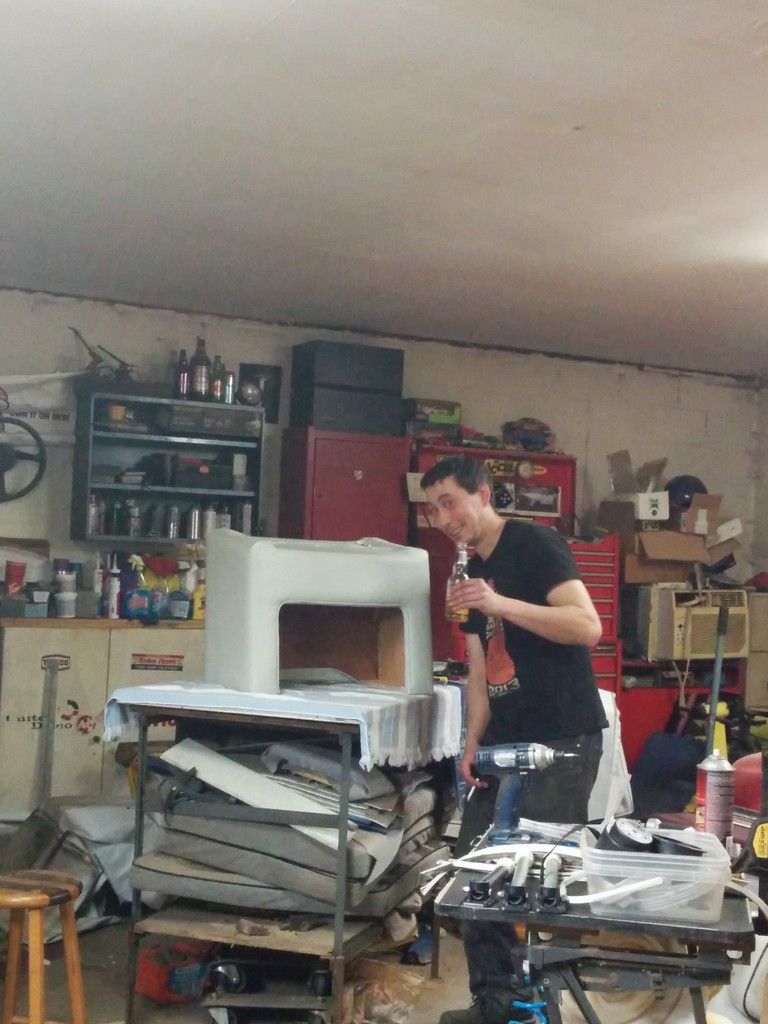
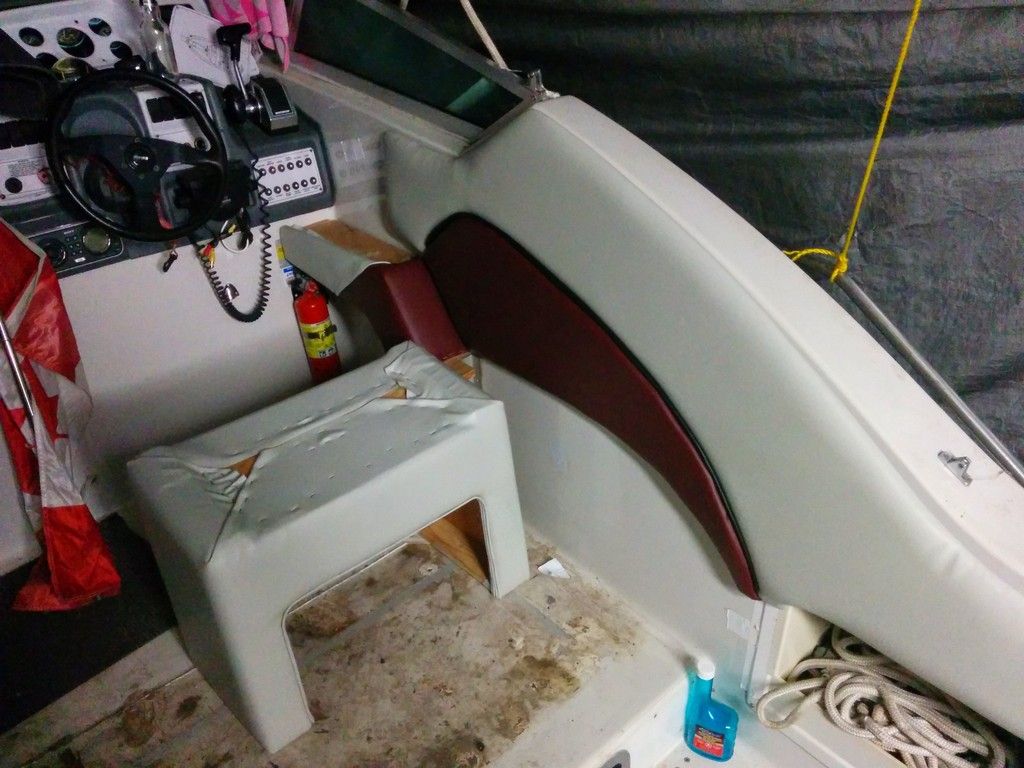
heres the seat base wrapped..
IMG_20150329_223920_zps3km2lalb.jpg


I may have been a little impressed with myself..

IMG_20150329_211630_zpsratlygaa.jpg

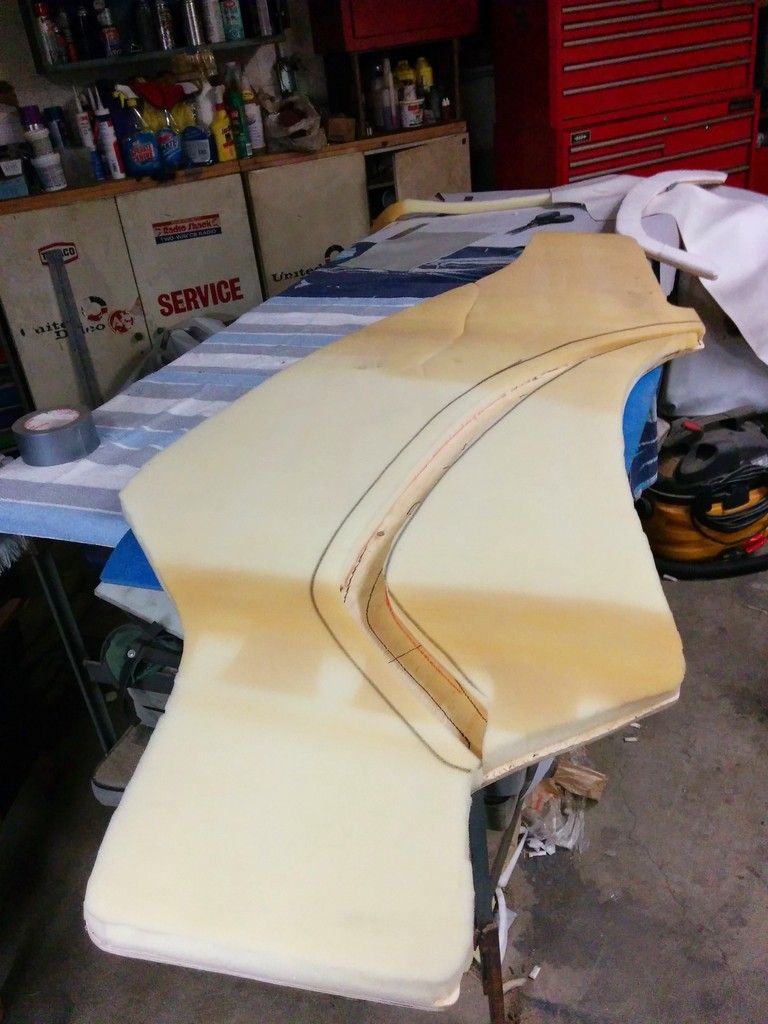
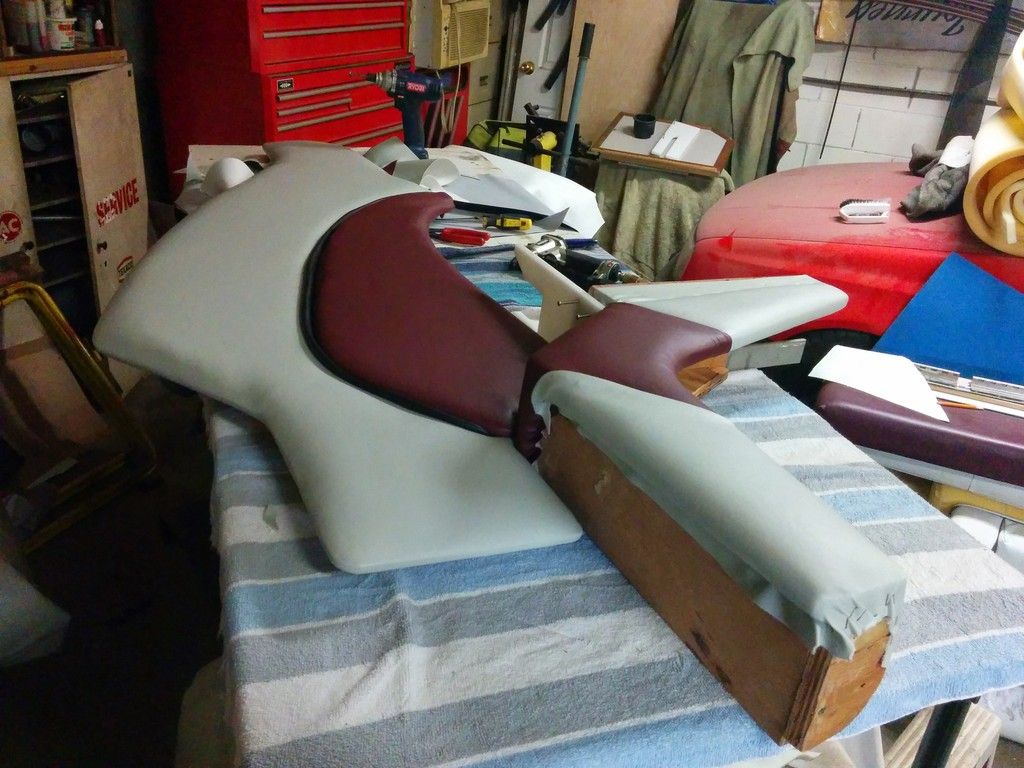
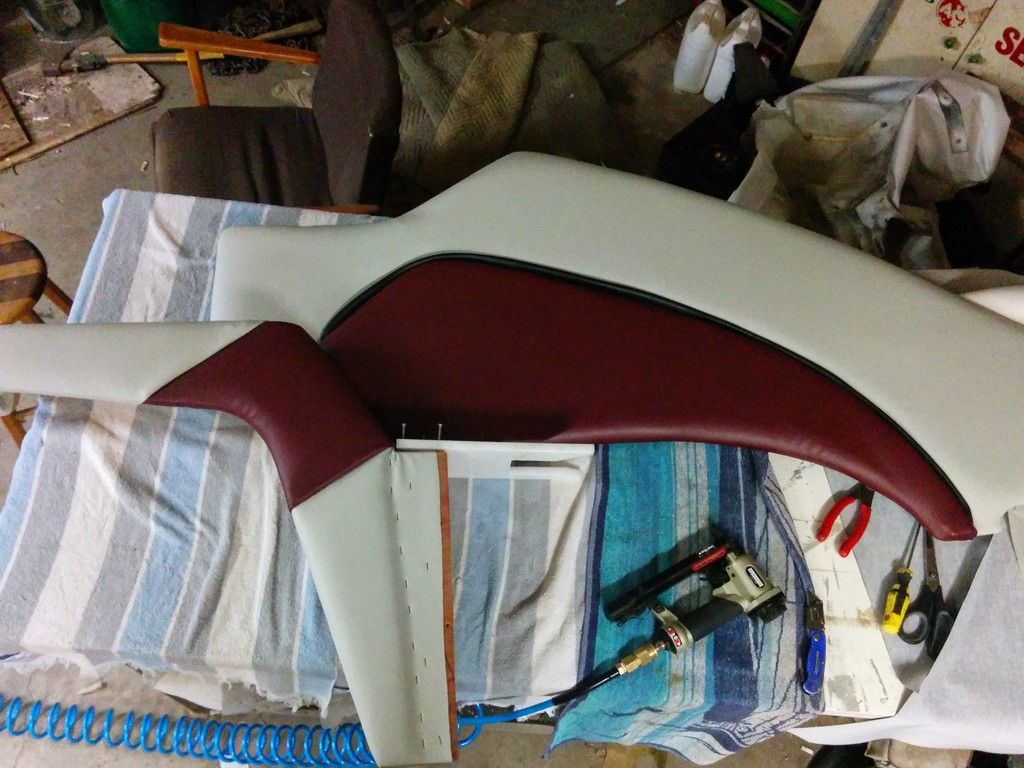
Its been a while and I had to relearn how to do a few things, but it turned out ok. The trim on the cutout is actually salvaged/reused from the bottom of one of the rear seats.. :lol: So onward to the console, and my attempt at matching the existing port side panel, and colors/paterns...

IMG_20150330_194930_zpsoothnlws.jpg


IMG_20150330_235509_zpsa8extfq4.jpg

IMG_20150330_235412_zpspodxbfli.jpg

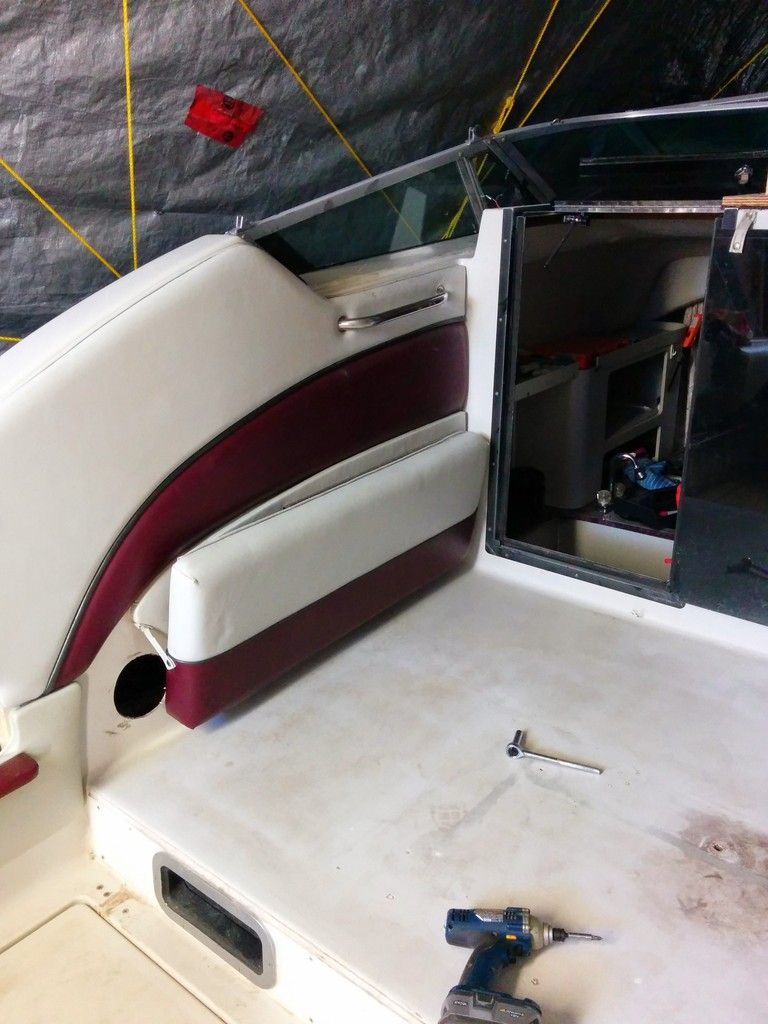
I managed to find some material localy that matched the original red and white pretty close.. as always, Im on a bit of a budget and cant have the 'everything' done all at once, so the port side panel and rear upper seat bolsters will have another year of service..

IMG_20150331_000848_zpsloyrojwr.jpg


the port side is original, starboard is my new stuff.. I'm happy with the match :)

IMG_20150331_000825_zpsyk7oqziw.jpg
 

bigdirty

Senior Chief Petty Officer
Joined
Oct 4, 2013
Messages
652
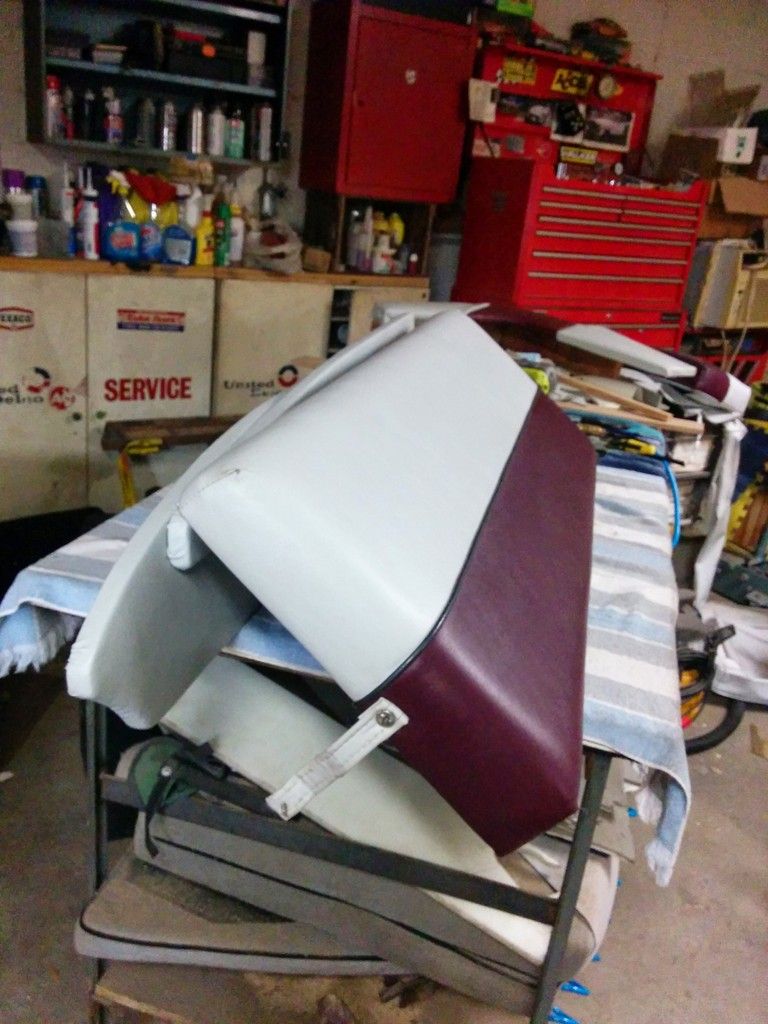
Also in the works is a passenger flip up bench, :repourpposing" the old backrest from the original helm monstrosity bench. .. don't have any other pics of it yet, but I'm planning on installing in this weekend.
IMG_20150401_222841_zpsvownfeic.jpg


Along with the new lower/rear panels and the redesigned bench seating..
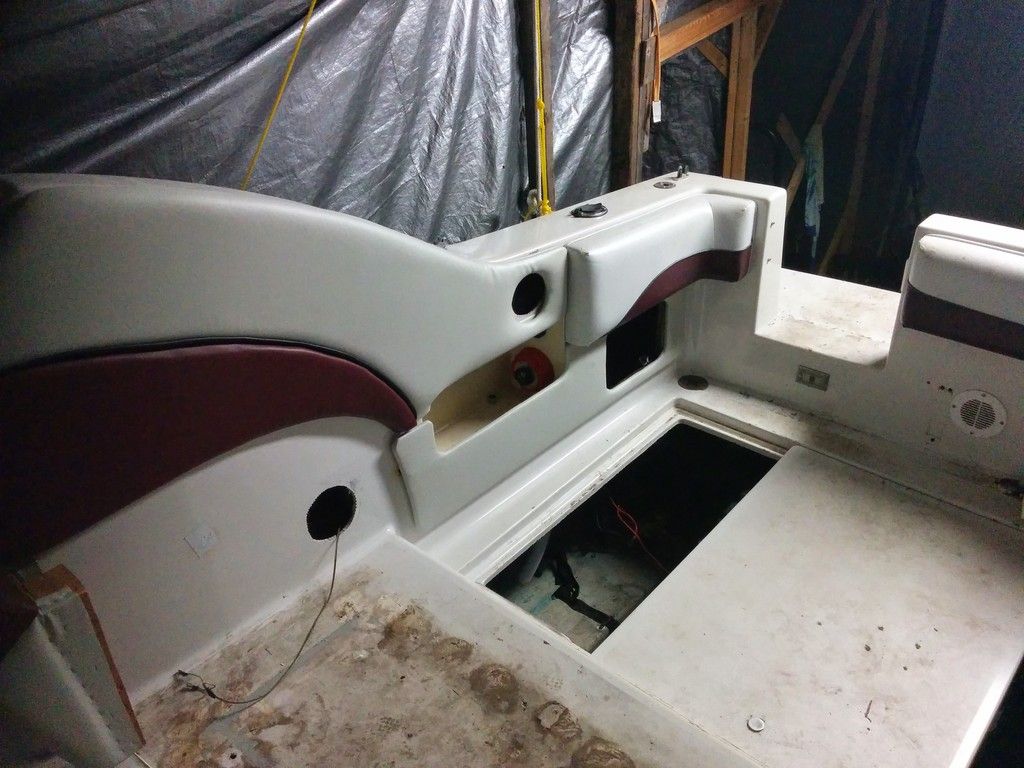
IMG_20150407_230954_zpsqhznbg0d.jpg


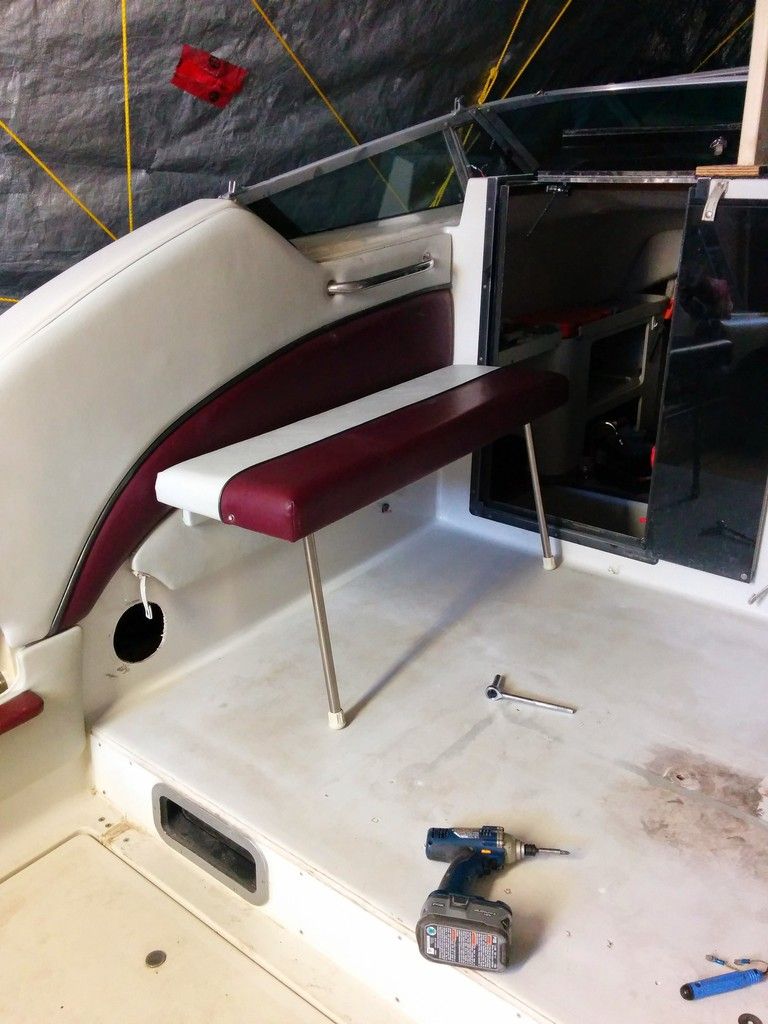
its hard to explain, but pics will help, once I take a few more.. :lol: the red piece on the right lower panel is actually part of the support for the rear bench (which is now the original flip out seat from the helm) and the piece on the transom with cup holders is also support for the rear bench, when its in the rear position. I've come up with a system that allows the seat to be moved 90 degrees, depending on what layout I need/want.
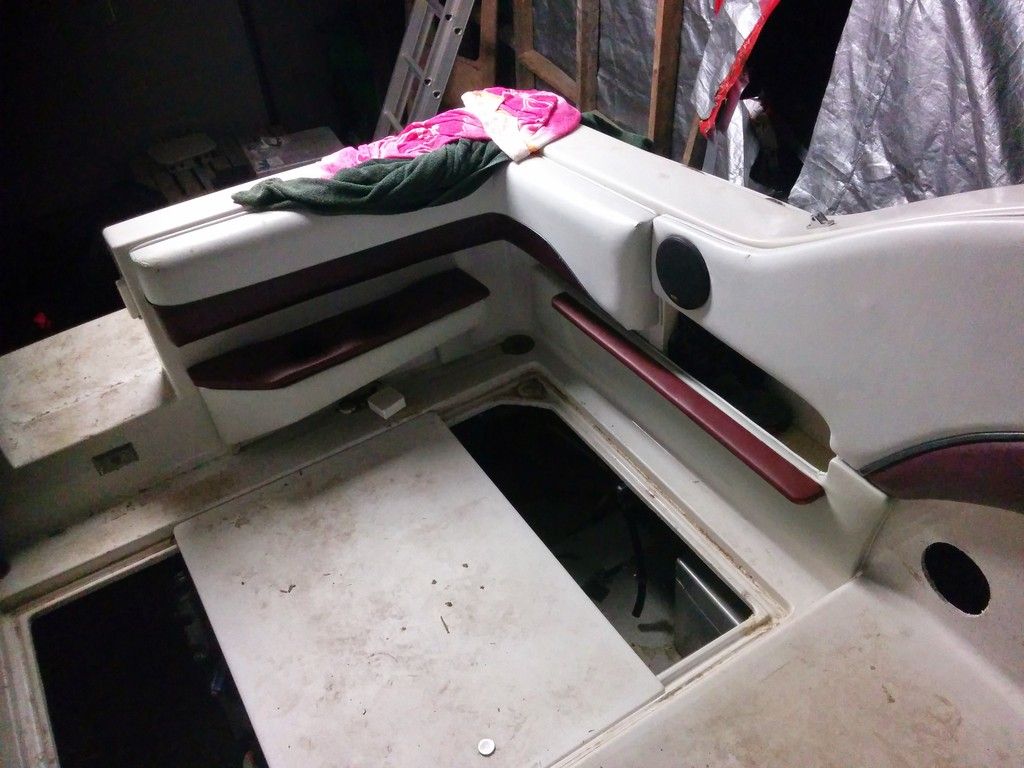
IMG_20150406_232840_zps4w5nz0cc.jpg


and photobucket is a bit pos, and has decided to stop working for me now.. so that's it for now folks! more tomorrow maybe :)
 

Speak

Chief Petty Officer
Joined
Jul 29, 2012
Messages
467
Also in the works is a passenger flip up bench, :repourpposing" the old backrest from the original helm monstrosity bench. .. don't have any other pics of it yet, but I'm planning on installing in this weekend.

IMG_20150401_222841_zpsvownfeic.jpg


Along with the new lower/rear panels and the redesigned bench seating..

IMG_20150407_230954_zpsqhznbg0d.jpg


its hard to explain, but pics will help, once I take a few more.. :lol: the red piece on the right lower panel is actually part of the support for the rear bench (which is now the original flip out seat from the helm) and the piece on the transom with cup holders is also support for the rear bench, when its in the rear position. I've come up with a system that allows the seat to be moved 90 degrees, depending on what layout I need/want.

IMG_20150406_232840_zps4w5nz0cc.jpg


and photobucket is a bit pos, and has decided to stop working for me now.. so that's it for now folks! more tomorrow maybe :)

Glad to see you back at it. Bd. looks nice.
 

Mikeopsycho

Senior Chief Petty Officer
Joined
Feb 6, 2014
Messages
738
I think I can speak for everyone here when I say WOW! :shocked: You've got some crazy great ideas and skills! :thumb::hail: This is going to be an awesome, one-of-a-kind interior! Very cool! :clap2:
 

bigdirty

Senior Chief Petty Officer
Joined
Oct 4, 2013
Messages
652
Thanks guys, I do what I can.. :)


oh, and funny thing about this comment;

Welcome back BD, I thought the Russians finally caught up with you..:rolleyes: :lol:

I started getting text messages today from the guy who ended up with the old bayliner.. :lol: seamed a bit odd tho, asking questions like "do you know what the motor was in it?" as well as "do you recall the make and model of the boat?" :confused: I dono.. was just a bit weird...


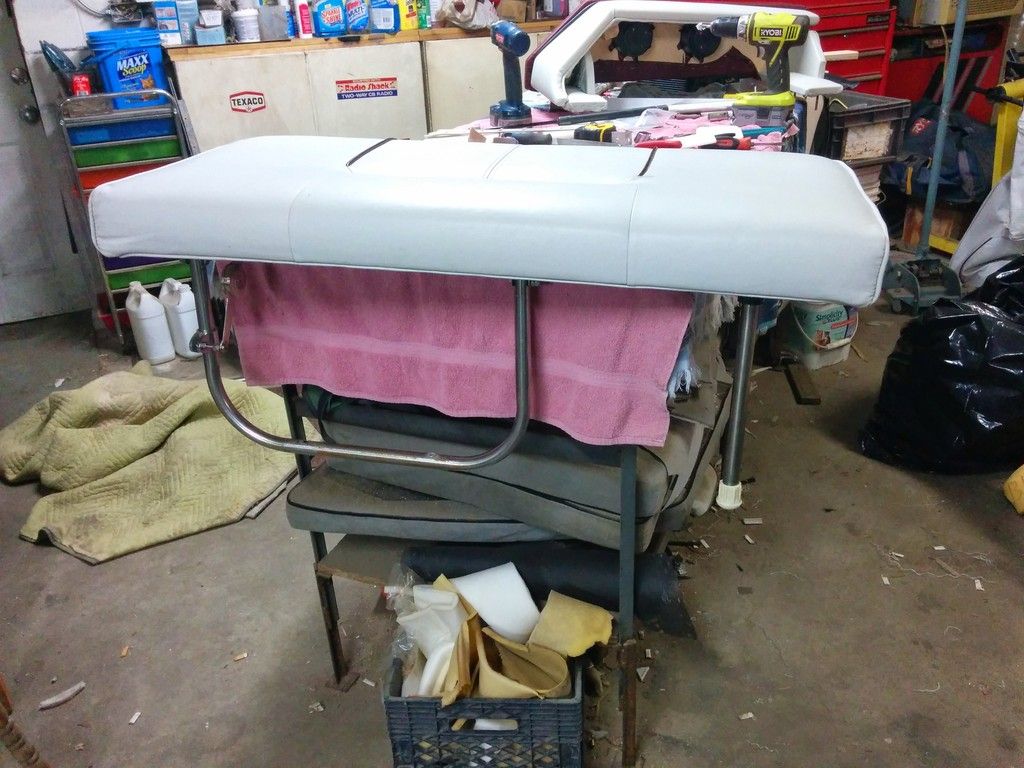
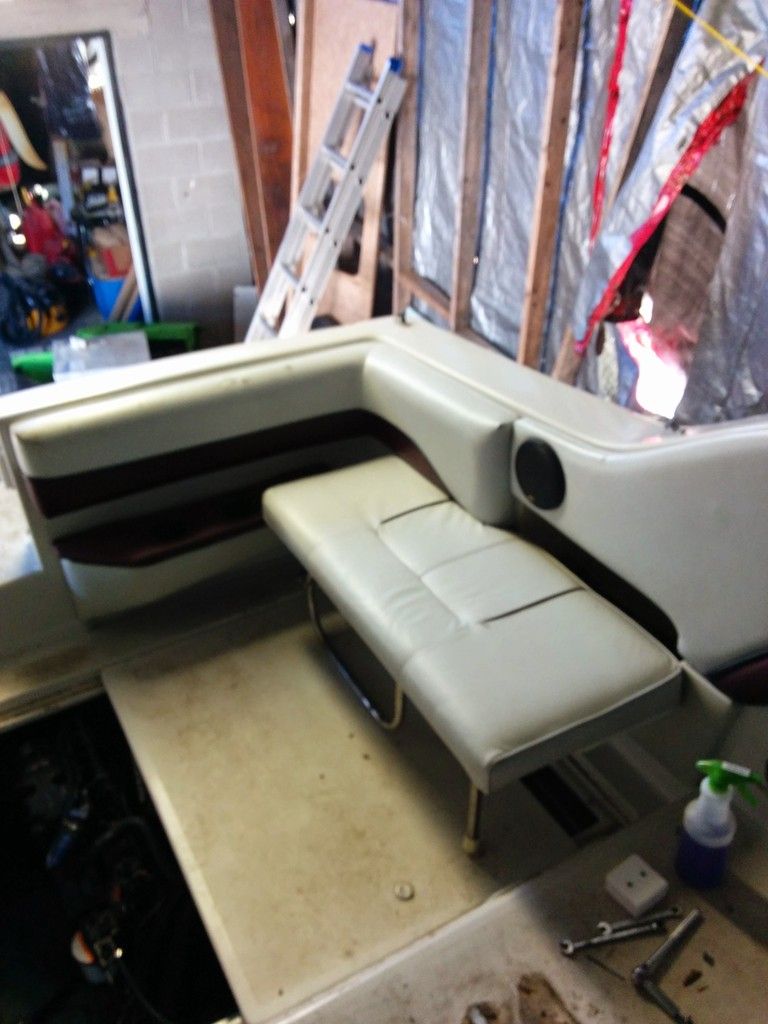
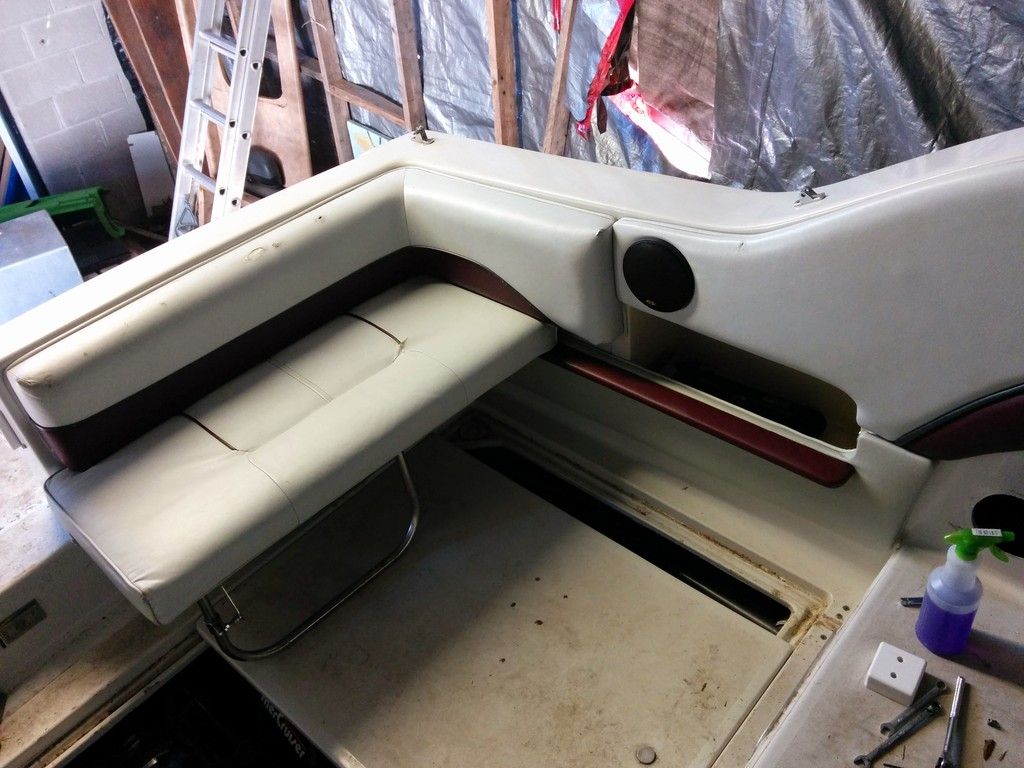
AAAnyway... got a late start today, due to staying up late last night and enjoying a few (or ten?) beers... but I've got the rear seat all figured out now, just need to add a few straps/snaps on the final install in the boat. Seeing as this seat was almost always flipped into the original bench and hidden, its in really good shape for its age, with only a few slight tears. It will do for a season tho..
IMG_20150411_214628_zpslmychnm0.jpg


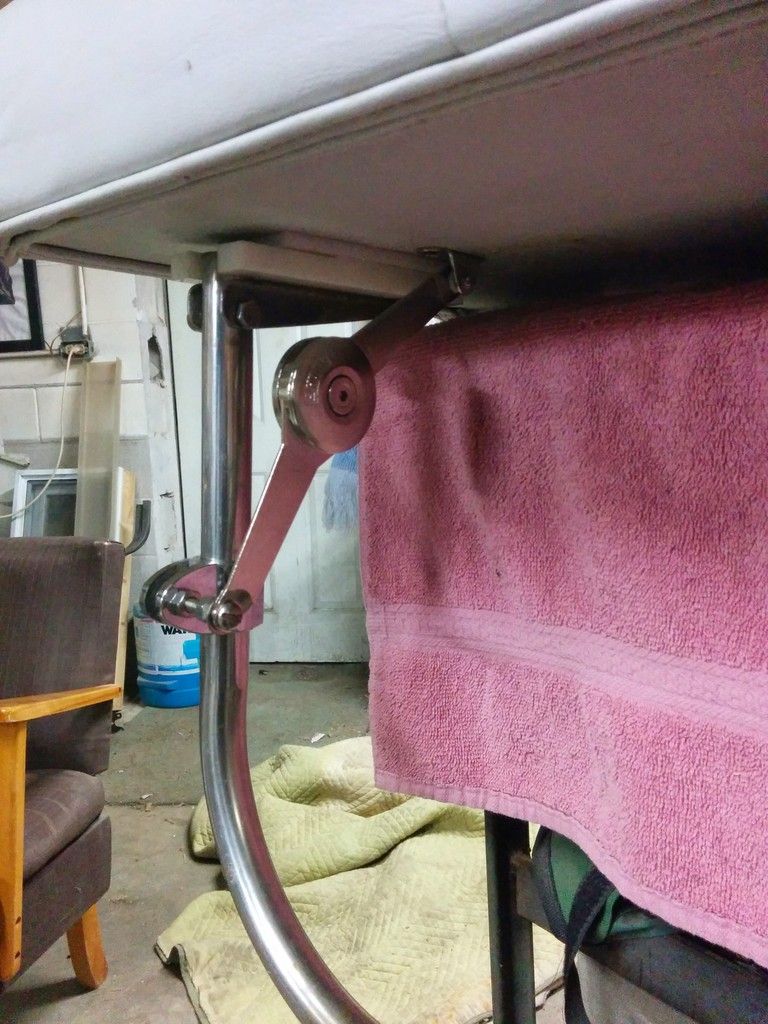
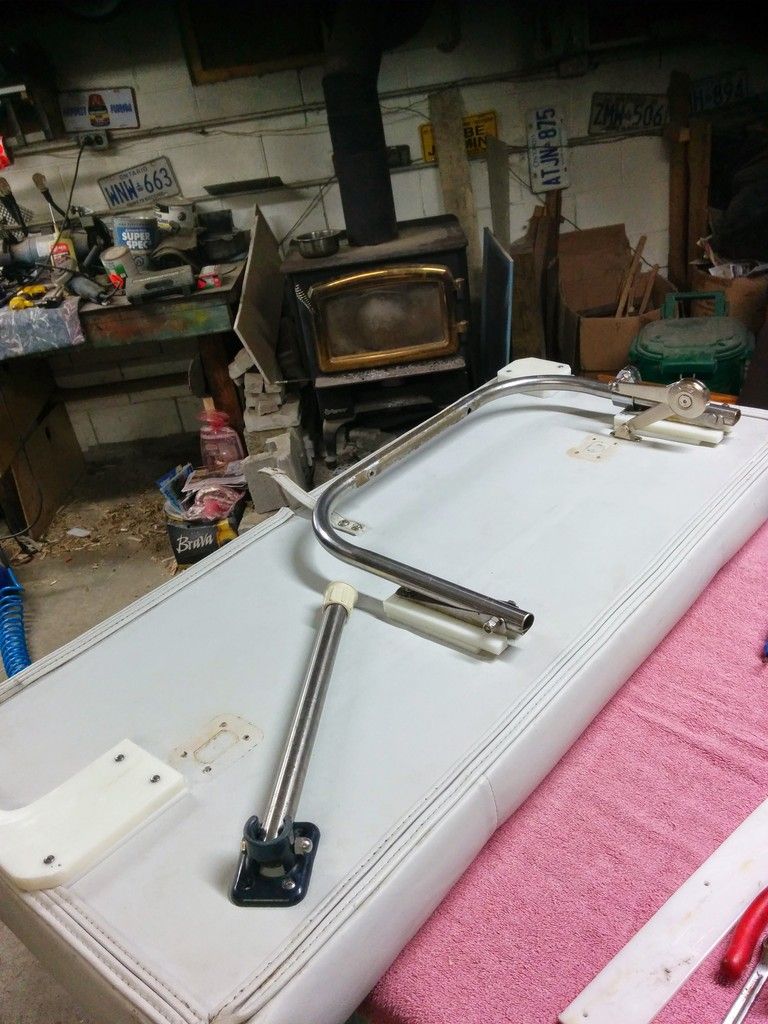
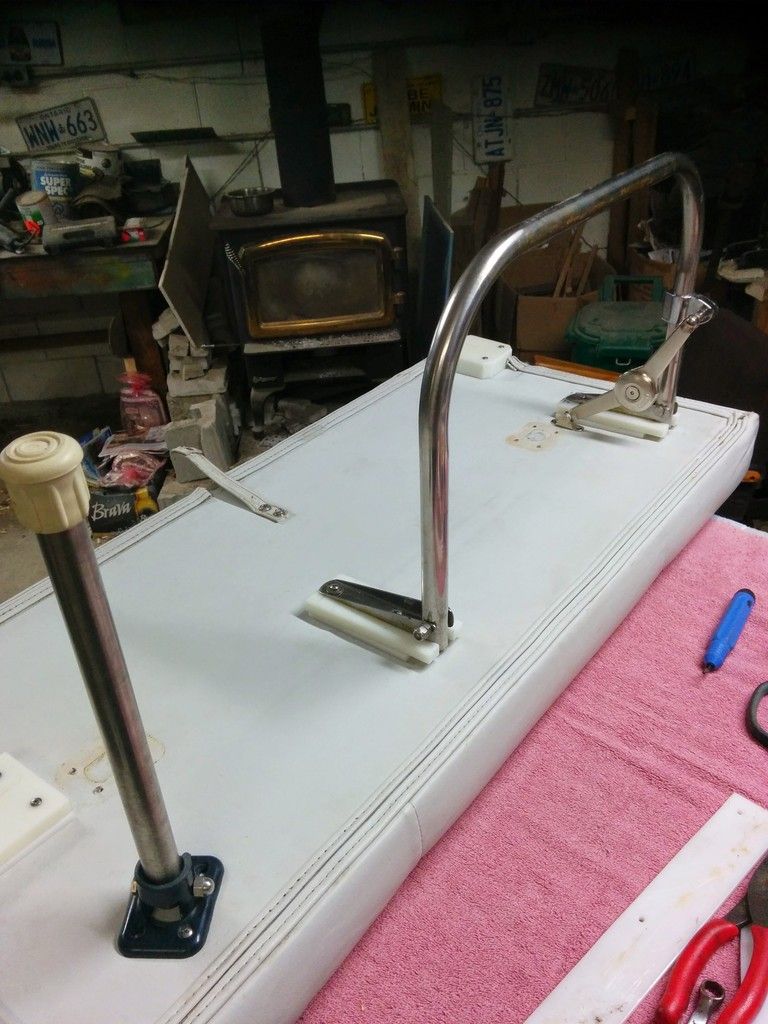
The single leg is original, just moved outwards for support when the bench is to the side position in the boat. The round "legs" are actually an old step from a swim platform, cut down to the height I needed. I made up some plastic detent/stop blocks that they rest against when up. Next problem was it didn't stay put very well.. and a stray foot or rolling bumper might kick the legs down.. so while on another mission to home depot today, I found something interesting...
IMG_20150411_214653_zps2kzmxfih.jpg


They call it a 'flap stay' :lol: meant for kitchen cabinets, but I think it will do the trick here. It was a $30 unit so I hope it can hold up to the marine environment.. seams to be coated nicely and looks 'boat-ish' to me.. There is little to no downward force on it from the seat, as the stop blocks and legs take all the weight, and requires a fair amount of 'push' to drop the legs back so time will tell I suppose.. looks cool anyway..

IMG_20150411_213541_zpsj6cch5kl.jpg


I went for drop down/folding legs simply to make complete removal of the seat easy, to gain access to the engine bay....which was a huge PITA originally. as the old rear bench was permanently mounted, and stuck out 16" over the one engine hatch. and only sat about 9" above it. Ya, it sucked a lot.
IMG_20150411_213549_zps0kl8ssa5.jpg


The plastic pieces screwed to the seat bottom on the corners are to line up and "lock" the seat into that red covered piece on the side panel AND the rear cup-holder piece on the transom, depending on the position I want for seating. Both positions will have strap/snaps to hold the seat base against the tub and panels as well. Was a bit tricky to figure all out, but in the end it should work well and be easy/quick to switch the seat around, or remove completely.
 
Last edited:

Mikeopsycho

Senior Chief Petty Officer
Joined
Feb 6, 2014
Messages
738
Vaht kind of wodka do yoo prefer, komrad? :lol: FLAP STAY.....flap stay, flap stay. flap stay......I like the sound of that, wanted to say it three times fast :blabla:, so I did. If boat builders had people like you designing their boats, no one would be able to afford them...........oh, wait....never mind.Boat, affordable, all in one sentence, now that's funny :laugh:.
 

bigdirty

Senior Chief Petty Officer
Joined
Oct 4, 2013
Messages
652
Vaht kind of wodka do yoo prefer, komrad? :lol: FLAP STAY.....flap stay, flap stay. flap stay......I like the sound of that, wanted to say it three times fast :blabla:, so I did. If boat builders had people like you designing their boats, no one would be able to afford them...........oh, wait....never mind.Boat, affordable, all in one sentence, now that's funny :laugh:.

huhhuhuhu... flap stay..flap stay, flap stay! :lol:


and I agree.. you simply can NOT put 'boat' and 'affordable' in the same sentence without laughing a bit.. :laugh: but thanks for the uh.. compliment? :)
 

bigdirty

Senior Chief Petty Officer
Joined
Oct 4, 2013
Messages
652
I made some good progress today, got the rear bench all sorted out, it snaps and holds nicely in place to the side and the rear positions..
IMG_20150412_122359_zpsgsogmyzu.jpg


IMG_20150412_122510_zpsniaudncw.jpg


and then I got the front/passenger seat mounted, its the original rear backrest piece from the old main bench. Seams sturdy enough.. and stowes away nicely too. :)

IMG_20150412_162101_zpsnnzwjjhv.jpg


IMG_20150412_162143_zpsj25dxhn6.jpg
 

bigdirty

Senior Chief Petty Officer
Joined
Oct 4, 2013
Messages
652
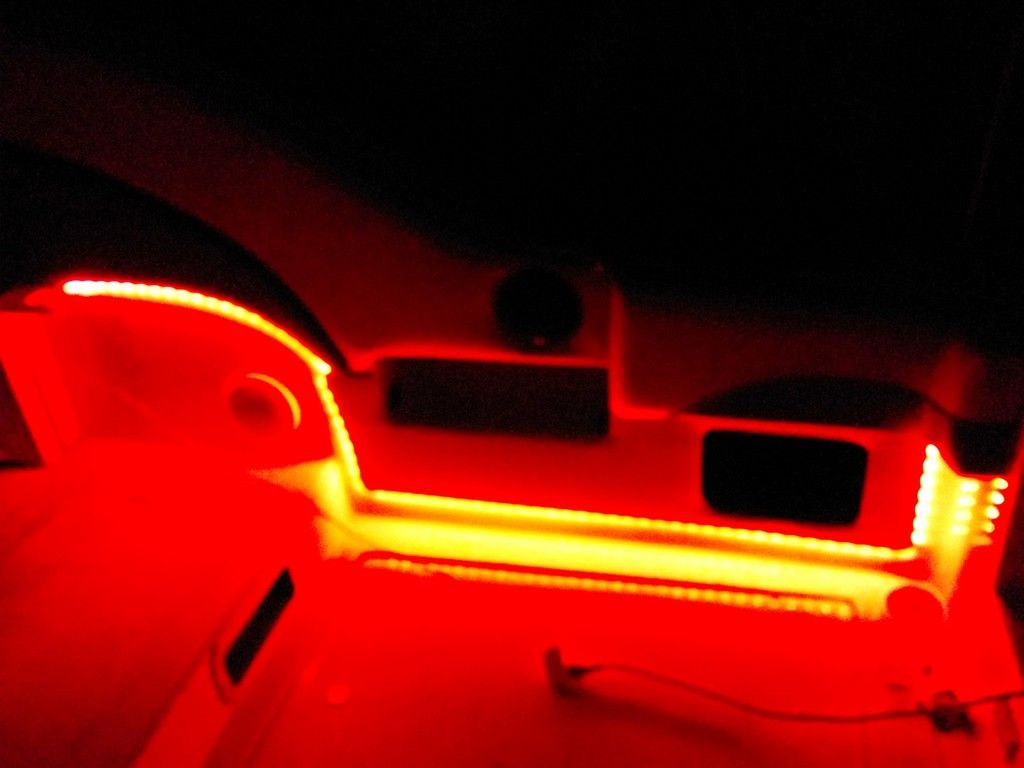
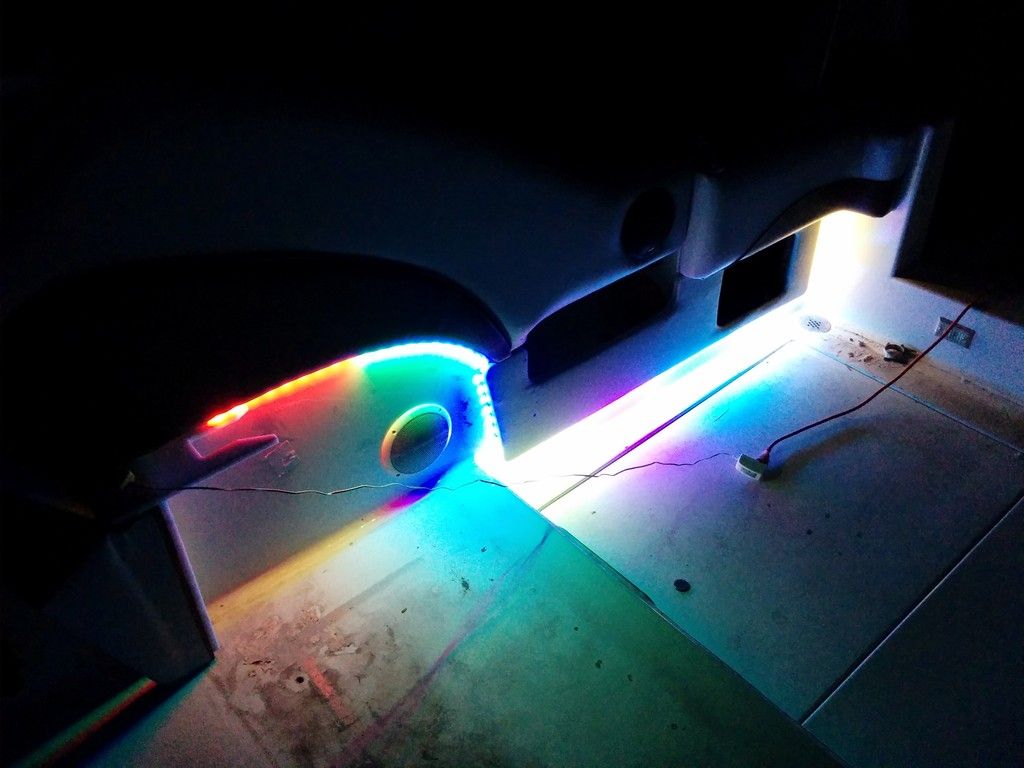
After that, along with installing all the speakers and cleaning up a bit, I put in some led strip lighting... gota have cool lights right? :lol


IMG_20150412_202408_zpsl3gtgfnj.jpg


bright buggers.. :laugh: also has an epileptic seizure mode... flashes between 6 colors, goes back and forth and brightness changes all at once.. should be fun after a few wobbly pops..

IMG_20150412_202625_zpsrshtxz2p.jpg
 

bigdirty

Senior Chief Petty Officer
Joined
Oct 4, 2013
Messages
652
IMG_20150412_202422_zpsgtsn9tmi.jpg
IMG_20150412_192412_zpsfpyzvako.jpg

IMG_20150412_192359_zpsp3emng92.jpg

they are 110v 8ft strips from home depo, but transformer runs them at 12 volts so I'll cut it off and wire to a switch off the house battery. Might go get some more now, these things are pretty cool! :)
 
Last edited:

Mikeopsycho

Senior Chief Petty Officer
Joined
Feb 6, 2014
Messages
738
Disco is alive and well :rockon::peace::whoo:. Ya gotta get a glitter ball too :D. Nice passenger seat, I like the way it stows out of the way :thumb:.
 

bigdirty

Senior Chief Petty Officer
Joined
Oct 4, 2013
Messages
652
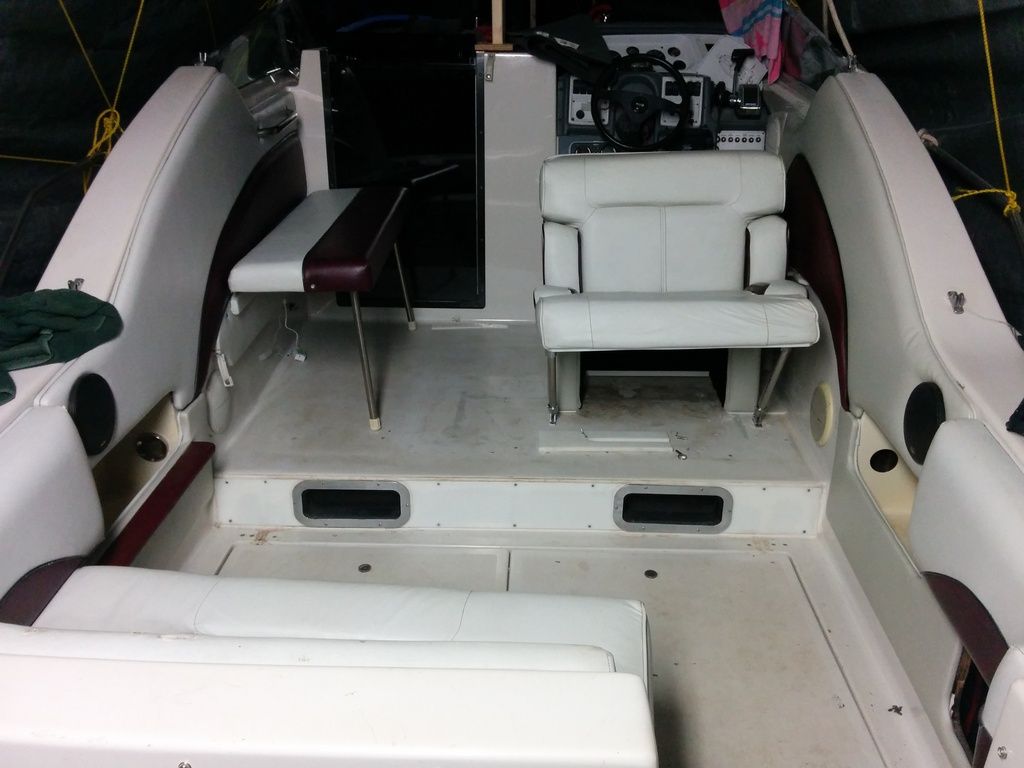
Put the helm seat in tonite.. sits a little higher than I was wanting when flipped back, but I usually have a cooler on the rear deck, so it will end up acting as a foot rest. I think overall this is a much better layout, easier to move around and in the end, offers about the same seating as the original interior. Just need to finish up a few little bits, screw the flip up table top to the back of the seat, then source out some new carpet..
IMG_20150413_222930_zpse2b5yl70.jpg

IMG_20150413_222849_zpswiqnnkly.jpg

IMG_20150413_223014_zpspzmfn7qb.jpg

IMG_20150413_223433_zpsajmrod9g.jpg


Then, well... its on to the wonderfull fiberglass land of itchy and stink! :lol: Next on the list is engine hatch repair (port side is delaminated underneath, and about twice a heavy as the other.. shes a bit waterlogged :laugh: oh, and an custom extended swim platform is likely going to be in the works this season..
 
Last edited:

bigdirty

Senior Chief Petty Officer
Joined
Oct 4, 2013
Messages
652
Thanks guys :)

So I've been pondering and measuring, thinking and drawing, pondering some more... I cant afford to just buy one of the platforms and will build my own instead. Have a few concerns tho, looking for input and ideas. Going to copy cat something like this...

http://www.swimplatforms.com/showImages.php?mk=211

Now, the first thing is venting. I know while trying to get on plane if the platform drags, it will cause issues.. hence the air has to have a route to escape. Looking at the pics from that web site, I can see 3 slots/holes at the transom side of the platform, which end up under the factory hull/ platform. Fine by me, and I'll likely go a bit bigger with them. I';m also thinking of adding some flat pieces in between the support ribs, on an angle.. essentially turning the rear underside into a giant trim tab, in the hopes of helping to get her up on plane.

Then there is a vent/drain(?) in the middle... I'm wondering if I even need one? I was told by a guy you need it, to prevent suction and pressure issues from the platform slapping the water, say rafted up or at a dock.. as well as getting on plane.. but I cant see any other reason for it than for a drain for water from the top surface of the platform?

Personaly, I would prefer a clean flat surface (with non skid mind you) AND I feel it will be easier to construct and glass. I have found a few local guys that can spray gel coat over it for me in the end so I'm thinking I'll be into it about $800 or so.. compared to the $2500+ to have one shipped to me..

Thoughts and theorys?
 

tpenfield

Moderator
Staff member
Joined
Jul 18, 2011
Messages
18,040
I have never known the venting (or not vented) to be an issue, but I'll take it as a given. Maybe just a couple of small notches where the platform meets the transom will do the trick and be easy to make.

I too have visions of making a swim platform (some day), so I will follow along with great interest. :thumb:
 
Top