'85 Sierra 16.5' Fiberglass - Floor / Transom / New Layout

Twhjelmgren28

Petty Officer 3rd Class
Joined
May 31, 2016
Messages
85
As recommended by you guys, I'm starting to replace my floor and transom. Noticed a little rot on the floor and when I pulled it up, the stringer was rotted all the way through. My plan is to replace the floor and transom. When I put it back together, I'm going to make storage space for fishing poles, make the battery space more user-friendly, and install pedestal seats. With new seats, I'll most likely match carpet to them and change the upholstery accordingly. I'm also toying with the idea of getting an estimate for some body repair and new paint job but that is a long ways down the road. I'll start with some photos - not the greatest quality - in future, I'll use a better camera. I'm pretty religiously following Frisco's guide and will be checking other threads as well.

Here's the the boat - I inherited from my Grandpa:

IMG_5343.JPG

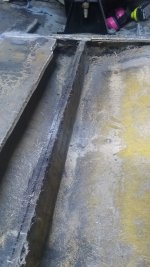
Rotten stringer:

IMG_20210825_181739417.jpg


This is the entire floor removed from the cockpit back - the nice thing about it being a smaller boat is there is a lot less demo and there will be less new materials compared to some of these restorations I've been looking at. Interesting note, there was only 1 stringer down the center and no bulkheads. Also no flotation foam. When I rebuild it, I think I'm going to connect 2 stringers together and leave the bottom completely open so I have enough space to store fishing poles"
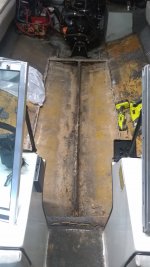
IMG_20210825_184351946.jpg


Here's a pic of the floor with a cross section cut out. The floor itself seemed pretty solid. The wood is dark on the bottom but as you can see, no rot in the layers (yet). The bottom is also a bit shiny so I'm wondering if the dark color is some sort of waterproofing - does anyone know?
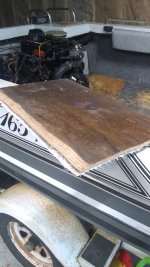
IMG_20210825_184734360.jpg


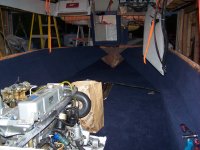
This last picture is kind of worthless but just showing my engine mount situation. This will all be replaced as well.
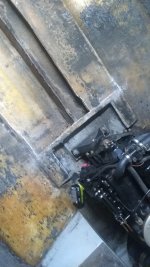
IMG_20210825_181544856.jpg
 
Last edited:
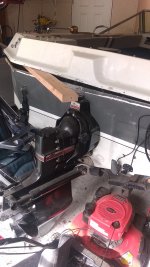
Scott Danforth

Grumpy Vintage Moderator still playing with boats
Staff member
Joined
Jul 23, 2011
Messages
49,540
build a cradle and pull the motor

you have a lot of work ahead of you. if the floor is rotten, the transom and stringers long ago rotted away.
 

JASinIL2006

Vice Admiral
Joined
Feb 10, 2012
Messages
5,673
Looks like you're on your way! Hard to know why that plywood is dark... could be some sort of coating, could just be aged wood. Hard to tell from a picture.

Good luck pulling the engine and working on the transom. I'd probably want to get that weight out of there, since you've removed some of the boat's structural strength already.
 

Twhjelmgren28

Petty Officer 3rd Class
Joined
May 31, 2016
Messages
85
Alright - so it's been a while since I jumped back into the boat. I took a "break" in order to put up a back splash in our kitchen.

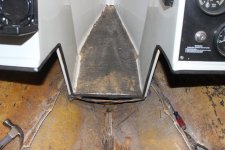
I need a little advice / suggestions on how to tackle my next problem. Here is a picture of the area I'm working on:
IMG_5348.JPG

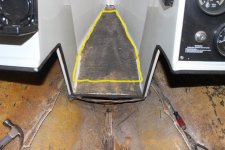
As you can see, the cockpit, front benches and front walkway are all thick fiberglass and gel coated. Underneath the fiberglass walkway is another piece of the wooden floor - this piece was unattached to the stringer and main part of the floor. Although it's really hard to check, I noticed at least one spot that looked weak. I'm going with your guys' advice and just replacing all the wood.

With that said, any suggestions on how to tackle this part? Is there any way I can keep the thick fiberglass walkway and still get the wood out from underneath?

Here is a rough estimate showing what I believe to be the wood outline underneath the glass:

Board Outline.jpg
 

Twhjelmgren28

Petty Officer 3rd Class
Joined
May 31, 2016
Messages
85
Remove the cap with the front splash and both consoles
Thanks for the response. The consoles are all fiberglass so i was planning on leaving those. There is some wood in certain spots on the consoles but it's not rotted and not near the rotted wood.

With that said, there is still that piece of wood under the front walkway. If I'm reading you right, i should just cut right into the floor there as well. I was hoping to keep the gel coat intact on the front benches. Guess I'll try some masking tape to keep the gel coat from cracking...
 

todhunter

Canoeist
Joined
Sep 15, 2020
Messages
1,308
No, he is saying to pull the entire boat cap. Remove the rub rail from the perimeter of the boat, then remove the screws/rivets holding the cap onto the hull, then lift off the cap. This will give you access to the area under the walkway without cutting the walkway out, since it's part of the cap. You'll need a few folks to help you lift it off and you can either hang it from the ceiling if you think your rafters can take it, or you can build a stand to set the cap on (I opted for the latter).
 

Twhjelmgren28

Petty Officer 3rd Class
Joined
May 31, 2016
Messages
85
No, he is saying to pull the entire boat cap. Remove the rub rail from the perimeter of the boat, then remove the screws/rivets holding the cap onto the hull, then lift off the cap. This will give you access to the area under the walkway without cutting the walkway out, since it's part of the cap. You'll need a few folks to help you lift it off and you can either hang it from the ceiling if you think your rafters can take it, or you can build a stand to set the cap on (I opted for the latter).
Ahhh! Got it. Didn't know that was a thing. Thanks for clarifying - I'm impressed that you can remove that as one piece.

I'll do some research and give it a go
 

todhunter

Canoeist
Joined
Sep 15, 2020
Messages
1,308
It's honestly way less of a hassle than it seems. We got a video of us putting the cap back on mine - you can see it here. I just separated the halves and slid some long 2x4's between them and lifted the cap off (with the help of some family and friends).

Just make sure you measure a bunch and support the hull if you pull the cap off - you don't want the hull to splay open or you'll have a really hard (impossible?) time getting it back on. Mine splayed open some, but I used ratchet straps to pull it back into shape before glassing in any new structure.
 

Scott Danforth

Grumpy Vintage Moderator still playing with boats
Staff member
Joined
Jul 23, 2011
Messages
49,540
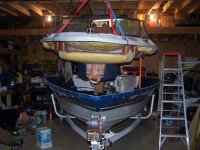
pull the whole cap

it will look like this

much much much much much less work than leaving the cap in place

below are pics of my re-assembly of a prior boat

100_0435.JPG100_0434.JPG
 

Scott Danforth

Grumpy Vintage Moderator still playing with boats
Staff member
Joined
Jul 23, 2011
Messages
49,540
BTW, did the whole job myself.

those are 1500# ratchet straps looped over the ceiling rafters.

it took me 2 hours to pull the cap in the first place (3 batteries in the cordless drill and a half hour looking for the screws in the carpeted front splash)
 

Twhjelmgren28

Petty Officer 3rd Class
Joined
May 31, 2016
Messages
85
BTW, did the whole job myself.

those are 1500# ratchet straps looped over the ceiling rafters.

it took me 2 hours to pull the cap in the first place (3 batteries in the cordless drill and a half hour looking for the screws in the carpeted front splash)

Apologies for the late response - I've been a bit sidetracked on boat stuff.

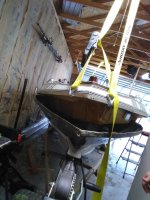
That picture is awesome! I'm going to pull the cap. I would really like to do it the way you did. My garage ceiling is open so it's exposed to the rafters.

Do you think the rafters would hold? I have prefabbed trusses - it's a newer garage and slightly larger than a typical 2-car garage. How heavy is a 16.5' fiberglass cap?
 
Last edited:
Scott Danforth

Grumpy Vintage Moderator still playing with boats
Staff member
Joined
Jul 23, 2011
Messages
49,540
Apologies for the late response - I've been a bit sidetracked on boat stuff.

That picture is awesome! I'm going to pull the cap. I would really like to do it the way you did. My garage ceiling is open so it's exposed to the rafters.

Do you think the rafters would hold? I have prefabbed trusses - it's a newer garage and slightly larger than a typical 2-car garage. How heavy is a 16.5' fiberglass cap?
your cap is probably 400# total, most of the weight in the front

your going to be fine
 

Twhjelmgren28

Petty Officer 3rd Class
Joined
May 31, 2016
Messages
85
BTW, did the whole job myself.

those are 1500# ratchet straps looped over the ceiling rafters.

it took me 2 hours to pull the cap in the first place (3 batteries in the cordless drill and a half hour looking for the screws in the carpeted front splash)
Follow up question. I've got the cap loose-ish and now I'm trying to get it up off the lower half fully and I'm struggling. Did you get the cap up that high with a hoist and then put the straps on?

I've basically got the very tip of the bow up over the bottom half:

16325951686903318800672901531607.jpg


And I've got the stern mostly off:

16325952539305472029820241778441.jpg


I don't have a hoist - I've managed this much with a floor jack.
 

Twhjelmgren28

Petty Officer 3rd Class
Joined
May 31, 2016
Messages
85
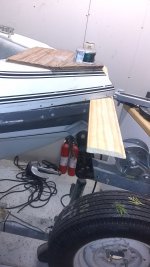
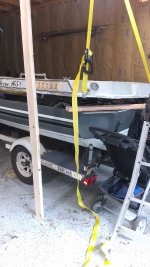
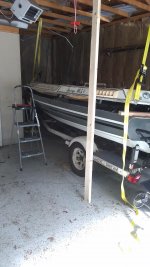
Thanks for the help! I got it popped off yesterday. Now I'm just working on taking pictures and marking all the wiring before I get the cap lifted further up and remove the engine. Here are some pictures:

IMG_20210926_110036218.jpg

IMG_20210926_105953849.jpg

IMG_20210926_134405990.jpg


As you can see, I decided to spend $5 for piece of mind and brace the rafters with 2x4's on the joists that are actually strapped. The rafters didn't even move while I was lifting the cap.

Straps are 27' and rated at 3,333 lbs. Only $10 per strap at Home Depot if anyone is looking for some.
 

Twhjelmgren28

Petty Officer 3rd Class
Joined
May 31, 2016
Messages
85
Well...It's been over a year since my last post. Haven't had much time for boat stuff - my second son was born in February so I've been pretty busy.

Thought it was time for an update b/c I actually did something! And...now that I'm back at it, I'm sure I'll have additional questions so an update is warranted.

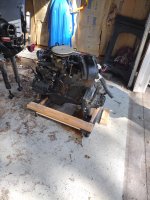
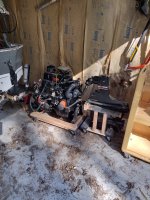
I got the engine lifted out - I was amazed at how easy it was. I've had it prepped to be removed since last fall so glad to finally get it out. I of course labeled and took tons of pictures of everything as I removed it from the engine. Here are a couple of pics:

IMG_20221008_142428048.jpg

IMG_20221008_145416223_HDR.jpg
 

JASinIL2006

Vice Admiral
Joined
Feb 10, 2012
Messages
5,673
Congrats on the new(ish) addition to your family and on getting back to your boat. I've had small ones at home, and I've done a boat restoration, but I'm not sure I could have managed both at the same time!
 

Twhjelmgren28

Petty Officer 3rd Class
Joined
May 31, 2016
Messages
85
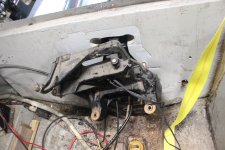
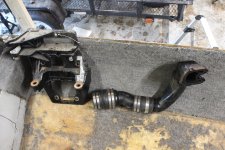
Small update on the world's slowest boat restoration: I got the transom plate off and am about to remove the gimbal housing. In the first photo, you can see some of the soft wood on the lower right-hand side of the transom where I can basically stick my finger in an inch or two.

Next up begins the true demo work.

I've been generally following friscoboater's guide to a restoration but I'm wondering if there is a better way to remove the transom wood. He mainly went at it with a prybar and a hammer - taking bits at a time. I'm cool with going that route but wanted to verify if there were any easier ways to go about this...

IMG_5803.JPG

IMG_5809.JPG
 

JASinIL2006

Vice Admiral
Joined
Feb 10, 2012
Messages
5,673
I set my circular saw to cut 1 3/4” deep and made criss-cross cuts about 2” apart all over the transom. After that, a hammer and prybar popped out the wood pieces and a grinder was used to get down to fiberglass. That was one of the least enjoyable parts of the resto.
 
Top