'85 Sierra 16.5' Fiberglass - Floor / Transom / New Layout

froggy1150

Master Chief Petty Officer
Joined
Nov 3, 2017
Messages
843
My build took 5.5 years.....
And counting but it has been splashed and i have been trying to get it to run reliably. I have taken it out about 6 times. Still have some stuff in the interior to finish.
It's all about progress and don't get discouraged because once done the satisfaction is worth it
 

Twhjelmgren28

Petty Officer 3rd Class
Joined
May 31, 2016
Messages
85
The circular saw criss-cross is a brilliant idea to make it a little easier. I thought about using my reciprocating saw / sawzall with a long blade to just get the front half of the wood out and then go at the rest with a pry bar. Though sawzall can be a little unwieldy at times...

Thanks for the encouragement froggy! It's amazing how time flies with little kids - it feels almost impossible to get any sort of project done. Good to know the boat project is worth the wait and hard work, however!
 

Twhjelmgren28

Petty Officer 3rd Class
Joined
May 31, 2016
Messages
85
Very quick update since it's been a while. I'm still slowly progressing. The transom has been removed - that was a fairly tough process as you guys warned. I noticed that there are 2 additional structural areas on the back corners (one behind the gas tank) so I plan on removing the fiberglass / wood from those areas as well.

Any recommendations on gas tank removal? It's a squar-ish steel tank but it looks like there is some fiberglass along the bottom sides of it...do I just jimmy it out of there? Also, recommendations for getting old gas out? I haven't always been successful using a siphon.
 

mickyryan

Rear Admiral
Joined
Apr 18, 2016
Messages
4,214
flip the cap before you are done and redo the bedding in the cap where the cleats are especially and the small pieces where ya step and stuff its well worth it once you are this far in :)
 

Twhjelmgren28

Petty Officer 3rd Class
Joined
May 31, 2016
Messages
85
Here's a short photo dump. I haven't been completely idle, haha! Hopefully you guys like seeing pictures because it's keeping me motivated between long periods of not working on the boat.

Gimbal housing and transom plate removed:
IMG_20230810_183839214.jpg


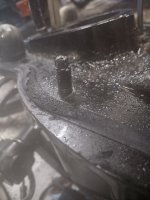
A bolt decided to rust itself (hard) into the gimbal housing. I tried multiple extraction methods and tons of penetrating lube:
IMG_20230822_194219216_HDR.jpg


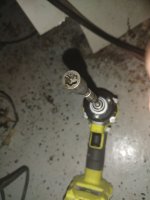
Finally got it out with this extraction tool (and much much more penetrating lube):
IMG_20230822_194622295.jpg


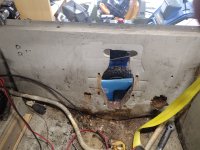
Next, I started to dig into the transom. Here's a before shot of the transom and some of the rot:
IMG_5867.JPG
 

Twhjelmgren28

Petty Officer 3rd Class
Joined
May 31, 2016
Messages
85
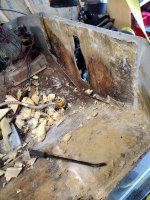
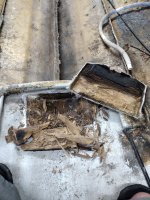
Here's an after picture with the transom wood removed. You guys were not kidding, I really didn't think it would be as bad as you all warned me but it was much worse! I slowed way down during this part of the project - Not fun:
IMG_20240714_101539017.jpg


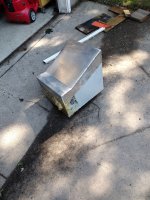
Here's a shot of the gas tank removed. If anyone needs a recommendation on a siphon, this guy from Harbor Freight was awesome - https://www.harborfreight.com/multi-use-transfer-pump-63144.html - I've never had luck with siphons in the past. This time, I tried the old fashioned method and one little drop of gas in my mouth was enough! I ran to Harbor Freight and picked up that siphon linked and it worked flawlessly:
IMG_20240714_101524020.jpg


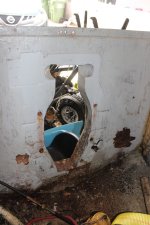
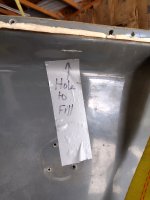
Then I made an oops and cut through the hull with my oscillating tool. What happened is I thought the 45 degree-ish corners at the back of the boat were also reinforced with wood (like the transom). So I decided I was going to take that wood out too, but the entire time I was looking at those corners from inside the boat and didn't realize they were just molded fiberglass that swelled inward. Of course I cut through the hull before I realized my mistake. Oh well - at least it was less fiberglassed wood to take out.
IMG_20240714_161256709.jpg
 
Last edited:

Twhjelmgren28

Petty Officer 3rd Class
Joined
May 31, 2016
Messages
85
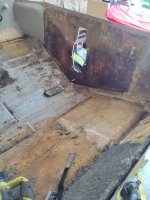
This morning, I went back in and cleaned up the as much fiberglass as I had time for. The oscillating saw has been a lifesaver for taking out thinner layers of non-structural fiberglass. Here's some shots of it cleaned up.
IMG_20240714_161310740.jpg

IMG_20240714_161324946.jpg


As you can see, I'm down to taking out the remaining motor mounting structures and stringers prior to finishing off the demolition. I'm taking tons of pictures of everything including a lot of measurements of sizes and location of the structures.

Once I get some of this stuff out, I'm definitely going to have a lot of questions on how to sand / prep the old fiberglass before I even think about the rebuilding process.
 

todhunter

Canoeist
Joined
Sep 15, 2020
Messages
1,308
Nice progress. For surface prep, you're going to want to use 40-grit flap discs on an angle grinder. Wear PPE (tyvek suit, gloves, glasses, and respirator) and either do the grinding outside or build a tent around your boat to contain the mess, because there is going to be a lot of fiberglass dust. Here are the discs I used. Brace yourself for the least fun part of fiberglass boat restoration.
 

Twhjelmgren28

Petty Officer 3rd Class
Joined
May 31, 2016
Messages
85
Nice progress. For surface prep, you're going to want to use 40-grit flap discs on an angle grinder. Wear PPE (tyvek suit, gloves, glasses, and respirator) and either do the grinding outside or build a tent around your boat to contain the mess, because there is going to be a lot of fiberglass dust. Here are the discs I used. Brace yourself for the least fun part of fiberglass boat restoration.

Thanks for the heads-up! What is the goal with surface prep? Obviously I will get the remaining wood out of there and get the entire surface flat. What else is my aim with that?
 

Scott Danforth

Grumpy Vintage Moderator still playing with boats
Staff member
Joined
Jul 23, 2011
Messages
49,538
Thanks for the heads-up! What is the goal with surface prep? Obviously I will get the remaining wood out of there and get the entire surface flat. What else is my aim with that?
To give the new fiberglass something to mechanically bond to while removing all the coatings/contaminants to get to good solid glass. nothing finer than 40 grit. I normally use 24 grit if I am bonding anything to it.

as compared to surface prep for spraying gel. that is between 40 and 80 grit. nothing coarser than 40, nothing finer than 80
 

froggy1150

Master Chief Petty Officer
Joined
Nov 3, 2017
Messages
843
I did a "pre sand" with 80 grit to remove surface junk. Wash with acetone to remove contaminates so you don't grind them in deeper. Then get to the "pink" with a coarse grit. Wash with acetone again. I did a final touch with 16 grit but that's a bit overkill.
When you start to lay glass with polyester use csm first and lay wet on wet with fabric. The csm hairs get tangled into the "tooth" that was put there with the grinding and lock it in
 

Twhjelmgren28

Petty Officer 3rd Class
Joined
May 31, 2016
Messages
85
Appreciate all of the replies. I haven't looked in the forum yet so I'll do a search soon but are there any recommended guides to follow? Like I mentioned earlier in the thread, I'm mainly following friscoboater's guide. I'm just looking for something a little deeper when it comes to prep, and fiberglassing - mainly everything you guys are responding with right now.
 

Twhjelmgren28

Petty Officer 3rd Class
Joined
May 31, 2016
Messages
85

Scott Danforth

Grumpy Vintage Moderator still playing with boats
Staff member
Joined
Jul 23, 2011
Messages
49,538
I used the 24 and 36 grit discs from general junk er... I mean harbor freight

The flap wheels tend to work better on steel

I also have tried 4.5" carbide saw blades in the angle grinder.....I do not recommend that.......
 

froggy1150

Master Chief Petty Officer
Joined
Nov 3, 2017
Messages
843
I also used fiber disks with a backing plate.
I have taken a few hits with an angle grinder and I don't think I would ever use a carbide saw blade. I am pretty ballsy but those things will cut off body parts before you can blink
 

Twhjelmgren28

Petty Officer 3rd Class
Joined
May 31, 2016
Messages
85
I used the 24 and 36 grit discs from general junk er... I mean harbor freight

The flap wheels tend to work better on steel

I also have tried 4.5" carbide saw blades in the angle grinder.....I do not recommend that.......
I also used fiber disks with a backing plate.
I have taken a few hits with an angle grinder and I don't think I would ever use a carbide saw blade. I am pretty ballsy but those things will cut off body parts before you can blink

I didn't even know they made carbide saw blades for angle grinders - I don't think I'd trust myself with those either!

Got the motor mounts out - the aft one is rotting:
IMG_20240716_183013293.jpg


But the fore-one is almost completely gone other than that section of jet black wood:
IMG_20240716_183558594.jpg


Basically down to stringer removal, the very front of the floor and some of the skin flaps that are protruding:IMG_20240716_184549578.jpg

Then it's on to grinding :-(
 

Scott Danforth

Grumpy Vintage Moderator still playing with boats
Staff member
Joined
Jul 23, 2011
Messages
49,538
I didn't even know they made carbide saw blades for angle grinders - I don't think I'd trust myself with those either!
they are the same size as a cut-off wheel. so they fit......

I have also chucked up a 7-1/4" carbide in the angle grinder, then mounted the grinder to the bench to make a table saw when my table saw died and I needed to rip some plywood.
 

Twhjelmgren28

Petty Officer 3rd Class
Joined
May 31, 2016
Messages
85
Alright, stringer and carpeting is out! I also cut out some of the lips that were still protruding from earlier demo. Here is what it currently looks like (although this picture is prior to carpet removal):
IMG_20240719_112245887.jpg


My plan is to work on getting the carpet glue and remnants out with MEK. Figured I could work on that in the evenings after work (although it's been raining so far this week). Then I have no more excuses but to get grinding. How far up the side of the hull should I grind? I'm thinking about 4 inches so I'm able to tab the floor to the hull (not sure if that's the correct terminology or not).
 

Scott Danforth

Grumpy Vintage Moderator still playing with boats
Staff member
Joined
Jul 23, 2011
Messages
49,538
skip the MEK..... go straight to grinding. figure 4-6" past every seam for tabbing...... then grind about another 4" further than you think
 

Twhjelmgren28

Petty Officer 3rd Class
Joined
May 31, 2016
Messages
85
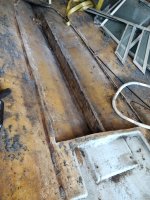
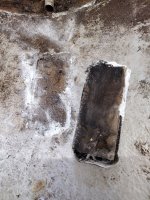
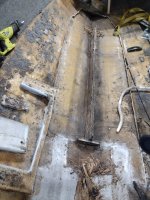
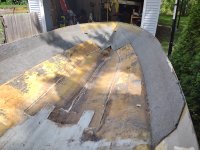
I've been rolling with the grinding. I'm about 8 hours in and have a lot to do yet. I'm back to the age-old question: How far do I grind?

Here is a couple pictures from each end of the boat:


I have specific questions about the following 3 areas - In the first, it looks like I've ground to some fabric - not sure if that's the fiberglass mat or something else? Do I need to grind through that in that section of the boat?


The next area, I think I just ground through 1 layer, down to the next. Again, should I do that for the entire section of the boat or is that just an area I should build back up when fiberglassing?


My final question relates to the transom. I've ground quite a ways through the transom already and I'm still coming across some of these smaller voids (??) - In other words, I'm still not smooth to a singl layer but I don't want to grind all the way to the gel coat. I've already taken quite a bit off (though I still have about 8mm of thickness or so).


***Note: The above-images were posted through Imgur since the server is still having issues. Let me know if you can't see them.

I will undoubtedly have more questions as I continue the grinding process and all help is appreciated!
 
Last edited:
Top