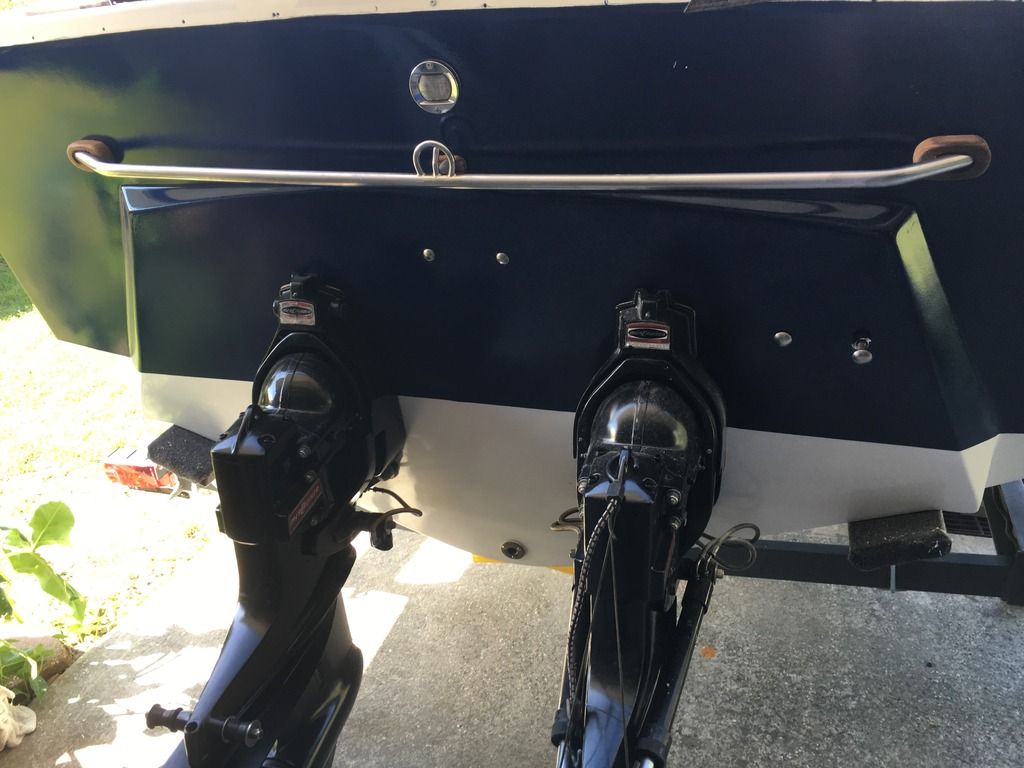
72 Thunderbird Formula w/twin 165hp Mercs

Mark72233

Ensign
Joined
Jul 11, 2014
Messages
926
Got a few things done this weekend.

All the cleats are in, fuel vent and hose, fuel fill and hose. 2 pieces of teak trim on the front deck. The bow rail. And some teak wood stripes I bought on eBay.


Mark72233

Ensign
Joined
Jul 11, 2014
Messages
926
I also pulled the windshield out of the back yard and cleaned and inspected them. They are broken down into 4 pieces. One part of the starboard aluminum window frame is broken so I will need to find someone to weld that. All of the weather striping is dry rotted so that will need to be replaced. I also need to find replacement bolts for the bolts that run under the windshield that attach the window to the cap. They look brass and have a flat rectangle head that slides into a channel at the bottom. And forgot I also installed the glove box.
 
G

Guest

Guest
Looking Great Mark!

Couple questions - Are you going to install a transom platform with the presence of the grab rail at the transom?

What is that at the bow stem below the waterline, Is that one of those "keel-guards" for beaching?

Love the teak bits on the fantail,

Mind those collapsible stern cleats, they can get a little arrogant with age and some salt build up.
 

Mark72233

Ensign
Joined
Jul 11, 2014
Messages
926
Working on getting the list done. I tried highlighting things I have done but it didn't work so I will just put Done at the start of each one that has been done.
Here are things I have gotten done and additions to the list.

  1. Finish sanding and polishing the rest of the rub rails and attach them using the through bolts and 3M 5200 on the seam between the hull & cap
  2. (Done) Clean up the bow rails and associated hardware and attach to the cap again sealing them with 5200
  3. Clean the aluminum on the windshield and replace the old weather stripping and possibly some hardware for the small flip up windows at the base of the windshield.
  4. (Done) Install the 8 rod holders & 6 cleats
  5. (Done) Install the anchor hatch, the fish cooler hatch and a small hatch on the floor of the cabin
  6. Install both chairs
  7. Install the bow navigation lights (also run wires) and anchor line bow chock cleats and the bow anchor roller
  8. Replace a sheet of plywood up in the bow that will need to be cut to bow curve shape, coated in resin and fiberglass into place. Thinking of making small storage boxes in this piece that can be used for storage up in the cabin. This is the wall that separates the anchor line storage from the cuddy cabin.
  9. Finish cleaning all the old glue and blue indoor carpet fur from the ceiling of the cabin. Haven't decided how I am going to finish it yet, probably some type of carpet.
  10. (Done) Install the glove box and 5 cup holders
  11. Install all the gauges in the console & steering parts before installing the console back in the boat.
  12. Install the throttles and trim switches and switches into the console and trim switch wires back to the engine bay
  13. (Done) Attach the fuel fill hose and vent hose and ground wire
  14. Run throttle and shift cables
  15. Run the main engine wires from the front to the engine bay
  16. Run the battery wires from the battery box back to the engine bay and up to the console
  17. Finish making and then painting the step/storage box I made that is at the foot of the co-captains chair
  18. Getting some older chrome pieces chromed
  19. Attaching the anchor light to the windshield and running wire
  20. Attach the 2 cigarette/USB plugs in the cabin and run wires
  21. Fix the damaged fiberglass and plywood on the engine dog box and paint it. Also attach a layer of sound insulation inside the dog box and fiberglass over it.
  22. Repair and paint a large panel that sits in the rear of the boat that covers the areas right and left of the engine box. A trim piece.
  23. Fix the teak louvered cabin door and along with all the rest of the teak wood that survived get them all cleaned up and attached
  24. Fix the metal trim on the fiberglass cabin hatch and paint it.
  25. Run and attach all the wiring, fuse blocks and battery switches
  26. Make a fiberglass box that will contain the bottom machine that will attach to the top of the console and run all the associated wires
  27. Buy and attach a decent compass
  28. Buy and install a radio, cd player and speakers
  29. Reupholster the cabin and dog box cushions
  30. Attach the new Bimini top
  31. Put down the deck cover tiles I bought
  32. Buy and install windshield wiper motor and wiring
  33. And a dozen other things I haven't thought of yet
  34. Get trailer tag updated and the new boat registration
  35. (Added) Fix and paint the sliding cabin entry hatch
  36. (Added) Get the broken window frame welded
  37. (Added) Rebuild the swim platform and install same. The wood core of the large swim platform I bought was rotted so I cut the bottom layer of fiberglass off and cleaned out the core. Now I need to cut a new plywood core, PB it in and seal it with fiberglass than paint the platform and clean up the teak inserts.
 

Mark72233

Ensign
Joined
Jul 11, 2014
Messages
926
CaptErich, thanks for the compliments. Yes I bought a large fiberglass swim platform with teak inserts about 18 months ago. A few months back I finally started working on it and figured out the plywood core was waterlogged and rotting which is why it weighed 110lbs. So I cut the rivets holding the rub rail on the platform which I think I might reuse. I cut the bottom layer of fiberglass off and took out all the wood core. I should be able to replace the core and seal it all back up with fiberglass and paint it. I have put that on the back burner for now.

Yes that is a Keel Guard which is 8 feet long and should help with preventing the keel from being scratched up when I beach her on Shell Island which is a local island here in Panama City that is 7 miles long and a good spot to relax and enjoy a beer and family fun.


I love teak and this boat had a lot of bits and pieces of teak from the factory. Most of it survived and still needs to be cleaned up and put back on.

These collapsible cleats are actually pretty durable. My dad bought them from a boat manufacture (Century Boats) locally that closed down back about 1989 and I put the rear cleats on the boat back in 1990 and they still look brand new and function as designed. They are pretty heavy duty. I would agree with you on something like this that is exposed to salt water and heavy use but these things have held up nicely so I didn't hesitant to put them back on the boat.
 

alldodge

Moderator
Staff member
Joined
Mar 8, 2009
Messages
42,075
Moving in the right direction, 5 done and 3 added. Hope the done continues to exceed the add's
 

Mark72233

Ensign
Joined
Jul 11, 2014
Messages
926
I have been cleaning up the windshield and I need to find replacement bolts for the ones that are at the base of the windshield. These bolts are 1/4 inch by 1 3/4 inch long what I would call "T" bolts that slide along a "T" track at the bottom of the windshield, they look like they are made of brass or bronze. Whatever they are made of interacted poorly with the aluminum frame during the last 43 years because the aluminum corroded badly where it made contact with the bolts and the bolts snapped. Of the 14 or so bolts only one survived in one piece. I have looked for these things on the internet but cant really find any that match these. I have contacted the company that made the windshield, Water Bonnet via email but haven't heard back from them yet.


wilkboater

Petty Officer 3rd Class
Joined
Jun 19, 2009
Messages
95
Kind of a weird thought, but they look like the brass bolts that hold a toilet to the flange. Not sure on the measurements, but they look close....
 

Mark72233

Ensign
Joined
Jul 11, 2014
Messages
926
Actually wilk not so weird that is exactly what they look like except the toilet bowl bolts look a little slimmer. I just got back from the hardware stores and local bolt store (Fastenal) and looked at them and they may work if I cant find anything else.
 

nurseman

Lieutenant Junior Grade
Joined
Jun 2, 2013
Messages
1,045
How about some SS stove bolts ground flat on the sides so that they slide into the channel? Just a thought...
 

Mark72233

Ensign
Joined
Jul 11, 2014
Messages
926
Yep, I bought one at Fastenal to take home and do just that. I will let you know if it works.
 

kcassells

Fleet Admiral
Joined
Oct 16, 2012
Messages
8,721
Marc,
They make a heavier flange bolt/washer, a little larger. Has the same head as you show
Also tank to bowl nuts/bolts are thicker and made of brass. They also come with washers that you can trim to fit to stop what is called for lack of another word "galvanic reaction." Round head but it's brass and can be ground to fit.
 

Mark72233

Ensign
Joined
Jul 11, 2014
Messages
926
kc, which hardware store has those bolts? And yes come to think of it if I remember correctly the metal washers had a rubber like washer on both sides of it.
 

mr300z87

Senior Chief Petty Officer
Joined
Sep 15, 2010
Messages
694
Good see forward progress, wish I could say them same for my project. Have you looked at McMaster Carr web site for the windshield bolts. Their warehouse is close to my home but they do mostly mail order, and they have every type of fastener imaginable. I have been buying ss hardware from them for the last few years.
 

kcassells

Fleet Admiral
Joined
Oct 16, 2012
Messages
8,721
kc, which hardware store has those bolts? And yes come to think of it if I remember correctly the metal washers had a rubber like washer on both sides of it.


Any plumbing supply house will have all the above for sure. Big box and local hardware stores in general might have the larger closet bolts and will definitely have the tank to bowl nuts with washers.
Looking Good there mark!
 

Mark72233

Ensign
Joined
Jul 11, 2014
Messages
926
Went to HD and sure enough the 1/4 toilet bowl bolts work just fine. They are a bit longer and will stick down into the cabin but I will just cut them off flush after I install the window.
 

kcassells

Fleet Admiral
Joined
Oct 16, 2012
Messages
8,721
Mark,
On the bolt you will see that little "Non-threaded" spot. Thats for a snap off. Usually you can snap it off with a little cut of a sazsall or cheese saw to break it off there. But you can always cut it to length after it's installed.
 
Top