69 Evinrude How to replace coils,condensers,plugs, points and adjust carb

cajuncook1

Chief Petty Officer
Joined
Sep 3, 2009
Messages
559
Re: 69 Evinrude How to replace coils,condensers,plugs ,and points

Re: 69 Evinrude How to replace coils,condensers,plugs ,and points

ccvolsdhf,

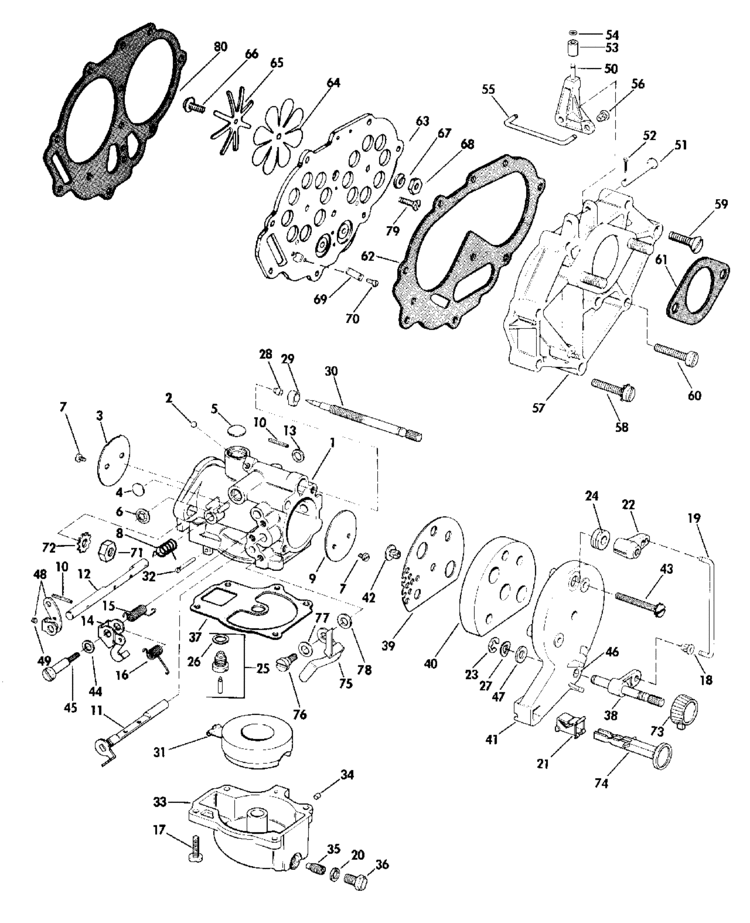
Couple of suggestions about your carburetor. Here is a diagram to reference to:

- Please don't rely on the previous owners statement that they did a carburetor cleaning( That usually implies that they squirted some carburetor cleaner in the carburetor and called it good.)

- Please get a carburetor kit and do a proper job, so you know that it has been done and correctly.

- Look at parts ( in the diagram ) part # 5 (core plug/welch plug) part# 28 (needle bearing valve) part# 29 (needle valve retainer). Those parts need to be replaced. A lot of times people omit part#5 and part#28.

The only way to properly clean the carburetor is to remove part#5 (core plug/welch plug) and make sure it does not have junk in there. This can affect your engine running and idling at low speeds. *** Also part#28 is either not removed and gets soaked in carburetor cleaner and get distorted and causes a flow/obstruction issue preventing proper idling at low and idle speeds. (So when you remove the core plug and slow needle valve make sure the needle bearing valve and needle valve retainer is removed and replaced after you complete a carburetor soak and cleaning.) Use the new parts in the kit.
39896.gif


I assume you have a new carburetor kit and you have clean the carburetor, blown all the passages with air. This also includes the expansion/welch plug.


- remove the core/expansion plug (item #5) to make sure that the mixing chamber was free and the three little at it's base was clear and clean. (This step is the one people forget or don't think about and it bites you in the butt sometimes.)

- Blow all the passages with compressed air after the carburetor dip?


Here is a procedure for removing the expansion/core plug for cleaning.


Nonremoval of that core or expansion plug to do a complete carburetor cleaning is probably the one issue that plagues a lot of us. It is also a source of frustration because the trash and goo that is in that pocket can't always be cleaned with carb clean or blown out. In the future if when you get a carburetor kit and do a complete carburetor cleaning, always remove the core or expansion plug and replace with a new plug.

I am going to supply some diagrams for better explanation.


Be very careful if you put the carburetor body in a vise, so you don't damage the linkages or body with the vise.

You can use a punch or a drill to [highlight]carefully[/highlight] puncture a hole so you can remove the core plug. I have used a machine screw to puncture the core plug and used a pair of piers grasp the screw head and pop the core plug out, but be very careful not to go too deep with the drill, punch or screw. You don't want damage the chamber.

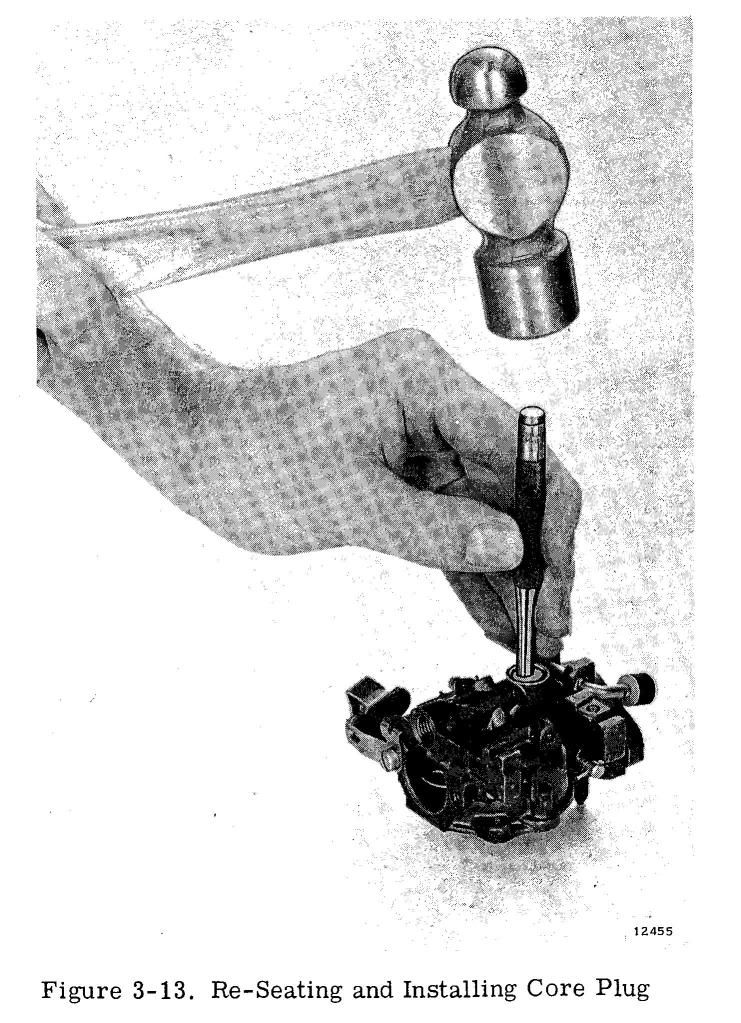
Once you have carefully cleaned the chamber, the little holes at the bottom and the needle passage to the mixing chamber then apply the core plug with the convext side up (the rounded side facing the sky).

[highlight]Try not to use wire to scrub out the holes or the needle passage way to the mixing chamber are you could damage or widen the hole and cause mixing problems. Spray carb cleaner or compressed air.[/highlight]

If you do not have a air compressor, then walmart sells compressed air cans with the straws that can be used. $3 or $4 dollars(you have seen the cans of compressed air that we use to clean are computer keyboards and equipment).[highlight]Also remember to disassemble your carb of all plastic and gaskets prior to using carburetor cleaner or dip( that stuff eats gaskets and plastic)[/highlight]. Blow it all out with compressed air.


Then take a wide punch or a 3/8 or 1/2 extension from a socket set (it has a wide flat base) and carefully tap(with a hammer and wide punch or extension piece) the core plug replacement in place. The convex (rounded portion) should be somewhat flat when done.
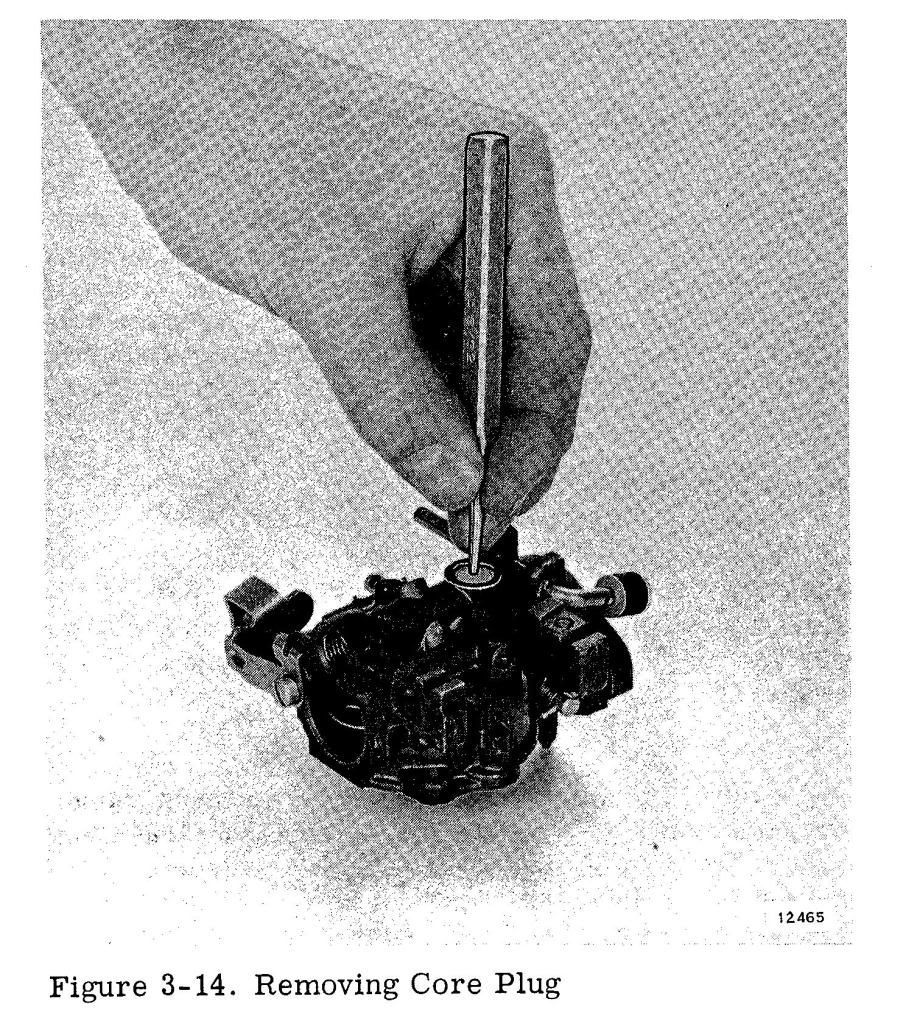
removalofcoreplugorexpansionplug.jpg


seatinganewcoreorexpansionplug.jpg


Well, that's how I do it, maybe someone will have other methods.


[highlight]Make sure these are your beginning carburetor settings:[/highlight]

These are going to be the initial settings for the carburetor for starting purposes. Your will later fine tune the settings.

Facing the carburetor you will notice slow speed and idle knob.

- Top needle is your slow idle needle. You will gently turn in (clockwise) until the needle is gently seated..please don't force. Once seated, you will turn out (counter clockwise) the slow idle needle 1 1/2 turns. Leave it there for the time being.

- You do not have a high speed needle. You have fix high speed jet. Please, after soaking the carburetor, blow this jet (part# 35 in the diagram) out with compress air.


(Carburetor Adjustment - Single S/S Adjustable Needle Valve)
(J. Reeves)

Initial setting is: Slow speed = seat gently(turn in clockwise), then open 1-1/2 turns(turn out counter clockwise). Do not tighten or force the slow idle needle shut or it may damage the needle.

Start engine and set the rpms to where it just stays running. In segments of 1/8 turns, start to turn the S/S needle valve in (clockwise). Wait a few seconds (10 to 15 sec) for the engine to respond. As you turn the valve in(clockwise), the rpms will increase. Lower the rpms again (turn your throttle slightly slower) to where the engine will just stay running.

Eventually you'll hit the point where the engine wants to die out or it will spit back (sounds like a mild backfire). At that point, back out(turn out counter clockwise) the valve 1/4 turn. Within that 1/4 turn, you'll find the smoothest slow speed setting.

When you have finished the above adjustment, you will have no reason to move them again unless the carburetor fouls/gums up from sitting, in which case you would be required to remove, clean, and rebuild the carburetor anyway.


Couple of things you can try if you are still having some running or idling issues after you completed your carburetor cleaning and kit.


1.) Check to make sure your fuel hose from your tank is in good shape as well as your fuel connectors, so it does not allow air to enter and cause fuel displacement and poor fuel delivery. Also check the fuel hoses from the motors fuel connector to the fuel pump and the fuel hose from the fuel pump to the carburetor.

2.) Remove the fuel pump adjustable cover and make sure the little screen is not clogged up with trash or gummed up fuel. This can cause poor fuel delivery.

3.) Make sure your bulb and connector is connected closest to your tank with the arrow pointing to motor as the direction of the fuel flow.

4.) Make sure the fuel cap air vent is open. If closed it will not allow the fuel pump to properly siphon fuel because of the increase negative pressure in the tank.


*** If you are testing this motor in barrel, then take the cover off and put a fan blowing next to it, so the motor does not inhale its own exhaust.

6.) Make sure you have fresh mix of gas 87 octane and twc-3 2cycle oil mixed at a ratio of 50:1. Old fuel mix in tank can accumulate water and cause very poor running indeed.


I hope this helps you out. In the secret file link, there is a description how to properly set your float for your carburetor.

Good luck!
 

ccvolsdhf

Petty Officer 1st Class
Joined
Jan 4, 2012
Messages
214
Re: 69 Evinrude How to replace coils,condensers,plugs ,and points

Re: 69 Evinrude How to replace coils,condensers,plugs ,and points

i have my popcorn ready....now on to the back flip please :)

lol... :d
 

ccvolsdhf

Petty Officer 1st Class
Joined
Jan 4, 2012
Messages
214
Re: 69 Evinrude How to replace coils,condensers,plugs ,and points

Re: 69 Evinrude How to replace coils,condensers,plugs ,and points

Thanks cajun
That was great having the diagram there, and using the part #'s make's sure no matter if I've ever heard of a part or not. I know exactly what your talking about. I'm pretty sure the whole setup has been out of adjustment. I'm going to set the S/S needle, and roller cam, get a kill switch and adjust the Idle control on the tiller handle. Hopefully that'll straighten her out. With a carb rebuild being in the near future. If it doesn't run right after the adjustments the carb rebuild will be in the vary near future. I want to rebuild the carb after working on just the few parts I have the past few days, and looking at the diagram. It doesn't look as hard as I once thought it would be. I want to be able to completely rebuild these old motors so I carb rebuild or two is definitely in the cards. Thanks for your help
 

ccvolsdhf

Petty Officer 1st Class
Joined
Jan 4, 2012
Messages
214
Re: 69 Evinrude How to replace coils,condensers,plugs ,and points

Re: 69 Evinrude How to replace coils,condensers,plugs ,and points

OK guys how bout part# 73. the low speed needle adjustment knob. It has Numbers 1 thru 7 on it. As KFA explained the rpms should go up when twist in the S/S needle is because by twisting in the needle you are restricting the flow of fuel into the combustion chamber (i.e. "leaning" out the mix)which decreases the amount of fuel being combusted, and consequently increases the relative amount of air/oxygen. as a result, the combustion is hotter and therefore faster than it was before. This is the first Info I've read on leaner fuel air mix and what not. So basically that is all I know about it. I played with it on the water, but really not knowing what I was doing. Thanks to KFA I now understand turning the knob to the right screws the S/S needle in giving less fuel and more air (Leaner) and that burns hotter, And Apparently runs better at low speed Idle. So turning it all the way left allows more gas compared to air so that would be (Rich) and run better at WOT. So can you guys school me on this knob, Is what I posted right ,and what other instances/circumstances would I use this adjustment knob...Thanks
 

cajuncook1

Chief Petty Officer
Joined
Sep 3, 2009
Messages
559
Re: 69 Evinrude How to replace coils,condensers,plugs ,and points

Re: 69 Evinrude How to replace coils,condensers,plugs ,and points

Buddy,

The slow speed/idle needle is only for adjusting flow at idle and low speeds. After you set it, you should not have mess with it any more unless you accidentally move it or you have clean your carburetor. The instructions I supplied that was quoted from J. Reeves is the best information for setting your carburetor. Been very careful not to set the low speed needle too lean are you can lean out your fuel oil mix too much and your motor will not get sufficient oil.


Your carburetor does not have a high speed needle, instead it has a fix jet located at the base of the carburetor bowl(part# 35). No adjustment there just clean it and blow compressed air through it.


Here is a link to a you tube video that will show a Evinrude/Johnson carburetor being cleaned. This carburetor is very similar, but instead of a fix jet orifice, it has a high speed needle. Cleaning, inspection, and setting the float and adjusting the link and synch is very very similar. Watch the video/s and compare it to your manual diagrams and procedure. I think it was will give you a bit more understanding and comfort.

episode 19 (carburetor dis-assembly and cleaning)

http://www.youtube.com/watch?v=MwLrW51_uao&list=UUqtXoVOxjtEKjjTKj0cFydg&index=21&feature=plcp

episode 20 (carburetor dis-assembly and cleaning)

http://www.youtube.com/watch?v=GBsQ8rAYhOw&feature=mfu_in_order&list=UL

episode 21
(carburetor dis-assembly and cleaning)

http://www.youtube.com/watch?v=Z8199RDZt5k&feature=BFa&list=ULGBsQ8rAYhOw&lf=mfu_in_order

episode 22 (carburetor dis-assembly and cleaning)

http://www.youtube.com/watch?v=4BKbY0pVmiQ&feature=BFa&list=ULZ8199RDZt5k&lf=mfu_in_order

episode 23 (carburetor dis-assembly and cleaning)

http://www.youtube.com/watch?v=PA4KG8_XysQ&feature=BFa&list=UL4BKbY0pVmiQ&lf=mfu_in_order

episode 24 (carburetor dis-assembly and cleaning)

http://www.youtube.com/watch?v=RgNy5RZrFGc&feature=BFa&list=UL4mvM-EYtBj0&lf=mfu_in_order

episode 25
(carburetor dis-assembly and cleaning)

http://www.youtube.com/watch?v=4mvM-EYtBj0&feature=BFa&list=ULRgNy5RZrFGc&lf=mfu_in_order

episode 26 (carburetor dis-assembly and cleaning)

http://www.youtube.com/watch?v=uIUo17JR6VA&feature=BFa&list=ULRgNy5RZrFGc&lf=mfu_in_order

episode 27

http://www.youtube.com/watch?v=R38ji2kKsLA&feature=BFa&list=ULuIUo17JR6VA&lf=mfu_in_order

episode 28

http://www.youtube.com/watch?v=ad1g9bpuamw&feature=BFa&list=ULR38ji2kKsLA&lf=mfu_in_order


Again, this is not your exact motor(the carburetor is a representative of motors in the mid 1950's and 1960's). Very very similar to yours. Watch all the videos list and it will make sense and good reference to your motor. Promise.

Good luck
 

ccvolsdhf

Petty Officer 1st Class
Joined
Jan 4, 2012
Messages
214
Re: 69 Evinrude How to replace coils,condensers,plugs ,and points

Re: 69 Evinrude How to replace coils,condensers,plugs ,and points

OK Yeah that makes sense The slow speed/idle needle is only for adjusting flow at idle and low speeds. It does say SLOW speed needle. I'm obviously a little slow sometimes too :). So is the is this knob #73 Maybe just a for final adjustment on the water. Thanks for the links
 

lindy46

Captain
Joined
Nov 27, 2008
Messages
3,886
Re: 69 Evinrude How to replace coils,condensers,plugs ,and points

Re: 69 Evinrude How to replace coils,condensers,plugs ,and points

I usually adjust the carb on the water with the knobs off, or installed backwards so the stops don't interfere. Once the needles are fine tuned and the engine is running at optimum, then I re-install the knobs in the middle of their range.
 

kfa4303

Banned
Joined
Sep 17, 2010
Messages
6,094
Re: 69 Evinrude How to replace coils,condensers,plugs ,and points

Re: 69 Evinrude How to replace coils,condensers,plugs ,and points

Hi cc. From the diagram you supplied, knob (#73) is your slow speed needle/knob. You should use it to adjust you low/slow speed idle as mentioned in the previous posts. While you can certainly dial it in pretty close in a test tank, the lack of water causes rather low back pressure on the exhaust when compared to being on an open body of water. As a result, you may need to do a tiny bit of tweaking to the slow speed idle once your on the lake, but once it's dialed in, snug down the brass bushing such that the needle is firm, but can still be twisted a bit, if need be, then forget about it. You shouldn't really need to touch again for quite a while. Do check the needle bushing from time to time to see that it hasn't wiggled loose, but otherwise you should be good to go. I'm kind like lindy46 I guess, in that I install the plastic knob after I have the brass needle set, so that it looks nice and tidy, but that's just my OCD rearing it's ugly head :) Happy boating!
 

ccvolsdhf

Petty Officer 1st Class
Joined
Jan 4, 2012
Messages
214
Re: 69 Evinrude How to replace coils,condensers,plugs ,and points

Re: 69 Evinrude How to replace coils,condensers,plugs ,and points

Well CRAP!!!.. It appears I've regressed. I adjusted the roller so that the butterfly just starts to move on the marks, and is wide open with the throttle all the way open. Turned the low speed needle just till it started to stop me from turning . Then back out a turn and a 1/4. applied the choke. And nothing pulled it 40 times and couldn't get it to start

The spring that closes the choke plate is broke so I just held it down with my finger. I don't think that was the problem,but I don't know so I'm throwing out everything I can think of.

I twisted the throttle as far as it would go in neutral. I'm thinking before to get it to start it had to be almost to the same point at least past the marks, But before the butterfly was starting to open as soon as the roller started to touch the throttle cam. So could it be not opening enough now. In neutral the carb butterfly only opens about an 1/8 of an inch at full throttle.

I checked spark it was good.

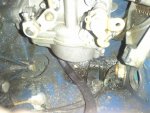
I checked gas it was good to the hookup past the fuel pump ,and all the way up the the carb. That is I unhooked the fuel line at all those points and squeezed the fuel bulb,and gas shot out. The only time I didn't see gas come out of the tubes is when I turned the throttle handle. I had the line unhooked from bottom of the carb and twisted the throttle and nothing came out. Should gas have came out by twisting the throttle. It seemed the bottom of the carb and underneath the carb was saturated with fuel

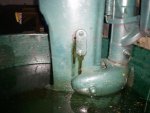
It also squeezed some oil or gas out the lower unit access panel. I hope this is not something bad.

Last night the S/S needle was really hard to turn in any direction. I screwing it in with pliers but never got to a point where it started to tighten. Knowing i wasn't ready for that part anyway I just left it where ever it was. Today it was alot easier to turn .I turned it by hand till just the last little bit. when the motor didn't start I turned it all the way out by hand ,and then almost all the way back in by hand .If I over tightened last night could that make it not start

LU cover plate.jpgunder carb.jpg
 

jbjennings

Captain
Joined
Jul 18, 2007
Messages
3,903
Re: 69 Evinrude How to replace coils,condensers,plugs ,and points

Re: 69 Evinrude How to replace coils,condensers,plugs ,and points

Well CRAP!!!.. It appears I've regressed. I adjusted the roller so that the butterfly just starts to move on the marks, and is wide open with the throttle all the way open. Turned the low speed needle just till it started to stop me from turning . Then back out a turn and a 1/4. applied the choke. And nothing pulled it 40 times and couldn't get it to start

The spring that closes the choke plate is broke so I just held it down with my finger. I don't think that was the problem,but I don't know so I'm throwing out everything I can think of.

I twisted the throttle as far as it would go in neutral. I'm thinking before to get it to start it had to be almost to the same point at least past the marks, But before the butterfly was starting to open as soon as the roller started to touch the throttle cam. So could it be not opening enough now. In neutral the carb butterfly only opens about an 1/8 of an inch at full throttle.

THat sounds correct to me

I checked spark it was good.

What are you using to check your spark? (is it an air gap tester)?

I checked gas it was good to the hookup past the fuel pump ,and all the way up the the carb. That is I unhooked the fuel line at all those points and squeezed the fuel bulb,and gas shot out. The only time I didn't see gas come out of the tubes is when I turned the throttle handle. I had the line unhooked from bottom of the carb and twisted the throttle and nothing came out. Should gas have came out by twisting the throttle. It seemed the bottom of the carb and underneath the carb was saturated with fuel

It also squeezed some oil or gas out the lower unit access panel. I hope this is not something bad.
No big deal, but indicates the carb was flooded.

Last night the S/S needle was really hard to turn in any direction. I screwing it in with pliers but never got to a point where it started to tighten. Knowing i wasn't ready for that part anyway I just left it where ever it was. Today it was alot easier to turn .I turned it by hand till just the last little bit. when the motor didn't start I turned it all the way out by hand ,and then almost all the way back in by hand .If I over tightened last night could that make it not start

If it was overtightened, that could not only keep it from starting, but ruin the tip of the slow speed needle so that it would never adjust properly.
Check your spark with an actual air gap spark tester---I doubt your spark is good.

View attachment 130271View attachment 130272

check your spark
 

kfa4303

Banned
Joined
Sep 17, 2010
Messages
6,094
Re: 69 Evinrude How to replace coils,condensers,plugs ,and points

Re: 69 Evinrude How to replace coils,condensers,plugs ,and points

He cc. For starters, you shouldn't have to use pliers to twist the needle. You may have broken the tip off of the needle. It's actually more common than you might think. If you can post a pic of your S/S needle that would be nice. If the tip is broken off, then you'll have to take the carb apart and get it out, and perhpas get a new needle. If it's ok, then I think the issue may be with the needle bushing (nut) that the needle passes through. It should be sung, but not tight. You should just barely be able to adjust the needle by hand, or with the plastic knob. I know it's hard to describe, but think of it as having the resistance of a large volume knob on a stereo. It should have a nice solid feel to it while still being smooth and easy to adjust. You also need to wait about 10-15 sec in between each adjustment to allow for a response. It's not instantaneous.
At this point if may be easier to take the carb off and start fresh. I remember I had the hardest time getting my old 10 hp, until I realized that the bowl on the carb wasn't on tight enough. It wasn't obviously loose, or leaking, but it was loose enough to throw off the mix our of whack and keep it from starting and running. Once I took the carb off and snugged it up and voila! She purred like a kitten. You may not have the exact same problem, but it may just be something simple. Don't worry about the black goo, that's just unburnt fuel and exhaust. It'll go away once it's running right. Hang in there. You'll get it!
 

ccvolsdhf

Petty Officer 1st Class
Joined
Jan 4, 2012
Messages
214
Re: 69 Evinrude How to replace coils,condensers,plugs ,and points

Re: 69 Evinrude How to replace coils,condensers,plugs ,and points

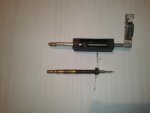
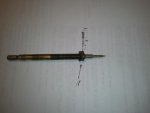
Ok here's the pics

S.S needle and spark tester.jpgS.S needle.jpg

The S/S needle was tough to move last night,But I don't think I ever seated it cause it never got tight at all. Today it was basically as you described. Stiffer but smooth screwing. All the way in and out. Used the open air tester in the pic set to about a 1/4 of an inch. The only thing I can say about it is one cylinder consistently only had 1 maybe 2 good sparks per pull. While the other cylinder would get 2 and 3 sparks per pull consistently. Everything is new except the wires which I didn't want to wait on. When I was redoing the coils,and points it was Kinda difficult to get the points close. When I first started the old points where closer to .025,and when putting back together it was hard to get them closer I would say they are both closer to .022 than .020 especially on one cylinder. I left the mounting screw not tight then adjusted the points to .020 then when I would tighten the mounting screw it would pull away a little. I had them as close to the stationary point as I could get them. with the adjustment screw,But when everything was tight it was like .022 was as close as I could get it.

Is there any way to know if the carb is actually getting gas.
 

jbjennings

Captain
Joined
Jul 18, 2007
Messages
3,903
Re: 69 Evinrude How to replace coils,condensers,plugs ,and points

Re: 69 Evinrude How to replace coils,condensers,plugs ,and points

.022 should still work, but I'm not sure why you're having such trouble.
Try squirting some fuel/oil mix into the carb throat. If it runs for just a few seconds, you have a stuck float needle and the float bowl is not filling up with fuel most likely. YOur slow speed needle looks fine as far as I can tell.
Sorry it's giving you so much grief. I know how frustrating that can be. Even if it were running on one cylinder, it should still crank up and run. Lots of people think their motors are running great when only one cylinder is sparking, until they get it on the lake and try to open up the throttle.
Btw, the spark plug wires should be screwed onto the coils, not pushed on. That's a common problem with inconsistent spark if the wires are new......
good luck,
JBJ
 
Last edited:

ccvolsdhf

Petty Officer 1st Class
Joined
Jan 4, 2012
Messages
214
Re: 69 Evinrude How to replace coils,condensers,plugs ,and points

Re: 69 Evinrude How to replace coils,condensers,plugs ,and points

Thanks JB
I plan on getting a compression tester on payday. Checking compression. If it checks out good Ill order plug wires,boots,and a carb rebuild kit. change the plug wires and boots. check the points gap. And rebuild carb. I'll try the spray into the carb throat. If that works you think that's a good indication that a carb rebuild would fix the problem? In looking up the carb rebuild kit I noticed that it doesn't come with the leaf assembly gaskets. Is it necessary to take apart the leaf assembly as well when doing the carb rebuild.
 

cajuncook1

Chief Petty Officer
Joined
Sep 3, 2009
Messages
559
Re: 69 Evinrude How to replace coils,condensers,plugs ,and points

Re: 69 Evinrude How to replace coils,condensers,plugs ,and points

Hey ccvolsdhf, I have to commend you on your determination!!! I know you're getting discouraged and trying everything you can.

Couple of suggestions: Step away from the motor a day or so and have a couple of beers. (Spend the evening reading the information from your manual, suggestion that you have been given, and regroup. Look at the post and diagrams I suggested to you regarding ignition and the carburetor.

- Good, now that you are refreshed, I want you to use a systematic approach to diagnosis your engine's problems. Complete one task and section at a time before moving on. This will help you stay organized and resolve each problem. If your are making changes here and there then you may not figure out what is working or what is not!!


Please reading the information below, it will help you get organized. I posted this for another individual an it helped him out. I follow the same logic, reasoning and pattern when I get a new project motor. All of it may not apply directly to you will get the general idea.

Please don't think I am talking down to you, I am just trying to help you out my friend.


Here is some guidance that will help you evaluate your motor and help us help you! (You will have go back and recheck the compression, ignition and carburetor. I know you have done some of these things already, but when you get caught up in jam it is best to start with the basics and recheck. You may laugh, be we have been there and even the experience guys will tell they sworn everything was right, but went back to recheck work and found a problem and then the thing comes alive!!)


Now you want to use a systematic approach to assess your engine's problem. Sure, it maybe just needing a carb kit and cleaning and your on your way. But if you a systematic approach to evaluating a motor then you become more efficient than you just guessing and changing out parts.

You will see a lot of experience guys ask about compression, spark and fuel. (They are using a systematic approach to diagnosing an engine problem or problems....in this order)

C= compression ( if your compression is low are uneven between cylinders >10% then others checks don't matter until the that is resolved) Low compression will cause your motor not run or run very poorly.

S= Spark (if your have problems with your ignition then you can have the cleanest carb and great fuel delivery but it will run bad or not at all)

F= Fuel (if your carbs are not clean and fast/slow idle needle are not set right then it will run but like crap. If you have it set too lean then you run the risk of poor fuel/oil delivery and damage your pistons and cylinders then you run into the problem of C (poor compression from damage).

For your motor to run and run well (this a general statement) all three of above categories need to be fulfilled.

So it is advisable to get a manual for your motor. Excellent resource, specifications, and diagrams.


How to check compression: (remember to remove both spark plugs) You can get a compression guage for about $10 to 12 dollar at harbor freight or auto zone) auto zone will let you borrow one with a refundable deposit)

http://forums.iboats.com/showthread.php?t=391323

http://www.youtube.com/watch?v=PyCw4SiuT2I (gives you visual)

How to check for spark.(with a spark checker) about $6 at autozone (or similar store)...harbor freight store. You will also need a feeler guage to gap your spark plugs to 0.030 (feeler gauge is about $3 to 4 dollars)

- adjust the spark test to about 1/4 inches or so. It should be a good strong blue spark. (don't forget to ground the tester to the motor)

http://forums.iboats.com/showthread.php?t=294072

http://www.youtube.com/watch?v=lk70oyUEftY (general visual)


Carburetor adjustments

http://forums.iboats.com/showthread.php?t=167352

Carburetor cleaning instructions


http://forums.iboats.com/showthread.php?t=244013

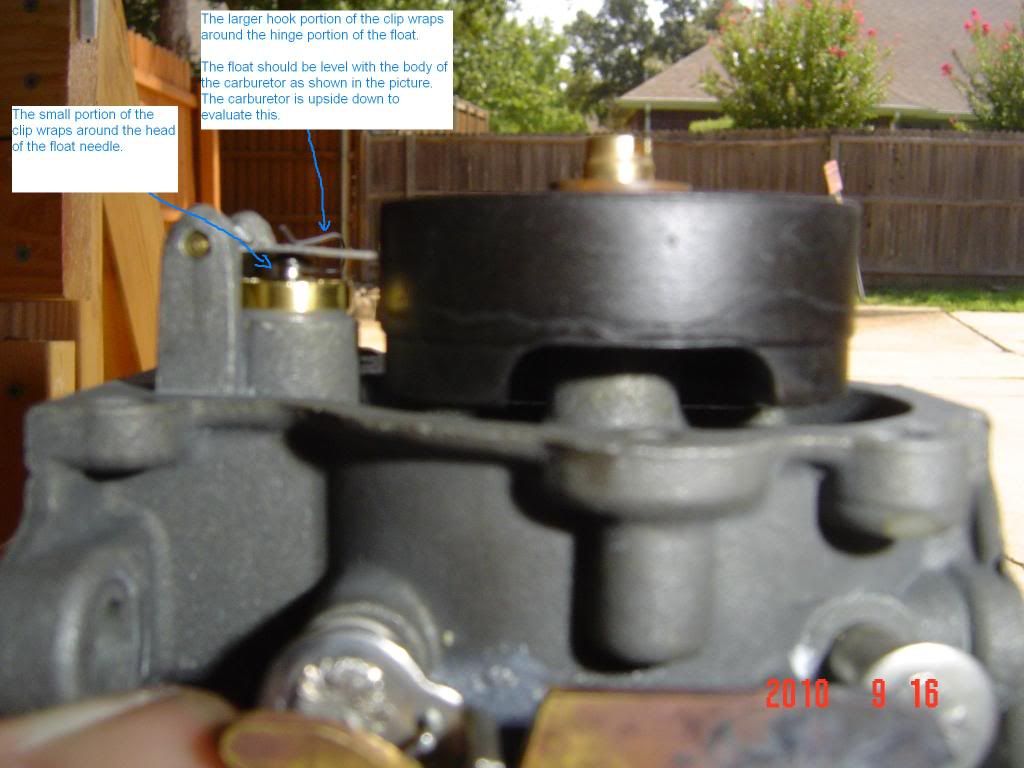
Here is a picture of how the float should lay.

levelfloatandclipinformation.jpg


Check to make sure the vent cap or plug on the tank is open. If it is not open then the motor will run ok for a little bit and die or run poorly. The vent cap or plug has to be open to allow air to enter the tank so fuel can easily be pumped out of the tank by the fuel pump. If the vent cap or plug is closed then the fuel pump has to work against a negative system created in the tank, and you may get low or no flow from the tank.**** Make a long story short, make sure the vent cap/plug is open and try to start your motor.

Also check to see if the fuel line bulb near the tank has the arrow pointing toward the motor and pumps up somewhat firm.


Here is a electronic parts diagram of your motor, so that will help you a bit.


http://www.marineengine.com/parts/johnson-evinrude-parts.php?year=1969&hp=25&model=25902B


Get some compression numbers and check your spark with a tester and report back with your finding and a seasoned and experience member can assist you better. (Be sure to have your motor in water to run, if not you run the risk of damaging the water pump and not cooling the powerhead and burning it up.)

Proper fuel to oil ratio is 50:1

8oz TCW-3 oil with 3 gallons of gas(87 octane)....mixed well.


Good luck buddy! Hope you sort things out and get her running soon!
 

ccvolsdhf

Petty Officer 1st Class
Joined
Jan 4, 2012
Messages
214
Re: 69 Evinrude How to replace coils,condensers,plugs ,and points

Re: 69 Evinrude How to replace coils,condensers,plugs ,and points

SOLID Cajun..Plum Solid...Thanks
 

AlTn

Commander
Joined
Mar 9, 2010
Messages
2,813
Re: 69 Evinrude How to replace coils,condensers,plugs ,and points

Re: 69 Evinrude How to replace coils,condensers,plugs ,and points

I'd venture to say that a high percentage of forum members have traveled a parallel road, CV, I know that I have. Too impatient to wait on parts, fix one thing and it brings another "weakness" to light. The drop in idle rpm in your video is most likely a spark < or lack thereof >problem. You're headed in the right direction replacing the wires and boots. Doubtlessly you"ll get to the carb overhaul and it's worthwhile to do if for no more than the knowledge you'll gain.
One other tidbit of unsolicited advice..when you have the carb off, hold the throttle plate exactly horizontal in the carb throat and mark the position on the carb body of the roll pin that goes through the throttle shaft. A scribe mark or a centerpunch dimple are 2 suggestions.
That carb is wonderfully simple, but really needs to be super clean in the mainjet and idle areas. You've got great pics of linkages and such for reassembly and there's no need to fool with any of the linkage "stuff" once the carb is off. Might as well replace the choke spring.
A drop of oil on the choke and throttle shafts helps.
Hurry payday.
 

kfa4303

Banned
Joined
Sep 17, 2010
Messages
6,094
Re: 69 Evinrude How to replace coils,condensers,plugs ,and points

Re: 69 Evinrude How to replace coils,condensers,plugs ,and points

Hang in there. The good news is that your needle looks great, so all the parts are in good shape, we just gotta put 'em back together nice and carefully. Take your time, be methodical and enjoy it as much as possible. After all, this part of the "charm" of owning a vintage motor. They really are very reliable and simple once they're set up. No really. We promise :) ( If all else fails use The Force. Always good in a pinch. )
 

lindy46

Captain
Joined
Nov 27, 2008
Messages
3,886
Re: 69 Evinrude How to replace coils,condensers,plugs ,and points

Re: 69 Evinrude How to replace coils,condensers,plugs ,and points

Well CRAP!!!.. It appears I've regressed. I adjusted the roller so that the butterfly just starts to move on the marks, and is wide open with the throttle all the way open.View attachment 130271View attachment 130272
Make sure you're aligning the roller to open with the mark on the CAM and not the timing marks on the armature plate. The two vertical marks on the armature plate are for setting the points with a special tool if you're real fanatical about getting the points perfect. They have nothing to do with synching the carb to the magneto.
 

AlTn

Commander
Joined
Mar 9, 2010
Messages
2,813
Re: 69 Evinrude How to replace coils,condensers,plugs ,and points

Re: 69 Evinrude How to replace coils,condensers,plugs ,and points

Wow..glad you saw that Lindy!..CCV...only the mark on the timing cam for the roller adjustment..I was wondering how it could go from running so well to a no start condition so quickly <I'm sure you were wondering as well CC>
 
Top