68 Offshore restoration

Sharpie223

Petty Officer 2nd Class
Joined
May 24, 2021
Messages
173
Took it for a test run today, it wouldn't start for a long time, then it had issues holding idle. Finally was able to put it in gear but if I gave it much throttle it would die. My best guess is that I need to tear apart and clean my carbs again. I need to be better about draining and storing these right. Eventually I'm looking to repower with something fuel injected for simplicity.

I have noticed each time that I've been out that the boat rattles/shakes a lot at low motor RPMs. Does anyone else have this?
 

SHSU

Lieutenant Junior+Starmada Splash Of The Year 2019
Joined
Mar 8, 2017
Messages
1,741
How much shaking we talking about? My 1970's Evinrude vibrates the hull at low speed, but not something I would think abnormal for an engine of that age. As for the carbs, you using a ethanol based fuel, you using a fuel stabilizer?

SHSU
 

Sharpie223

Petty Officer 2nd Class
Joined
May 24, 2021
Messages
173
Shaking, I couldn't tell you a side to side magnitude in inches, probably not actually much. It does make anything in the side storage rattle quite a bit and if the motor is centered it will shake itself to one side turning the steering. The outboard is a '97 suzuki dt75. I think I am more curious if there is anything that could be worn out leading to the shaking, should the cable connection have any kind of damper to it? My main concern would be any excessive vibration wearing at rivets. It mellows out at higher rpm.

I use ethanol gas but use a fuel stabilizer with ethanol treatment. This has always worked for me in the past, the real issue is that I filled up last year planning for more use, but never did. The heat then evaporated about half the fuel, certainly leading to increased gumming. I just need to give it a better cleaning and a better fuel/carb maintenance plan. A fuel injected motor would still be nicer in my mind, but looking at them, it's a minimum of 50 lbs extra for an etec, and closer to 100 lbs more for an optimax or a 4 stroke, and raises the question how much the hp rating of the boat plays into transom strength for hanging the weight.
 

SHSU

Lieutenant Junior+Starmada Splash Of The Year 2019
Joined
Mar 8, 2017
Messages
1,741
Not familiar with your engine, but wouldn't expect it to shake as bad as you mention. Might do some Googling to see if others have experienced similar. Weird that it goes away under power.

As for hanging a new motor, I am with you on what the extra weight will actually add. Also the price is what kills me... lol. Hard to justify ~10k when I have a motor that is working.

SHSU
 

Sharpie223

Petty Officer 2nd Class
Joined
May 24, 2021
Messages
173
Back at it today to kick off project season.

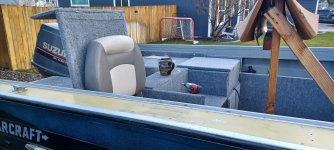
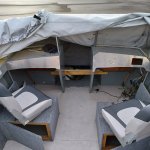
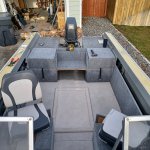
Installed some rear seat covers. I originally wanted to have these fold all the way back (flat), but decided today there's no good reason for that. So I will find some method to attach them to the seat backs that allows each to slide relative to each other. The top flap (front when closed) just sits straight back, it will need a limiter strap. I will find some strong magnets for latching closed.
20241123_102409.jpg

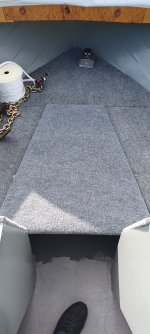
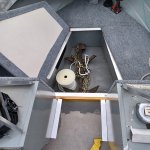
Then I cut a piece to fill the opening in the front. Ran out of hinges, so I couldn't attach yet. I decided I prefer a full bow platform, but wanted easy to access storage.
20241123_115020.jpg

I will continue with the elevated surface to the back of the console.

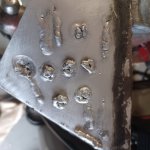
Finally, bought a tig welder and I've spent a couple weekends getting used to it. I have only burned some aluminum so far, I think I may not be giving enough gas flow. I set it to chart specs, but my patterns look similar to lack of gas pictures online. Once I figure this out, I can patch the holes in my gunnels, and then weld a new windshield frame how I want it.
20241123_154230.jpg
 

SHSU

Lieutenant Junior+Starmada Splash Of The Year 2019
Joined
Mar 8, 2017
Messages
1,741
I like the hidden seats. Very nice!!! Also I did the front deck too, and it works well for us.

SHSU
 

BOYS & TOYS

Petty Officer 2nd Class
Joined
Mar 1, 2008
Messages
149
Back at it today to kick off project season.

Installed some rear seat covers. I originally wanted to have these fold all the way back (flat), but decided today there's no good reason for that. So I will find some method to attach them to the seat backs that allows each to slide relative to each other. The top flap (front when closed) just sits straight back, it will need a limiter strap. I will find some strong magnets for latching closed.
View attachment 403737

Then I cut a piece to fill the opening in the front. Ran out of hinges, so I couldn't attach yet. I decided I prefer a full bow platform, but wanted easy to access storage.
View attachment 403738

I will continue with the elevated surface to the back of the console.

Finally, bought a tig welder and I've spent a couple weekends getting used to it. I have only burned some aluminum so far, I think I may not be giving enough gas flow. I set it to chart specs, but my patterns look similar to lack of gas pictures online. Once I figure this out, I can patch the holes in my gunnels, and then weld a new windshield frame how I want it.
Not sure if you're practicing with old/corroded aluminum but it would be best to start with new/clean. When you hit corrosion with the arc dark soot appears and it needs cleaned again, each time.
Do you have mig or spool gun experience?
What did you set the gas flow at?
 

Sharpie223

Petty Officer 2nd Class
Joined
May 24, 2021
Messages
173
Not sure if you're practicing with old/corroded aluminum but it would be best to start with new/clean. When you hit corrosion with the arc dark soot appears and it needs cleaned again, each time.
Do you have mig or spool gun experience?
What did you set the gas flow at?

My experience so far has been flux core on steel. No true mig and no spool gun experience. TIG torch and filler control is certainly taking some getting used to.
I am currently practicing with scrap from the boat, so definitely old and thick corrosion. I wire wheeled as best as I could and then wiped down with acetone, but this is still a suspicion. My thought was to practicing filling holes on the actual aluminum that's on the boat, though I'm starting to think epoxy for filler again...
Gas was set to 10 cfh per everything I could find. I later doubled that and it seemed to do better just laying a normal bead down, I'm not sure if I trust my regulator.
My .04 (I read use whatever size is just under the thickness of material) tungsten balls up seemingly no matter the settings, any thoughts on what to check? Even more gas? Amps were set to 50 (1 amp per .001 material, correct?), 90 hz, 30% balance. Using pure argon. Size 5 cup, also tried a 6.
 

BOYS & TOYS

Petty Officer 2nd Class
Joined
Mar 1, 2008
Messages
149
My experience so far has been flux core on steel. No true mig and no spool gun experience. TIG torch and filler control is certainly taking some getting used to.
I am currently practicing with scrap from the boat, so definitely old and thick corrosion. I wire wheeled as best as I could and then wiped down with acetone, but this is still a suspicion. My thought was to practicing filling holes on the actual aluminum that's on the boat, though I'm starting to think epoxy for filler again...
Gas was set to 10 cfh per everything I could find. I later doubled that and it seemed to do better just laying a normal bead down, I'm not sure if I trust my regulator.
My .04 (I read use whatever size is just under the thickness of material) tungsten balls up seemingly no matter the settings, any thoughts on what to check? Even more gas? Amps were set to 50 (1 amp per .001 material, correct?), 90 hz, 30% balance. Using pure argon. Size 5 cup, also tried a 6.
The ball on the tungsten is fine and some prefer it.

Aluminum can corroded kind of like Swiss cheese where the surface looks clean and then dark soot appears after you arc it. Keep cleaning, dirty aluminum doesn't weld easy.
Try the same gauge but new material because welding holes in thin,corroded aluminum is harder.
My new tig has auto settings that I start with then maybe adjust for better cleaning.
My gas flow is probably around 15 or so. I'm cheap so I try not to waste it.

If I'm using the foot pedal I will set the Amp,s higher and use what I want. Sometimes you want quick heat because aluminum conducts it away quickly.

I find welding corroded holes easier with a magnifying lens in my helmet.

Not sure what size tungsten you mean. I probably use larger diameter than recommended.
 
Last edited:

Sharpie223

Petty Officer 2nd Class
Joined
May 24, 2021
Messages
173
I think I may stick to the 3/32 tungsten rather than the .040". It balls less and doesn't seem to weld any worse. The .040 just keeps slowly rolling back.

I probably need some new aluminum to get the technique down first, but if I weld the screw holes on the gunnels I won't have a choice. I am going to try some thicker filler first, maybe some shielded stick welding electrodes as filler even. I may try a wider cup since it seems like the filler is marginally shielded right now. I bought thinner tig gloves as well, that should help with filler control. Still leaning towards some marine tex for the screw holes if it's taking too long to figure out.
 

BOYS & TOYS

Petty Officer 2nd Class
Joined
Mar 1, 2008
Messages
149
I think I may stick to the 3/32 tungsten rather than the .040". It balls less and doesn't seem to weld any worse. The .040 just keeps slowly rolling back.

I probably need some new aluminum to get the technique down first, but if I weld the screw holes on the gunnels I won't have a choice. I am going to try some thicker filler first, maybe some shielded stick welding electrodes as filler even. I may try a wider cup since it seems like the filler is marginally shielded right now. I bought thinner tig gloves as well, that should help with filler control. Still leaning towards some marine tex for the screw holes if it's taking too long to figure out.
Keep using proper tig filler rods and make sure they are clean too. Can wipe them with Scotch Brite and clean rag. Try to keep the filler rod near enough the welding arc to not melt but still get shielding gas coverage in between dabs.

Should have better luck with your larger tungsten.
Keep practicing with new material until you get comfortable. I had too many holes to count in my gunnels and you would never know now. I try to fill the holes quickly because the aluminum will warp alot with low heat and slow welding. That also gave me a chance to practice removing dents and high spots with a torch,hammer and dolly.

I also like using a carbide burr on the die grinder to really clean any pits or holes.
You will never use plastic fillers or epoxy after you get your tig sorted.
Hang in there,you will get it.
 

Sharpie223

Petty Officer 2nd Class
Joined
May 24, 2021
Messages
173
It does have pulse, haven't played with it yet. What kind of settings do you use for filling holes? I'm thinking about 1/8 or so screw holes.
 

BOYS & TOYS

Petty Officer 2nd Class
Joined
Mar 1, 2008
Messages
149
It does have pulse, haven't played with it yet. What kind of settings do you use for filling holes? I'm thinking about 1/8 or so screw holes.
I would set the Amp,s higher than recommended by the manufacturer for the thickness then use the pedal to control the heat.

Hotter first then very little when finishing. I always end with an extra dime on top to prevent the crater you can get at the end.
 

Sharpie223

Petty Officer 2nd Class
Joined
May 24, 2021
Messages
173
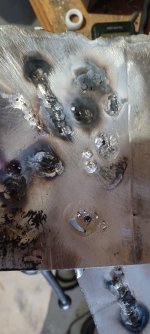
I realized that the scrap I was using wasn't from the boat but from a billboard, so unknown material. I found some scrap from the boat and tried again. I don't have the stack of dimes down, but getting the hang of straight beads, still need to work on filling the end crater. Filling holes is slightly better but still not quite working. I just end up with a volcano forming. I'll start looking up pulse settings and maybe see if that will help, I don't have a foot pedal yet. Any recommendation on frequency settings?
20241206_132200.jpg
 

ShoestringMariner

Lieutenant Commander
Joined
Apr 18, 2015
Messages
1,600
I realized that the scrap I was using wasn't from the boat but from a billboard, so unknown material. I found some scrap from the boat and tried again. I don't have the stack of dimes down, but getting the hang of straight beads, still need to work on filling the end crater. Filling holes is slightly better but still not quite working. I just end up with a volcano forming. I'll start looking up pulse settings and maybe see if that will help, I don't have a foot pedal yet. Any recommendation on frequency settings?
View attachment 404056
What are you using for a TIG welder? brand, model.
using AC high freq., right?
All Material has to be super clean, filler rod included. Stainless brush for cleaning.

How many amps & what size tungsten?

Using pure argon?
 

Sharpie223

Petty Officer 2nd Class
Joined
May 24, 2021
Messages
173
Welder is a yeswelder ac/dc/pulse tig/stick. AC, adjustable frequency, I've tried anywhere between 60 and 180 hz. I've been brushing and then wiping down with acetone as I've seen recommended. Amps, I've been setting to the thickness of the metal, so 60 amps for .060, 125 for .125. Tungsten in 3/32. I have some .040 tungsten, but it just continuously balls up until it is behind the rim of the cup. Pure argon.
 

Sharpie223

Petty Officer 2nd Class
Joined
May 24, 2021
Messages
173
Update.
I made some front support for the center bow hatch and attached the hatch by hinges. The fit isn't perfect, but I have some other floor supports I am retrofitting that should pull things into place.
20241214_133916.jpg

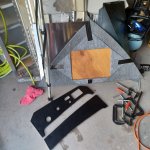
I made some aluminum skins for my dashboards, still need some holes cut for gauges and I need to figure out how I will paint. I'd like to jewel it and then cover in black candy coat to mute the glare, but I think time and practicality might dictate more smoke grey.
20241214_120024.jpg

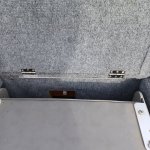
I added some 1/2 or 3/4 angle under a rear seat cover and it worked well to prevent the hinge screws from trying to pull out.
20241214_115001.jpg

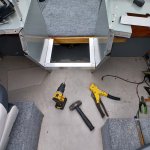
I riveted in some angle for a continuation platform between the consoles.
20241214_135027.jpg

Coming up.
- I am cutting a hatch in the front triangular bow platform board. Mostly for a trolling motor battery. I may do the same in a side bow board for the anchor.
- I need to attach some limiting straps in the floor hatch/"ski locker" and the rear seat covers, or I will rip the hinges out one of these days.
- finish the bow platform
-once the side console dash is installed, I will add a glove box opening in the side of the console, and create a sealed compartment.
- I'm still playing with the welder, but will at the very least create a new windshield. I'm leaning towards epoxy putty filler for the gunnel holes, but I have a lead on someone who may be able to teach me what to do.

20241214_132100.jpg
 
Top