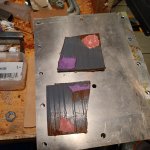
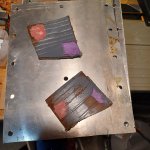
68 Offshore restoration

Sharpie223

Petty Officer 2nd Class
Joined
May 24, 2021
Messages
165
I saw the part where it mentions not to apply to frosted surfaces, but it's in the context of min/max temps, otherwise it seems rather silent on surface moisture. I will attempt to use a shop towel to remove the majority of moisture prior to install, but was curious if anyone had experience with this. If it needs to be perfectly dry then I will break out the heat gun.
 

SHSU

Lieutenant Junior+Starmada Splash Of The Year 2019
Joined
Mar 8, 2017
Messages
1,725
We used 5200 on every rivet and only cleaned with acetone before shoving a new rivet in. Haven't had a leaky rivet thus far.... knock on wood.

SHSU
 

Sharpie223

Petty Officer 2nd Class
Joined
May 24, 2021
Messages
165
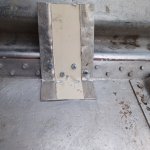
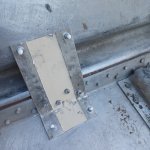
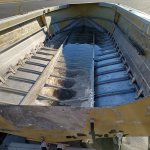
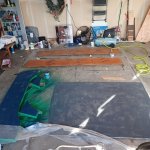
This weekend I got the solid rivets securing the tabs on. Some tails ended up smooshed to one side, but they are tight, so I think they should be okay. They also all got a good dose of 5200.
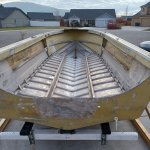
20230122_142951.jpg

20230121_143446.jpg

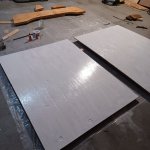
Deck boards got a slathering of spar urethane across the bottom. The two largest also got a coating of oil based primer, just for good measure. The front boards will get the same, just ran out of room while coating my transom with spar. The transom was flush routed to knock down any high spots. The edges doused in penetrating epoxy, and then varnished.
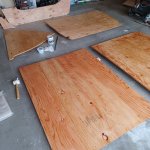
20230121_143501.jpg
20230123_203908.jpg

Would it be cheaper to just buy laminating epoxy to seal the wood? Probably, or just a nominal amount more. But so far I had everything on hand already other than the spar varnish, and it's nice to finally use those things stored away because "this might be useful someday..."

Next up will be removing the last remnants of silicone that the previous owner globbed on, then leak checking the rivets, buzzing any that seem to allow fluid through.
Then it will be closed end riveting the ends of the tabs down.
Deck tops will have canvas glued to the top, and then stapled underneath the edges, then painted. This makes a nice floor and protects the wood surprisingly well.
After that, I am not sure. The weather is going to cool again to a point where epoxies will take too long to cure, so will 5200. I don't mind heat curing some epoxies in small sections but don't want to do a whole boat that way. So I will probably begin work on cutting new dash panels, maybe triming down and reshaping the splashwell, stockpile materials, and otherwise the project will then be on pause until warmer weather comes.
 

SHSU

Lieutenant Junior+Starmada Splash Of The Year 2019
Joined
Mar 8, 2017
Messages
1,725
Any protection you put on the wood is more then what came from factory. You will see many different ways people have done it on the forum. Ultimately, as long as your happy that is all that matters.

Never heard of using Canvas glued and painted as a protectant. I would almost be concerned that it would trap water. Then again, so would laminate/vinyl. So if it works more power to you.

SHSU
 

Sharpie223

Petty Officer 2nd Class
Joined
May 24, 2021
Messages
165
It's a variation on how some old sailboat decks were done, and how some people on the camper building forums are covering plywood. The paint makes for a thick waterproof layer, the canvas gives it some durability otherwise it would crack at that thickness. As long as the canvas stays glued to the wood, there should be no room for water trapping. I did the same thing in my 14', it made a nice durable nonslip floor and was easy to clean.
 

Sharpie223

Petty Officer 2nd Class
Joined
May 24, 2021
Messages
165
My transom side that will be facing metal I had given a coat of homemade cpes. Literally just some jb clear that I diluted with acetone. For how much I diluted I wasn't sure if it would do much, but putting some spar varnish over it today, the (thinned) varnish stayed on top for most of it, so apparently it did do something.
An observation, not a recommendation unless, like me, you are trying to use materials already on hand. If you will be buying all materials without anything on hand, I will only recommend laminating epoxy for sealing wood.
 

Sharpie223

Petty Officer 2nd Class
Joined
May 24, 2021
Messages
165
A tip, xylene and a paper towel do a great job removing 5200 from clothing. This was on a coat with a nylon shell, might not work so well for other types.

Three of four deck panels are now covered in canvas and drying. I soaked the canvas with water after stapling on the back. In the past this has caused it to shrink and remove any wrinkles, it doesn't seem to be having the same effect this time, we'll see once it's dry. I have also used a heat gun to cause wrinkles to shrink out after paint, but that was with latex paint and I will be using alkyd this time. Maybe the tension of the alkyd will pull out wrinkles. If not, it's not the end of the world, just not as great looking.

Tabs have been fully riveted on the edges. Still trying to source aluminum angle to finish the reinforcements. My experience is that hardware stores charge about twoce as much as a metal supplier, but there aren't many metal suppliers where I live.
20230127_161402.jpg

20230127_161949.jpg

I finished wire wheeling away the silicone and performed a leak check. I used the turn it into a bathtub and tilt method. Guess what, IT LEAKS!!! The positive is that only 3 or 4 rivets leak, the rest is mostly the chine seams and front keel section where the sealant is 50+ years old.
20230129_145828.jpg

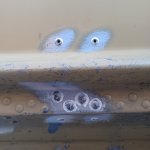
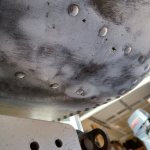
The negative is that this build is going to become familiar to some. While wire wheeling silicone, I discovered that the section under the knee brace has pitting through the hull.
20230129_132140.jpg

The knee brace traps dirt which I think causes the reaction. Luckily I have a plate of 1/8 6061 that I can patch with, and I think I will back this up on the inside with some billboard metal (likely 5052) to create a patch sandwich full of 5200 mayo. The knee brace is going to get filled (likely with styrofoam) and capped off while it is off to help prevent further dirt fill.
 

SHSU

Lieutenant Junior+Starmada Splash Of The Year 2019
Joined
Mar 8, 2017
Messages
1,725
Noticed you used blind rivets to secure the braces, thought you were going to use solids all around?

As for the knee brace, I used 1/8 sheet formed to hull, slathered in 5200, and then riveted through direct to knee brace with 1/4 rivets. That way I didn't have to worry about it. As for the dirt in there, that is why I moved my drain hole to inside. Cleans it all out and is the lowest point so all the water comes out too.

SHSU
 

Sharpie223

Petty Officer 2nd Class
Joined
May 24, 2021
Messages
165
The stainless 18-8 closed end rivets got used for the edges, I had them already and since these are not replacing an existing structural rivet, I'm not worried about it. The rivets that I drilled out got replaced with the same kind. If a problem arises later on, having the deck attached with screws will allow it to be a quick fix, just pop off the deck and replace.

I'm tempted to use stainless screws to replace the knee, and peen the nut in place. Not sure why it seems easier to me, really just more familiar. I'll probably go find the right length rivets though, just to have a second chance at making prettier rivet tails. I need to tighten up some original rivets anyway.

It would be nice to move the drain, but I don't want to tear apart the transom more than I need to. I think I will stuff the inside with foam as a displacer, and then cap off the openings with a sheet of thin aluminum.
 

Sharpie223

Petty Officer 2nd Class
Joined
May 24, 2021
Messages
165
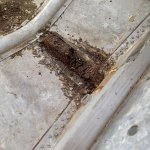
I managed to remove the transom brace this weekend...disgusting! I wonder how old some of this debris is.
20230203_133343.jpg

20230204_125036.jpg

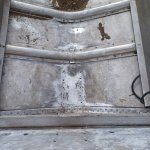
Hard to see in the second picture, but just in front of the first rib there was some kind of screen lodged in the drainage, trapped a lot of stuff and there is corresponding pitting, luckily not through, but it will need patched as well. I think this will have to be done only with a bottom doubler patch since I don't want to deal with rib removal. I'll still try to fill it in with epoxy just to prevent buildup inside, or maybe just paint as a barrier.

I used a BFH and got the dents removed. Working on filling and covering the brace to prevent new buildup. I think I may try to paint all pieces prior to install in order to prevent future corrosion, ideally if they are all sandwiched, there shouldn't be any real abrasion.

Waiting for 1/4x5/8 rivets to arrive. Ordered 1/4 mostly to get the right length, but seeing some double holes after removal of the brace, thinking this should help fill them in.

Painted the canvas deck boards and gave the transom wood a coat as well. I had mixed white and black to create a medium grey, unfortunately the white had some small chunkies that caused color smear when painting. This won't be the prettiest floor, but it will be well functional. No pictures of this yet.

Also working on removing the adhesive residue from the side storage liner. I think I will simply paint these spots, but don't want the residue to cause issues. I tried a wore wheel but it just smeared most spots. Today I am going to acid wash with heavy duty acetic, diluted to 10% to start, maybe this will cause the residue to lose adhesion. If that doesn't work I will try using some old gasoline as a solvent, naptha is supposed to be good, I figure gasoline isn't far off and I have some that I no longer trust in any engine.
 

Sharpie223

Petty Officer 2nd Class
Joined
May 24, 2021
Messages
165
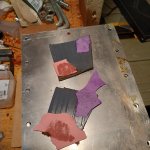
I ran a test to see how well enamel wpuld stick to hdpe. I tried untreated hdpe as well as flame treated. Then I tried scraping with a nail, scratching with a wire brush, scratching with a corner of the other hdpe, and hitting with a hammer. The hammer took no paint off either, the nail was about the same for both, but the wire brush and hdpe corner both caused flaking on the untreated, but only marred paint (no plastic showing through) in the flame treated. This is a wood look terrace board for lawn and garden borders, made of recycled PE. I plan to cover the gunnel tops and the bow top with this, welded together like planks. I want to maintain a grey scheme rather than a brown trim though. Pictures are difficult to see, but the first is untreated, second is treated. When I actually do this I will prime of course, probably with a bonding primer.
20230204_201104.jpg

20230204_201134.jpg
 

Sharpie223

Petty Officer 2nd Class
Joined
May 24, 2021
Messages
165
It was less of a work weekend and more of a stockpile weekend. (My wife's favorite)
Purchased an old walk through windshield that I can salvage to close the center of my original windshield. (The crazing even matches)
Purchased some angle to finish the chine braces, was given some square tube from a neighbors scrap pile, and found some aluminum in my own scrap. I now have all the aluminum I need for my plans.
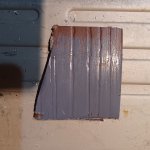
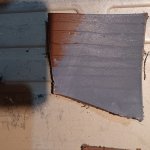
In terms of real work, I was able to paint the last section of deck canvas. Turns out all the sections need another coat, and I ran out of paint. I used whatever old rattle cans that I had left to extra seal the transom, seahawks colors are purely incidental. These colors will be covered once the boat is together anyway. Then I soaked my side panels with some 50/50 boiled linseed oil and mineral spirits, and coated with varnish once dry. These will be carpeted before install.
20230212_154320.jpg

Not pictured, I wire wheeled the knee brace pitting and filled with jb weld, then gave the first few seams a drink of gluvit.
 

SHSU

Lieutenant Junior+Starmada Splash Of The Year 2019
Joined
Mar 8, 2017
Messages
1,725
When you say "Flame Treated" do you mean you took a blow torch over it really quick to break up the plastic surface tension?

SHSU
 

Sharpie223

Petty Officer 2nd Class
Joined
May 24, 2021
Messages
165
Yes, took a propane torch over the whole surface, but not enough to melt or char it. I'm not fully sure how that works, you say breaking up surface tension, I've also heard something about changing the ionization or polarity. Either way, it works incredibly well.

I ran a couple more tests, one where I CA'ed some paper on to rip off, one a traditional cross hatch test. The untreated one let quite a bit of the paper come off with paint attached, the treated was holding tight and the paper ripped. For the cross hatch, paint was starting to peel the untreated just cutting it, and ripped a lot off with the tape, the treated was fully unaffected. Keep in mind this was just enamel mixed with enamel hardener, zero primer. I'm kinda impressed, I've heard of the flame treatment before but never really believed it. This will make some excellent trim and not very expensive.

Paper glued on, untreated on bottom:
20230216_193123.jpg

After peeling paper:
20230216_193611.jpg

After crosshatch:
20230216_194719.jpg
 

Watermann

Starmada Splash of the Year 2014
Joined
Jan 12, 2013
Messages
13,787
Am I seeing that right, it looks to me like the spray rail split out and someone beat the heck out of it with a hammer to close it up and then put some chicken scratch welds on it?

Be sure to inspect the bottom closely for any rib end cracks as well.

20230106_143936.jpg
 

Sharpie223

Petty Officer 2nd Class
Joined
May 24, 2021
Messages
165
No welds on the spray rail, just beat up, looks like something repetitive. No rib end cracks that I could see. Leak check also didnt show cracking. A limited number of rivets leaking, maybe 4, and then the seams on the side with the bad spray rail, as well as the transom seam. I had wire wheeled the seams before leak check, I wouldn't be surprised if that caused the leaking if I removed some old sealer. For how much pitting was below the brace, my guess is that was the primary source of the previous owners leaks. Getting patches installed this weekend ideally. Finishing gluvit, too.
 

Sharpie223

Petty Officer 2nd Class
Joined
May 24, 2021
Messages
165
This weekend I got my patch plates all ready for riveting. Made sure all holes aligned correctly and everything fit together. Smeared them with 5200 and held in place tight with some temporary screws. Went to install rivets, and the 1/4" rivets won the battle. Tried multiple strategies of bucking and could never get the tails to expand properly, just formed a thin pancake at the top, no usurping to the hole nor tightening up. Thinking my air hammer might just not be strong enough?
Back to plan b, ordered some stainless button heads and lock nuts, I will coat these heavily with 5200 and probably peen the threads to the nut after torqueing. Between nut serrations, torque, glue, and distortion, these should hold well.
Other work done, I was able to fill the low spots of the damaged spray rail with pc7 epoxy putty, will need to sand in a few days and then probably torture test the bond somehow.
The bilge side of the deck boards have been well coated in house paint just for extra protection after other treatments. The transom also got a coat of this, we'll see how much scrapes off during install. Wishing I'd have thought to coat all the boards in boiled linseed oil prior to spar varnish, this has been an afterthought once I started working on the side boards. All above deck boards will get this treatment at least.
 

SHSU

Lieutenant Junior+Starmada Splash Of The Year 2019
Joined
Mar 8, 2017
Messages
1,725
Ya, underpowered gun. You could try upping the air, but guessing that won't help.

SHSU
 

Watermann

Starmada Splash of the Year 2014
Joined
Jan 12, 2013
Messages
13,787
Never have used 1/4" rivets only 3/16". Machine screws and nuts will work, I'd use nyloc nuts so you don't have to worry about them loosening up.
 
Top