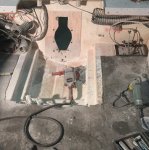
Haven't decided yet wether to build something like this or just laminate in mounts and lag it on. Nice thing is with this method is the glassed in mounts are separate and isolated from the stringers as a source of water contamination.
Ayuh,.... While I'm also a welder fabricator kinda guy, Lookin' at yer drawin's, it looks like the laminated blocks, 'n lag bolts is a better fit than fabin' up aluminum mounts to me,....
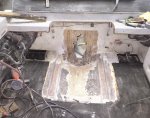
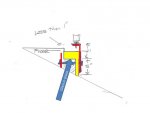
Especially seein' ya gotta cut holes in the deck to put nuts on the bolts,...
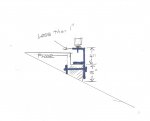
Did you find the point in space the way I described in that other thread,..??
Hangin' the motor, 'n alignin' it,..??
I've done metal mounts in some "Off-shore" type boats, 'n they ain't all that great, compared to plywood blocks,...
The Best tip I can think of is, don't over do it, as the bigger the mounts, the more they'll be in yer way someday,...
The 1st time I pulled the motor in my tinbarge, I skeletonized the aluminum mounts I'd made previously, as they were in the way, All the time,...
I cut out 'bout 1/2 of 'em, 'n now I can reach 'bout everything, with the motor in-place,...
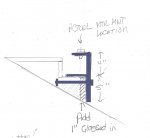
Oh, Btw, the aluminum plates only bring the grade up to the deck, there's 3" plywood blocks on them, the motor's mounts are lagged into,...
'n no disrespect to AD, but 99% of the boats out there have their motors held down with lag bolts,......
Mine included, over 15 years, goin' on 20 now,....