3.0L to 4.3L mtr mounts and 25 yo transom

Rick Stephens

Admiral
Joined
Aug 13, 2013
Messages
6,118
No Title

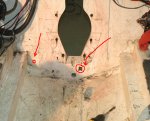
Here's making the test holes bigger. Wood is not soft, definitely in the bottom has ben wet, now not truly dry, the wood shavings are slightly damp from the lowest hole. The wood does not come out in a single plug. I started the hole saw ti the center drill, then removed the drive since the saw isn't long enough to make it through the full depth. The plug in the saw comes out in layers.

When poked at with a screwdriver blad the inside of both holes are solid, even the bottom one, which surprised me.

I am truly on the fence. I REALLY don't want to spend winter in the Rockies trying to butch out a mostly solid hunk of transom and then chase sunny days to get resin to cure. If it needs doing, I even less want a piece of crap boat........ Just isn't obvious the correct choice. (either way I'll enjoy the doing, whether I'm moaning about it or not :^)

Thanks!

Rick
 

Attachments

  • photo232590.jpg
    photo232590.jpg
    270.4 KB · Views: 3
  • photo232591.jpg
    photo232591.jpg
    267.6 KB · Views: 3

Woodonglass

Supreme Mariner
Joined
Dec 29, 2009
Messages
25,927
As I stated earlier If the area all around the keyhole is solid (and now the larger hole is kinda looking like it is!!!) then cutting away the bottom 6" and replacing it is a valid alternative. I'm usually a proponent of just going ahead and doing a full replacement but...in this case you've done due diligence on the core sampling and inspection and I'm of the opinion that it may just be the bottom 6 inches that's bad. But...I AM just an Old Dumb Okie soooo, you have to take that into consideration when you make your decision!!!!!:eek::peace:
 
Last edited:

alldodge

Moderator
Staff member
Joined
Mar 8, 2009
Messages
42,056
The bottom center is dry but as you go up its wet. Either something besides the drive was leaking (trim tabs, speed sensor, sonar) of the transom is leaking
 

Rick Stephens

Admiral
Joined
Aug 13, 2013
Messages
6,118
AllDodge, the 'clean' hole is higher up next to the bottom transom plate bolt. The dark one is 1 inch above the hull about 6 inches outboard and 6 inches lower. About what you'd figure if water was intruding from a transducer screw that was loose. A drop a day, all it would take. My bet is the sonar transducer and or pitot. I replaced all those 3 years ago, and added other stuff like trim tabs, a kicker mount and a second sonar on the port side. I used marine goop to seal new screws and drilled out/epoxied in old screw holes that were now unused. I noticed dark wood right along bottom of transom on the starboard side when installing the trim tab hinges back when.

Kind of like working on an engine though - when I cutaway some of the wood along the bottom I will get a fast idea of how far the bad wood goes. If it gets too deep then a complete tear out will be in the works. No time like the present to get started. Out comes all the other stuff. Needed to change out the steering, my donor boat has a really nice radial gear box that I want over the loosy goosy rack system currently in there. Start pulling everything and next think you know the old carpets will have to go too..... never ends, does it.

Thanks gentlemen.

RIck
 

alldodge

Moderator
Staff member
Joined
Mar 8, 2009
Messages
42,056
OK, was seeing your bottom hole and that's the boat drain, was thinking it was one you cut since there about same size. That's bad no glass just paint in the drain hole, so water that sits can soak right into the wood
 

JASinIL2006

Vice Admiral
Joined
Feb 10, 2012
Messages
5,673
The wood from that lower plug looks pretty punky. Assuming there is already some rot, what do you think are the chances it won't progress and the wood will dry?
 

Rick Stephens

Admiral
Joined
Aug 13, 2013
Messages
6,118
The wood from that lower plug looks pretty punky. Assuming there is already some rot, what do you think are the chances it won't progress and the wood will dry?

I think we have to assume that if there is water there is rot. Punky is a good description of the wood at the bottom. Starting to lose long grain structure. My biggest fear is I'll end up pulling hunks of transom wood out from under/behind the floor and at the end of the stringers and end up with as big a mess as if I just replaced it all. Gonna be a bear to rip the upper 3/4 loose from the fiberglass portion of the transom, though. Hence my fence sitting. (and the wife says rebuild the 3.0L and go back to fishing, who needs/wants 225HP anyway?)
 

JoshOnt

Chief Petty Officer
Joined
Aug 12, 2013
Messages
487
I think we have to assume that if there is water there is rot. Punky is a good description of the wood at the bottom. Starting to lose long grain structure. My biggest fear is I'll end up pulling hunks of transom wood out from under/behind the floor and at the end of the stringers and end up with as big a mess as if I just replaced it all. Gonna be a bear to rip the upper 3/4 loose from the fiberglass portion of the transom, though. Hence my fence sitting. (and the wife says rebuild the 3.0L and go back to fishing, who needs/wants 225HP anyway?)
Even if you did rebuild the 3.0L you would still want to look into the transom and see about replacing it so upgrading to 225HP still might be the best idea.
 

JASinIL2006

Vice Admiral
Joined
Feb 10, 2012
Messages
5,673
I think we have to assume that if there is water there is rot. Punky is a good description of the wood at the bottom. Starting to lose long grain structure. My biggest fear is I'll end up pulling hunks of transom wood out from under/behind the floor and at the end of the stringers and end up with as big a mess as if I just replaced it all. Gonna be a bear to rip the upper 3/4 loose from the fiberglass portion of the transom, though. Hence my fence sitting. (and the wife says rebuild the 3.0L and go back to fishing, who needs/wants 225HP anyway?)

I had that problem, as well: the part that was rotten was easy to remove, but the other 75% was pretty solid. It turned out to not be that difficult to remove the good part. I just ran a circular saw in criss-crossed lines over the transom and then popped the squares out with some chisels, pry bars and a hammer. After doing it for a while, I got pretty good at getting most of the wood out, leaving behind just a thin layer adhered to the fiberglass. A grinder made short work of that.
 

alldodge

Moderator
Staff member
Joined
Mar 8, 2009
Messages
42,056
Its not looking good Rick, we have all been there and feel your pain. It will get better when done but sometimes it seems to take way to long to get to the end of the flush tube (tunnel).
 

Rick Stephens

Admiral
Joined
Aug 13, 2013
Messages
6,118
No Title

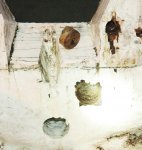
AllDodge - actually feeling a bit better. Did another couple test holes, the wood came out of those in one nice solid chunk. Wet, so far, is limited to the one lowest hole at end of drain tube. Pics show new hole locations, the right hand spot was where paint had flaked off showing a darkened wood area. This is closer to the cutout bottom, so a great test of what the right side will look like. Second test hole is necessarily a little higher up than the lowest one because of the drain.

These holes the wood came out clean and in one or two pieces. I'm sitting firmly atop my fence :D

Rick
 

Attachments

  • photo232689.jpg
    photo232689.jpg
    271.3 KB · Views: 1
  • photo232690.jpg
    photo232690.jpg
    203.5 KB · Views: 1
  • photo232691.jpg
    photo232691.jpg
    303.2 KB · Views: 6

Woodonglass

Supreme Mariner
Joined
Dec 29, 2009
Messages
25,927
Nothing wrong with those core samples. If you keep finding wood like that you're good to go!!!:clap2:
 

Rick Stephens

Admiral
Joined
Aug 13, 2013
Messages
6,118
Nothing wrong with those core samples. If you keep finding wood like that you're good to go!!!:clap2:

Thanks for the comment. It is so easy to plug cores that I don't mind sticking a hole wherever. Since I'm making a bunch of plywood laminate stripes for the motor mounts, and I'll take plugs off that when I cut down to fit. I am going to have to punch a hole in the floor on the starboard side and pull a core off the transom inside there. I'll be pretty satisfied then if the water was limited. We shall see.

The advice of everyone has been and continues to be invaluable. I would not have drilled plugs without. Sure is better than a drill bit.

I am going to sand off the paint and give the whole thing a coat of resin before I finish. And no more leaky screws!

Rick
 

alldodge

Moderator
Staff member
Joined
Mar 8, 2009
Messages
42,056
This one on the lower right hole (transom bolt hole) gives me concern. Looks dark, this is where my last problem started. Sure hope you don't have the same issue. Do you have a moisture meter?
fetch
 

Rick Stephens

Admiral
Joined
Aug 13, 2013
Messages
6,118
I don't have a moisture meter... cept one for wheat. Wonder if it would work?

No matter, what about I pop out a 1 1/2" core with that hole at the inner edge? I could plug solidly and re-drill the hole easily. I understand what you are saying. And while I poked and prodded with a screwdriver, that is not very definitive. Taking a big chunk out and inspecting it would answer more thoroughly.

I think the wood is about the same all over, but the upper gearcase on the old outdrive had an internal leak and this boat had constant if small intake of water until I purchased an SEI outdrive last year. I can see how a little water over time can damage the wood around the keyhole.

Rick
 

Woodonglass

Supreme Mariner
Joined
Dec 29, 2009
Messages
25,927
I agree with AD, that One outdrive mounting hole does look a bit "Yucky" (that's a Nautical term ya know!!!!;):D:eek:) Cutting and plugging around the keyhole is not the best thing to do, IMHO but I suppose if it was just that one area and if it was done carefully and precisely you could get away with it as along as all the bad wood in the surrounding area was removed and replaced too!!!
 

Rick Stephens

Admiral
Joined
Aug 13, 2013
Messages
6,118
No Title

I hear ya. I also am not sure current moisture content is going to tell us about past damage. I can't find crappy wood I can push a screwdriver into. Dark, yeah.

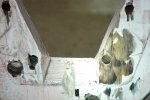
I sanded off the paint, drilled that hole out to 9/16 - going to do that to all of them and resin coat the holes anyway. Here's a pic with the flashlight in the hole.

I don't know..... seems like the wood is solid but discolored. I'll do a moisture test, be interesting to see what it's like now. I am sure it will structurally hold up for a long time as long as there is no active rot happening under my half blind nose. So a moisture meter would be the way to resolve any long term conflicts.
 

Attachments

  • photo232722.jpg
    photo232722.jpg
    226.9 KB · Views: 2
Top