2.3L omc swap to 4.3L merc project.

Speak

Chief Petty Officer
Joined
Jul 29, 2012
Messages
467
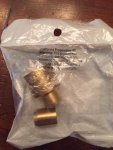
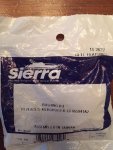
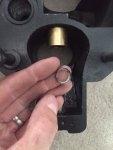
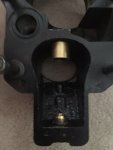
Hi guys, I have ordered a ton of parts off of iboats. One of them is the shift bushing for the bell housing. When the parts arrived I noticed that the bushing looked huge and may be wrong. Here are the pictures. Im wondering if the one i got is for a gen 2 alpah. My bell housing is for a gen 1.
 

Speak

Chief Petty Officer
Joined
Jul 29, 2012
Messages
467
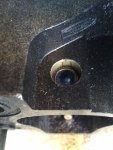
bell housing hole.jpg
The Hole in the bell housing has a lip in it to hold the old seal. But how does the new on go in? ThoughtsThis is the package it came in. I did see a kit 18-3760, I wonder if this is for the gen 1 bell housing. Thoughts???
 
Last edited:

Speak

Chief Petty Officer
Joined
Jul 29, 2012
Messages
467
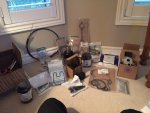
room.jpgTon of parts sitting in my bedroom again. Surprised the wife has not mentioned anything about it yet :lol:
 

Speak

Chief Petty Officer
Joined
Jul 29, 2012
Messages
467
That's the new style for Alpha 1. The seals sit below and last a lot longer.
I cant see how that goes in. My bell housing has a lip in it see post 63. I wonder if i should grind off that lip?
 
Last edited:

Speak

Chief Petty Officer
Joined
Jul 29, 2012
Messages
467
doesn't appear to be part of the seal. I could probably use a round file and gentle remove it. What u think?
I looked closer - rick you are right, that lip is steal. It looks like I can knock it out. I will do that tonight and report back
 

Speak

Chief Petty Officer
Joined
Jul 29, 2012
Messages
467
bell housing seal ring out.jpgHere is that ring that I knocked out. The busing pressed in real nice after this thing was removed
 

Speak

Chief Petty Officer
Joined
Jul 29, 2012
Messages
467
Bell housing bushing installed.jpgHere is a pic of both bushings installed. That upper one is a beast. Why so big. LOL Anyway, looks like it will work well. Next step is to replace the steering pin seal and and start putting the gimbal ring and bell housing into the transom assembly with the new bellows, shift cable, trim senders. I hope I will be able to reassemble all this with out mounting it on the boat. guess I will find out.
 

Speak

Chief Petty Officer
Joined
Jul 29, 2012
Messages
467
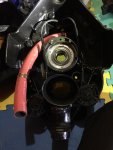
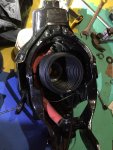
Bellows 2.jpgMISTAKE LOL Dont install the u joint bellows on the transom assembly first!! Dont know what I was thinking. Was a pain to remove the old bellows cement off the bellows and transom.
 

Rick Stephens

Admiral
Joined
Aug 13, 2013
Messages
6,118
Oops. Turn the clamp over too. You need to reach it from low down on the starboard side with a flex extension.
 

honda400ex2003

Petty Officer 3rd Class
Joined
Aug 3, 2010
Messages
81
looks awesome! i commend you for the efforts to get that into a capri! cant wait to see the rest!

steve
 

Speak

Chief Petty Officer
Joined
Jul 29, 2012
Messages
467
On vacation this week - so no new reports. Need to pick up spark plugs next week. I also Need to figure out how to mount the gauges from the other boat. The bayliner set up is so cheesy with no back support. I'm thinking of getting some thin plexiglass. Wrap the plexi in some faux carbon Fiber mount the gauges and see how that looks / thoughts?
 

Speak

Chief Petty Officer
Joined
Jul 29, 2012
Messages
467
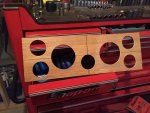
Cluster 1.jpgHey guys Im going to use the gauges out of the donor boat. I was going to use plexi glass, but found this very thin plywood. let me know what you think
 

Speak

Chief Petty Officer
Joined
Jul 29, 2012
Messages
467
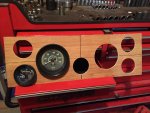
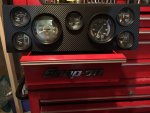
cluster 2.jpgcluster 3.jpgHey guys Im going to use the gauges out of the donor boat. I was going to use plexi glass, but found this very thin plywood. let me know what you think. I wrapped the whole thing in this carbon fiber wrap. I think it came out looking great. What do you think???
 
Top