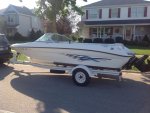
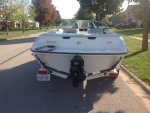
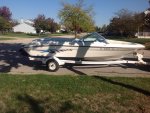
1997 Sea Ray 175

Searayb

Seaman Apprentice
Joined
Jul 6, 2011
Messages
46
Re: 1997 Sea Ray 175

Make sense Marc to use the panel you have. The one I had was cracked, weathered, I look for an economical replacement for over a year with no luck. Looking forward to seeing end result of your mod.
 

fat fanny

Lieutenant Commander
Joined
Feb 9, 2006
Messages
1,935
Re: 1997 Sea Ray 175

OK picture this on my Ray I replaced the dash with 3/16 plexi and painted the back side after cutting and drilling to fit. Just wire lable and map all your wires of the harness. Now Marc as for the sun pad in your 2nd pic the flat area above the warning sticker is where the piano hinge was located and the small 1' sunpad straddled the bilge blower intake and vent ports leaving the stern side ports open for intake and ventilation the bow side of the intakes had plastic plates blocking off that open side, The pad it self wrapped over the bow side and down the jump seat sections as back rests and recessed up and over the fiberglass dog house with a small section of carpet covered wood the length of the flat section (in the 2nd pic) that held the bilge bulkhead steady in the center that bulkhead was also covered in carpet. You can increase the sunpad to 3' by eliminating the dog house and jump seats and recessing the sunpad into the rim and using heavy duty hinges and hydraulic assist lift pistons (like on hatch backs). This enclosed area will be great for a open bilge engine compartment and possibly a built in cooler. I hope that made sense.
 

Marc Peternell

Petty Officer 3rd Class
Joined
Dec 21, 2013
Messages
97
Re: 1997 Sea Ray 175

That makes sense. What I'm trying to picture is how you would have the sunpad go on top of the bilge intakes (let's call it the rear rim) and then recess the sunpad into the rim on the sides of the boat. I can see how you could put a sunpad to sit on top of all rims, or recess on all rims, but how would you have it sit on top of the rear rim and not the side rims? Because the side and rear rims are level with each other.

(I hope this is making sense)

I think I would just recess the entire sunpad.
 

fat fanny

Lieutenant Commander
Joined
Feb 9, 2006
Messages
1,935
Re: 1997 Sea Ray 175

The area (rim)where the intakes are where covered with the sunpad from the factory. I would make a seperate pad to cover that area possibly of a different color! Maybe searayb can snap you a pic of how his is I never took any pics of mine. I miss that boat!!!!!!!!!! And you are on the right track of recessing the whole pad there are some molded notches in the inner rim area where the jump seat pads could be placed to make the factory sunpad larger along with the dog house but to me that was just to many pieces to make a sunpad for the admiral to lay on my overall future plan was exactly what your doing. Do you still have the fiberglass bulkhead insert for the jump seats?(it's removable) and if so it could be a great template for a new bulkhead along the deck to the side shelves possibly even a contoured curve? the possibilities are endless but I would suggest fitting all your mechanical's 1st engine,trim pump, fuel tank, battery and electrical's. I just noticed in post#7 pic 2 you have the insert and doghouse this can help explain some of the factory design of the sunpad if you imagine a small pad on top the doghouse and a long narrow pad the width of the hull lying on top of a wooden carpeted bulkhead hingrd to the flat area between the intakes there was also a 6" gap between the bulkhead and back of the rim for bimini storage the width of the hull.
 
Last edited:

saginawbayboater

Senior Chief Petty Officer
Joined
Mar 8, 2012
Messages
677
Re: 1997 Sea Ray 175

Following along Marc this is a fun refit!!! Nice work on the Ray :eagerness:
 

Searayb

Seaman Apprentice
Joined
Jul 6, 2011
Messages
46
Re: 1997 Sea Ray 175

image.jpgimage.jpg. My boats in storage for the winter. Here's a couple of pictures that I think show the area of interest.
 

Searayb

Seaman Apprentice
Joined
Jul 6, 2011
Messages
46
Re: 1997 Sea Ray 175

image.jpgimage.jpg. Looking through my IPad I found a couple more for you Marc. Hope they help.
 

Marc Peternell

Petty Officer 3rd Class
Joined
Dec 21, 2013
Messages
97
Re: 1997 Sea Ray 175

Thank you Searayb! I appreciate your help and time posting those. I was looking at mine today and it will be close, but if I do want to go with a recessed sunpad (a sunpad that does not sit on top of the cap), I will be able to clear the flame arrestor on the engine. It will be closer than I thought though.

I think that if I go with a recesssed sunpad, and then a pad somewhat like Searayb's, then I could have my sunpad and a cover over the bilge blower vents. We will see when I get to that point. I'm much better at the mechanicals than I am the cosmetics. I'm really not very good at making pads and I don't sew well. I've read a lot of posts on here where people can, and I understand the concepts, but it still doesn't give me the talent (or the sewing machine needed).
 

Marc Peternell

Petty Officer 3rd Class
Joined
Dec 21, 2013
Messages
97
Re: 1997 Sea Ray 175

I did do a little bit of work on it over the weekend. I got the throttle/shifter and the tilt/trim pump transferred from the donor boat to the Sea Ray. It was pretty simple considering that the boat is gutted and there aren't any cushions or anything to navigate around. The mounting holes for my shifter didn't line up with the pre-existing mounting holes on the sea ray, so I just drilled 3 new holes. One more mechanical item out of the way though.
 

Marc Peternell

Petty Officer 3rd Class
Joined
Dec 21, 2013
Messages
97
Re: 1997 Sea Ray 175

My plastic gas tank had a thick layer of old gas that had turned to varnish on the bottom of it. This is from the previous owner, not me. Well, I did my search for "how to remove old varnished gas from a plastic fuel tank" and came up with a several different ways. I'll admit, my gas tank is out, so my job was easier than most.

I have to give credit where credit is due. There is a product called Berrymans Chemtol B12 (product # 0113). It is available at walmart and auto parts stores, it isn't an uncommon product and I've used it before as gas treatment and to clean carburetors. Well, I wasn't sure whether or not it would harm my plastic gas tank, so I called them. They actually put me on the phone with one of their chemists! How cool! Very customer service friendly of them! He ensured me that it wouldn't hurt my gas tank, even non-dilluted.

So, I put a couple of cans of it in my tank and it completely desolved the varnish from the old gas. The what was a clear liquid B12, turned to a brown liquid. I wish I had before and after photos, but it is hard to take a picture through the fuel gauge hole.

Anyway, I was pleasantly surprised by both the product and the customer service of the products manufacturer. So, I wanted to mention it.

By the way, I have a small piece that had broken off of one of the places where you attach the vent hose to the plastic tank (so I have a detached part of the plastic tank) that I submerged in the B12 and let it soack overnight just to make sure, and the B12 didn't hurt the plastic piece at all, so I could've soaked the tank in non-dilluted B12 all night had I wanted to, but it dissolved the varnished old gas within minutes, althought I did let it sit for an hour or so.

So, the project is ready to continue with a functional gas tank now.
 

britisher

Petty Officer 1st Class
Joined
Feb 23, 2012
Messages
369
Re: 1997 Sea Ray 175

Just my 5 cents here on the location of the sunpad. My 1989 SR 180BR has the full width sunpad which SR recessed inside. It sat on 2 upholstered brackets on the side which were attached to the full length upholstered side panels and the front of the sunpad rests on the seat back panel which goes full width of the cockpit. The problem with this set-up is one of water run off. If it rains it simply drains down inside the boat. When I completely rebuilt my boat 2 years ago I wished I'd rejigged the sunpad design altogether, made it dimensionally bigger and located it on top (like a lid), then I would have had no water run off issues. The other thing I would mention if you are considering rebuilding that sunpad is why not make it 3 pads? That sunpad is one heavy thing to lift and manhandle. A 3 part sunpad would mean lighter panels and easier access to the parts of the boat rear you want. As a note, the PO used 2 SS hinges to hold the sunpad on the back of the cap. I noticed several screw holes on the cap and deduced it was a botch job. To hold my sunpad on the boat I bought a 72 SS piano hinge that fits all way across the back of the cap. Not sure if that was overkill, but it works.
 

Marc Peternell

Petty Officer 3rd Class
Joined
Dec 21, 2013
Messages
97
Re: 1997 Sea Ray 175

Britisher - thank you for your input. I agree with you about the water runoff if the sunpad is recessed. I boat is salt water most of the time too, so I could certainly protect the components underneath it better if the pad was not recessed and sat on top of the cap. I'm going to continue to put some thought into this. Realistically, it isn't like the sunpad is real thick, so if it does sit on top of the cap, it really wouldn't obnoxiously stick up in the air. Then again, if I can put some sort of a gutter-ish type of a rail on it (I'm thinking like a U-shapped piece of aluminum trim, then I can possibly channel where the water drips.

You are right about sunpads being heavy, 3 pads would be cool! How did you have it configured? One over the engine, and then one over each side of the engine? Problem with that is it would create more of the run off issues that we are discussing. I guess it could still be channeled and drained somehow. I get plenty of water in the bilge from run off in the cockpit, so as long as it didn't drip onto any important things underneath, it would be fine.

Very interesting.
 

britisher

Petty Officer 1st Class
Joined
Feb 23, 2012
Messages
369
Re: 1997 Sea Ray 175

When I was doing the rebuild on my boat, the engine, etc had been removed and was at the boat repair guy's shop. I had the boat as I had to completely gut it and rebuild from the ground up with all new wood. I had the old sunpad in the garage, which I used as the template for the new one. After the boat returned with the engine fitted, I offered up the newly made sunpad in its standard recessed position and thought straightaway, this is going to create water issues. At that point I did consider doing another rebuild, but having just paid out over $100 for the fresh vinyl and the cost of the hinges, tee nuts, wood, etc, I didn't feel I could justify paying out again for a redesign. So the sunpad is just as Sea Ray designed it back in 89. This huge,and heavy (3/4" ply, resined + plus foam & vinyl). Gas struts weren't around in those days, so it has an aluminum pole strut that you put in a set hole under the sunpad to hold the thing up.
If I'd have gone down the 3 pad route with all 3 sitting on top of the cap, then the join between the center pad and the 2 outer pads would have been the water ingress problem area. Mine has 2 longitudinal wood frames that are vertical either side the engine. They act as supports for the sunpad and also mounting points for the hour clock, etc. I guess you could have installed a U shaped gutter of sorts on the top of each to manage water run off. I always look closely at hatch designs on newer boats to work out solutions for mine.
 

Marc Peternell

Petty Officer 3rd Class
Joined
Dec 21, 2013
Messages
97
Re: 1997 Sea Ray 175

My 1987 "donor" boat (you can see it in some of the photos) has a recessed sunpad made of 3/4 ply (at least I think it is that thick) painted with resin, then the foam and vinyl. I've always held it up with a pole (it's actually an old broken aluminum boat hook pole). That as always worked well, except for 1 time, I was checking on something in the engine compartment while the boat was in the water at the ramp, a boat went by the no wake zone with a wake, rocked my boat, the pole came out and the sunpad cracked me in the head. OUCH!!! I'm surprised it didn't knock me out. Hmmmm, now that I'm thinking about it, maybe that knock in the head explains a lot. haha
 

Marc Peternell

Petty Officer 3rd Class
Joined
Dec 21, 2013
Messages
97
Re: 1997 Sea Ray 175

I tell you what, the thieves that gutted my gutted project boat, sure took a lot of stuff that was worth nothing to them. In working on the gas tank portion of the boat, I just had to buy a gas cap ($20 from ebay) and a fuel pickup tube (yes, thieves actually stole that! -- another $20 on ebay). Neither from the donor boat would work on the project boat. I'll likely have to buy a fuel sender too, depending on whether or not the fuel sender from the donor boat fits. I doubt it will, but I don't remember how much adjustment room I left on the donor boat's fuel sender when I replaced it a while back.

But, once I have those 3 components squared away, I will be able to get the fuel tank installed. Maybe I can sell the donor boat's aluminum fuel tank on craigslist. It could maybe reimburse me for some of this. It's just a 20 gallon belly tank, so I doubt it is worth much.
 

fat fanny

Lieutenant Commander
Joined
Feb 9, 2006
Messages
1,935
Re: 1997 Sea Ray 175

Mark you may have already thought of this but it seems your putting allot into this sun pad construction. I suggest using large sheets of cardboard to mock up your ideas and others.
 

Marc Peternell

Petty Officer 3rd Class
Joined
Dec 21, 2013
Messages
97
Re: 1997 Sea Ray 175

fat fanny - how is your fuel line routed from the gas tank to the fuel pump? Do you have a water separator on yours? On the 1996 engines, is the fuel/water separator mounted on the engine? You probably have an electric fuel pump as well.

I'm trying to figure out the best way to run my fuel line from the tank, to the fuel/water separator, and then to the mechanical fuel pump (my fuel pump is mounted to the engine block on the starboard side -- (non-carb side).
 

fat fanny

Lieutenant Commander
Joined
Feb 9, 2006
Messages
1,935
Re: 1997 Sea Ray 175

Just so your aware I do not own this rig I reffer to anymore (had to sell to pay for legal fees to get custody of my grandaughter) but it was routed along the transom down into the bilge and along the starboard side of bilge up to the fuel pump. I did not have a water seperator it was only a option on my year (96) but I have seen a few like ours that were mounted on a plate on the starboard side of the transom at the level of the top of the tank. I remember every detail of that rig down to a T I loved that boat I kept it in top operating order but I love m grandaughter more and the choice was a no brainer!!!!!!!! if you have any question let me know I keep an eye on your thread. And it was a mechanical fuel pump.
 
Top