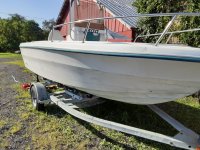
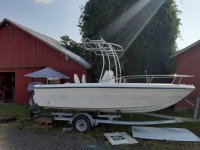
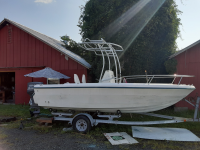
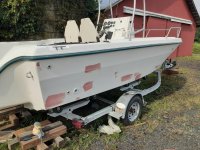
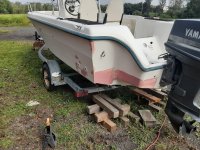
1996 Century Boats 1800 Center Console Refit and Modernization

zool

Captain
Joined
Aug 19, 2012
Messages
3,432
I decided to run a thread on this project, since Ill be working on it a lot over the next 10 months. It needs to be in the water by June of next season. Lately i'm bouncing back and forth between the Checkmate and this rig.

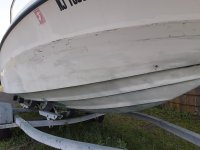
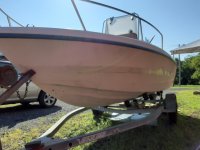
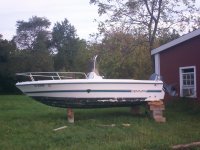
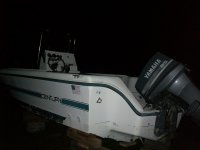
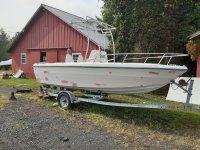
The last time it was in the water was 2008. This is how it was when I brought it back from the shore after Hurricane sandy. It survived sitting on the trailer, and chained to a tree. The house
didnt survive.
1628047457591.jpeg

1628047496521.jpeg

That was as far as I got removing all the old anti fouling paint layers, up until this week that is.

Ill be doing everything from rewiring, paint work, gel work, electronic upgrades, t-top, upholstery, and a bunch of other stuff.

Ive done some tasks already, ill update the project to its current state, which isnt that far along.

The engine started up with little effort, so that was a good start!

Gonna make this girl sexy again!
 
Last edited:

zool

Captain
Joined
Aug 19, 2012
Messages
3,432
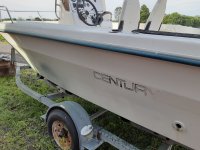
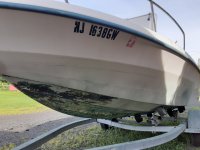
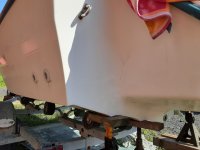
I stripped off more of the bottom paint, the side stripes and logos, still have more sanding, and the old decal residue is a *****, but its getting there.
1628049285376.jpeg

1628049322812.jpeg

1628049355313.jpeg

The bottom paint is old, thick, and really stuck on there....The reg numbers have to be changed too....and changed to white, since the hull sides will be colored.
 

todhunter

Canoeist
Joined
Sep 15, 2020
Messages
1,244
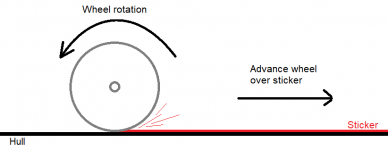
What are you using to remove the decals/residue? I was very impressed with the 3M Stripe Off Wheel on a battery powered drill. Make sure the surface of the wheel is moving against the direction you are moving the drill. I removed reg numbers and pinstripes from my entire boat using one. After wiping with a microfiber with a small amount of xylene, there was no residue left behind.
 

zool

Captain
Joined
Aug 19, 2012
Messages
3,432
Hey Tod, I used a heat gun and plastic razor to remove the decals, casme right off. then acetone wipe pretty much removes the residue, after some time. I have a few of the drill wheels, but havent used them yet.

Its basically the 1/8 inch of bottom paint thats causing all my fun lol....I got about 3/4 done when my sander bit the dust. Gonna move the boat inside tomorrow to remove the rest with a new sander, then prep the bottom and hull sides for paint.
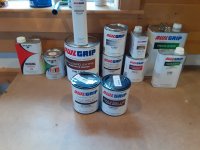
Awlcraft super jet black for the sides, and pettit vivid white over awlgrip hull guard for the bottom....after a ton of fairing...
 
Last edited:
zool

Captain
Joined
Aug 19, 2012
Messages
3,432
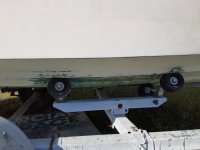
I finally got most of the layers of crap off the bottom, just have to get under the roller areas, I started jacking the back up enough to get the sander under.
I broke out the drill wheels Tod, and they worked good on the reg numbers and the remaining decals, left a bunch of snot tho, but hteyre off.

1628533293505.jpeg

1628533323821.jpeg

1628533354401.jpeg

1628533393253.jpeg

This is worse than grinding glass! I also picked up some black vinyl dye in a rattle can to change the rubrail from green to black. And now the Hull Guard, Bottom Paint, Primer, and hull side paint came in.....so i can finally start moving up from the bottom.

1628533531844.jpeg
 

todhunter

Canoeist
Joined
Sep 15, 2020
Messages
1,244
I found that if I used the wheel as shown below, it left hardly any residue. If you use it where the wheel is spinning the other direction, it left lots of adhesive snot after removing the sticker, like you observed. Of course, your boat may have stickers that used a different adhesive, which behaves differently.

Untitled.png
 

zool

Captain
Joined
Aug 19, 2012
Messages
3,432
Yea, I got the hang of it after a bit, they sure do melt away tho, doing large areas.....solvent and some elbow grease will get it the rest of the way.....
 

sphelps

Supreme Mariner
Joined
Nov 16, 2011
Messages
11,435
Surfing around just found this one Zool ! Gunna be a nice fishing rig for sure !
 

zool

Captain
Joined
Aug 19, 2012
Messages
3,432
Thanks Sam, I got a lot of stuff to install on this rig, should be fun!

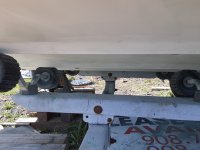
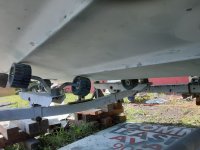
So I ended up removing the roller brackets one by one and sanding underneath. I got about 2 square feet left under the last bracket. Then another degreasing, then prep sand for the barrier coat.

1629496397399.jpeg

1629496446540.jpeg

I only burned thru the gel in a few spots. Not too much fairing to do on the bottom.
 

kcassells

Fleet Admiral
Joined
Oct 16, 2012
Messages
8,600
Thanks Sam, I got a lot of stuff to install on this rig, should be fun!

So I ended up removing the roller brackets one by one and sanding underneath. I got about 2 square feet left under the last bracket. Then another degreasing, then prep sand for the barrier coat.

View attachment 348201

View attachment 348202

I only burned thru the gel in a few spots. Not too much fairing to do on the bottom.
I dread getting to that point. I like the way you approached it vs. blocking it.
 

zool

Captain
Joined
Aug 19, 2012
Messages
3,432
I dread getting to that point. I like the way you approached it vs. blocking it.
Yeah, im not fond of laying under a blocked boat......plus im too lazy to do it....pretty sure the next time this boat leaves the trailer will be at the ramp :]
 

zool

Captain
Joined
Aug 19, 2012
Messages
3,432
Update:
Finished removing the old bottom paint, glad that's behind me.
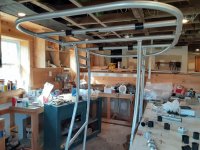
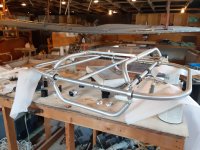
Its kinda too hot and humid to paint this week, so me and a helper assembled the Dolphin Pro TTOP and some of the accessories.

1629927236181.jpeg
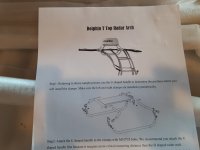
Working next to a window ac sure beats masking and suiting up in 95 deg weather! I assembled the framing for the top, then assembled the radar bracket for it. The ttop didnt come with any instructions but the arch did gi something.

1629927407152.jpeg


1629927441577.jpeg

Took all day but we finally got it installed on the boat, just have to install the ebox, rod holders, and antenna mounts/lights.

1629927518196.jpeg

I have to do some fabrication to the ebox to flush mount a few items, and add some busses.
 

kcassells

Fleet Admiral
Joined
Oct 16, 2012
Messages
8,600
Geez... That looks really nice Zool.
How did you mount it to the floor?
What goes on top?
You'll catch alot of perch with that set up for sure!
Looking back at the pick looks like even God approves!
 

zool

Captain
Joined
Aug 19, 2012
Messages
3,432
Thanks Kev, It comes with neoprene pads for under the legs, so i cleaned the hull area, used 5200 to attach the pads to the legs, and more under the pads to the deck. Then 4 screws lagged it down to the composite deck. There are also standoffs attached from the legs to the console on both sides, its sturdy but needs vertical braces on the front to avoid sway when the dome and ebox are up there. I have to order a pair.
 

zool

Captain
Joined
Aug 19, 2012
Messages
3,432
It also came with a black tarp cover, I had it on but took it off to align and tighten it all down.
 

KJM

Lieutenant Junior Grade
Joined
Jul 31, 2016
Messages
1,188
Thats a nice looking boat! Did you check out the wood for rot or wet floatation foam?
 

zool

Captain
Joined
Aug 19, 2012
Messages
3,432
No wood, its a composite transom and stringers. No foam under the deck either, its up in the gunnels on the side of the tub. Its also self bailing so it helps keep water out of the bilge.
 

zool

Captain
Joined
Aug 19, 2012
Messages
3,432
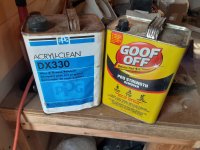
1631718921310.jpegWhile the powerhead for the checkmate is soaking, I began prep for painting the hull sides of this. I scavenged the shelves and used goof off to remove the remaining decal residue from the sides. Then cleaned it all with wax/grease remover.
Then sanded it all with 120 grit. Then mixed up some Awlfair compound and filled in anything that was obvious.
1631719051499.jpeg

1631719075754.jpeg

1631719122210.jpeg

The back corner was the worst due to some dock rash, probably from a piling. Letting it cure, then will follow with Awlgrip 545 primer, then 3M marine filler to fill in the shrinkage, and finally 3m glazing compound for any pin holes.
 
Top