1995 Larson 174 SEI Complete Rebuild

Mechanicalmike08

Petty Officer 1st Class
Joined
Aug 29, 2018
Messages
308
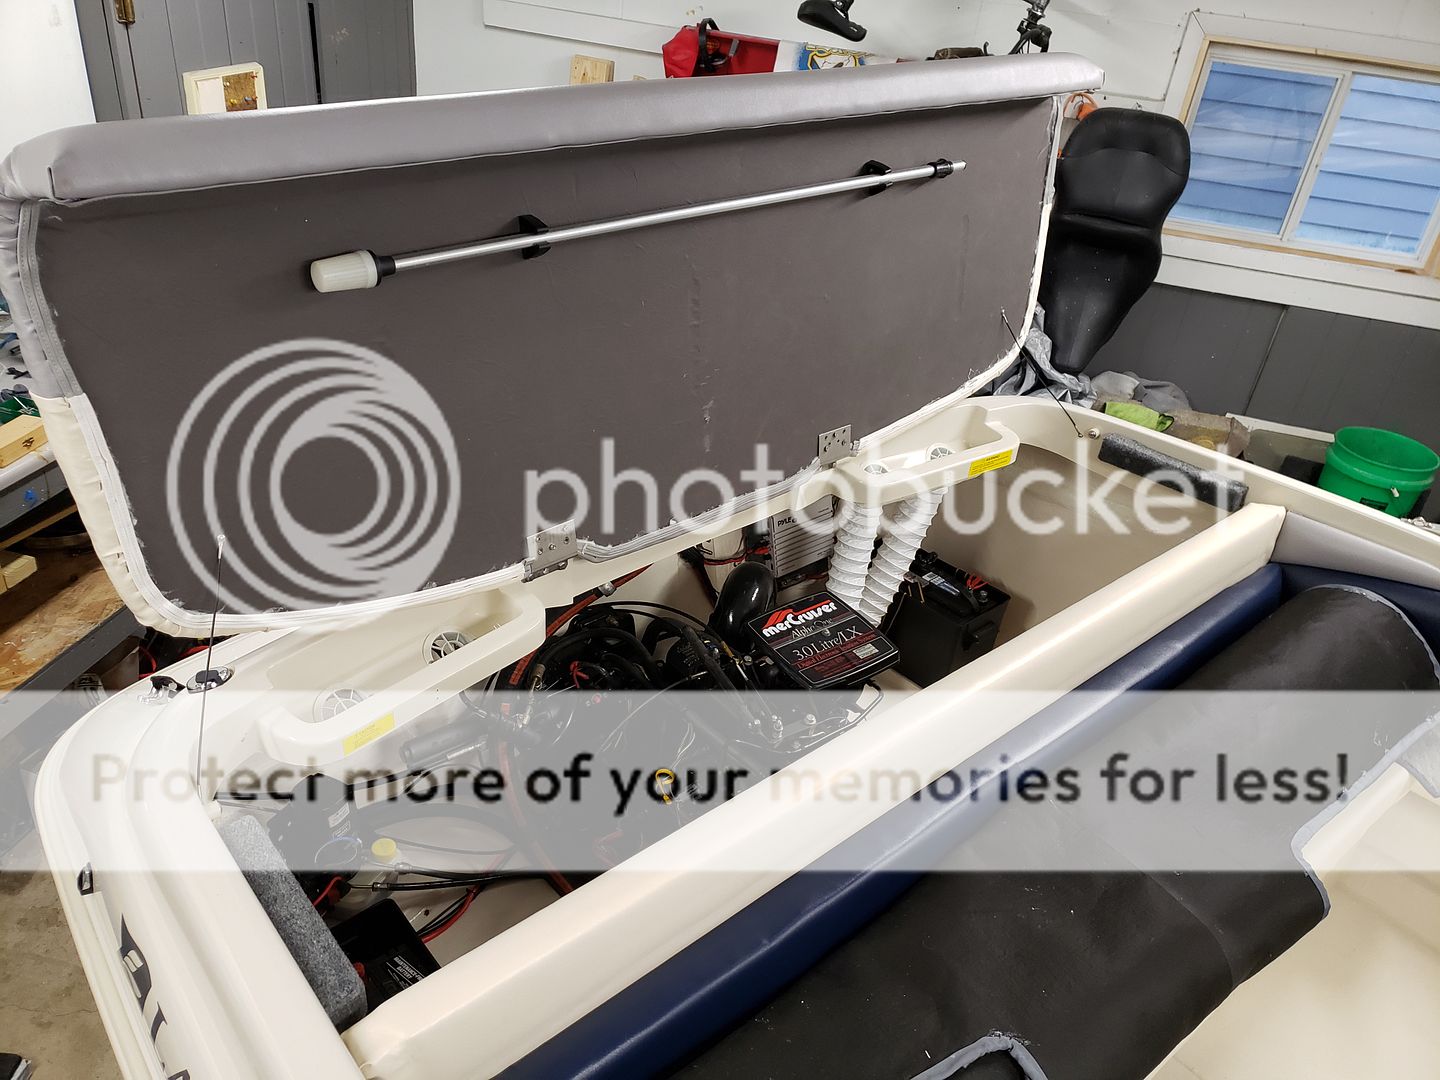
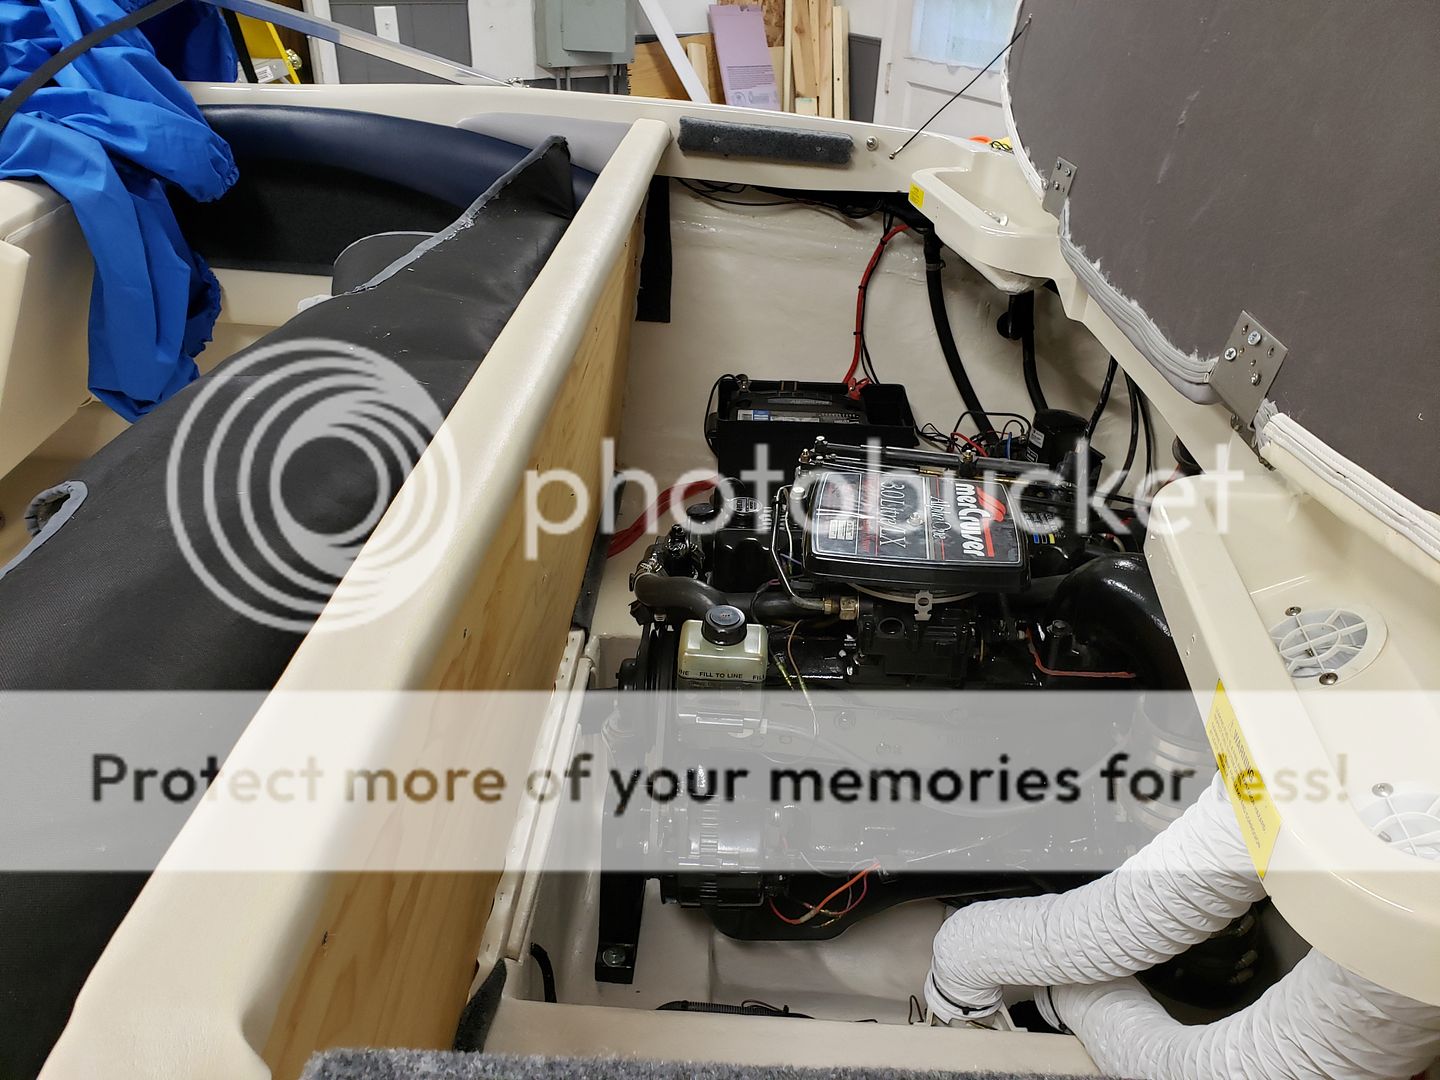
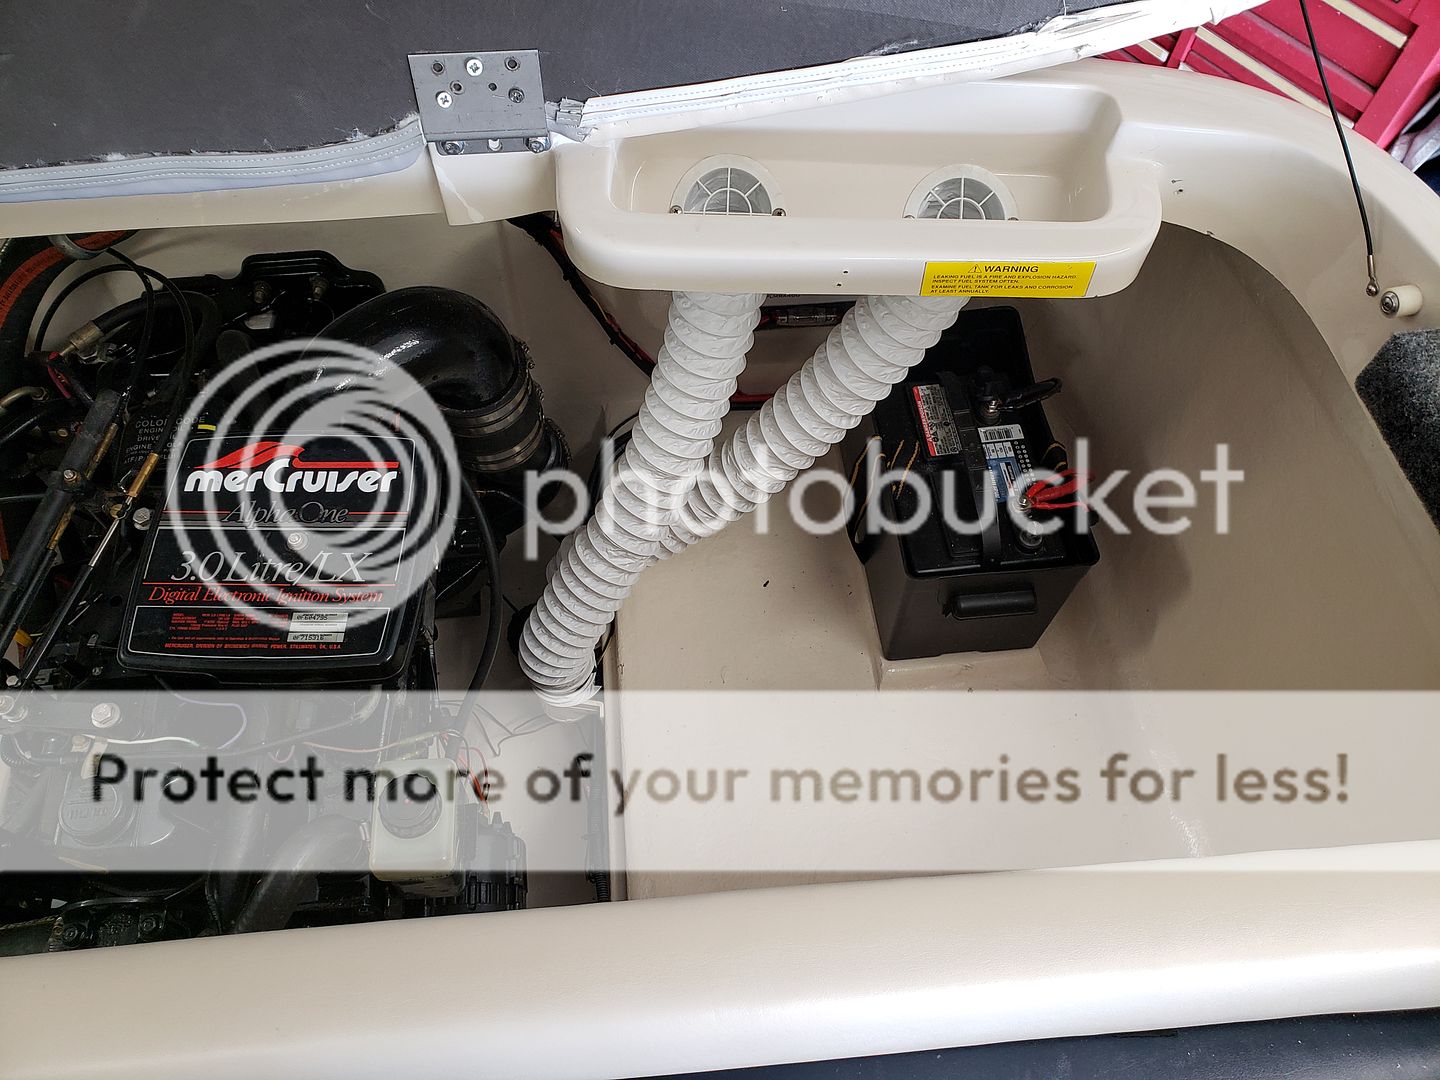
Wow, Mike, this is absolutely incredible work. Would you mind posting a few photos of your sun pad/engine cover lifting up and the engine bay inside? I love the way you've done and plan on doing mine similar. Thanks in advance!

Thank you very much. Here are some pictures of the sun deck assembled and how everything fits. I added supports along the side wall to help take some of the load when people are on it. I also dont think i posted any pictures of how the seats are finished on the underside. Here you can see the fabric on the underside and the edging. I still have some frillys from the batting peaking through. Also finally got the bilge and blower with new vents put in. I have some Dynamat around from a job that never got done that i might stick to the back side of the bench to quiet the motor but haven't really had a chance to run it with the cover on to see how bad it is.


dezmond

Senior Chief Petty Officer
Joined
Jul 21, 2010
Messages
760
Hey Mike, where did you get your hinges for the sundeck??
 

steve_h7

Chief Petty Officer
Joined
Sep 16, 2018
Messages
401
Way back when you were going to try and make a list of the amount of products used during the build... have you had a chance to do that? Selfishly I'm wondering how much gelcoat it took and foam kits you used?
Once again, beautiful job and thanks for documenting the build for us!
 

Mechanicalmike08

Petty Officer 1st Class
Joined
Aug 29, 2018
Messages
308
I’m sorry I did kind of forget that because I have been wrapped up in the finishing details but here is a list of everything I bought and the amounts. The only things I had left was about 5 yards of CSM, maybe a ¼ of the chopped strand, the 4oz bottle of MEKP, and a bunch of styrene and the surfacing wax because you don’t use much. The only reason I bought the styrene was to try and thin the gel coat and ended up not doing it after the first coat because it laid down just fine for me out the bottle. I would for sure order more MEKP than they send you with the resin, they give you just enough and found myself needing more. The quart of gel coat was bought to fill spider cracks, the 2 gallons was for the inside and had just enough could have used maybe another quart. Foam was right on the money and had very little left over. The rollers, trays, brushes and quart cups I found were the best prices I could find anywhere.

I only went through 1 gallon of acetone. Be smart and buy an empty metal quart paint can with a lid, fill it ¾ full of acetone and set your tools in for like 5 mins when done and everything will just fall off. Put the lid on and save it till next time. Wipe clean with some paper towel and this will save you a ton on acetone.

I could have gotten away with 4 sheets of plywood if I did not leave the gas tank area exposed. This created some awkward cuts that made we have to buy another sheet.

Anyone reading this thinking about doing a project like this and you add up the dollars associated with this list (didn’t list prices as they change so much) it doesn’t look so bad, what added up to me and sent me above and beyond my budget was all the little stuff that added up to be more than expected over the course of the project. Of course some of the stuff I did just because I had everything apart. For example I have probably $300 in rebuilding the gimbal housing, the interior cost me quite a bit even doing it myself, stainless screws add up quickly, I did the vinyl wrap on the outside which was another $120. I am not at all saying it was not worth it, in fact I am very happy with my total investment because I have shopped around and for what I have in what I paid for the boat and all the expenses I could not buy as nice of a boat any newer.
ProductSupplierAmountPart #
CSMUS Composites25FG-10550
1708US Composites20FG-170850
435 Resin (5 Gal)US Composites4SM-435500
Cabosil (4 Gal)US Composites2FL-AER400
Chopped (1/4" 4LB Tub)US Composites1SM-CH144
Bubble RollerUS Composites1FR-1224A
MEKP (4oz)US Composites1SM-MEKP040
MEKP (8oz)US Composites1SM-MEKP080
Surface wax (Pint)US Composites1SM-SWAX16
Gel Coat (Quart)US Composites1GEL-NU025
Gel Coat (Gallon)US Composites2GEL-W100
Off White Color (1oz)US Composites1AC-HA001
Off White Color (4oz)US Composites2AC-HA004
Foam (2LB Density 4Lb Kit)US Composites1FOAM-0204
Foam (2LB Density 16LB Kit)US Composites2FOAM-0216
Styrene (Quart)US Composites1SM-STY025
Chip Brushes (36 Pack)Harbor Freight1
6" RollerAmazon2
Trays 12 PackHome Depot3
Quart BucketsAmazon100
3/4" ACX Plywood (4x8)Home depot/Menards5
2x2 Lumber (8' For cleats)Home depot/Menards3
 

steve_h7

Chief Petty Officer
Joined
Sep 16, 2018
Messages
401
One more question when you have time...
I wondered if you think in hindsight it was a waste to add the texture to the gelcoat when ultimately you ended up using carpeting? Or was it still beneficial and worth adding with carpet in traffic areas like you did? I'm planning on following your example... it looks terrific. :thumb:
 

Mechanicalmike08

Petty Officer 1st Class
Joined
Aug 29, 2018
Messages
308
One more question when you have time...
I wondered if you think in hindsight it was a waste to add the texture to the gelcoat when ultimately you ended up using carpeting? Or was it still beneficial and worth adding with carpet in traffic areas like you did? I'm planning on following your example... it looks terrific. :thumb:

Sorry Steve, been busy getting the boat finished up as well as opening all my summer can of worms. I don't think it was a waist of time. I think at some point the carpet will be out of the boat and i will be glad its there. I also think it helps hold the carpet in place or from sliding around. My carpet is not glued down its just a mat that is set in place and currently i do not have any snaps to hold it in place but seems to be held in place just fine so far.
 

Mechanicalmike08

Petty Officer 1st Class
Joined
Aug 29, 2018
Messages
308
Well we finally get her out and running and what a good feeling. As usual the docks were pretty busy for this weekend so I couldn't grab a picture but everything went great! Found my one mistake so far, I somehow swapped the location of the gas and oil gauge. Luckily my labels were still on the back so a quick swap and I had a steady oil pressure again.

Happy Memorial day to everyone!
 

Mechanicalmike08

Petty Officer 1st Class
Joined
Aug 29, 2018
Messages
308
I know, I know. Probably wont be until this coming weekend. Was to busy this weekend and bad weather.
 

Mechanicalmike08

Petty Officer 1st Class
Joined
Aug 29, 2018
Messages
308
This is way over due, we have had it out 5-6 times now and every time I forget to grab some pictures. She is now on the boat lift up north and has been a blast. The compliments I get on the water make it all worth it. Only issues are a small power steering leak at the compression fitting that I think will need to be undone and clean the seats, the other issue is the exhaust bellow. The front does not want to stay on, it hasn't come fully off yet but has slid back and is close. When I did it i had it come off on me twice, the final time I let the bellows adhesive dry for a long time before tightening the clamp but apparently still wants to come off now. Any tips or anyone else have this issue?


Our happy pup
 

ACon977

Senior Chief Petty Officer
Joined
Nov 21, 2017
Messages
759
Amazing pics Mike! Sorry I dont have any idea on a solution to your issues.. not quite technical enough to troubleshoot without looking and touching. Im sure someone on here will help ya though.
 

TinTexas

Cadet
Joined
Sep 14, 2019
Messages
8
Hi - I'm new to the forum. Came across this thread while doing a google search. You did some beautiful work. I own the same boat in a very similar condition that yours was in when you started. I'm trying to decide if I want to tackle the job or not. This thread is a gold mine resource. Do you mind sharing a ballpark cost of what your materials set you back? I'm debating if it's worth it or not. Thanks!
 
Top