1995 Larson 174 SEI Complete Rebuild

Mechanicalmike08

Petty Officer 1st Class
Joined
Aug 29, 2018
Messages
308
looks good. maybe you can take a picture on how the inside looks like with the next cusions


Here are some pictures of the next cover I made. Basically its a extra piece of fabric on the inside of the cover to pull it down and around the foam. The foam is cut to match the curves in two pieces. You basically put one part of foam down and pull everything tight with the inside and shove the second part in. Now if your good the "extra" piece would just be an extension of one of the top parts but I'm not that good so i just sewed on a extra piece.


Mechanicalmike08

Petty Officer 1st Class
Joined
Aug 29, 2018
Messages
308
Over the last few days got the 2nd and 3rd coat down. Pretty happy with the turn out. The third coat had wax added. Im really happy with the color match.


Also here is a close up of how the texture turned out on the gas tank cover, its not that great. I think I am happy with it, ill give it the bare foot test tonight to be sure. I was hoping for more of a defined outline of the textured surface like more of a factory look but it all just kind of washes out.


Mechanicalmike08

Petty Officer 1st Class
Joined
Aug 29, 2018
Messages
308
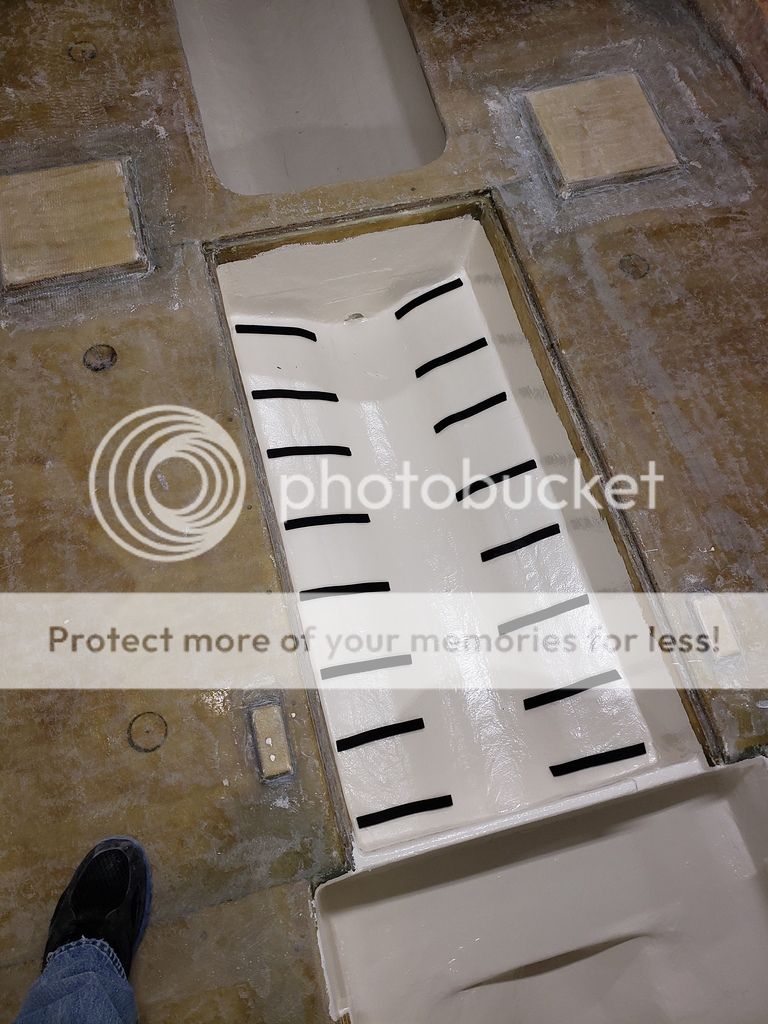
Last night I got the gas tank prepped and installed. Put down rubber strips the vertical way so if water gets under my hatch it will run out the bilge.


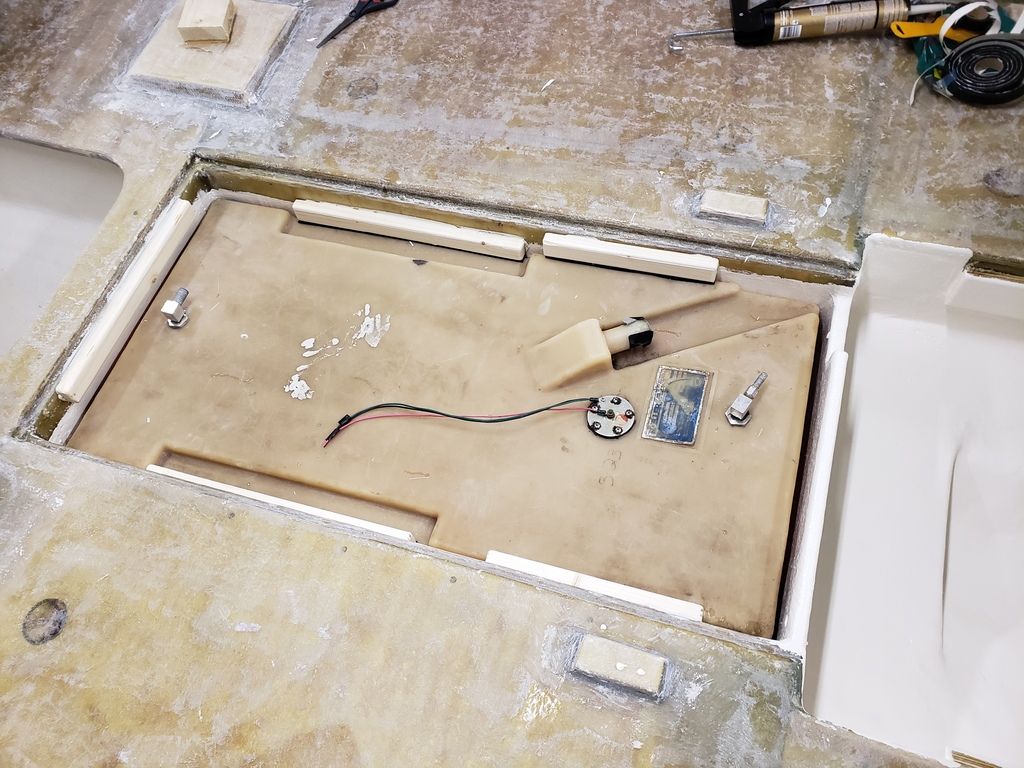
The ones in the indent of the tank are cut so that a 2x4 will sit on top of them flush with the top of the stringer. I will screw into these pieces only so I have no penetration into my stringers or bulk heads. I then added some of the same rubber to the bottom side of these wood pieces and glued them in the PL. Should work out nicely.


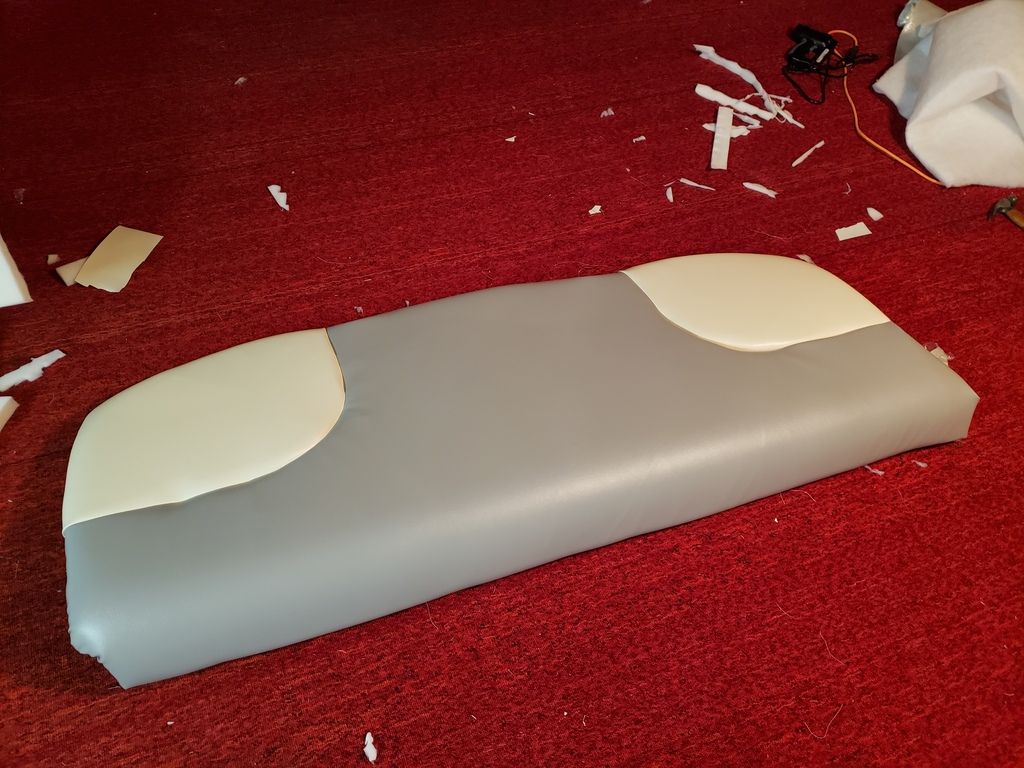
Also over the last few nights I have been fighting with the sun deck cover and foam. This was very frustrating and it’s not as clean as I would like but looks decent. I didn’t really want the seam indent but ended up having to do it to get the cover to fit correctly, I guess it will kind of match the lower seats. I still have to tuck the right side but i was done for the night last night.


dezmond

Senior Chief Petty Officer
Joined
Jul 21, 2010
Messages
760
Very very nice work. Love the gas tank access as well for the just in case value.

Good job 👍🏼
 

Mechanicalmike08

Petty Officer 1st Class
Joined
Aug 29, 2018
Messages
308
Man was I far down the list. I've been down and out again for the last few days, but finally felt decent enough and got back at it a little bit last night. I got the second side panel fully finished and put back together.


Then finally got the second cushion for the back bench covered.


Its going to be -25 here tonight so not much is going to be getting done inside the boat even in the heated garage. Next step is a little fairing on the floor and sidewalls to just make it look a little better then i can gel coat the entire inside.
 

Mechanicalmike08

Petty Officer 1st Class
Joined
Aug 29, 2018
Messages
308
Going to look fantastic when it's all together. -22F here this morning

I really cant wait to see it in there, I have been debating putting the side panels and bench in before gel coating to check fits one last time and I also need to measure for the middle seat yet and the panel between the seat cushions and sun deck. But then again part of me just wants to wait and see it with the gel coat done too.
 

Mechanicalmike08

Petty Officer 1st Class
Joined
Aug 29, 2018
Messages
308
Tonight I started and got one of the factory front cushions done. This one was pretty tricky and I think looks pretty good except for one wrinkle. I saw a trick to tighten up and get rid of some wrinkles is to use steam or some hot towels resting in that area for a bit. Ill try that when there all done.


ACon977

Senior Chief Petty Officer
Joined
Nov 21, 2017
Messages
759
Dang, well if thats your image of "pretty good" I can't Imagine what your version of perfection is!

Those seats are harder than they look for sure, I didn't even give it a try.
 

steve_h7

Chief Petty Officer
Joined
Sep 16, 2018
Messages
401
Read through this entire thread yesterday and I'm embarrassed to say I started about the same time and have yet to start on my transom! Beautiful job so far! :thumb:
Question: Way back at the beginning I didn't see a lot of pics of what the factory bulkheads and stringers looked like... were the replacements you made a lot different than factory? My project (Campion 185) had just two stringers and one bulkhead at the gas tank and one at the bow and that was it. I'd like to do more framing like yours and wondered if you varied a lot from what the factory installed and if that was advisable?
 
Top