1991 Searay 225 BR Transom and Stringer Evaluation

froggy1150

Master Chief Petty Officer
Joined
Nov 3, 2017
Messages
803
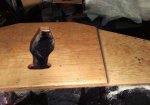
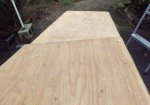
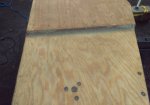
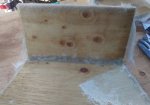
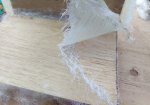
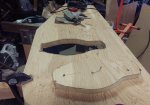
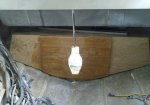
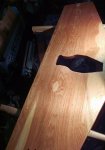
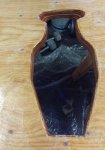
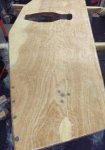
That's what I have been using to seal all my wood so far. Radius the wood. And what I did that got the 2oz to work was I would make a hard fold and whak it with a hammer on the flat of my vise then tear it up. It will lay down on 3/4 ply, just takes practice.... and 2oz is thirsty
 

GCartwright

Petty Officer 2nd Class
Joined
Jul 1, 2012
Messages
149
thanks for the glassing tips, did a practice run on some scrap plywood. I'm assuming the mat on the right side is 2oz, it's slightly thicker (.02 "vs .03) and it's much more furry, coated the wood in resin and fileted the corner, after it got tacky I put more resin on the wood and on top of the glass and worked it with a aluminum roller. Couldn't get the corners to lie down before the resin kicked, may not of used enough resin, the next day I grabbed the glass at the corner where there was no adhesion and was able to peel a big strip off, not sure if that's normal when an edge is sticking up or if it just indicates poor adhesion
 

Attachments

  • photo303226.jpg
    photo303226.jpg
    605.9 KB · Views: 4
  • photo303227.jpg
    photo303227.jpg
    694.2 KB · Views: 4
  • photo303228.jpg
    photo303228.jpg
    541.3 KB · Views: 4
  • photo303229.jpg
    photo303229.jpg
    544.2 KB · Views: 4

GCartwright

Petty Officer 2nd Class
Joined
Jul 1, 2012
Messages
149
I have a few questions about using thickened resin and mounting hardware , how well does it take threads or is it better to use through bolts?

I'm thinking of drilling out the upper trim tab mounts shown in the picture. Using a 3" hole saw to drill all the upper holes out, and filling it back in with the thickened resin after transom is installed to allow excess resin to squeeze out.
For the lower I will drill each hole oversized and again fill with resin

The keyhole is cut and ready for some CSM once I feel confident with my glassing
 

Attachments

  • photo302656.jpg
    photo302656.jpg
    463.4 KB · Views: 2
  • photo302657.jpg
    photo302657.jpg
    547.4 KB · Views: 2
  • photo303270.jpg
    photo303270.jpg
    388.4 KB · Views: 3
  • photo303271.jpg
    photo303271.jpg
    306.7 KB · Views: 3

Mad Props

Lieutenant Commander
Joined
Jul 8, 2016
Messages
1,766
Looks like your having adhesion issues in your previous post. The wood under the glass looks totally dry. What type of wood is it and is it possible it has any oil, varnish, or wax on it? Looks like the resin didnt penetrate at all.

For the trim pump mounts, I wouldn't recommend drilling one large hole, I would oversize each individual hole by 1/8" or 1/4" then drill the proper size hole... then use oversize washers with the hardware. Thickened pb is mostly resin which is very brittle so I personally don't like the idea of it being the only thing holding stuff.. I like some plywood sandwiched between if possible.

transom looks good.. better hurry up tho.. getting cold soon!
 

GCartwright

Petty Officer 2nd Class
Joined
Jul 1, 2012
Messages
149
the plywood I used for the trial run was just some I had around and stored outside so perhaps the wood just wasn't taking the resin in, will try again with a better grade of dry plywood and see what I get.

What you said about the one oversize hole makes sense, no need to take out more material than necessary

Were in the low 70's for the next few days so hopefully Monday will be a go
 

GCartwright

Petty Officer 2nd Class
Joined
Jul 1, 2012
Messages
149
I have a few questions about the transom install. How much clearance is there in the keyhole? Does the plywood need to be completely flush with the fiberglass cut-out? If I want to wrap the csm that I will put on the backside around into the keyhole would I need to go a bit undersized for this? At present I have a 1/16" to 1/8" oversized lip on the plywood in some areas

If I use the 5/8" dia holes for the trim tabs on the outer part of my transom for clamping, what's the best way to make sure I can get these clamping bolts out after the resin hardens up? Will coating them in candle wax be enough?
 

GCartwright

Petty Officer 2nd Class
Joined
Jul 1, 2012
Messages
149
Some more work on the transom this week, got the keyhole cut to size and drilled the relief holes, coated with resin and added the fillets to the stepped part, drilled the trim tab holes oversized and filled with pb,
Put a layer of csm on the back of the transom , Iooks like I have a few dry spots to grind out and patch
Lots learned on my first big glass attempt, used a litre (32 oz) of resin on the one side
 

Attachments

  • photo303642.jpg
    photo303642.jpg
    481.2 KB · Views: 1
  • photo303643.jpg
    photo303643.jpg
    357.2 KB · Views: 1
  • photo303644.jpg
    photo303644.jpg
    362.3 KB · Views: 1
Last edited:

GCartwright

Petty Officer 2nd Class
Joined
Jul 1, 2012
Messages
149
one more picture
 

Attachments

  • photo303644.jpg
    photo303644.jpg
    362.3 KB · Views: 1
  • photo303650.jpg
    photo303650.jpg
    427 KB · Views: 1
Last edited:

Woodonglass

Supreme Mariner
Joined
Dec 29, 2009
Messages
25,924
Did you precoat the wood with resin before applying the glass? Did you coat the edges thoroughly? The transom thickness need to be 2" - 2 1/4" Thick and the sides parallel.
 

GCartwright

Petty Officer 2nd Class
Joined
Jul 1, 2012
Messages
149
Did you precoat the wood with resin before applying the glass? Did you coat the edges thoroughly? The transom thickness need to be 2" - 2 1/4" Thick and the sides parallel.

Yes I did coat everything in resin prior to the CSM, original transom was 2 1/8"so that's what I'm shooting for
 

GCartwright

Petty Officer 2nd Class
Joined
Jul 1, 2012
Messages
149
should I grind it all off back down to the ply and redo?
 

Attachments

  • photo303677.jpg
    photo303677.jpg
    508.1 KB · Views: 1

kcassells

Fleet Admiral
Joined
Oct 16, 2012
Messages
8,600
I think you are ok. Just roll some resin over it lightly. Looks pretty tight. :)
After it's installed your gonna glass it again right?
 

GCartwright

Petty Officer 2nd Class
Joined
Jul 1, 2012
Messages
149
I think you are ok. Just roll some resin over it lightly. Looks pretty tight. :)
After it's installed your gonna glass it again right?

Well that would be easy enough.

​​​​​​So only the back has a layer of csm at the moment , I was going to install with pb and fillet the edges and fill the area under the transom cutout with pb as well.
Transom thickness is hull(. 30") plywood with on layer of csm on the back (1.8") which puts me at around 2 1/16", so with a layer of pb between ply and hull I'm not sure what I will put on the inside face unit I know the pb thickness
 

kcassells

Fleet Admiral
Joined
Oct 16, 2012
Messages
8,600
The pb to the face of the skin is fine. Just cover it well. Resin alone has no dimensional thickness btw. It's just acting as a sealer to the exposed minute areas you showed.
You definitely have to skin the exposed transom with glass after you tab it in.
 

GCartwright

Petty Officer 2nd Class
Joined
Jul 1, 2012
Messages
149
tabbing with 1708, is csm enough or is 1708 needed for the complete inside surface? any idea what the thickness of the pb normally is?
 
Last edited:

kcassells

Fleet Admiral
Joined
Oct 16, 2012
Messages
8,600
tabbing with 1708, is csm enough or is 1708 needed for the complete inside surface? any idea what the thickness of the pb normally is?

ok ok ok Soo 1708 w/csm backing is fine. You need 2 tabs. depending on the area 1st tab should be a 4" lay up over seam, next about 8"next for the overlap. If you have more space to work then you could make the tabs bigger.
. All depends on your restrictions.
PB should be mixed thick enough that when you hold it up on a let's say paint mixing stick upside down it doesn't drip off.
The thick texture should then get applied with a trowel similar to tile adhesive. And use the cheap disposable type.
Do a trial fit. Also great to have another person there to help out for this part.
On another note I screwed 2 handles on the transom that alowwed me to handle it easier, then removed and pb those holes.
urlookin good.
 

GCartwright

Petty Officer 2nd Class
Joined
Jul 1, 2012
Messages
149
appreciate the help
if I remember correctly wog recommended a 3/8" notched trowel
 

GCartwright

Petty Officer 2nd Class
Joined
Jul 1, 2012
Messages
149
Now have a layer of csm on both sides, natural lighting really makes the bubbles stand up out,, worst ones are in the fillet. Looks like I will be grinding those out and patching.
In spots there are some micro bubbles, not sure if you can see them in the pictures.
I am working in cool weather (low 60's) but heating the wood and resin up first with halogen lamps and the poly is gelling up in about 15 min and the glass is no longer tacky in an hour so catalyst at 2% seems fine.
 

Attachments

  • photo304058.jpg
    photo304058.jpg
    581.9 KB · Views: 5
  • photo304059.jpg
    photo304059.jpg
    517.4 KB · Views: 5
  • photo304060.jpg
    photo304060.jpg
    504.9 KB · Views: 5

JASinIL2006

Vice Admiral
Joined
Feb 10, 2012
Messages
5,548
Bubbles on the fillet are probably worth grinding out, but I would not lose a lot of sleep over the microbubbles. If you're worried about the little bubbles being a collection spot for water, you can always get a small hypodermic needle (our local farm supply store had 'em), drill a tiny hole into the bubble and inject some catalyzed resin. The resin won't add any strength, but it will fill the hole. The larger bubbles, I would grind out and maybe apply some more PB.
 
Top