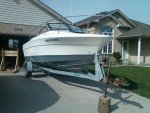
1991 Bayliner Trophy 2002 Transom Repair

Status
Not open for further replies.

j_k_bisson

Lieutenant Junior Grade
Joined
Oct 6, 2010
Messages
1,082
Update 03-19-2011

Update 03-19-2011

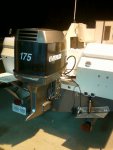
Well I'm back here as I started working on the boat again. The motor is on hold waiting for parts. Need to get the 5" extension kit before assembling the motor. Here is a couple of pic of the motor with half of the decal installed.
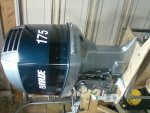
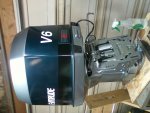
SSPX0008.jpg

SSPX0007.jpg

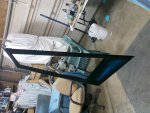
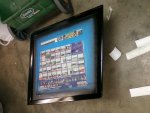
Last night disassembled the front windshield cleaned all the glass and painted the frame. I also ordered the push in molding from the local bayliner dealler. It was only $1.52 per foot. Only replacing the front modeling. The sides did not shrink nearly as much as the fronts did. Here a few pics of how the front window came out.
SSPX0029.jpg

SSPX0028.jpg

Tonight the side window get the same treatment. Then the kicker bracket get made. So I'll be posting here for the next little while.
 

j_k_bisson

Lieutenant Junior Grade
Joined
Oct 6, 2010
Messages
1,082
Update 03-20-2011

Update 03-20-2011

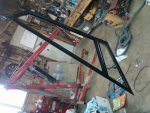
Was able to disasseble the side windows and clean, sand, and paint them yesterday. Here is how they came out.

SSPX0010.jpg

SSPX0009.jpg

This afternoon I will semi reassemble them. Waiting on the gaskets for the big windows. Then I move on to the kicker bracket. Going to stop by a buddies and see how his welder is doing. See if he is up for welding some aluminum.

Things left to do on the boat:

1) Finish and install the windshield
2) Install the front hand rail
3) Finish and install the motor
5) Build and install the kicker bracket
6) Mount the kicker and do yearly maintence
7) Close up fishing tackle storage opening, with either plastic sheet or new box.
8) Purchase and install controll king kicker motor control
9) Reinforce gimbal mounts for downriggers
10) Breakin the motor
11) Go fishing..........

Seeing ice is still blocking the marinas and the river has sheets of ice still floating down it. Plus the water needs to be around 49' to 51'f for the eyes to spawn around here. Basically when the tulips start flowering. So I have time.
 

j_k_bisson

Lieutenant Junior Grade
Joined
Oct 6, 2010
Messages
1,082
Update 03-23-2011

Update 03-23-2011

I finished off pre assembling the windshield after painting. Still waiting on the molding to come in at the Bayliner dealer. Need 40ft of it. I'll post pics of that when they are complete.

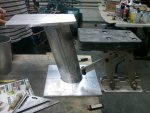
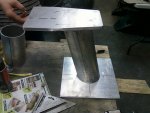
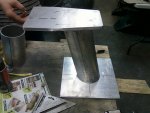
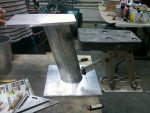
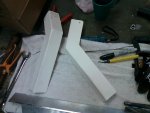
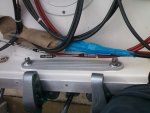
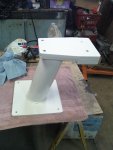
I have been fabricating the kick bracket for the last couple of days. The main extension piece is 5" OD .188 wall aluminum pipe. and the plates are 1/2" thick aluminum plate. Here is how the look before welding.

SSPX0016.jpg

SSPX0014.jpg

I took the pattern of angles from the old adjustable kicker bracket. I have had bad experiences with these adjustable types of brackets, That is why I am going to a fixed height. You can see the old on in the one pic.

Tonight going over to a buddies to get this welded together. Then prime and paint this weekend. Running out of things to do. SO I had my buddy bring over his atv. It is having issues with starting. It needs to be gone through. So I'll also start that this weekend.
 

j_k_bisson

Lieutenant Junior Grade
Joined
Oct 6, 2010
Messages
1,082
Update 03-24-2011

Update 03-24-2011

Was able to get the welding done for the kicker bracket last night. I'm not the best welder but I think it came out not too bad for someone who has never welded aluminum before. Here is a couple of pics.

SSPX0014.jpg

SSPX0016.jpg

I was quite impressed with the welder. It was a lincon mig pack 180 with the aluminum spooling attachment. If I where to buy a new welder, this unit would deffinately be may first choice. Very nice setup and not very hard to use. Cost is a mid factor though....

Tonight I will clean up the welds 3and get the bracket ready for paint. Need to wait until I get the bracket into place and test on boat to make sure the base mounting plate is the right size. Its on the big size for now. Also need to drill and tap a few holes for mounting the teflon and bracket. So there is things to do.
 

j_k_bisson

Lieutenant Junior Grade
Joined
Oct 6, 2010
Messages
1,082
Re: Update 03-24-2011

Re: Update 03-24-2011

Wll we picked up the boat last night. So I am making progress again on it and posting here. The motor progress is still being posted over there. I will combine the two post into this one when the motor gets mounted.

SO I started into the capping for the splash well. I am reusing the siude vertal caps but I have cut off the bottoms even with where the piece of aluminum angle is being mounted. Check it out here...

SSPX0054.jpg

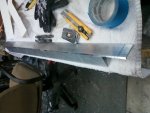
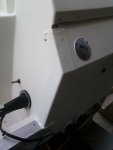
I took the piece of angle and routered, using my carbide bit in my wood router, a chamfer on the sharp edge. This will keep my knee caps from getting perment damage from a possible slip and fall. I did not go 1/4 round dure to possible alignment issue of the routering. So this is what I came up with.

SSPX0053.jpg

I plan on using a scotch brite madrel mounted pad to get the brushed effect on the aluminum piece. I'll post how that comes out. Never done that before.

Also need to drill the bolt holes in the transom and resin them up to avoid the same transom issues. Also have clearence issue with the motor mounting bracket. Check those solutions over on the motor theard.

So today, depending on the weather I have lots to do. Also have a hell of a hang over. So hope to get a ton done. I'll post as I make progress.
 

Attachments

  • SSPX0052.jpg
    SSPX0052.jpg
    126.9 KB · Views: 7

j_k_bisson

Lieutenant Junior Grade
Joined
Oct 6, 2010
Messages
1,082
Update 04-10-2011

Update 04-10-2011

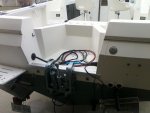
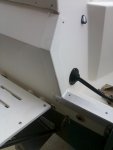
Only got to work on the boat for a couple hours yesterday. But I was able to finish the splash well molding and the motor bracket installation. It went pretty well other than all the grinding. Here are the pics of the finish product.....

SSPX0057.jpg

SSPX0058.jpg

SSPX0059.jpg

SSPX0060.jpg

SSPX0061.jpg

Today job is hard wiring in the main Evinrude harness cable to the old Force one still in the boat. I have sat down and reviewed the wiring diagrams for both motors, so it is only confirmation of what the wiring diagrams says the wires do then solder them together. So today will be a fun day I can just see it. Also need to run the temp sender wire to the dash and wire in the new transom mounted trim switch.
 

j_k_bisson

Lieutenant Junior Grade
Joined
Oct 6, 2010
Messages
1,082
Update 4-11-2011

Update 4-11-2011

Yesterday was a successful day but there where some serious moments where I was ready to start throwing some wrench's around.

Started off with patching in the Evinrude wiring harness to the existing Force Harness. That went ok, only needed to run a one extra wire from the ignition to the rectifier. Forces do not have this wire. Also did not hook up the positive and ground wires from the evinrude harness. This is because the force motor do not have these feeds intergrated into their harness. They are separatre. The wires are there if I need to run them but at this point I do not think I need to. Also ran the temp sender wire to the dash. So wiring is done except the dash for the new guages.

After that was all done and cleaned up, I started looking at installing the mid leg to the transom bracket. Ran right into a brick wall on that one. Seeing I mounted the bracket the dasy before I did not check if I could fit/install the pivot/steering tub into the bracket with the bracket on the boat. Of coarse it did not fit, not enought clearence in the splash well. So I had to remove the bracket from the boat and mount the bracket to the mid section then reinstall. Well while mounting the bracket to the mid section, the whole mid section fall. Not once but twice from the table top that I was working from. So it got a bit dinged and scratched up.

After settling my temper down I sanding and feathering the paint out. Then touched the paint up. After supper I got back out there and reinstalled the bracket. Thank God I remembered to install the steering cable in the tube this time.

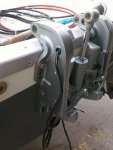
So here is the finished pics. I mounted the hood and the side cowlings for the pics and check for clearences..

SSPX0062.jpg

SSPX0065.jpg

So tonight the windshield gets installed and possibly the front hand rail. Also the Bay Mfg extension kit came into today. So paint will start on that to. Busy, busy, right now. Launch date three weeks from this past Sunday I hope.
 

ezmobee

Supreme Mariner
Joined
Mar 26, 2007
Messages
23,767
Re: Update 4-11-2011

Re: Update 4-11-2011

I did not check if I could fit/install the pivot/steering tub into the bracket with the bracket on the boat.

Rookie mistake, that I have made :p Stupid steering tubes :mad:
 

j_k_bisson

Lieutenant Junior Grade
Joined
Oct 6, 2010
Messages
1,082
Update 4-12-2011

Update 4-12-2011

Well finished off a few little jobs yesterday. Here they go.....

Install the windshield and sealed up all the screws. That was fun in the 40+ mph winds we where having yesterday. Also hooked up the wiring for the mast light. Overall came out nice and look great. Sorry no pic today. A little dark when I finished last night at 11pm.

After I painted the Extension kit and started probing around on that installation. I have installed the extension studs into the mid housing, Soldered on the water tube extension, and took out the shift rid and the cap. The kit does not come with the new gaskets for the shift rod cap and while I'm at it I am going to replace the o-ring for the shift rod. Also I need to pick up a 1 1/.8" holes saw and some threaded rod to drilling out the mid section. The clearences are not big enough for the drive shaft stub shaft to slide up in. So I'll get those today.

Next I Closed up the fishing locker opening with a piece of 1/4" thick Starboard. I glued it in place with 3m 5200 white. The flages did not over lap that much so not place for screws. I taped it into place until the 5200 dries.

Tonight the front hand rail gets mounted. The the kicker bracket painted, also want to get the motor fully assembled. So the kicker bracket might get postponed. A day or two. We'll see.
 

j_k_bisson

Lieutenant Junior Grade
Joined
Oct 6, 2010
Messages
1,082
Update 4-14-2011

Update 4-14-2011

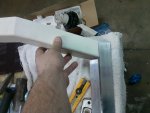
Well the motor installation is going pretty good, if you want to check it out go and see the motor thread. I have been able to install the windshield and the hand rail in the last couple of days. The hand rail still needs some work seeing I could not get to some of the screws/nuts. So will need to go back to them in a couple of days. I'll get my buddy over with the "micro hands", it is what we call him. My "sausage fingers" just do not go where I want them all the time. Here are a couple of pics of how it is going.

SSPX0073.jpg

SSPX0075.jpg

The motor still needs the power head installed and hooked up. That will be tonight.

So the things still left to do before the first splash are as follows;

1) Finish the motor installationn (tonight)
2) Finsih the hand rail installation (next week)
3) Clean up and install the rub rail (next week)
4) Install the new guages on the dash (this weekend)
5) Paint and install the kicker bracket (this weekend)
6) Purchase and install the prop and hardware for motor (next pay day)
7) Fuel Boat (not looking forward to that one.....) (next pay day)
8) Change out trailer bearings (next week)
9) Go through the trail electrical to make sure everything is working (next week)
10) Fix trailer tonge jack, bent on odd angle (next week)

So first start up is scedualed for the week after Easter or that weekend. Can not wait! Can not come soon enough.
 

bear_69cuda

Commander
Joined
Oct 10, 2008
Messages
2,109
Re: Update 4-14-2011

Re: Update 4-14-2011

Looking awesome Jeff!!!!!!!!!!!!!!!!!!!!!!!!!!!!
 

j_k_bisson

Lieutenant Junior Grade
Joined
Oct 6, 2010
Messages
1,082
Re: Update 4-14-2011

Re: Update 4-14-2011

Thanks. It's appreciated. Especially after spark gap testing the motor this afternoon. I could not get spark on cylinders 2, 3, and 6. I did a bit of playing swaping coils and stuff. Looks like I need power packs and two coils and a complete set of spark plug wires. Two wires fell apart while I was swaping things. I just hope It is not a timer base (trigger) It will deffinatelly cause the launch date to push back.

But hay That is wat boats stand for. Break Out Another Thousand!
 

proshadetree

Lieutenant Commander
Joined
Jul 19, 2008
Messages
1,887
Re: Update 4-14-2011

Re: Update 4-14-2011

I cant see the outside pics due to the glare of the sun. Must have waxed and buffed her to muck. Sorry to hear about the engine. If you have to replace the packs and coils at least it will provide peace of mind for those fishing trips.
 

Gun Dog

Petty Officer 1st Class
Joined
Mar 22, 2011
Messages
265
Re: Update 4-14-2011

Re: Update 4-14-2011

Hey JK, Really cool post. I've learned so much from you. In a photo, 4/10/2011, of the inside of your transom I noticed a nice looking aluminum support with the motor mounting bolts protruding. I've been looking for something like that for my application. Did you make it or buy it? Thanks
 

j_k_bisson

Lieutenant Junior Grade
Joined
Oct 6, 2010
Messages
1,082
Re: Update 4-14-2011

Re: Update 4-14-2011

Hey JK, Really cool post. I've learned so much from you. In a photo, 4/10/2011, of the inside of your transom I noticed a nice looking aluminum support with the motor mounting bolts protruding. I've been looking for something like that for my application. Did you make it or buy it? Thanks

Um you mean the "transom saver" aluminum bar? It is comercially available from any marine dealer. They are on sale in the detroit area for around $15-$20. They are listed in the sumer sale book that the dealers give out locally. You might want to look around your local dealers for it. They are a standard size for the top and bottom bolt patterns for motors built after 1985 I think. The top one was 13.5" I think. But there is slop length ways for variation in the holes. Not much about 1/4".
 

j_k_bisson

Lieutenant Junior Grade
Joined
Oct 6, 2010
Messages
1,082
Re: Update 4-14-2011

Re: Update 4-14-2011

Well got a couple things done on the list this afternoon along with trouble shooting the motor ingition system. The little things where change the lower unit oil, and fill up the trim tab oil.

As to the motor ignition system There where three plug wires bad, took apart and rebuilt, then test the coils and three of them where bad. One was cracked and the other two had the rubber sealant on the bottoms delaminating. So Need to order six new ones. I swapped the good coil all to one side and then the other the power packs seem to be working. So don't need them. But this is a cold test. They could still be bad when they get warm. Wont know until I get it in the water. At least the trigger is ok. That a big money part.

Also was able to play a bit with the trim switch. it appears that the new trim switch at the rear I installed is ok. Only the one from the dash. So need to cut into the harness pack job, "heat shrink" and play/test the wires from the force harness. Might also be the trim relays not disenguaging at the motor. This will be fun I can see. Need to think about it a bit more before cutting into anything.
 

j_k_bisson

Lieutenant Junior Grade
Joined
Oct 6, 2010
Messages
1,082
Re: Update 4-14-2011

Re: Update 4-14-2011

Well the trim motor relay fixed itself last night. Check the tread I started on that one for further details. It is still baffeling me....

I next went through and double check the warning horn. I did not know that the horn was polarity driven. I had wire switched. The only thing that is bugging me on that one is the horn does not sound when the ignition is turned on. Is it supposed to?

I next finished off the kicker bracket. Here is a pic.

0417011030.jpg

Today besides the oil change in the car, I want to install the kicker bracket, wash the rub rail and inserts. Maybe even install the new guages (hour meter, and temp guage) in the dash.

Then the short list is as follows....

Install rub rail
Finish the hand rail installation
Replace poer packs and coils on motor
Change the oil and lower unit oil in kicker
Change impeller in kicker
Buy prop and prop nut kit
Buy 2 stroke oil and gas it up
Change/grease trailer bearing
Check/fix trail lights
Fix trailer tounge jack (at wired angle after falling off the log this winter)

Then we are in the water......And done for now.

Summer upgrades....
-Cockpit tunnel canvas
-Controllking kicker upgrade
-Bimimi top and side curtains
-Replace hatch and door with starboard
 

j_k_bisson

Lieutenant Junior Grade
Joined
Oct 6, 2010
Messages
1,082
Update 4-18-2011

Update 4-18-2011

Well sorry but there is not any pics today. It started snowing and I was not going to get covered just to take the pics. But there is always tomorrow.

Was able to install the kicker bracket and the new dash guages. This was over and above the oil change in the car I had to do. The kicker bracket was fun to install I played with one bolt location for over an hour before I got it tight enough like I wanted. The had to reinstall all the crap I had in there. But it is done.

As to the dash that was quite easy. Just plug and play for the wiring and gages.

Tonight I have to work on my parents truck. They have a caliper sticking on it. I'm going to try to change or the flex line first. If that is not it, then its a caliper replacement. Nothing big. After that I'll start cleaning up the rub rail and pieces. I do need to find new cap for the ends of the rub rail. Mine are very bleached and cracked. Anyone know where I can get new ones?

Thats It for now.
 

sasto

Captain
Joined
Jun 1, 2010
Messages
3,918
Re: Update 4-18-2011

Re: Update 4-18-2011

I'm looking foreward to your splash day, Jeff. The only problem I have is your thread will be over. Been enjoying your progress and am sure everything will work out for you. Then....go catch some fish and bring us back a trophy. May the Fish Gods be with you.

Good Luck!
 

j_k_bisson

Lieutenant Junior Grade
Joined
Oct 6, 2010
Messages
1,082
Re: Update 4-18-2011

Re: Update 4-18-2011

Thanks man. At this rate my only worry in a couple of weeks will be where am I going to be getting the money to fill it up. Gas went up another .25 today here in Detroit area. It's averaging $4 a gallon. Is it going to stop going up any time soon?
 
Status
Not open for further replies.
Top