1991 Bayliner Trophy 2002 Transom Repair

Status
Not open for further replies.

ezmobee

Supreme Mariner
Joined
Mar 26, 2007
Messages
23,767
Re: Update 01-24-2011

Re: Update 01-24-2011

For your motor rebuild you should probably start a new thread in the J/E forum as you won't get a lot of help on that here. Boat is looking great.
 

jonesg

Admiral
Joined
Feb 22, 2008
Messages
7,198
Re: Update 01-24-2011

Re: Update 01-24-2011

Looks good, except for the wingnuts on the 12v battery.
 

j_k_bisson

Lieutenant Junior Grade
Joined
Oct 6, 2010
Messages
1,082
Update 01-25-2011

Update 01-25-2011

Last night cleaned the garage top to bottom. Even under the boat. What a mess you can generate in a month working on a boat!:eek: I then proceeded to vaccuum the entire boat. Tonight if I don't get out of the house I will wash the floor, then reapply a coat od traction wax. Then maybe the rub rail. That needs to be cleaned and washed with MEK. I find the MEK melts the outside putting a nice new finish on it.
 

j_k_bisson

Lieutenant Junior Grade
Joined
Oct 6, 2010
Messages
1,082
Re: 1991 Bayliner Trophy 2002 Transom Repair

Did not get anything done last night. Just got out of the house. My new bronze thru hulls came in today. So they will be getting installed tonight. Also might try to install the rub rail. I was planing on doing that this spring when things warm up a bit. We'll see how it goes. If it shrunk then all bets are off on the installation to night.
 

Yacht Dr.

Vice Admiral
Joined
Feb 26, 2005
Messages
5,581
Re: 1991 Bayliner Trophy 2002 Transom Repair

What kind of rubrail is it JK ? .. insert or plastic back ?

YD.
 

j_k_bisson

Lieutenant Junior Grade
Joined
Oct 6, 2010
Messages
1,082
Re: 1991 Bayliner Trophy 2002 Transom Repair

What kind of rubrail is it JK ? .. insert or plastic back ?

YD.

The first piece of the rub rail that goes on the boat is a black rubber "c" shaped channel piece. There are aluminum flat bars that fit into the channel that hold the rubber rail straight for the length of the boat and then there is another 3/4"-1" round rubber piece fits into it to hide all the attachment screws. I'll take a couple of picks of the pieces tonight and then post them tomorrow. The "c" shaped piece is in good condition. It's the insert that had a 8" piece snap off the one end that is giving me a bit of head ache That is why I put it off till spring. I just could not get it warm enough last night to make channel flexible enough. Also not enough room in the garage to work all around the boat. So we will wait till spring to put it on.
 

j_k_bisson

Lieutenant Junior Grade
Joined
Oct 6, 2010
Messages
1,082
Update 01-27-2011

Update 01-27-2011

This post is for all Bayliner owners out there. If you have the old style of splash well drains this is what should be done to avoid the transom rebuild I just completed. I will install the new Bronze 3/4" extra long thru hull fittings. Actually did it last night. I started it by drilling the holes in the old locations. If you are just replacing you can skip this step. I drilled a smaller hole first so I could make sure I could line up with the hole in the splash well. I then Switched over to a 1" forstener bit and drilled the correct size hole. I made sure to direct the hole in the direction while I was drilling to make sure the holes lined up. I then used this tool to fit the hole to the new fittings. You might have to do this if you are only replacing the old fittings. Bronze is not as flexable as plastic.
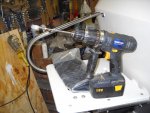
DSCN1262-1.jpg

All it is is a extra long carbide burr in a cordless drill. You should be able to pick one up at any production tool supply for 15 bucks. I kept removing/grinding the hole size until I was able to push the fitting thru with out any resistance. It did not take long. I then painted the wood that was exposed with resin to seal up the wood from future possible water intrusion. (Did this previously last week) Than after is was dry I had to regrind a little bit just to make sure it fit again. Then I had to cut the new bronze fitting to the proper length. But before I did I had to sand a flat on the one edge/flat of the nut. This was inorder to get the nut to sit flat to the splash well hull. (Take a look at the pic of the modified fitting) Next I dry fitted everything together. Marked the lenght and cut it. Cleaned up the cut edge. Here is a pic of the modified fitting and nut.

DSCN1264-1.jpg

Next I used 3M 5200 and put a nice and big bead along the head of the fitting. I then worked in a gob of the same into the threads where the nut would go. Next a small/medium bead on the nut and another gob in the threads and worked in. Next slip the fitting in the hole and turn the fitting to thread on the nut. I did not crank these fittings down. Only until I get a nice wet out of the 5200. And done. Here is a pic of the completed install. I like to let the 5200 dry and I can cut off all the little fingers of goop after it drys.
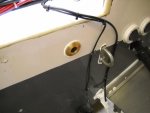
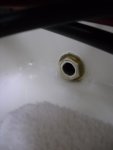
DSCN1265-1.jpg

DSCN1266-1.jpg

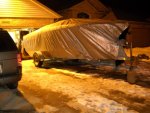
The next thing I did was I gave the whole deck of the boat another coat of deck traction wax. After washing the deck again of coarse. Then the hull was sent outside and tarped. It will stay there untill either the town tows it away for violation of the trailer in drive way bylaw or spring hits. We'll see what happens first. Here is a pic of the fully wrapped up hull sitting in the drive.
DSCN1267-1.jpg

I'm going to start a new thread today over in the Johnson/Evinrude forum for the motor refresh/resto. If anyone wants to follow along by all means check it out. I'll post the link when I get it started. In the spring when I come to finish the hull (windshield, rub rail) and mount the motor I'll revive this thread. But for now I'll be stopping the posting of the dailly updates. I'll keep checking it thought.

If anyone has questions about something I have done by all means please feel free to send me a PM and I'll be happy to answer.
 

bear_69cuda

Commander
Joined
Oct 10, 2008
Messages
2,109
Re: Update 01-27-2011

Re: Update 01-27-2011

Great job Jeff!

I'll be checking out the outboard re-build...

Hurry Up spring!!!!!!
 

mcgyver

Petty Officer 2nd Class
Joined
Oct 3, 2009
Messages
123
Re: Update 01-27-2011

Re: Update 01-27-2011

Jeff, where did you pick up the bronze thru hulls from? Did you find them for a reasonable price?
Doug
 

j_k_bisson

Lieutenant Junior Grade
Joined
Oct 6, 2010
Messages
1,082
Re: Update 01-27-2011

Re: Update 01-27-2011

Jeff, where did you pick up the bronze thru hulls from? Did you find them for a reasonable price?
Doug

I got them from Greatlake Skipper on ebay. They where the cheapest I could find. Came out to $58 for both with shipping.
 

mcgyver

Petty Officer 2nd Class
Joined
Oct 3, 2009
Messages
123
Re: Update 01-27-2011

Re: Update 01-27-2011

Thanks, i'll check them out....
 

proshadetree

Lieutenant Commander
Joined
Jul 19, 2008
Messages
1,887
Re: Update 01-27-2011

Re: Update 01-27-2011

Rock on JK can you see the light? Can you smell the water? Its a coming. Killer job man going to check out your new thread. Still love this boat man.
 

j_k_bisson

Lieutenant Junior Grade
Joined
Oct 6, 2010
Messages
1,082
Re: Update 01-27-2011

Re: Update 01-27-2011

Well it's nice to see that my tax dollars are at work. Just received a notice that the boat that has been from my driveway in less than a week or it will be towed. Its only been there for 6 days. Hell I love living in a subdivision.

I am temped to take the tires off it and all the securing straps. That way if they do tow it then they can be charged with an unsafe load.
 

j_k_bisson

Lieutenant Junior Grade
Joined
Oct 6, 2010
Messages
1,082
Update 02-01-2011

Update 02-01-2011

Well this post is an update on the motor and to post a pic of the other boat (my buddies) that we have been building from scratch.

The Motor. Have block tore down, cleaned, inspected, and ready for reassembly. Hope to have all the block parts in by Friday or Monday. The reassembly starts. Check it out on the motor thread.

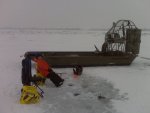
Here is a pic of the air boat. It was designed and built by myself and my buddy Buck, we are both Mechanical Engineering Tech's. So needless to say we had alot of fun and arguments building this. Everything is from scratch other than the motor. The purpose was for duck hunting in the late fall and Ice fishing in the Winter. Area of use is the semi frozen Detroit River. Biggest objective was to transverse ice flows in the river. It has a Rotax 583 electric and pull start aircraft motor. The hull is a modified 16' semi-flat bottom Tracker aluminum hull. The hull has a 1/4" thick LDPE HDHM.

IMG00037.jpg
 

sasto

Captain
Joined
Jun 1, 2010
Messages
3,918
Re: Update 02-01-2011

Re: Update 02-01-2011

I've been enjoying your thread, Jeff. But:

Now the airboat? That is the first time I've ever seen a photo of a guy who takes his boat to his favorite fishing hole.....forget to anchor.... pulls out a couple chairs....a bait bucket and some salt....and still found time to take a photo. And I thought there was only one guy who could do that!

My nickname for you now is "Overboard" (in a good way).
 

j_k_bisson

Lieutenant Junior Grade
Joined
Oct 6, 2010
Messages
1,082
Re: Update 02-01-2011

Re: Update 02-01-2011

Sorry to mislead you. I don't Ice Fish. I have a very strong belief that fat people (ME 300+lbs) should not walk on ICE. We have a tendancy to test the strength factor first fr everyone else. I hate that. This is my buddy out with his son this past weekend. I do the duck hunting thing with him.

I forgot to mention that the fan cage was built as a complete modular unit. That way we can remove it and put a 35hp evinrude on it and do duck hunting in the early fall. All fuel, electrical and steering in mounted to the cage. So the hull is only a boat hull with poly on it. Good for crashing into rock on shore.
 

proshadetree

Lieutenant Commander
Joined
Jul 19, 2008
Messages
1,887
Re: Update 02-01-2011

Re: Update 02-01-2011

My nickname for you now is "Overboard"I agree with this whole heartedly. Over board on waxing and repairing that beautiful bayliner and designing and building an air boat WOW Jeff you rock dude. If it wasnt for the difficulties of finding your threads I would say change you Id to Overboard. Thats one of the reasons I keep checking this thread out. You let people know they are not alone in working hard to get a quality product out in the end. At the end of you threads where your name is you should put AKA OVERBOARD Have a great week dude.
 
Status
Not open for further replies.
Top