Update 01-27-2011
Update 01-27-2011
This post is for all Bayliner owners out there. If you have the old style of splash well drains this is what should be done to avoid the transom rebuild I just completed. I will install the new Bronze 3/4" extra long thru hull fittings. Actually did it last night. I started it by drilling the holes in the old locations. If you are just replacing you can skip this step. I drilled a smaller hole first so I could make sure I could line up with the hole in the splash well. I then Switched over to a 1" forstener bit and drilled the correct size hole. I made sure to direct the hole in the direction while I was drilling to make sure the holes lined up. I then used this tool to fit the hole to the new fittings. You might have to do this if you are only replacing the old fittings. Bronze is not as flexable as plastic.
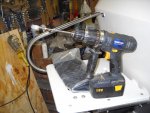
All it is is a extra long carbide burr in a cordless drill. You should be able to pick one up at any production tool supply for 15 bucks. I kept removing/grinding the hole size until I was able to push the fitting thru with out any resistance. It did not take long. I then painted the wood that was exposed with resin to seal up the wood from future possible water intrusion. (Did this previously last week) Than after is was dry I had to regrind a little bit just to make sure it fit again. Then I had to cut the new bronze fitting to the proper length. But before I did I had to sand a flat on the one edge/flat of the nut. This was inorder to get the nut to sit flat to the splash well hull. (Take a look at the pic of the modified fitting) Next I dry fitted everything together. Marked the lenght and cut it. Cleaned up the cut edge. Here is a pic of the modified fitting and nut.

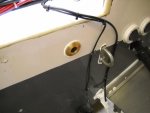
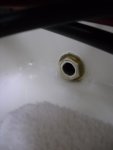
Next I used 3M 5200 and put a nice and big bead along the head of the fitting. I then worked in a gob of the same into the threads where the nut would go. Next a small/medium bead on the nut and another gob in the threads and worked in. Next slip the fitting in the hole and turn the fitting to thread on the nut. I did not crank these fittings down. Only until I get a nice wet out of the 5200. And done. Here is a pic of the completed install. I like to let the 5200 dry and I can cut off all the little fingers of goop after it drys.
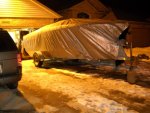
The next thing I did was I gave the whole deck of the boat another coat of deck traction wax. After washing the deck again of coarse. Then the hull was sent outside and tarped. It will stay there untill either the town tows it away for violation of the trailer in drive way bylaw or spring hits. We'll see what happens first. Here is a pic of the fully wrapped up hull sitting in the drive.
I'm going to start a new thread today over in the Johnson/Evinrude forum for the motor refresh/resto. If anyone wants to follow along by all means check it out. I'll post the link when I get it started. In the spring when I come to finish the hull (windshield, rub rail) and mount the motor I'll revive this thread. But for now I'll be stopping the posting of the dailly updates. I'll keep checking it thought.
If anyone has questions about something I have done by all means please feel free to send me a PM and I'll be happy to answer.


