1991 Bayliner Trophy 2002 Transom Repair

Status
Not open for further replies.
Joined
Aug 17, 2009
Messages
941
Re: Update 01-09-2010

Re: Update 01-09-2010

Jeff,

Been following your work. Very nice!

I was going to suggest the same thing Bear did above - paint the switches. Those switches can be pricey. Some satin black spray will make them look better than new. Keep up the great work.
 

j_k_bisson

Lieutenant Junior Grade
Joined
Oct 6, 2010
Messages
1,082
Re: Update 01-09-2010

Re: Update 01-09-2010

Jeff,

Been following your work. Very nice!

I was going to suggest the same thing Bear did above - paint the switches. Those switches can be pricey. Some satin black spray will make them look better than new. Keep up the great work.

I have found at a local marine dealer the replacement caps for "like" switches. But not these caps. I was hoping someone here would know where I could get the right caps. All the switches work. I'll look at paint in the spring. But for now they are going to stay as is.

Last night started assembling. Did not get into the Trim tabs. Maybe tonight is I can't meet up with Yatch Dr. after work. If I do it will be finishing the gel repair I started.
 

j_k_bisson

Lieutenant Junior Grade
Joined
Oct 6, 2010
Messages
1,082
Update 01-11-2010

Update 01-11-2010

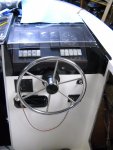
Last night finished installing all the controlls for the Bennett trim tabs in the dash. Had to install the new switch, auto retractor circut, and install the wiring. The reason for the auto retractor circut is the tabs sit right over my bunks on the trailer. If the tabs are in the down position when I go to trailer the boat they could be damaged if they are down. With this circut from Bennett when I turn off the key they will automaticly retract. I have bad luck so I would probably leave them down the first time out and have a very costly repair. When installing the switch I had to relocate the fuse panel to make room for the new switch hole. In doing this I pulled the cutout switch wires too tight. I still need to cut them out of the factory harness to releave the strain on the wires. If not they will eventually fail. Starting to ge a bit busy under the dash. Also another thing I did was cut out the inline fuse to the trim tabs. I hate redundent fuses. What I mean is I was taking power from the fuse panel to power the trim tabs, there was no need to have a inline fuse in the wire oing from the fuse panel to the tab switch. I have the same thing on the marine VHF radio. Also the inline fuse on the VHF radio is starting to give me issues where I have to wigle the wire occasionally at the inline fuses. I will probablly cut that one out and use the one in the panel as my fuse. Double fuse located every where on the boat is not a good thing in my opinion. If it should go at a critical time, then you are spending time trying to diagnose the problem. Anyways here is the pics of the out come.
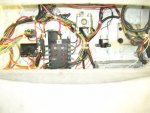
DSCN1213-1.jpg

DSCN1211-1.jpg

I also removed the dash panel and hooked the vacuum line to the speedo. Also need to pick up some new black screw caps and trim switch (momentary up and down) for the dash today. The old switch was plastic and broken. The caps where very corroded. Also while I out and about today I need to pick up some bolts for my horn and some fuses. Also order the rest of the componets required to finish off the deck drains and thru hulls for the spash well drains yesterday. Things are coming along great. Should be done by middle next week. Then it's on to the windshield and bow rail. Then ultimately the motor rebuild! Looking forward to that.

Anyways did not get together with Yatch Dr. yesterday, he was tied up with a bunch os stuff and today looks to be ut seeing we are to get some more snow. So the gel repair will have to wait for a couple of days.

I started making a list of things that need to be done. Here it is.

Install the trim tab pump
Install the windows after cleaing
Reseal hull hatch window
Install the deck drains
Finish the gel repair.
Buff and wax the splash well
Finish and install the splash well drains
Clean and install the steering cable
Clean and install the shift control cables
Install the other batery
Install the horn, fuel tank vent, cable boots, side panels, door, door strap, etc.
Rebuild and paint the windshield
Straighten and install the bow rail
** Recheck every system, bolt, nut, and screw**


Actually quite a bit of things to do. Oh well nothing else to do!:D
 

j_k_bisson

Lieutenant Junior Grade
Joined
Oct 6, 2010
Messages
1,082
Re: Update 01-11-2010

Re: Update 01-11-2010

Well I guess enough said about the dream boat, but I will state that being in control of a pair of twins in the morning is a great feeling to have!!!!

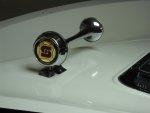
Last night worked on finishing the dash and switches and trim tabs. Also installed the horn and antenna. All nice and clean. Here is a pic of the horn after installation. Check out the shine in the gel.

DSCN1214-1.jpg

Tonight going to get into the side panel installation reseal the front hatch window, drill the drains and seal/epoxy. Try to pump out as many items as possible. Looking like I'll be going out of town every week for work 2-3 days. So need to make the most of my time.
 

proshadetree

Lieutenant Commander
Joined
Jul 19, 2008
Messages
1,887
Re: Update 01-11-2010

Re: Update 01-11-2010

WOW Jk my Bayliner never glowed like that. Nice horn I got a link on a wolf horn and mama said santa brought it. Maybe if I start working out now maybe Ill be in shape to do as fine as you have. I still lust your boat. I hope time blesses you before spring.
 

j_k_bisson

Lieutenant Junior Grade
Joined
Oct 6, 2010
Messages
1,082
Re: Update 01-11-2010

Re: Update 01-11-2010

WOW Jk my Bayliner never glowed like that. Nice horn I got a link on a wolf horn and mama said santa brought it. Maybe if I start working out now maybe Ill be in shape to do as fine as you have. I still lust your boat. I hope time blesses you before spring.
Isn't x-mas over? Or is she using it to get the honey do list done....LOL My wife does that occasionally.

Hey man its not musle power, it's a matter of clearing your mind of everything and just getting into it. Also get the right tools and componds then let them do the work, not your arms. I am a firm believer of there is the proper tool for every job. The other thing is don't rush, take your time, and have at her! Getting drunk while doing it helps.......... You get into it a bit more. Also crank the tunes and start making that buffer dance to the music. If anything you'll put a hell of a show on. I have my kids rolling on the floor watching through the window while I buffing a couple of times. Got to keep the buffer moving some how.

Everything is always for sale...... It could be yours. But I'd wait for the motor to be done if I where you.
 

j_k_bisson

Lieutenant Junior Grade
Joined
Oct 6, 2010
Messages
1,082
Update 01-13-2010

Update 01-13-2010

Well last night got out of the house for a couple of hours to borrow some more music from a buddy for the weekend. Was never musically inclined or knowledgable. Did my onwn thing when I was younger. My buddies are giving me my 70's, 80's, 90's hard rock education. Nothing like puting a bit of Dream Theater on the box and getting into working on the boat! Never listened to them before. Got to say not bad to work to. Especially buffing or waxing a boat for 3-4 hrs at a time.

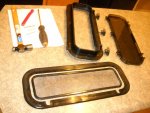
Anyways got home early and cleaned up one window for reinstallation. It did not come out too bad. My other buddy that works laying the graphics on all the high end Chargers and Challenger SRT-8's for Chrysler gave me a nice and nifty tool to help remove th old silicone/caulking. It is the red handled device in the pic. Its plastic and you can scrape off the silicone without scratching the plastic. They use it for decal removal at his work. Here is the out come for the washing and silcone removal.

DSCN1215-1.jpg

Here is what they looked like before.

DSCN1216-1.jpg

I think I am going to try to buff out the outside of the window. It is starting to get a bit faded/oxidated. When I go by Laird plastics tomorrow to get some more starboard I'm going to pick up some of their buffing compound for plastic. We will see how that goes at a later date. Tonight finish washing the other window and reinstall them hopefully. Will need to get the wife involvd with that one.

The hose I bought for the deck drains was the wrong size. (1 1/4") So I have to go and buy the right stuff. (1 1/2") Should have measured before I bought it. That will teach me.

Hope to meet up with Yatch Dr. this afternoon or tomorrow morning to sort out the gel issue. When I get the gel done I can really get into the assembly process with all the cables and stuff. I can finally see the end to the hull side of this project!!!!
 

oops!

Supreme Mariner
Joined
Oct 18, 2007
Messages
12,932
Re: 1991 Bayliner Trophy 2002 Transom Repair

JK.....take the good doctor a chip.....!...he can only guess with out one.....give him one and he can nail it....!

yeah...you are way dark on those spots....matching is really tough, i got lucky on the 05 liner i did...i saw it driving down the road....owner grinning and waving at me....i could not tell that the thing was totally sunk and the bottom hull rebuilt.....lol.

i gotta go match a bright yellow on a obvious place on the hull today......this is gonna take some doing !

over all....you are doing a great job bud !...

p.s.......dont you just love cleaning the whople boat every time you go to the next phase????.....lol
 

j_k_bisson

Lieutenant Junior Grade
Joined
Oct 6, 2010
Messages
1,082
Re: 1991 Bayliner Trophy 2002 Transom Repair

JK.....take the good doctor a chip.....!...he can only guess with out one.....give him one and he can nail it....!

yeah...you are way dark on those spots....matching is really tough, i got lucky on the 05 liner i did...i saw it driving down the road....owner grinning and waving at me....i could not tell that the thing was totally sunk and the bottom hull rebuilt.....lol.

i gotta go match a bright yellow on a obvious place on the hull today......this is gonna take some doing !

over all....you are doing a great job bud !...

p.s.......dont you just love cleaning the whople boat every time you go to the next phase????.....lol

I'm bring him one of the fish well hatches to colour match to. But he was sick today again. I hope he is feeling better tomorrow.

Actually no I do not love cleaning the whole boat every time. Right now I can go bear feet in the boat but have to put my shoes back on when I get of the boat to walk around the garage floor. I need to clean that up now.

Thanks, I do not know how you and Yatch Dr do this every day. It is a bit much for me. You deffinately need to be in shape!
 

j_k_bisson

Lieutenant Junior Grade
Joined
Oct 6, 2010
Messages
1,082
Update 01-14-2011

Update 01-14-2011

Last night scrubbed the other window and then buffed the lenses to remove the oxidation. Used the 3M Finesset compound and it came out great. Only took about a minute per lense side. Here is a pic of the compound and out come. Deffinately would reccomend this process to anyone who's windows are a bit oxidated.

DSCN1220-1.jpg

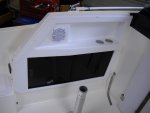
I then went on to clean the passenge side side-panel and install it. It came out pretty good. Deffinately not stained anymore. Here is a pic.

DSCN1218-1.jpg

Talked to Yatch Dr. and he is still not feeling up to snuff, so he is off work again. We'll meet up next week sometime to sort out the gel. So next week I'll finish off the gel coat repair.

This weekend I'll buff the splash well, and then clean up the control cables and steering cables. Also need to clean up and grease my shifter control. Tonight the side windows get installed. Might call a buddy to help with that one. Not much will get done after that project s finished tonight other than a case of beer. We'll see how I'll feel tomorrow!
 

j_k_bisson

Lieutenant Junior Grade
Joined
Oct 6, 2010
Messages
1,082
Update 01-15-2011

Update 01-15-2011

Last night installed the windows on both sides. I need to pick up a small tube of 3M 5200 black to finish sealing the outside. I could not get the caulking gun around the bottom side due to the size of the gun. So will try to pick that up today if not this week. Here is a pic of the installed window.

DSCN1222-1.jpg

Moved on to drilling the drain holes in the splash well. Then hogged them out a bit for space for the resin that seals them. Had to wait till today to get a small paint brush. Will do that this evening. Then moved on to drilling the anchor drain hole. Got that done and the vent cap installed over it. Had the wife help me install the windows, so none of buddies came over last night. In bed earlier last night actually. I'm basically waiting on materials to finish everything off. The hose and thru hulls will be in on Tuesday. So they are my next things to install.

Tonight I buff the splash well. I know I should wait for the gel, but then I would have nothing to do tonight. I'm just going to advoid the gel repair area.
 

oops!

Supreme Mariner
Joined
Oct 18, 2007
Messages
12,932
Re: 1991 Bayliner Trophy 2002 Transom Repair

Thanks, I do not know how you and Yatch Dr do this every day. It is a bit much for me. You deffinately need to be in shape!

i once posted about being sore from the demolition phase of restoration......tashasdaddy told me that he was a framing carpenter for years and fixing boats was just as tough.

in the 07 blue water i just did......i had to lay under the boat for 50 hours with an air powered long sanding board and 40 grit pressing on the hull as hard as i could. did it for 3 weeks straigt including grinding (another 50 hours) and polishing and sanding.
they are making jokes about me looking like popeye. this is tough dirty work....mike row from dirty jobs aint got nuthin on us !....but for me...its a labor of love.....and just somthing to get thru till i get to the next pahse of the project
 

j_k_bisson

Lieutenant Junior Grade
Joined
Oct 6, 2010
Messages
1,082
Update 01-18-2011

Update 01-18-2011

Well I have not been working on the boat much the past couple of days. Sort of at a stand still untill more materials show up. Started working on the boat yesterday and after installing the vent cap for the anchor drain I snapped the VHF antenna clean off at the mount. So I called it quits. I was having a bad day already and did not need to have it get any worst!

Hoping that all my materials come in today. Also ordered a new antenna from ebay. I also hoping to meet up with YD after work today. Get the gel sorted out. Then its full speed ahead!!!! I figure only 2 weeks left on this hull portion. Then it's motor time!!!! Really looking forward to that part of this project. I love working on motors.

Question for everyone. Is there any other clip for the antenna that is not metal two screw? Or is that the one I want? It appears a bit flimsy.
 
Joined
Aug 17, 2009
Messages
941
Re: Update 01-15-2011

Re: Update 01-15-2011

Last night installed the windows on both sides. I need to pick up a small tube of 3M 5200 black to finish sealing the outside. I could not get the caulking gun around the bottom side due to the size of the gun.

Jeff,

Great work. Put a piece of clear tubing on the end of your caulk gun. That will allow you to apply caulk through the tubing where needed and in tight spaces without having to have the gun in there.
 

j_k_bisson

Lieutenant Junior Grade
Joined
Oct 6, 2010
Messages
1,082
Re: Update 01-15-2011

Re: Update 01-15-2011

Jeff,

Great work. Put a piece of clear tubing on the end of your caulk gun. That will allow you to apply caulk through the tubing where needed and in tight spaces without having to have the gun in there.

I'll give it a try. Never would of thought of it. Seeing as I do not use and do this on a daily basis, I would never of though of that. Thanks for the tip.
 

j_k_bisson

Lieutenant Junior Grade
Joined
Oct 6, 2010
Messages
1,082
Update 01-19-2011

Update 01-19-2011

Stopped by Yatch Dr.'s after work last night and figured out the gel mtching issue. Man does that guy know his Sh*t! If you need information about the Who, What, Where, Why, How about glass'n and gel'n, ask him, he knows! Don't doubt, just do it........ Anyways by the time I got home last night I did not want to get into it until I had proper amount of time to do it properly and the proper mind set to get into it. So I'll do it tonight after supper. I'll post the steps as I go.

I also recieved the Seachoice thru-hulls for the splash well drains. They where 5/8" too short for the splash well drains. The bulk head is 3.125" thick. So I'll probably have to get the bronze or stainless ones. Need to do some investgation today to find the right ones. But I can use the curret ones I have to measure for fit and seal the wood in the holes with epoxy.

Also ordred a new antenna yesterday to replace the one I broke the night before. Bought the same one but with the chrome copper coupler instead of the nylon one. Should fix the problem permently. Now only the antenna clip to get to fully finish that system.

So tonight the following is going to get done.

1) Deck drains and scupper installation
2) Fit and seal up the splash well drains
3) Spray the gel coat repair
4) Reinstall the baterries and electrical in the transom area.

Hope I can get it all done tonight.
 

Yacht Dr.

Vice Admiral
Joined
Feb 26, 2005
Messages
5,581
Re: Update 01-19-2011

Re: Update 01-19-2011

Stopped by Yatch Dr.'s after work last night and figured out the gel matching issue. Man does that guy know his Sh*t! If you need information about the Who, What, Where, Why, How about glass'n and gel'n, ask him, he knows! Don't doubt, just do it........

Dont get me wrong JK.. I do appreciate the compliment..but..

There are others among us here in the Iboats forums that "knows there stuff".

I also suggest to try to get as Many opinions ( Pros or the "newbies" ( they come across with some brilliant ideas ! )) and then Verify for yourself before you "just do it".

Dont just Trust me or anyone else..evaluate..verify..use the thing between your ears instead of just blindly going where no man has gone before.

There is Good Solid Intel here on Iboats guaranteed ( Or I or others im sure Would Not Be Here : ).

YD.

PS. Hope your gellin goes good tonight :)
 

proshadetree

Lieutenant Commander
Joined
Jul 19, 2008
Messages
1,887
Re: Update 01-19-2011

Re: Update 01-19-2011

YD your being modest right? What pics you have posted look first class to me. Its the pros like you that help us newbies to do an acceptable job. While not professional all we have to do is have a boat fast enough to keep everyone 10 feet away. Wish I was a little closer to MI to stop by and spy on your work.
 

j_k_bisson

Lieutenant Junior Grade
Joined
Oct 6, 2010
Messages
1,082
Update 01-20-2011

Update 01-20-2011

Well YD you and Opps and the rest of the pros here help us newbies every day do things that we would not normally not try to complete. With better than hoped for result the first time. I score that up to you helping the little guy. Hell, you are teaching us what you do for a living. Normally we would have to pay for this information from some web site or book. I thank you for all your help and knowledge thus far and with any future projects. It is greatly appreciated.

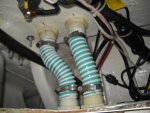
Now on to what I was able to complete last night. I first started off the night installing the deck drains hoses and scuppers. I ordered from Ebay a 5' piece of 1.5" ID hose and it finally came in. I started off installing the scuppers to the hull and sealing them with 3M 5200 white. I know if someone came around and looked, it could be said I used too much sealant. But after going thru what I just did replacing a transom for not being properly sealed. My thoughts there can never be enough sealant! Anyways, after getting the scuppers installed sealled and tightened. I wiped sealant on the inside of the trimed to lenght hose and the outside of the fitting and slipped them together. Then a ring clamp to make it nice and tight. The sealant was on the original fittings and it helped me make the tight hose slip on easier to the fitting. Would recommend. Just have lots of gloves on hand to keep hands and work clean. Here is a pic of the one side after done.

DSCN1223-1.jpg

After that I painted the wood in the splash well drains to seal them up nice and tight against water intrusion. Sorry no pics of the shiny holes! lol

Then I got down to buisness with the gel coat repair. I stared by wiping down the area with acetone. Then resanded the whole area with 220 grit sand paper. Then another wash down with acetone. Here is a pic of the area before spraying.

DSCN1225-1.jpg

Then I started mixing the gel. I mixed the spectrum gel (Color: Searay Artic White #A501470Q) with MEK reducer to about 10-12%. Then I tryied to spray it through the Prevail. It was not thin enough to spray so I added a bit more until I got the right ratio. You basically want it to come out a bit on the globy side but not all globy. After getting the right consistancy I cleaned the Pervail with MEK then mixed in the recommend 12-14drops of MEKP. Mixed it up really throughly with a screw driver. Then started spraying. I made sure that the coats where a bit on the heavy side, but would not sag or drip. Waited 2-3 minutes then hit again. I put on 4 heavy coats. The reasom for the 4th is my mask strap dropped into the gel and I had to fill it a bit where it touched. Note: make sure your face if not too close! It could be sweat the drips! lol Here are some pics of the materials.

DSCN1227-1.jpg

DSCN1228-1.jpg

Cont'd Next post.
 

Attachments

  • DSCN1232-1.jpg
    DSCN1232-1.jpg
    154 KB · Views: 9
Status
Not open for further replies.
Top