1991 Bayliner Trophy 2002 Transom Repair

Status
Not open for further replies.

Yacht Dr.

Vice Admiral
Joined
Feb 26, 2005
Messages
5,581
Re: Update 01-07-2010

Re: Update 01-07-2010

geez........i hope you see this........take him a chip of gell off the boat !!!!!!.

tell YD i said hi and have a beer with him for me

I had the Spectrum gel for his boat ( I hope lol )..

JK is A stand up guy after meeting him :) ( not to say he wasnt before..but..oh you know what I mean lol ).

He brought the beer ..but we had a band of heavy snow blowing through here so no drinks :( .. but Im having one now with for ya m8 :) .

YD.
 

proshadetree

Lieutenant Commander
Joined
Jul 19, 2008
Messages
1,887
Re: Update 01-07-2010

Re: Update 01-07-2010

Yd glad you could help JK with my boat. Ok his boat I like to dream. Did his arms look like he has been weight training for the Olympics? After all that buffing I can feel the pain.
 

j_k_bisson

Lieutenant Junior Grade
Joined
Oct 6, 2010
Messages
1,082
Update 01-07-2010 later that evening

Update 01-07-2010 later that evening

Stopped by Yatch Dr's work on the way home yoday and picked up the gel. He had already tinted gel from spectrum, no need for the chip. And he gave one of the best classes I ever had. He knows his stuff and was able to talk the chemicals and the various techniques of all this stuff and all the product associated with fiberglass. He blew my mind away! :eek: I deffinately did not retain half of what he taught me but I'm going to try to do it tonight to help it strick in my head.

By the way Yacht Dr. Got home safe and sound, but only took me 2 hrs for 25 mile drive. At least no accidents! Thanks Again. Like I said I'll be back in a couple of months to get some grey tinted up and another lession. I also left that pt of Michigan Fiberglass liquid gel. Hope you can use it.

Proshade tree this is going to be a new boat when its done with Yatch Dr's schooling! Migth never leave the driveway. To nice for the water........

Anyways, Since I have been home I dove right in to it!. Let me start off on what Yatch Dr. taught me, I want to say the few things. Deffinately need a full vapour mask for this job. This stuff is way toxic. Also If you have facial hair, you either need to shave shave it off or use vasilne for a perfect seal to the mask. I'm feeling it after 1 hr with no seal but with mask. Will be finding the jar of vasilne before I go back out. Second This is not hard to do, just need to know the proper steps and not to worry about screwing up. You can always grind it out and start over. No for the repair.......

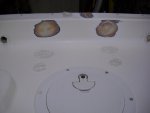
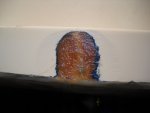
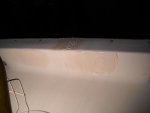
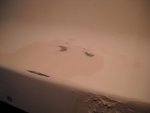
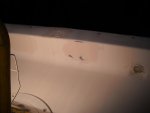
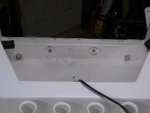
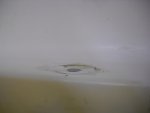
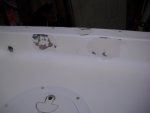
Here is the two holes up close that got pulled through. They ripped the glass when I found out my transom was rotten. One of the first indicators I had to the transom problem. I have already laminated on the other side with 1 layer of 1708 and epoxy. Look back a couple of pages and you will see that process and how I got here. Here is the holes are before washing the area a couple of days ago.
DSCN1154-1.jpg

Here is top view of the same holes tonight before I started. See how deep they where. I need to build this back up before gelling. Along with feathering the area out for the new gel.
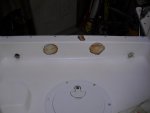
DSCN1173-1.jpg

DSCN1174-1.jpg

I first started not like Yatch Dr. told me, sorry!, he told me to sand the whole area that will get the gell repair with 180-220 grit first. Then grind the dish out. I ground the area out first to find out how big the dish was going to be with my rotory grinder and 36grit disc. Here is the pic.

DSCN1174-1.jpg

Then I sanded out anouth 2-4" for the gell repair feather. With the 180 sand paper. This is to make the gel low for the new stuff when I feather it and make it flat, but also to clean the surface and make the surface ready for the mechanical bond. Here is the out come.

DSCN1174-1.jpg

Next post....
 

Attachments

  • DSCN1172-1.jpg
    DSCN1172-1.jpg
    204.7 KB · Views: 10
  • DSCN1175-1.jpg
    DSCN1175-1.jpg
    149.8 KB · Views: 9

j_k_bisson

Lieutenant Junior Grade
Joined
Oct 6, 2010
Messages
1,082
Re: Update 01-07-2010 later that evening. Rev-2

Re: Update 01-07-2010 later that evening. Rev-2

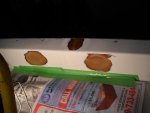
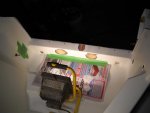
Next I washed/rinsed the surface with acetone and the surrounding area. Then I started cutting my 1.5oz chop mat to size. I cut three layers of mat gradually getting bigger with each layer. Also when I was done vacuumed up all the shavings of glass. I also pulled on the edge of the cut mat to help blend the edges when laminating them. I then washed the surface with a light actone rag again. Then the heaters where applied to preheat the surface. Check out the lights.

DSCN1179-1.jpg

Next I mixed up a batch of the polyester resin and started laminating the mat. I painted the surface of the boat, then a layer of mat, then paint the mat with resin, wait a second for the mat to wet out, anouth layer of mat, paint with resin.....so on. Use a disposable paint brush for application of resin. Reapply the lamp and wait to kick off. Had to reappy a final coat of resin before it kicked of. Here is the pic.

DSCN1177-1.jpg

Im waiting an hour and then Im right back into sanding this area. Will post the next steps at next break.
 

j_k_bisson

Lieutenant Junior Grade
Joined
Oct 6, 2010
Messages
1,082
Re: Update 01-07-2010 later that evening. Rev-2

Re: Update 01-07-2010 later that evening. Rev-2

I'm back already. I sanded it with the rotary air sander with 100 grit disc on it. Checked it with a straight edge to make sure that I had no low spots and it turned out I had a ring aound the out side edge of the mat that was about 1/64 shallow to much. So instead of putting another layer of mat and resin, I used a batch of mixed resin and chop glass mat that Yacht Dr mixed up earlier this afternoon. Here is what it looks like.

DSCN1182-1.jpg

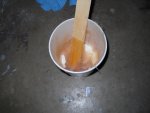
All it is is resin and silica and with a piece of choped mat shaved in 1/4-1/8" length of trimmings added to it. Then really mixed up. It's about 1:1 ratio of silica:resin. Then about 25% glass fibers added to it. I applied in very thin coat using the mixing stick to work it down. Here is the area pic.

DSCN1183-1.jpg

Here is a close up of the crack I'm fixing in the same area. You should be able to just make out the skim coat.

DSCN1180-1.jpg

Now waiting for it to kick.

Oh yes washed the area again with acetone after sanding and before appling mixture.

Time for a beer while I wait to sand again!!!!!!!!
 

oops!

Supreme Mariner
Joined
Oct 18, 2007
Messages
12,932
Re: Update 01-07-2010

Re: Update 01-07-2010

I had the Spectrum gel for his boat ( I hope lol )..

JK is A stand up guy after meeting him :) ( not to say he wasnt before..but..oh you know what I mean lol ).

He brought the beer ..but we had a band of heavy snow blowing through here so no drinks :( .. but Im having one now with for ya m8 :) .
YD.
tipping back a corona now......cheers. !


it sounds like our friend JK is happy and has the basics of a repair now......ya gotta know that when he drives 2 horus and 25 miles in a snow storm to get back to his boat !!!!! lol

thanks for helping out in the iboats way bud !

cheers
oops
 

Yacht Dr.

Vice Admiral
Joined
Feb 26, 2005
Messages
5,581
Re: Update 01-07-2010

Re: Update 01-07-2010

Nice work JK :)

How did the gel match ? ( I know you didnt spray it yet..but did you test dab it ).

That Mohair is good stuff eh :) .

YD.

PS. Yup..it took me 25 min to go 4 miles up the road lol
PSS. and I thought you were going to give me open koodoes about that Chris Craft paint job ;) .
 

proshadetree

Lieutenant Commander
Joined
Jul 19, 2008
Messages
1,887
Re: Update 01-07-2010

Re: Update 01-07-2010

Jk I wasnt going to put it in the water. I was going to build a living room around it and just take picture to the lake so the fish would jump in a bucket just to be near it?:D Glad YD hooked you up. Sometimes pros advice is worth it weight in gold. YD where are the pics of that Chris Craft paint job?
 

j_k_bisson

Lieutenant Junior Grade
Joined
Oct 6, 2010
Messages
1,082
Re: Update 01-07-2010

Re: Update 01-07-2010

Opps he is what this site is all about. "Helping your fellow boat owner make their boat repair the best it can be."

Well did not get back out to the garage. One to many beers and it was getting late. Neighbours don't like the compresser and shop running at 1 am. Plus the neighbour right next door just had a baby. So called it a night. Will get back into it this afternoon.

I forgot to ask one question while I was there yesterday. Is there a good marine supply place in that area? I mean for deck hardware and stuff?

Sorry about the Chris Craft, I was so overwhelmed with everything there that I did not know where to start. That thing was amazing. I have never seen a finish that had no waves, no defects and a mirror finish that was truely a mirror. I think it was in the 40-50' range of boat and like I said no waves in the mirrow. Wow is all I can say. You should take a few pics for your album. Also post a couple here just to show everyone what I'm talking about.

Proshadetree, instead of the bucket, I was thinking of getting a second boat to fish with...... Just need to talk to the wife into it! lol
 

Yacht Dr.

Vice Admiral
Joined
Feb 26, 2005
Messages
5,581
Re: Update 01-07-2010

Re: Update 01-07-2010

I forgot to ask one question while I was there yesterday. Is there a good marine supply place in that area? I mean for deck hardware and stuff?

There is one place we call Earl the Pearl that has just about everything for anything..

Hes up there @ S. river road and Jefferson ( next to West Marine ). Ill get an address and number monday from work.

I do have the "back room" full of stuff..what do you need..I might have it.

YD.

PS. proshadetree.. Aye..hes kinda buff in the arms m8 :) ( I wouldnt want to go a round with him for sure lol )
 

j_k_bisson

Lieutenant Junior Grade
Joined
Oct 6, 2010
Messages
1,082
Re: Update 01-07-2010

Re: Update 01-07-2010

It's not buff in the arms. Its only fat!!!!! lol

I'm looking foir 3/4" plastic white thru hulls. They need to be extra long. I found some made by seachoice that have 3" of thread. They should work for the splash well drains quite nicely. The regular ones are way too short. And I want to stay in plastic and not bronze if I can help it. I can order them off line, but If I could get the locally I prefer to do it. You know what I mean. I could deffniantly measure them to make sure they work before buying.
 

Yacht Dr.

Vice Admiral
Joined
Feb 26, 2005
Messages
5,581
Re: Update 01-07-2010

Re: Update 01-07-2010

Why plastic/nylon through hull fittings ? I would have bronze any day ..

That brings another thing to mind..All Fittings below the waterline should be bronze/metal cast ..not plastic.. ( I know this isnt below water line..just a sidebar thing ).

YD.

PS. did you dab the gel yet ? :)
 

j_k_bisson

Lieutenant Junior Grade
Joined
Oct 6, 2010
Messages
1,082
Re: Update 01-07-2010

Re: Update 01-07-2010

Nope, have not gotten to it yet. But it is one of the first things this afternoon I plan on doing when I get out to the garage. I just forgot about it. It's not like I have a choice. It is what it is. I'm colour blind so it will probably be fine. Also with the red patch aid in it. It will not represent what the true end colour will be right? Basically I plan on doing the full repair with buffing. If it really is off coloour, I was planning coming back get the rest of the gel tinted, and redoe the gel portion. Post a pic of the smear at my break.
 

Yacht Dr.

Vice Admiral
Joined
Feb 26, 2005
Messages
5,581
Re: Update 01-07-2010

Re: Update 01-07-2010

nope..the color will be basically the same if you finger dab some uncatted gel we mixed up on the sanded/prepped area we discussed. The gel will not swing colors that drastically..so if you dab uncured gel ( out of the can ) to a sanded area and it looks WAY off..then your going to have a WAY off spray..in that case dont spray.

Or you can use that gel mix we made for a smaller patch on your boat to kinda determine if its the right color ( your going to spray them at some point anyway :) .

YD.

PS. when you "dab/smear" the uncured gel .. let it sit about 15 mins...then looksies ..
 

j_k_bisson

Lieutenant Junior Grade
Joined
Oct 6, 2010
Messages
1,082
Update 01-07-2010 Rev-2

Update 01-07-2010 Rev-2

Well I wish I would of read that before now. I just finished the next step of the process. Here is the smear of the gel on the back outside corner. You can see where there where some original stickers/decals. The area is white the the surounding hull.

DSCN1185-1.jpg

Its a bit darker/red. But pretty close in IMHO. Good enough to proceed for now. This was only on the hull about 2-3 minutes. Not the 15 you suggested.

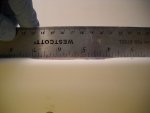
I started the afternoon with grinding the areas with 100 grit rotary air grinder. Basically grind the whole surface to rough it up and then with the aid of a ruler checked it for high spots. Here is a pic of the ruler check.

DSCN1187-1.jpg

You will notice I am about 1/32" shallow from the ruler. This is to leave space for the new gel. After I had it where I wanted it to be. I resandsed the whole area with 120 grit to feather the area for the gel. Then re-sanded area with 180 grit to help with scratches left from the wrougher sand paper. Here is a pic of the area after sanding and vacuuming and acetone wash. Also the lamp came back out to pre heat the area.

DSCN1188-1.jpg

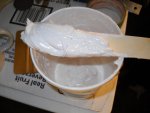
There where quite a few pits/bubble holes when I was done sanding. These get filled up with modified/thickened gel that Yatch Dr mixed up for me yesterday. It is Spectrum liguid gel with 25-30% patch aid, and 10-15% silica. The silica acts as a thickening agent. Don't know which silica it was. Yatch Dr mentioned two kinds yesterday. Also I asked him about the health hazards of this silica. Its very nasty stuff. Do not breath it at all. Well this got all mixed up until not more lumps present then add the MEKP at 8-10 drop per fuild oz of gel mixture. Here is a pic of the mixture.

DSCN1189-1.jpg


Then spred it in to the patch area. I put it on pretty thick because I had a ton of it. And I love sanding!!!!! Just joking. It just went on that way. I made sure to work it into the spots and holes. Then the lamp was back to heat the area. Here is the out come.

DSCN1191-1.jpg

So needless to say I'm back on break waiting for it to cure. Staying away from the garage because of the fumes. Hope the kids have a long sleep this afternoon. I would love to get this sanded and the gel sprayed. We will see what happens.

YD is there is anything I'm missing please chime in and correct me.
 

j_k_bisson

Lieutenant Junior Grade
Joined
Oct 6, 2010
Messages
1,082
Re: Update 01-07-2010 Rev-2

Re: Update 01-07-2010 Rev-2

Well ran into two problems this afternoon. One being the kids did not sleep that long. And two the gel really does not match the boat. It is fairly dark. Here are pics of the gel.

DSCN1194-1.jpg

DSCN1192-1.jpg

I will need to get ahold of Yatch Dr. about getting this fixed. He gave me pretinted Gel from Spectrum "Bayliner Artic White '01-'04" but I think it may be from 2001-2004 and not 1991-1994. Anyways the number on the can from spectrum is B#1699-FLCCP that he gave me. The gel paste I had was B#0360FL. It better matched the boat. I bought it from Spectrum but it was a bit too white. Well Yatch Dr I hope you still have that other can of Gel I left there. Also hope you can tint it for me.

Tonight I'll finish sanding that areas and get them ready for the gel. Then I'll move on to waxing the rest of the boat.
 

j_k_bisson

Lieutenant Junior Grade
Joined
Oct 6, 2010
Messages
1,082
Re: Update 01-07-2010 Rev-2

Re: Update 01-07-2010 Rev-2

Well I did do some research before supper tonight and the two year groups are different. But I still do not know if the 2001-2004 group was darker. Maybe someone here can tell me.

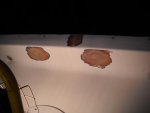
So when I got out to the garage tonight I finish sanding the majority of the three spots so they are ready for gel. All I have to do is give them a bit of a light sanding, then a acetone wipe down when I get the gel sorted out. Here is how they came out.

DSCN1201-1.jpg

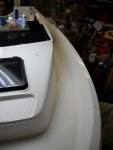
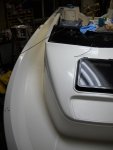
Next I wash down the whole top of the boat. The reason for this was to remove all the fiber glas dust. I vacuumed first. Next I proceeded to wax the boat. I have finished the front up to the steps and the dash and cockpit walls to the steps. Here is how it came out.

DSCN1196-1.jpg

DSCN1202-1-1.jpg

DSCN1200-1.jpg

DSCN1199-1.jpg

Cont'd next post.
 

j_k_bisson

Lieutenant Junior Grade
Joined
Oct 6, 2010
Messages
1,082
Re: Update 01-07-2010 Rev-2

Re: Update 01-07-2010 Rev-2

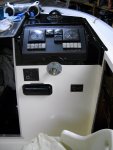
Here is the rest.

DSCN1203-1-1-1.jpg

DSCN1205-1.jpg

DSCN1204-1-1.jpg

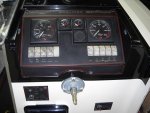
Not a bad 20 year old dash. I think the writing is in pretty good shape. I do want to replace the buttons on the switchs. But that will be this summer. Also anyone know where I can get one of these switches?

After I get done my break here I plan on finishing the rest of the cockpit with wax. Then I have to clean up and semi buff the fish well lid so I can bring it to YD to use as a colour match sample. Then a couple of beers.
 

j_k_bisson

Lieutenant Junior Grade
Joined
Oct 6, 2010
Messages
1,082
Update 01-09-2010

Update 01-09-2010

Well last night finished up around 2am. Got the whole cockpit waxed. I used The meguires premium wax on the vertical walls. Then on the deck I use traction wax. A note about the traction wax. It will attarct dirt if not fully whiped off and buffed. But it is great stuff. Helps a ton,especially for the times when you go to step and your feet slide. You do not slide with this stuff. If anyone wants the name of it let me know. Here are the pics.

DSCN1207-1.jpg

DSCN1208-1-1.jpg

So tonight I plan on getting into reassembly of the dash. I first need to take off the dash panel and hook up the speedo vacuum line. Then I plan on installing my new trim tab switch. That should be a good project. May even get into the pump installation. It would be nice to finally finish off a system.

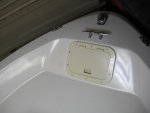
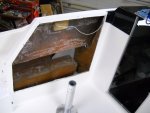
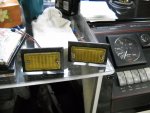
I do have a question about the cockpit lights. Anyone know where I cane get some new ones. Here are what they look like.

DSCN1206-1.jpg

The manufacture is ITC Marine Part # 21750. I hope someone knows where I can get exact new ones.
 
Status
Not open for further replies.
Top