1990 Sea Nymph FM160B Restoration

bonz_d

Vice Admiral
Joined
Apr 22, 2008
Messages
5,276
Hey Bonz, you mentioned you were putting down new ply in your boat, are you planning on 1/2" ply or 3/4"? Just curious, the carp that I took out of my boat was 1/2", I think there will be plenty of support with my replacement foam (blue or pink sheet stuff cut to fit), but thougth I would ask your plans...

Thoughts?

Frey

I've used 5/8" in a Lund and again here in this Sea nymph. The Lund had originally used 5/8" the Nymph I have no idea because it was already removed when I got it. The Alumacraft Classic 16 originally used 1/2" and at one time was replaced with 5/8" treated ply so that is now all torn out. I will be putting 1/2" back in it as the stringers are fairly close together so it should have good support. I find the 5/8" ply a good compromise, a little stiffer than 1/2" but a little lighter than 3/4". If I had to span wide distances like in the Starcrafts I would deffenately use 3/4".

What are your spans?
 

Rick Stephens

Admiral
Joined
Aug 13, 2013
Messages
6,118
No Title

Your setup looks almost just like mine Rick. I need a bimini top like that, I have the kind that snaps to the winshield only. I need to look at getting a kicker but would have no idea where to mount it with a stern drive.

At least bimini tops are getting cheaper every day. I am going to get another identical one, remove the front bow and add a zipper to the front of it and to the trailing edge of the one installed there now. That way I can have a full length stand under top - zipped together when it rains. If I make it narrow enough there is a 12 inch wide cover all the way across the stern of the boat that it can fit under. Those tops are like $90 and modifying them is easy.

I built that mount myself. Had the materials and had already spent too much on the boat that year to spend on a commercial built bracket. (wife was starting to get a moldy look to her, I was on a short leash) Main thing is getting a mount that clears the stern drive and gets the prop and outboard impeller deep enough to not ventilate and to keep pulling cooling water even in chop. There are a lot of really experienced hands on this forum that can assist in planning the outboard location before you start drilling.

Cheapest fishin and skeein rig I could figure out how to get, when I bought it. Around here IO ski boats hold the least resale value. Yet for me, are the easiest to work on. Sorry if we hijacked this thread a little. I am truly enjoying learning how this Nymph is gonna turn out. And it is well worth it when you got the kids out fishing! Those kids'll never be the same.

Rick
 

Attachments

  • photo229451.jpg
    photo229451.jpg
    76.5 KB · Views: 1
  • photo229452.jpg
    photo229452.jpg
    72.6 KB · Views: 1
Last edited:

Watermann

Starmada Splash of the Year 2014
Joined
Jan 12, 2013
Messages
13,798
Nice! another FM160 being brought back to life! :thumb: I hang out in the Starcraft forum too much sometimes I think. :lol:

On the deck question, on my SS160 I used 1/2" 5 layer marine ply for the bottom decking and the raised deck is all 3/4" (7 layer marine ply) due to numerous cutouts for hatches and livewells anything thinner would be too weak for me and my 250# fishing buddies. I also foamed the heck out of the bottom cutting each piece of foam to lay in edgewise to support the bottom deck while leaving a center runway for water to move to the bilge. I extended by front deck back to the front of the console and was able to incorporate an in deck cooler that sure has been nice to free up deck space.

On these older tin boats be sure to check the keel area closely for any leaks as they take a lot of abuse over the years.

You'll need to post some pics of the bracing your talking about not allowing the deck pieces to go in full length.
 

Frey0357

Petty Officer 1st Class
Joined
Mar 13, 2014
Messages
313
I've used 5/8" in a Lund and again here in this Sea nymph. The Lund had originally used 5/8" the Nymph I have no idea because it was already removed when I got it. The Alumacraft Classic 16 originally used 1/2" and at one time was replaced with 5/8" treated ply so that is now all torn out. I will be putting 1/2" back in it as the stringers are fairly close together so it should have good support. I find the 5/8" ply a good compromise, a little stiffer than 1/2" but a little lighter than 3/4". If I had to span wide distances like in the Starcrafts I would deffenately use 3/4".

What are your spans?

Thanks Bonz! the boat is 72" at its widest point, but the replacement foam that I plan to put in the bottom will support the lower decking. The plan is to cut/trim the pieces and stand them up on end like Jasoutside did on his SN restore project (AWESOME example of a great project! IMHO), and layer them in between the ribs on the bottom of the hull. The foam will not go above, but be at the same height as the ribs. I plan to leave a center gap for water to travel back to the bilge area so it can be pumped out. This was the original plan from SN when originally manufactured, but they placed white styrofoam in the center to "guide" or block the spray in foam from traveling to the center. Nice attempt, but the spray in foam simply pushed the white styrofoam aside as it expanded....great idea, but poor execution!

In the end I think I will be fine with 1/2" sealed plywood, but thougth I should poll this audience, as they are much more experienced than I! Oh yeah, the other main reason is that the support bracketing for the stern and storage areas of the boat are raised up only 1/2" above the ribs, so if I was to go with 5/8" or 3/4" I would have to raise those up too! I really want to avoid drilling out those rivets as they are external to the hull.....

Just my thoughts here,

Frey
 

Frey0357

Petty Officer 1st Class
Joined
Mar 13, 2014
Messages
313
No Title

Nice! another FM160 being brought back to life! :thumb: I hang out in the Starcraft forum too much sometimes I think. :lol:

On the deck question, on my SS160 I used 1/2" 5 layer marine ply for the bottom decking and the raised deck is all 3/4" (7 layer marine ply) due to numerous cutouts for hatches and livewells anything thinner would be too weak for me and my 250# fishing buddies. I also foamed the heck out of the bottom cutting each piece of foam to lay in edgewise to support the bottom deck while leaving a center runway for water to move to the bilge. I extended by front deck back to the front of the console and was able to incorporate an in deck cooler that sure has been nice to free up deck space.

On these older tin boats be sure to check the keel area closely for any leaks as they take a lot of abuse over the years.

You'll need to post some pics of the bracing your talking about not allowing the deck pieces to go in full length.

Thanks Watermann! Yeah pretty excited to bring this SN "up from the deep" water she was sitting in, so to speak...lol

I do like the idea of 1/2" bottom decking with 3/4" decking on the raised portions including the hatch covers, etc... As for the foam installation I plan to do, I plan to do just as you stated lay it in on edge trimmed to fit the same height as the ribs, leaving a center "runway" for water flow back to the bilge area to be pumped out.

I am glad that you mentioned the keel area of the boat! So far that is the only portion of flooring/foam not removed from my SN, and I was considering not touching it...I think you talked me into reconsidering that thought!

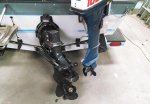
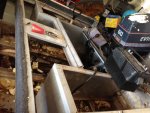
See the pic ( I will take another, more clear pic this weekend), for the bracing that I am referring to. I will need to "sneak" the floor under this bracing that is currently riveted to the hull of the boat at 1/2" height above the ribs. There is just not enough room to get large pieces of repalcement flooring under there. I will have to get smaller sections under and then screw em down, then seal em together.....just my thought here.....

thanks for stopping by! If you have more experiences with this please chime in at any point! The more help the better!!! :D

Frey
 

Attachments

  • photo230686.JPG
    photo230686.JPG
    140.6 KB · Views: 5

drpepper68

Petty Officer 3rd Class
Joined
Sep 8, 2014
Messages
75
At least bimini tops are getting cheaper every day. I am going to get another identical one, remove the front bow and add a zipper to the front of it and to the trailing edge of the one installed there now. That way I can have a full length stand under top - zipped together when it rains. If I make it narrow enough there is a 12 inch wide cover all the way across the stern of the boat that it can fit under. Those tops are like $90 and modifying them is easy.

I built that mount myself. Had the materials and had already spent too much on the boat that year to spend on a commercial built bracket. (wife was starting to get a moldy look to her, I was on a short leash) Main thing is getting a mount that clears the stern drive and gets the prop and outboard impeller deep enough to not ventilate and to keep pulling cooling water even in chop. There are a lot of really experienced hands on this forum that can assist in planning the outboard location before you start drilling.

Cheapest fishin and skeein rig I could figure out how to get, when I bought it. Around here IO ski boats hold the least resale value. Yet for me, are the easiest to work on. Sorry if we hijacked this thread a little. I am truly enjoying learning how this Nymph is gonna turn out. And it is well worth it when you got the kids out fishing! Those kids'll never be the same.

Rick


Thanks for the pics and advice Rick!

Sorry Frey, didnt mean to get off topic! I think I'll start my own remodel thread. Looking forward to seeing all your hard work and upcoming pics! You've inspired me to get in gear and take my boys out as well. You seem like a really good dad!

I'm going to engineer my downrigger soon and I'll share if I can come up with something creative, thinking of building my own since I'm cheap. :)
 

Frey0357

Petty Officer 1st Class
Joined
Mar 13, 2014
Messages
313
Thanks for the pics and advice Rick!

Sorry Frey, didnt mean to get off topic! I think I'll start my own remodel thread. Looking forward to seeing all your hard work and upcoming pics! You've inspired me to get in gear and take my boys out as well. You seem like a really good dad!

I'm going to engineer my downrigger soon and I'll share if I can come up with something creative, thinking of building my own since I'm cheap. :)

You are ok there DrPepper! Afterall we each have our own projects and projects within projects to deal with. You bring up Bimini tops, where do you find them cheaper? I would like to consider having one for my biuld more toward the end of the project...

Take your kids fishing and boating! Its fun, and most importantly the memories that you build with them cannot be replaced. I know for me I have memories of sitting in a small row boat with my father and grandfather (very tight quarters....) and fishing, talking, and laughing are something that I smile about even today!

I dont know if I'm a good Dad or not, it just feels like the right thing to do....:encouragement:
 
Last edited:

Watermann

Starmada Splash of the Year 2014
Joined
Jan 12, 2013
Messages
13,798
Thanks Watermann! Yeah pretty excited to bring this SN "up from the deep" water she was sitting in, so to speak...lol

I do like the idea of 1/2" bottom decking with 3/4" decking on the raised portions including the hatch covers, etc... As for the foam installation I plan to do, I plan to do just as you stated lay it in on edge trimmed to fit the same height as the ribs, leaving a center "runway" for water flow back to the bilge area to be pumped out.

I am glad that you mentioned the keel area of the boat! So far that is the only portion of flooring/foam not removed from my SN, and I was considering not touching it...I think you talked me into reconsidering that thought!

See the pic ( I will take another, more clear pic this weekend), for the bracing that I am referring to. I will need to "sneak" the floor under this bracing that is currently riveted to the hull of the boat at 1/2" height above the ribs. There is just not enough room to get large pieces of repalcement flooring under there. I will have to get smaller sections under and then screw em down, then seal em together.....just my thought here.....

thanks for stopping by! If you have more experiences with this please chime in at any point! The more help the better!!! :D

Frey

Ok, I think I know what you're faced with on the bottom deck, my SN has similar bracing for the deck and a side panel that only had enough room for the same 1/2" ply to fit under. My side panel is on the helm side of the boat and I had to put the ply in up under it first and then slide the port side down. You should be able to drop the stern piece of ply ahead of the deck bracing and slide it back underneath the boxes/bracing.

fetch
 

Frey0357

Petty Officer 1st Class
Joined
Mar 13, 2014
Messages
313
Ok, I think I know what you're faced with on the bottom deck, my SN has similar bracing for the deck and a side panel that only had enough room for the same 1/2" ply to fit under. My side panel is on the helm side of the boat and I had to put the ply in up under it first and then slide the port side down. You should be able to drop the stern piece of ply ahead of the deck bracing and slide it back underneath the boxes/bracing.

fetch

Yes, Watermann you completely understood what I was trying to describe. I will take better photos of my boat this weekend. On your SN how did you access the flooring or "decking" under the front casting deck? Of course I can remove the lids to the storage areas, but how to remove the wooden subfloor beneath? The stern flooring was completely rotten, so pulling it out was simple!

Thoughts?

Frey
 

drpepper68

Petty Officer 3rd Class
Joined
Sep 8, 2014
Messages
75
You are ok there DrPepper! Afterall we each have our own projects and projects within projects to deal with. You bring up Bimini tops, where do you find them cheaper? I would like to consider having one for my biuld more toward the end of the project...

Take your kids fishing and boating! Its fun, and most importantly the memories that you build with them cannot be replaced. I know for me I have memories of sitting in a small row boat with my father and grandfather (very tight quarters....) and fishing, talking, and laughing are something that I smile about even today!

I dont know if I'm a good Dad or not, it just feels like the right thing to do....:encouragement:


I'm glad you asked the question of bimini tops since I wanted to ask Rick where he got his for $90 but didnt want to take over your thread. :) Mine came with my boat but its only the kind that snaps to the window. I want one that sits up high and back as well.
 

Rick Stephens

Admiral
Joined
Aug 13, 2013
Messages
6,118
Well, I'm cheap. This is what I installed and it has been perfect for three seasons. It was $90 when I bought it.
http://www.amazon.com/gp/product/B0051WVPB0?psc=1
I installed backwards from what most people would. It rolls up over the windshield, so when folded up it is out of the way of fishing poles in the back.

Rick
 
Last edited:

Frey0357

Petty Officer 1st Class
Joined
Mar 13, 2014
Messages
313
Well, I'm cheap. This is what I installed and it has been perfect for three seasons.
http://www.amazon.com/Grey-Bimini-Hardwares-Aluminum-Frame/dp/B00ITIB5AO/ref=sr_1_1?ie=UTF8

I installed backwards from what most people would. It rolls up over the windshield, so when folded up it is out of the way of fishing poles in the back.

Rick

Rick - I'm all about saving a few bucks when the time is right for the right product. It is good to know that this bimini top is in use on your boat and the explanation of how you use it makes sense (it may help someone else, even me!). Got a pic of that top in use on your boat?

Frey
 

BWR1953

Admiral
Joined
Jan 23, 2009
Messages
6,201
Well, I'm cheap. This is what I installed and it has been perfect for three seasons. It was $90 when I bought it.
http://www.amazon.com/gp/product/B0051WVPB0?psc=1
I installed backwards from what most people would. It rolls up over the windshield, so when folded up it is out of the way of fishing poles in the back.

Rick
I have that same bimini top on my Amazon wish list. Dunno if I'll need it this year or not but it'll be the way to go on my frugal boat fixup.
 

Frey0357

Petty Officer 1st Class
Joined
Mar 13, 2014
Messages
313
OK, so I am planning on the next stage here of my build and I would like to ask how to determine how much Gluvit is needed to cover seams and rivets in my boat? Is there a general recommendation here for this? Can someone much more experienced with this help me?

Thanks all!

Frey
 

Watermann

Starmada Splash of the Year 2014
Joined
Jan 12, 2013
Messages
13,798
I used a quart size (2LB) of gluvit for my 16' SN and there was plenty.

On the front casting deck, once you take it off it you should be able to see the fasteners holding the sub deck down. On my SN the bulkhead at the back end of the front deck doesn't go all the way to the support underneath, there's a gap for the ply it so the ply slides up under it into the front V. Or reverse when removing. Hope that's not too confusing of an explanation. :lol:
 

Rick Stephens

Admiral
Joined
Aug 13, 2013
Messages
6,118
No Title

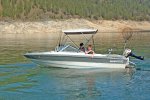
I found the doggone picture I was looking for. Since this picture I drilled out the rivet and lowered the solid front mount bar about an inch to level the top.
 

Attachments

  • photo230769.jpg
    photo230769.jpg
    89.9 KB · Views: 1

Frey0357

Petty Officer 1st Class
Joined
Mar 13, 2014
Messages
313
I found the doggone picture I was looking for. Since this picture I drilled out the rivet and lowered the solid front mount bar about an inch to level the top.

Rick, that top looks great! Your boat looks sharp all together. Thanks for sending.

Frey
 

Frey0357

Petty Officer 1st Class
Joined
Mar 13, 2014
Messages
313
I used a quart size (2LB) of gluvit for my 16' SN and there was plenty.

On the front casting deck, once you take it off it you should be able to see the fasteners holding the sub deck down. On my SN the bulkhead at the back end of the front deck doesn't go all the way to the support underneath, there's a gap for the ply it so the ply slides up under it into the front V. Or reverse when removing. Hope that's not too confusing of an explanation. :lol:

Thanks Watermann. I am glad 2lbs. package should be plenty, that stuff is expensive! If I'm in there now, then I want to seal the rivets and seams even though I dont have any leaks up front (only at the stern at the transom). Your explanation of the front casting deck seems perfect! I am following your experience and explanation, no problem. I went through your rebuild yesterday once again, and it really turned out nice! Great work. One aspect I am also interested in is painting the OB. The PO of my boat had greased up all joints and fittings on the motor (which is good....but), but did so much grease that it is everywhere! I want to use a degreaser to take as much off as possible before I sand lightly (worried about the paint sticking). Any suggestions on degreaser products?

Thanks all!!

Frey
 

Watermann

Starmada Splash of the Year 2014
Joined
Jan 12, 2013
Messages
13,798
The very best degreaser / cleaner I've ever found, amazing stuff. Oh yeah and WalMart has it.

Superclean
 
Top