1989 Skeeter SD-125 [bass boat]

jigngrub

Fleet Admiral
Joined
Mar 19, 2011
Messages
8,155
Work looks good!

Yeah those old rotten transoms don't put up much of a fight, and even the ones with some good wood still aren't much of a challenge if you use the right tools.
 

fmjnax

Chief Petty Officer
Joined
Jul 21, 2011
Messages
457
I'm working on putting together my materials list so that I can put in an order for 'glass supplies today or tomorrow. In my previous restore, I put a layer of CSM on the transom before installing in the boat. However, in WoG's updated post, I don't see anything about covering the transom with anything but the soak coat of resin prior to installing. Theories and methodologies always change (I know first hand how that goes; I'm a software engineer!), so is the CSM now thought to be unnecessary (and if so, I'm guessing because the CSM backing on the 1708 provides plenty)?
 

Woodonglass

Supreme Mariner
Joined
Dec 29, 2009
Messages
25,927
so is the CSM now thought to be unnecessary (and if so, I'm guessing because the CSM backing on the 1708 provides plenty)?

You are Koorectamundo!! As far as my research and talking with the MFG Techs and experts they tell me that is the case!!! Seal the wood with resin fill all voids with PB and then use the 1708 and you'll be good to go!!! Stringers and Transom!!!;) If you had extremely rough wood or laminate then you might want to use the 1.5 oz CSM to help fill in the depressions and increase the bond.
 

fmjnax

Chief Petty Officer
Joined
Jul 21, 2011
Messages
457
Nice! Thanks for the quick reply WoG. Saves me a little bit of material cost (though CSM is cheap, so it's pennies in a bucket).
 

fmjnax

Chief Petty Officer
Joined
Jul 21, 2011
Messages
457
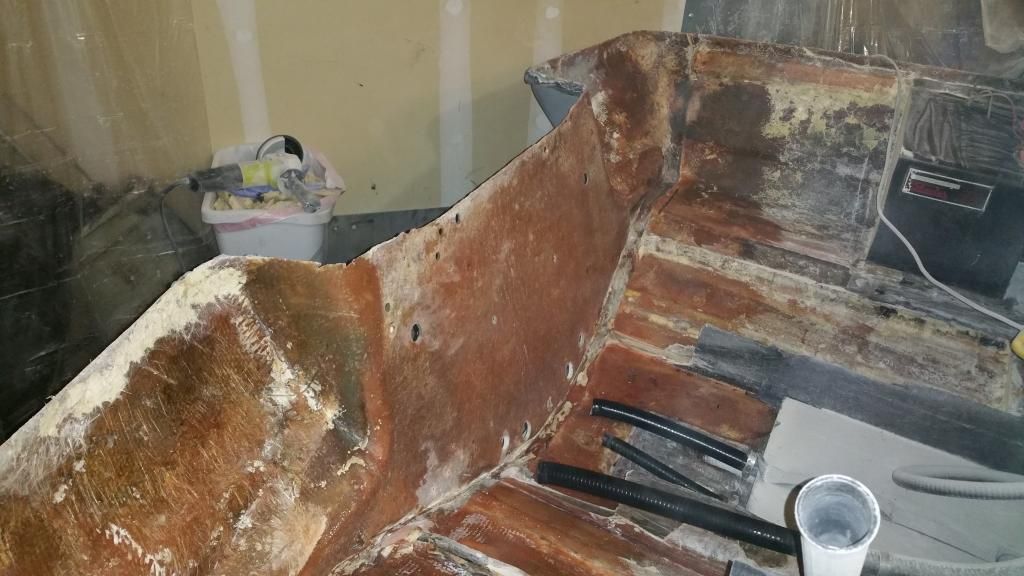
Not a lot done in terms of picture progress, but good progress nonetheless. I tented off my area, suited up, and did some good grinding. I think the last of my 24 grid discs is about done, so I'll either have to pick up some more or use the 50's. Most of the time was spent on smoothing out the curves between the transom and the sponsons. I still have some areas that I didn't take down enough. I'm not giving extreme attention to areas that I know won't see any new glass. I haven't hit any of the stringer grinding yet, either.

Now, as for my stringer situation... I have gutted them back as far as I can reach. I borrowed a friends camera scope thing and looked at the stringer structure from the drains in my deck and from underneath the gas tank. The good news is that the glass all appears to be intact and in good shape. I didn't notice and bubbles or obvious delam. The bad news is the rot extends much further than I can reach (and most likely are rotted all the way through). Again, I can't do much about it at this point in time; they will just have to wait until we move out of this place next year.

Now, I know that some of the burden of the stringer is carried by the glass and some of it by the core material. My plan is going to make you cringe, I'm sure. I'm going to finish extracting as much of the rotted wood as I can (which may only be a few feet back from the fuel tank). Then I will cut some makeshift stringer cores from some rigid pink foam and slide them in; which is probably easier said than done. I have a few cans of urethane spray foam that I will shoot in to fill the voids. I'll stop them just aft of the gas tank (if you look at the picture below, you can see on the right side where I stopped cutting the foam out and there is a yellow item just entering the picture; this is where I will stop). This is about the limit of where I will have proper room to do glass work. I will then sand it smooth and straight, making sure that I'm endcapped with urethane foam. I will bed/butt the new wood stringers up against this foam stringer.

I figure the boat survived probably at least a few years with rotted out stringers so a foam core stringer, as unorthodox as it may be, has got to be better than what it has been and it should be good enough for a year. Your thoughts?

Oh, I almost forgot the picture. Just one picture, as I was ready to get out of the suit and in to the shower and bed. Here's how we look after a quick wipe down with a wet rag. Not too bad, I don't suppose.
20150211_213808.jpg
 

Woodonglass

Supreme Mariner
Joined
Dec 29, 2009
Messages
25,927
Pics of the area where you CAN'T get to the rotted stringers would help ME understand your plan. Right now, I'm thinking save your money and your foam. It's NOT gunna do much to help the situation.:cool:
 

fmjnax

Chief Petty Officer
Joined
Jul 21, 2011
Messages
457
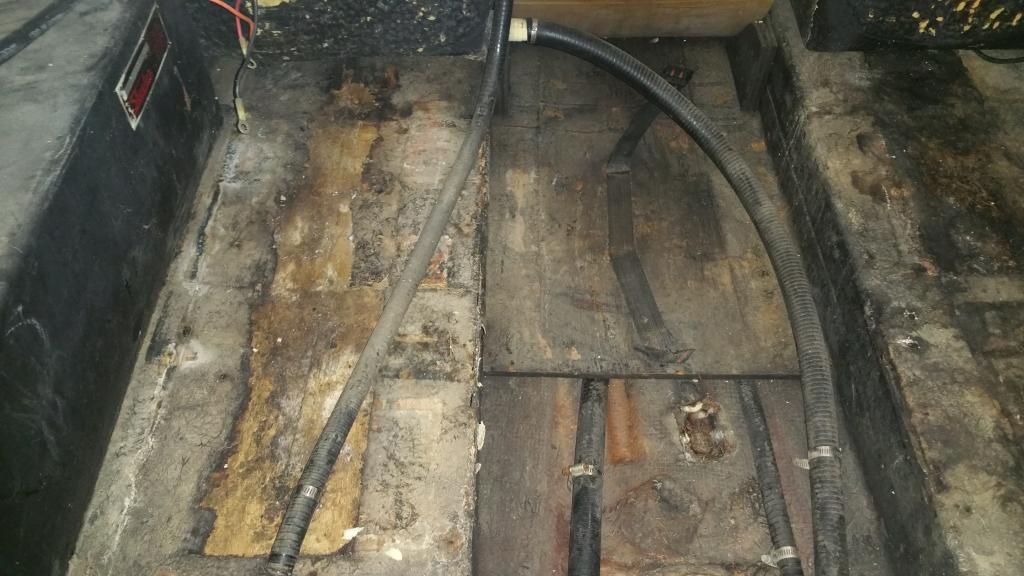
Yeah, sorry WoG, that was kind of confusing without pictures. I don't have any current ones of that area, but here is one of the earlier ones. Let's see if I can explain it via this picture. If not, I'll get a current picture and use MS Paint to show my plan.

So on the far left is the foam box with the hull plate. No change here. Next to the foam box is, well, foam (and what used to be part of the decking). I have cleared this out all the way back to the edge of the foam box, which is practically right underneath the livewell box. Down the center, there is a sub-floor covering the two hoses. Then it the same as the left side, only reverse.

So, from the point of where I have dug out the foam (you can also see the support that the fuel tank sits on; it's maybe 6" from those supports), the stringer "shell" looks good. From this point back, I was planning on digging out all the rotted wood possible and replacing with the foam, as far back as I can reach under there. Then, from that point to the transom, I'll do it the "right" way with real wood stringers.

20150131_152951.jpg
 

fmjnax

Chief Petty Officer
Joined
Jul 21, 2011
Messages
457
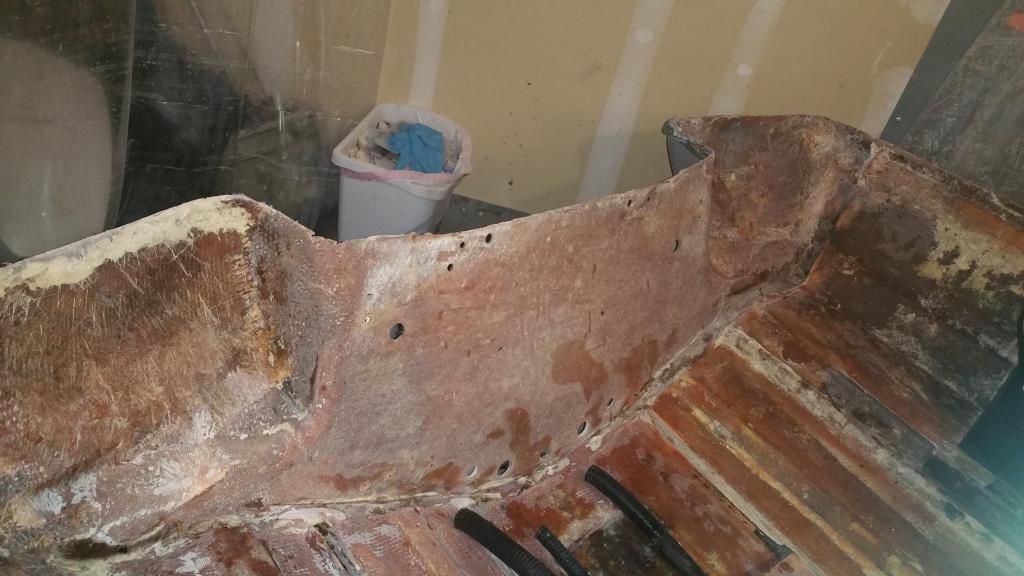
I think my grinding may be complete. I'm down to fresh glass everywhere new glass will touch; with exception of the subfloor down the middle. This looks to have just had a coat of resin, and no glass. I'll use my regular sander to scuff it up the rest of the way and will put down fresh glass on it. Some areas just didn't get to "pink" glass, no matter how much I hit it with the grinder. Not sure what this means, but it is smooth and fresh so I don't have much qualm about it. Maybe I will hit it just one more time and see if it changes.

No boat time tomorrow, but Saturday will be template day and more cleanup. My US Composites order was shipped today, so it should be here mid-week next week. Here's how we look after a wipe down with a wet rag. I'll give it an acetone bath just before I'm ready to lay down some glass.

20150212_212320.jpg


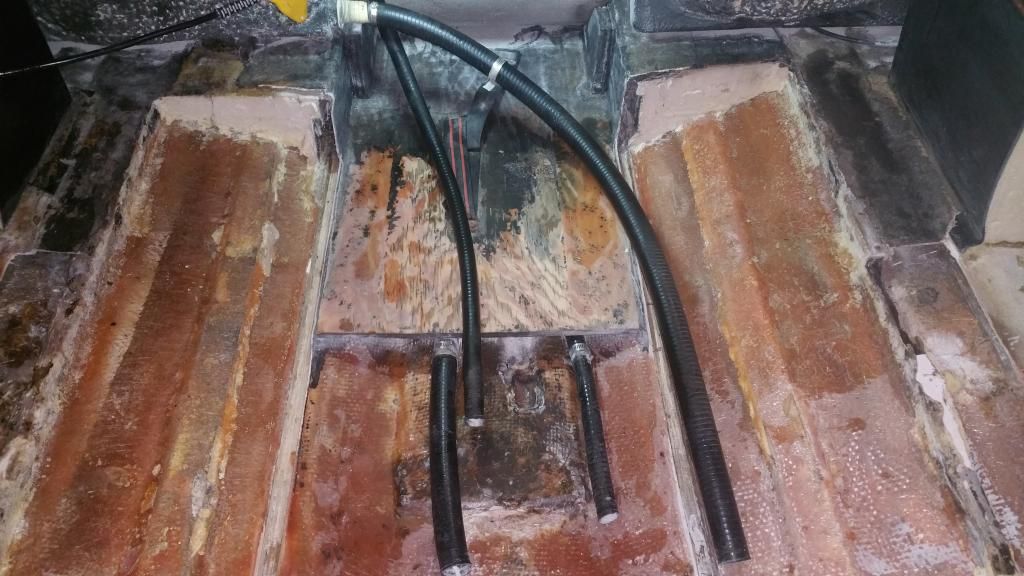
WoG, this shot may give a better idea of my plan. Where the stringers are still intact, they are hollowed out as far back as I could reach. The plan was to cut some pink foam to the rough shape and slide it in. Then I would fill the void with some urethane foam in the can, and seal the end (so that resin from the new stringer doesn't eat the polystyrene pink foam). Structurally, the fiberglass from that point up the hull appears to be sound, so maybe the foam won't do anything. I already have the material from another project so it's no loss on either account (though I could use the foam elsewhere). If that's the case, I think I'll still at least spray the urethane foam in it so that it has some sort of core structure right at the end.
20150212_212303.jpg
 

gm280

Supreme Mariner
Joined
Jun 26, 2011
Messages
14,604
Seems you have cleaned it up nicely since I last looked in on your project. You are talking about the stringers are merely glass shells with nothing in them? And then you stated that you were going to use some spray in form on them. I don't think the can spray form is the correct type foam unless it is the XSP type. The usual spray foam you buy at the home improvement type stores is open cell and will sponge water up quickly and problems start all over again. You need to make sure you use close cell foam to stop that wicking water option. JMHO!
 

fmjnax

Chief Petty Officer
Joined
Jul 21, 2011
Messages
457
Thanks gm. I think we're on the same page, but maybe not. I will summarize, just to [hopefully] make it clear. The stringers are rotten much further than I can reach without pulling the entire top cap (which is NOT an option for me right now). The fiberglass covering is in great shape, though. I have removed as much rotten stringer as I can, without breaking the glass shell.

I was going to insert a rigid foam core into this existing and cleaned out glass shell as best I could fit one and then use the spray foam to fill any voids left. Nothing ON the stringers, but IN the stringer shell. I just figured that some sort of core would be better than nothing at all. The stringer sections that I CAN access will be done properly, so no worries there. Oh, and the foam in a can is the Great Stuff, which I had researched and found was a closed cell foam. Is that not true?

Oh, and that plan actually is to start all back over... but in about a year and half (when I can move out of this place and have my space again). Well, not entirely done all over again, but at least pull the cap completely and properly do the remainder. So really, whatever I end up doing in the unreachable places only needs to last 18-24 months.
 
Last edited:

Woodonglass

Supreme Mariner
Joined
Dec 29, 2009
Messages
25,927
Ok, As you well know what you're proposing is not optimum but it is what it is. I'd recommend using a 1/2" spade bit and drilling into the stringer channels as far back as possible and wobbling the bit to clear out the rotten wood. I'd then cut the new stringers to the length which would allow then to slip into the channels just a bit fill the channels somewhat with PB and then when the stringer is inserted it would squeeze out and somewhat fill the void with PB and the stringer. I hope that makes sense. That will make it somewhat structural. The rest of your work looks good. When you come back for the redo in a year or two you should be able to "Sister" into the work you've done with no issues.;)
 

fmjnax

Chief Petty Officer
Joined
Jul 21, 2011
Messages
457
Hmmm, that's a great idea! I was worried about using wood because I wouldn't be able to glass it in properly... but if I give that end a bit of resin and maybe some CSM, and fill the channel with PB, I should be able to slide the stringer in to the shell and get a half-way decent bond. Plus, the wood will give it actual structural support. It's going to take a lot of practice and trimming before I try to make it permanent, but I think I'll give it a whirl.

And yes, that has been the plan from day one WoG. Instead of sitting on a useless boat for a few years, I decided that a new transom and a few feet of new stringers would be enough to at least get me on the water. :)
 

fmjnax

Chief Petty Officer
Joined
Jul 21, 2011
Messages
457
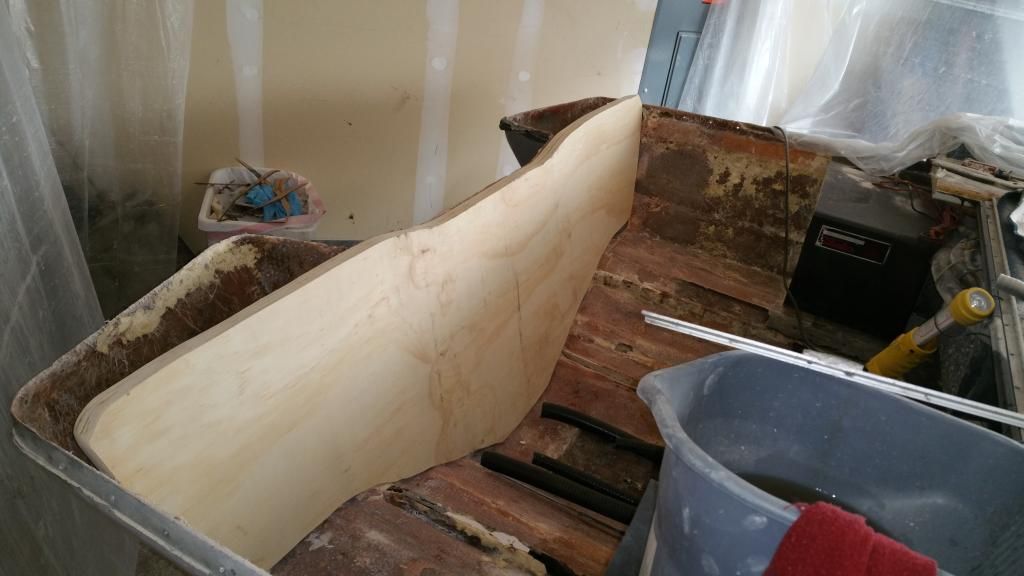
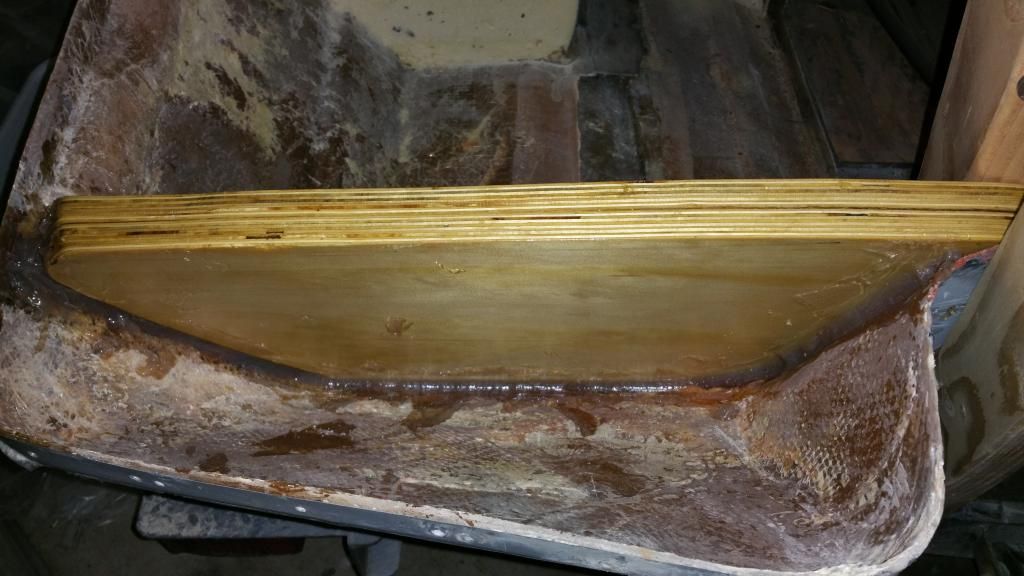
Allergies have been kicking my rear end since Friday, but I pressed through it this weekend. I got the transom pieces cut, glued together, and trimmed to fit.
20150215_123242.jpg


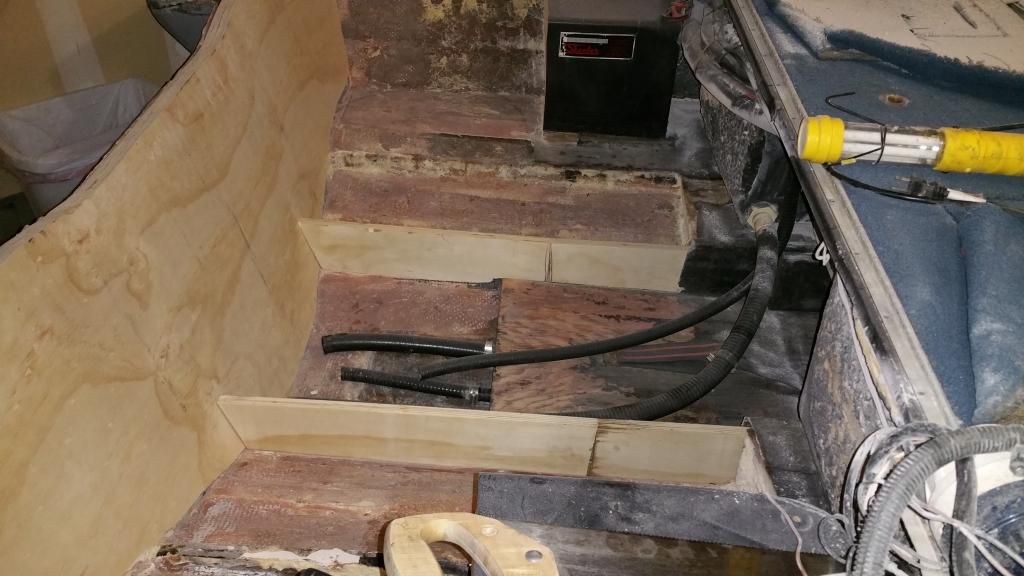
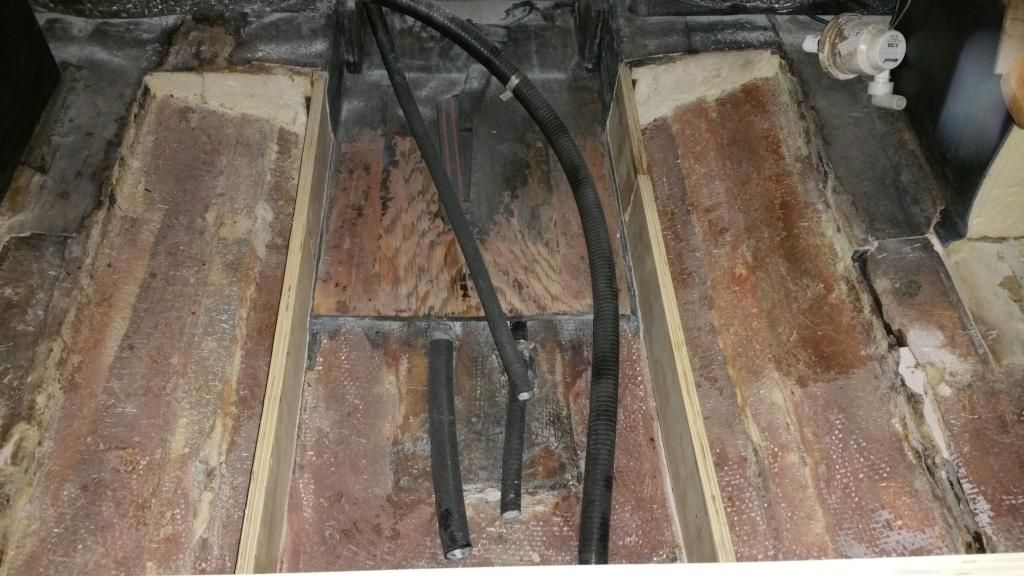
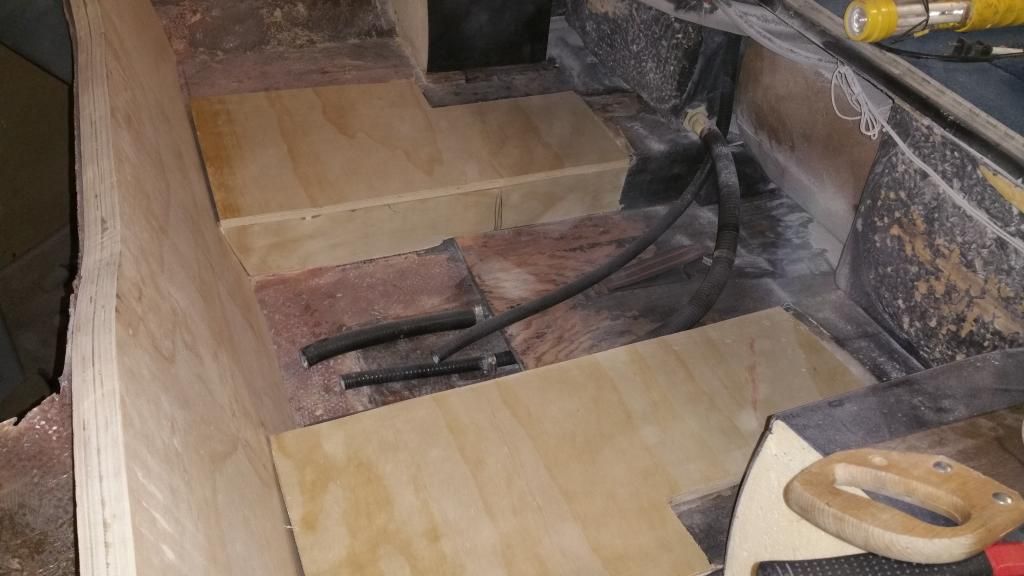
Then I decided to go ahead and rough cut my stringers and floor. Everything is just dry fit in place. My order of fiberglass stuff should be here Wednesday, so everything is ready to go when it gets here (but only if the temperature cooperates).

The stringers are pushed in to existing stringer shell about 14" on the right side, about 10" on the left side, and then backed out an inch or so to allow room for some PB at the end. I may have to do a little more trimming after the transom is in place, but trimming is no big deal. The deck may get some bevel put on it, but I'm not sure that I want to bother with that right now. Perhaps my mindset will change when I have these allergies under control.
20150215_195338.jpg

20150215_195321.jpg

20150215_203019.jpg
 

Woodonglass

Supreme Mariner
Joined
Dec 29, 2009
Messages
25,927
I LIKE the fabrication. I get BAD allergy Headaches so I sympathize!!! Any progress is one step closer to being on the Water!!! Good on ya!!!!:D
 

fmjnax

Chief Petty Officer
Joined
Jul 21, 2011
Messages
457
Last night I finished up my transom clamps and gave them a test fit so that I wasn't scrambling around/adjusting while PB was kicking off. Got everything exactly where I want it, made some reference marks, and backed them off just enough to get them off. My fiberglass shipment is on the truck for delivery today, so if the weather cooperates today I will start some glassing!

What is the minimal temperature recommended for 'glassing with polyester resin?

20150217_212832.jpg
 

fmjnax

Chief Petty Officer
Joined
Jul 21, 2011
Messages
457
Ok, good. I think I can keep the garage at 60 degrees with the electric heater, if not closer to 70. I think it's 57 here right now.

Yeah, I've considered the rivet holes, but I didn't do them on my first transom and never had any problems so I have that "if it ain't broke..." mentality. The actual contact area of the wood to outer skin is maybe a 20" x 30" area. Would I benefit more having the "rivets" or without?
 

Woodonglass

Supreme Mariner
Joined
Dec 29, 2009
Messages
25,927
I like em but...by no means are they require. I just think they ensure a really good mechanical bond and avoid any chance of air pockets between the wood and the outer skin. But, again TOTALLY up to you!! Don't get carried away with the clamps you want to clamp it down but...You also want to leave some PB behind and not squeeze it all out.:D;)
 

fmjnax

Chief Petty Officer
Joined
Jul 21, 2011
Messages
457
I opted to not use the rivets WoG. I don't have a good reason not to, other than I just didn't feel like it. :D

Good point on the PB and clamps. I had them set to leave a millimeter or two (I didn't measure, so who knows) thickness of PB. Basically, not tight enough to squeeze it ALL out, but for sure tight enough.

I turned on my electric heaters and heated the garage. My shipment was at room temperature half the day (it was brought inside after being dropped off). It still wasn't quite warm enough, though. I'd say I was at about 60 degrees by the time I started. I mixed up a pint of resin with 1/4oz or MEKP (1.5%) and painted it on one side of the transom and the ends. It still hadn't kicked after 4 hours (but the remaining 4oz or so in the cup had kicked fine). I checked it this morning, though, and it had finally cooked.

It's supposed to be a bit warmer today, so I will flip it and do the other side and maybe mix at 2% or 2.5% to see if it will cook quicker. I don't want it to cook so fast that is shrinks and cracks, though.

I'm using 435 resin (layup) this time around (last time I used the junk GP resin from Lowes/Home Depot), so this is my first experience with not having to sand/wash between coats and also with having a tacky surface. After I coat the other side (which is the side that will go up against the outer skin), do I have to let it cook off before I get my PB ready and install the transom, or do I only have to wait long enough to let it get a good soak in to the wood?
 

fmjnax

Chief Petty Officer
Joined
Jul 21, 2011
Messages
457
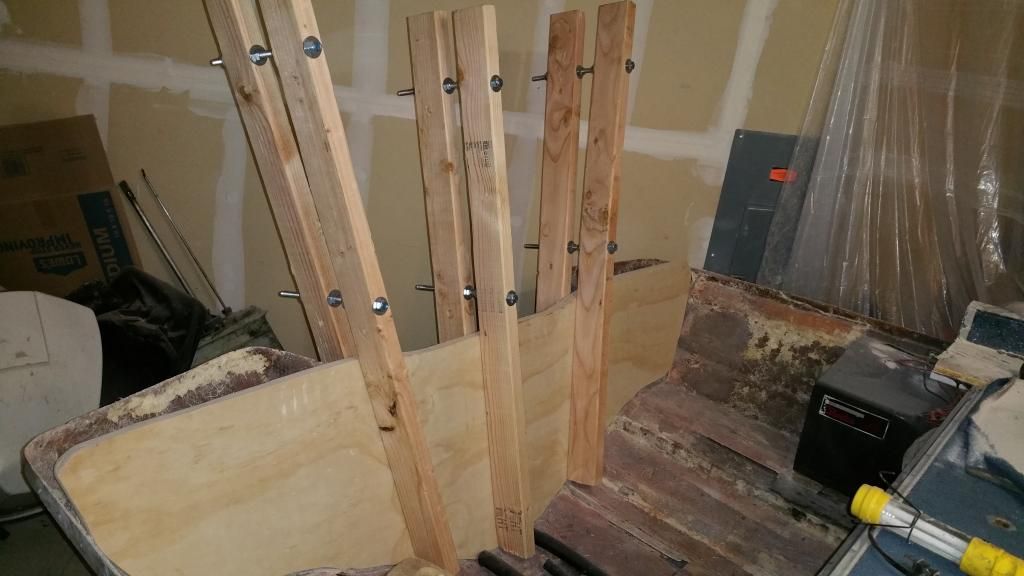
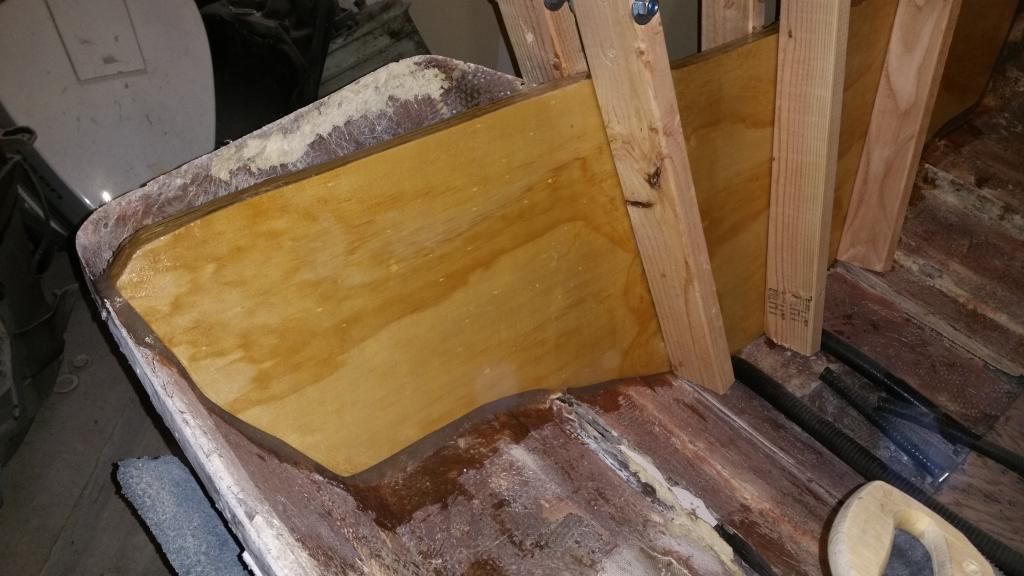
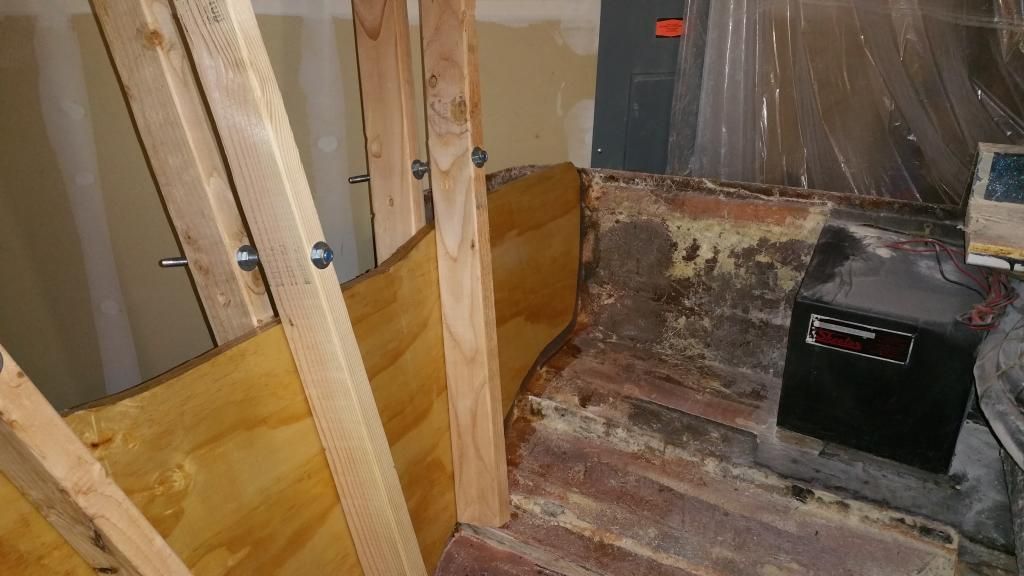
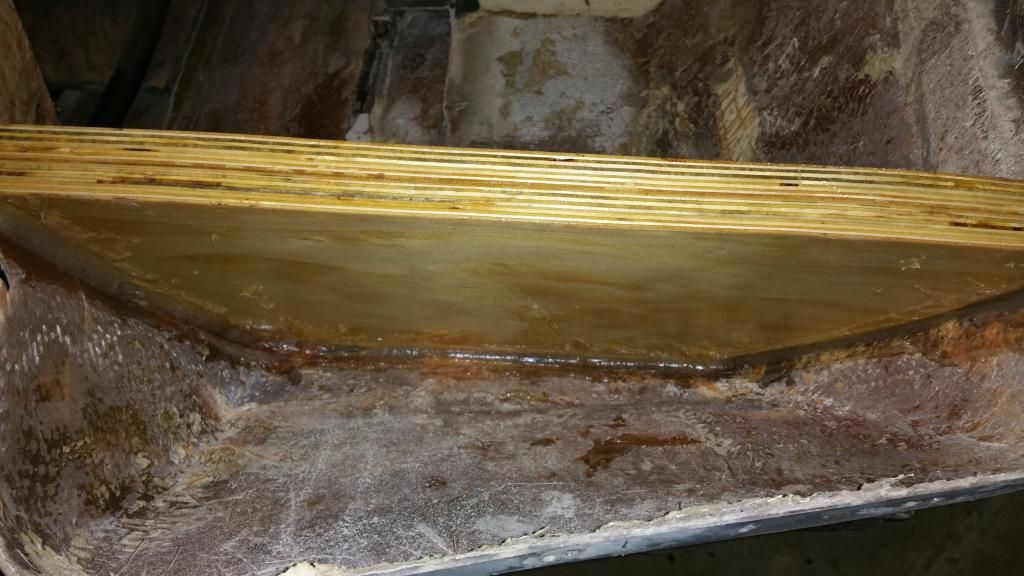
Warmer day today (low 60's) but I still went up to 2% mix ratio. That seemed to do the trick, as it started to cook as I wanted it to. I waited for it to be slightly sticky and then proceeded to PB it to the boat. I'll admit, I didn't get my placement 100% aligned with my reference marks, but it's in there well enough. I started my fillets, but because I had to fill more gap than expected, I didn't completely cove them off. I'll work on that Saturday after I remove the clamps.

Creating the fillets inside of the sponson chambers was a pain in the rear. My big hands and not having a small enough tool made it quite the challenge. I think I did pretty good, though, considering what I had to work with!

The wife will be out of town all weekend and Saturday we will be in the 70's (and maybe Sunday too) so I think I should be able to get everything officially glassed in this weekend and maybe even have the top cap back on. We'll just have to see how it goes, though. I'm still making good progress, though. If only I could get the machine shop to work as fast so that I can finish rebuilding the engine...

And now for the pictures.
20150219_225233.jpg

20150219_225308.jpg

20150219_225242.jpg

20150219_225251.jpg
 
Top