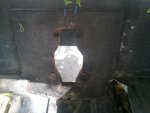
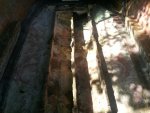
1988 Stingray SVB 192 Restoration

oops!

Supreme Mariner
Joined
Oct 18, 2007
Messages
12,932
Re: 1988 Stingray SVB 192 Restoration

take a few more core samples .....just to know for sure.

if that wood is not soft....(squish proof) .....when you are ready to re install......

squeeze some epoxy in the de lam areas......protect the open edges of the ply with epoxy.

then tighten inner and outer plates......thats it
 

Gator1996

Petty Officer 1st Class
Joined
Jul 29, 2011
Messages
228
Re: 1988 Stingray SVB 192 Restoration

Well, back at it today. I removed all three stringers. Think I was pretty lucky as two of three came out complete.

I know we have never heard this before but oops! called it when he told me to pull the cap. The first 8 or 10 inches of the starboard stringer that had been under the seat section attached to the cap was total dust. The last foot or so by the motor box was pretty bad too but at least had some shape to it

So oops!, I am good to do the stringer work as long as the hull is on the 2x10's and 2X6's right? No roller is making contact with the boat, I jacked the hull up and ran the boards in, then lowered it back down, the outside sits on 10 ft. 2 x10's and the inside is on 6 foot 2x6's. I also cut 2 three foot 2x6 to support the inside roller that does not line up with the inside farther toward the bow. Hopefully that describes it well and will do. The boat definitely does not weigh much with no cap or stringers.


To anyone interested, as I said, I cut out the stringers which left a nice track when I pulled the wood out. Is it possible to leave that channel there for replacement? Probably a stupid question but it sucks to grind out a perfect track for the new stringer. Comments?..go easy on me.
And by the way, what would you suggest to grind that channel down? It is basically four vertical layers of CSM, 2 on each side and the grinding wheel I was using a HF special it seems like a 24 grit or so but was not marked. That wheel does not like the old glass, so if I am taking that channel to flat along with the rest of the hull, I need something more effective.

I will get some pictures tomorrow if no rain.
 

oops!

Supreme Mariner
Joined
Oct 18, 2007
Messages
12,932
Re: 1988 Stingray SVB 192 Restoration

What's a SeaRay?

searay is a boat manufacture. the name on the side of his hull may say sting ray.......but the mold the hull came from used to be a searay, very distintive.
 

oops!

Supreme Mariner
Joined
Oct 18, 2007
Messages
12,932
Re: 1988 Stingray SVB 192 Restoration

hey gator.

glad to see you are really on this.....just a little more demo.....then the fin starts.

first off......just look at the trailer on the lumber and make sure its supported well. make sure there is no floppy parts, and that the transom is supported in line with the keel.
thats all....dont leave a space where the hull can hook as you add more weight.

that channel must come out.
the problem is, how are you going to get a good bond to the fibreglass and the new stringer?....you slide the new ply between the old glass.....how is the old glass going to grab the new plywood?. the best bond you will get is about 20% of surface area. and that just isnt good enough. on top of a bad bond....it will leave air voids as much as 1/2 inch in spaces. that half inch will just collect moisture.

so....sorry to say.....it should come out....you can leave it....but for going so far, doing all that work, then leaving a possible trouble spot...just doesn't make sense.

to get rid of that channel. you can take a sawsall with a short blade....or grinder with a cut off wheel, or grinder with a 24 grit and a rubber backing pad and just grind it down.
but what ever way you go.....it will come out like butter.
dont get to anal about digging down in the bottom of the channel with the grinder....just get the majority of the rotted wood out, if there is a sliver if wood in there its ok.

your next stage......is the grinding.

read safety basics of grinding and glassing in the sticky at the top of the forum. that is the bare minimum you need.
as you read here.....one of the worst things we hate about a restoration is the "itch".
the itch is fibreglass dust....it is worse than drywall dust and it gets every where. guys are doing all kinds of weird things to keep the area clean of the dust.
one trick that works ok is to have a full dust bag in your large shop vac, and when you are grinding try to point the spray of the wheel to the nozzle of the vaccume.
that will get 50% of the dust.
for person al protection. i wear a type of rain coat.....its actually a thin bio med suit, wrists tapped to rubber glaves. and ankles tapped to either rubber boots or booties over your shoes (that is slippery) then i wear coveralls, over the bio med suit....(a good full rain coat with pants works good) i use a towel over the hoodie if the rain suit,,,,i take the towel and wrap the ends around my exposed neck and tuck the rest into the coveralls. then i wear a full face mask with dual cartridges.
i can do a 8 hour grinding marathon in this outfit and not one spec of dust gets on my skin. nothing in the bed...and a good night sleep.

bear in mind......if you wear this.....you are going to loose a few pounds of sweat.....so every fifteen minits of wearing the suit,,,,,stop and drink some water.

you are really hammering away at this boat bud.......good for you....the more you work on it...the easyer it is, if you leave it even for a few days....it will take your mind a few hours to get back in it....so even two hours each day will do wonders for the build.

cheers
oops
 

Gator1996

Petty Officer 1st Class
Joined
Jul 29, 2011
Messages
228
Re: 1988 Stingray SVB 192 Restoration

So I have gotten back on the boat. Work stuff, family stuff, you know the drill. Since my last post I found that my about a third of my transom was definitely rotten so I removed it. So chiseling out the rotten stuff, no big deal; the good wood, not so much. I actually think I would rather grind than chisel the wood. It took hours. But it is done here's a picture.
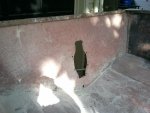
2011-11-01 14.46.36.jpg
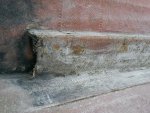
So today I am back with a variation of the same old problem. The deck on the old girl was not originally run all the way to the chines, but actually 8 inches or so away from them. It was my original thought that I would tab the deck in horizontally vs. vertically as it seems most have. Here is a picture.
2011-11-01 14.47.00.jpg
Stingray laid the plywood on the stringers and hull, filled in the space between the sides of the boat wiht a little bit of mat and a bunch of resin which has done some shrinking and is cracked in several places. So i was going to cut the new deck to line up with the raised lip install it in the boat, fill in any low spots with PB, tab it in and then glass the whole shooting match.

Well, In the process of cutting out the deck, I hit the hull with the circ. saw. Today, I thought I might be getting close to finishing the grinding so I ground out the area where the gash was. Its a pretty good one. Anyway the glass and the mat that was in this section was crap. And you can see that I have ground it down pretty flat to the actual mold of the boat.
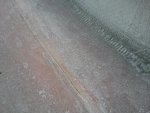
2011-11-01 14.47.16.jpg

So the problem is I think I have three options.
A. Leave the higher lip, grind it just to rough it up. line the new deck up with it and attempt to tab it in to the old stuff.
B. Grind it down as I have in the last picture, cut the deck narrow and fill in with new PB like Stingray did.
C. Grind out the whole setup, take the new deck to the chines and adjust the height of the stingers to accomodate the higher deck.

Please fire away with opinions, the more the merrier. Disregard the storage box, I am going to cut it out but it seems like it is providing some support for the sides so I thought I would get the new transom in first.

By the way if I go with option C, the deck will be about 1/2 inch higher than it was originally, will this affect performance? Do you forsee an issue with dropping the motor back in?
Thanks, Chris
 

oops!

Supreme Mariner
Joined
Oct 18, 2007
Messages
12,932
Re: 1988 Stingray SVB 192 Restoration

i think i would leave the deck at the lower height.....i think i can see it a few inches above the lifting strake.

the reason for this is that you want the centre of gravity as low as you can get, and you also want as much free board as you can get. this will give you a more stable platform.

as far as the deck height....it does not matter as long as the bilge/motor mounts are built with enough space.

now is the time to fill the circ saw line with peanut butter and glass. pb for the slice....two layers of csm over it and two layers of 1708 in a sandwich with the csm next to the hull. waxed resin.

cheers
oops
 

Gator1996

Petty Officer 1st Class
Joined
Jul 29, 2011
Messages
228
Re: 1988 Stingray SVB 192 Restoration

Small update: I decided to recreate the way the sole was installed originally, so went out and ground out the lip in question and took crazy measurements to ensure that the thing goes back together as close to right as possible. The resin the manufacturer put in the boat was 1 1/2 inches thick in some places. Four hours and about 15 pounds of dust later, it was gone.

So I have cut wood for the motor box, and bilge area. I previoulsy traced out the transom on a piece of foam so I will be transferring that to the Arauco plywood that I got for the transom and stringers. I will need to laminate the stringers for length and also the sections of the transom I had that box that created the extra thickness of the transom. It looked like this.

2011-08-23 10.28.19.jpg

I am planning on using resin and mat to laminate all of the components. From reading the more popular threads, I see that this is done with just resin not the PB mix. Is this what most have done?

I have not planned using PL for anything. If this sounds screwy please let me know. Thanks!
 

Gator1996

Petty Officer 1st Class
Joined
Jul 29, 2011
Messages
228
Re: 1988 Stingray SVB 192 Restoration

The lonely life of replying to myself.
I have some updates.
Cut out the 3/4 inch transom section, applied resin and a layer of glass that will go against the outer skin
Also cut out the two 1/2 sections that give the thickness around the keyhole, laminated those two together and then laminated them to the 3/4 piece.
Laminated the ply that wil serve as the front motor mount.
Cut the stringers, chiseled 6 inches off the ends and glued them together
I will be making plans to re-install the transom after I clean up some rough edges, etc.
So my newest question,
What is the trick to cutting out the keyhole? Inside the boat or out? Does everyone use a jig saw? Any good methods to ensure the drill remains perpindicluar to the hull? Is this easier than I think it is going to be? Or should I be worried?
 

SDSeville

Lieutenant
Joined
Mar 19, 2010
Messages
1,481
Re: 1988 Stingray SVB 192 Restoration

I traced the keyhole from the hull onto the new transom and cut it out with a jigsaw. I didn't use a special tool for the transom bolt holes. Just kept a steady hand on the drill. I stressed over it beforehand, but it was pretty easy -- even for a true beginner like me.
 

Gator1996

Petty Officer 1st Class
Joined
Jul 29, 2011
Messages
228
Re: 1988 Stingray SVB 192 Restoration

Thanks SD. I guess I need to be more confident. Thanks for keeping up with the thread.
 

Gator1996

Petty Officer 1st Class
Joined
Jul 29, 2011
Messages
228
Re: 1988 Stingray SVB 192 Restoration

So the question of the day... I have installed the new transom and am thinking life is good. I have the majority of the wood from the old stringers and I thought, just to check things out, I would put the the angled end of the old stringer (that as best as I can remember was entirely butt up against the old transom) in the boat to see how it fit. I guess this is no surprise but it does not butt up against the new transom. The new transom wood is totally flush and attached to the outer skin and it is easy to see that it fits as close to exactly as possible where the old transom wood was so I can't imagine that it has changed that much.

The question, what might cause the angle to be different? Has this happened to others? Should I cut the angle on the new stringers to match the transom or am I in big trouble here? Any suggestions would be great. Thanks
 

oops!

Supreme Mariner
Joined
Oct 18, 2007
Messages
12,932
Re: 1988 Stingray SVB 192 Restoration

gator....we need pics buddy.

is the old wood away at the top or the bottom of the transom....it is possible that you didnt get the bottom of the transom flush with the skin....this will give you a wrong angle. but so can a bad template ! and it is also more than likely that the stringers weren't flush to begin with !

when you cut your new stringers....make them fit this configuration....not the old one. ....get those stringers right up against the glass on the transom....and tab to that.
 

Gator1996

Petty Officer 1st Class
Joined
Jul 29, 2011
Messages
228
Re: 1988 Stingray SVB 192 Restoration

I'll get some pics tomorrow. The transom is flush to the skin all the way through. I can push the top of the old stringer to the transom, the gap is at the bottom. It looks like it is off by 5 to 10 degrees but I will cut a piece of scrap tomorrow to fit and see what the exact difference is. I guess I should not be surprised by this because I really don't know for sure if it was "right" in the first place. The old stringers were stapled to the old transom but there were only staples at the top so they may not have been flush at the bottom in the first place.


Thanks again oops! I will update tomorrow morning.
 

Gator1996

Petty Officer 1st Class
Joined
Jul 29, 2011
Messages
228
Re: 1988 Stingray SVB 192 Restoration

No real progress to update. Just a lot of thinking and prep for the stringers to go back in.

For anyone that read the last post, I am going to cut the stringers at the "new" proper angle to tab in to the hull. The newest problem is that my old stringer "template" also does not sit flush against the hull. When I was cutting them out I did notice that they were kind of forced down because as soon as they were free of the glass, they popped right up. Anyone else had this happen when doing their demo? Is the recommendation to cut them so they will contact the hull or re-create the stringers based on the template and weigh them down to install? Any suggestions?

I was also considering adding a couple of bulkheads into the boat. I have a couple of reasons.
1. The manufacturer used a 1X4 laid into a notch cut out of the stringer to have a base for attaching the deck at the 48" seams. I hate to cut the stringers and use this system again. I figured a 3/4" bulkhead in the stringer line would eliminate this could add some cleats also to provide some width to attach the deck.

2. When I put the 2 part foam back in, I will have no compartments to collect the foam and I am afraid that the result will be a lot of voids from trying to cover 16 feet of hull. I will cut a bunch of holes to pour but it just seems that a smaller area would make this a ton easier.

Is there any reason that I should not do this? I did take the time to chisel out the end joints of the ply which would be a waste of time with the bulkheads but no big deal there. I appreciate all responses.

Thanks
 

Woodonglass

Supreme Mariner
Joined
Dec 29, 2009
Messages
25,924
Re: 1988 Stingray SVB 192 Restoration

I see no need for bulkheads, but you can if you want. Once the deck is glassed you will have little noticeable flex at the seams. What is the span between your stringers? Stingers should be cut to conform to the hull. When you install them you should raise them off the hull approx. 1/4 to 1/2" and fill the void between them and the hull with PB or PL. This will avoid developing "Hard Spots" in the hull which can cause cracking in the Gelcoat etc... Here's a drawing on how to fabricate your stringers...

Click the Pic to Enlarge

34 Stringers.JPG
 

Gator1996

Petty Officer 1st Class
Joined
Jul 29, 2011
Messages
228
Re: 1988 Stingray SVB 192 Restoration

Thank you woodonglass. So with that being said, could I eliminate the original 1X4 that was installed to accomodate the seams? The deck was stapled into them and the stringers. The stringers are about 1 foot apart. The entire span of both outside and the center one is 24 inches. This is a picture of the original setup. You can see one of the 1X4's that is up at the bow and the notches that were cut out for the others.

2011-08-23 10.26.45.jpg
Thanks for looking and your opinions. I have been lucky with guys like oops! and yourself checking in on me.
 

oops!

Supreme Mariner
Joined
Oct 18, 2007
Messages
12,932
Re: 1988 Stingray SVB 192 Restoration

hi gator

im really having a hard time with this stringer pop up thing .... i really dont like it.

that means you hull is either not supported correctly, or there are issues with the hull.

and because the stringers popped up.... that means the hull went down.....down is hook.

i would stop the stringer installation untill you know what is going on with the hull.

when they put the stringers in at the factory.....they didnt use any pressure or any other means to lay the stringers in the boat.....they just put them in and glassed them.

take some stringlines to the bottom plaining surface of the hull. and make sure you are flat.....
if you see space between the string and the hull.....that is hook. a very little is ok...as this will lift the stern. but you really want rock instead of hook.

let me think of this some more.....

can you get me pics of the support system you are using...as well as pics of the bottom of the hull/plaining surface?
 

oops!

Supreme Mariner
Joined
Oct 18, 2007
Messages
12,932
Re: 1988 Stingray SVB 192 Restoration

by the way gator.....i must compliment you on the way you are doing this build.....you are really keeping on it, rather than letting it sit and doing an hour or two a week.

kudos to you bud
 

oops!

Supreme Mariner
Joined
Oct 18, 2007
Messages
12,932
Re: 1988 Stingray SVB 192 Restoration

i keep coming back to the thought that the hull has warped or it is not supported correctly

need those pics to know for sure gator......but dont install the stringers till you get this worked out....if you do...the hull will be permanently warped.
 
Top