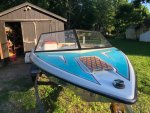
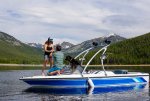
1987 Ski Centurion Tru Trac II - First Time Rebuild - Floor, Engine, Dash, etc.
Status
Not open for further replies.

briangcc

Commander
Joined
Jul 10, 2012
Messages
2,350
Think I have a similar Holly carb on my Trans Am. You can use a paper cup instead of a ketchup bottle to fill the fuel bowls via the vents...think there's 2...been a while since I pulled the shaker off to look. But been there, done that.
 

zroe89

Recruit
Joined
Apr 2, 2020
Messages
4
Glad to hear you got it to fire for a bit! Going back a few posts you were asking about the ballast resistor and I didn't see your final conclusion, but if I remember correctly the coil on/in your fancy DUI distributor wants a direct 12 volts. A bad ground would explain the intermittent spark results you were having when you could get it to crank.

Best of luck getting fuel to the fuel pump, hopefully it is still healthy enough to pull fuel from the tank, but at least you have narrowed your no-start options down a fair bit. Hopefully the pre-launch list is starting to feel more manageable.
 

Timr71

Petty Officer 1st Class
Joined
Jul 19, 2012
Messages
326
Hi Austin. Check this out. PIcs of a fully restored Tru Trac II were posted in the Centurion Facebook group. Check out the air scoop on this boat, with gator step material on it. Pretty sharp!
 

Attachments

  • photo332765.jpg
    photo332765.jpg
    108.7 KB · Views: 4

ACon977

Senior Chief Petty Officer
Joined
Nov 21, 2017
Messages
759
Hello!

Holy delay in posting... I needed to go back a few pages to even remember where I had last updated. I promise, all the good news on this one!! :focus:


So images werent loading so ill start from the beginning.
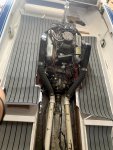
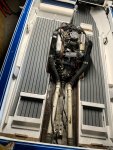
Painting of the Floor and interior Hull. Since we were putting down Foam it didnt matter to do it all. I was hoping for the paint to do more coverage and fill in the fiberglass texture but not so much.
IMG_20200502_194425.jpg

IMG_20200511_075813.jpg

IMG_20200511_075826.jpg


After the floor was prepped we got excited, and pulled it around front, hooked it up to the hose and started tinkering with the carb. I was able to get it running by raising the hose above the engine, inserting a funnel into the end and slowly filling the tube. Once it was full I had the Admiral crank the engine and the fuel pump transferred it to the carb. Had to repeat this a few times before I got enough gas in the bowls that it was running.

Waterleaks GALORE!!! haha we had water leaking from the exhaust manifold, water intake, etc. I took note of each and backed it back in the garage.
IMG_20200608_191249.jpg

IMG_20200608_191210.jpg


Tore off the exhaust manifolds and found a few cracks in the cast iron :faint2::facepalm:
Took my dremmel tool and ground out the cracks to give me something to bond to. Unfortunately I dont have a welder, and since there isnt much pressure build up... I used JB Weld.. Please dont hate me, but its held up pretty well so far.
IMG_20200611_180133.jpg

IMG_20200611_182538.jpgIMG_20200611_182541.jpg

after it cured for a day or so I painted it black and you can hardly tell.
 

Attachments

  • IMG_20200611_181541.jpg
    IMG_20200611_181541.jpg
    757.6 KB · Views: 3
  • IMG_20200611_180138.jpg
    IMG_20200611_180138.jpg
    798.1 KB · Views: 2
  • IMG_20200611_182534.jpg
    IMG_20200611_182534.jpg
    839.5 KB · Views: 2
  • IMG_20200611_181545.jpg
    IMG_20200611_181545.jpg
    988 KB · Views: 3

ACon977

Senior Chief Petty Officer
Joined
Nov 21, 2017
Messages
759
With the few water leaks fixed I wanted to try to keep fiddling and get it to run better. Fiddled this, and that and finally got it to run, but with a few back fires and it was still stalling under any sort of throttling.

regardless of our limited success we wanted to make it start to feel like a boat. So in goes the foam flooring. We tried getting everything cut to shape/size but with nothing square or flat it proved to be very difficult. We tried to router the edges to give it a more clean look, but a lot of time that made it look zig zagged... overall, it turned out fine, just not as "perfect" as I was hoping.

We also installed the captain seat and rear seat. Leaving the engine cover off to allow for better access to it.

The trailer lights were also shot, so tore them out, installed a new set, and ran all new wiring.
 

Attachments

  • MVIMG_20200607_164922.jpg
    MVIMG_20200607_164922.jpg
    667.3 KB · Views: 6
  • IMG_20200607_165709.jpg
    IMG_20200607_165709.jpg
    809.4 KB · Views: 5
  • IMG_20200607_165417.jpg
    IMG_20200607_165417.jpg
    828 KB · Views: 4
  • IMG_20200607_165707.jpg
    IMG_20200607_165707.jpg
    838.1 KB · Views: 5
  • IMG_20200607_211120.jpg
    IMG_20200607_211120.jpg
    715.8 KB · Views: 5
  • IMG_20200607_141531.jpg
    IMG_20200607_141531.jpg
    881.8 KB · Views: 6
  • IMG_2866.jpg
    IMG_2866.jpg
    972.4 KB · Views: 5
  • IMG_2872.jpg
    IMG_2872.jpg
    1 MB · Views: 5

ACon977

Senior Chief Petty Officer
Joined
Nov 21, 2017
Messages
759
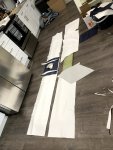
The admiral got excited about the progress and one night we pulled out the wood that I had cut for the side accent pieces and made up some vynil to cover them. We re-used the old foam since it was in decent enough shape. We fiddled with the idea of putting the original stitched decals on but decided to get some metal plates with the centurion logo instad.

Overall pretty good process, we didnt install them until later due to a lot of troubleshooting with the engine still to-do.

IMG_20200606_175915.jpg
IMG_20200606_175916.jpg

IMG_20200606_195511.jpg

IMG_2854.jpg

IMG_2858.jpg
 

ACon977

Senior Chief Petty Officer
Joined
Nov 21, 2017
Messages
759
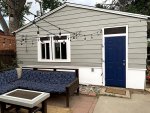
At this point we were getting excited about the prospect of having a functioning boat.. So we decided it was the perfect time to upgrade the garage. and by upgrade, I mean lift it 21"

So I tore off the rest of the ceiling, walls, electrical, doors, windows, etc. Braced the structure, corners, walls, and built a "custom" LVL out of 2x12 dimensional lumber.

IMG_3198.jpg

IMG_3197.jpg


So after all of that, you're probably wondering.... WHAT IN THE HELL DID YOU DO ALL THAT FOR?!?!?!

Well unfortunately for us the garage door was GARBAGE, constantly falling off the tracks, cable snapped on me, and it was a custom 6.5 ft. which barely fit the boat with the windshield off.
Since we were hoping to have a boat that has a windshield we needed a taller door, and this was my wacky solution. It also made for much better storage, and gave me a chance to re-run electrical that was shoddy at best, and inconveniently distributed around the garage.

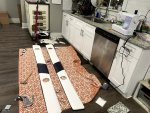
It also made a good spot for some ski storage!
IMG_20200530_191959.jpg

IMG_20200530_192028.jpg
 

ACon977

Senior Chief Petty Officer
Joined
Nov 21, 2017
Messages
759
So now that you know we're crazy, lets get back to the boat.

I tried a few more times to get the boat "tuned" as best my untrained ear could figure out but to no avail. So I gave up and called in some help.

I took the boat to an auto shop where I knew the owner. He had an old boat for years and understood my engine frustration. He helped get the timing right with the distributor and adjusted a few of the pickups on the inside as well. This fixed my backfire and stalling issues.

When we got it back it was running ok but still being annoying during throttle. few stalls and whatnot.

I rebuilt the fuel pump and checked a few other things, but nothing seemed to be working... Back to the shop and this time he focused on the carb. Turns out I had installed the internal components of the accelerator pump backwards.... So instead of injecting fuel, it was sucking it back out. Yea makes sense. he also fiddled with the air intake and got it situated in a good spot.

The admiral got excited when I had it running in front of the house and so technically our first splash was 6/21/2020
IMG_3109.jpg

IMG_3110.jpg

IMG_3149.jpg

IMG_3144.jpg
 

Attachments

  • IMG_3111.jpg
    IMG_3111.jpg
    95 KB · Views: 7

ACon977

Senior Chief Petty Officer
Joined
Nov 21, 2017
Messages
759
After running it around for a while we noticed that there was some water in the center of the boat, turns out the exhaust pipes that ran to the back of the boat had cracked and I didnt notice. Back to the workshop.

Not sure if anyone on here has the answer, I kind of figured it out the hard way....

What is the PVC that was used, In the images below the 45* Elbow is Schedule 40, 2.5" diameter, but this doesnt exist at HD...
IMG_20200712_171329.jpg

What I ended up with was electrical Schedule 80, since it is a 2.5" and fit the hoses very well, and it has a temperature rating of 90C or ~195F.

IMG_4133.jpg

So far this seems to be not melting, not leaking, and is in the same concept as what I pulled out of it. Time will tell. I would love to hear your thoughts on what youve used or whats in your boats.
 

Attachments

  • IMG_20200614_170103.jpg
    IMG_20200614_170103.jpg
    625.4 KB · Views: 3
  • IMG_20200614_170134.jpg
    IMG_20200614_170134.jpg
    684.9 KB · Views: 3
  • IMG_20200616_211116.jpg
    IMG_20200616_211116.jpg
    749.8 KB · Views: 3

ACon977

Senior Chief Petty Officer
Joined
Nov 21, 2017
Messages
759
Finished buffing out the other side of the boat and got her mostly cleaned up. Took the pups for a ride at our state park and they loved it.

IMG_3260.jpg

IMG_20200606_142703.jpg

IMG_9787.jpg

IMG_3163.jpg

IMG_9816.jpg

IMG_3303.jpg

IMG_3164.jpg

IMG_9828.jpg
 

ACon977

Senior Chief Petty Officer
Joined
Nov 21, 2017
Messages
759
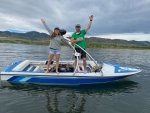
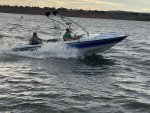
Now that the boat was running, mostly looking good, and not leaking, it was time for the day I had been planning for a long time. I'm going to cheat and call this its TRUE splash party.... You can see why I am so excited about it for yourself
DSC09383.jpgDSC09693.jpg

IMG_20200628_105657.jpg
 

Attachments

  • DSC09386.jpg
    DSC09386.jpg
    2.1 MB · Views: 7
  • DSC09442.jpg
    DSC09442.jpg
    2 MB · Views: 7
  • DSC09372.jpg
    DSC09372.jpg
    2.4 MB · Views: 7
  • DSC09440.jpg
    DSC09440.jpg
    2.1 MB · Views: 5
  • DSC09399.jpg
    DSC09399.jpg
    2.3 MB · Views: 4

ACon977

Senior Chief Petty Officer
Joined
Nov 21, 2017
Messages
759
So I got my best friend to say YES, the Admiral is now the Captain, and there is always more work to do.

We just finished up the new Schedule 80 PVC and it seems to be the best option so far.

re-installed the bilge, dont mind that its upside down in the picture lol.
AC Final Proof.jpg

MVIMG_20200713_211424.jpg

IMG_20200713_211432.jpg
 

Attachments

  • IMG_20200711_163053.jpg
    IMG_20200711_163053.jpg
    766.6 KB · Views: 2
  • IMG_4134.jpg
    IMG_4134.jpg
    1.1 MB · Views: 3
  • IMG_4135.jpg
    IMG_4135.jpg
    1.1 MB · Views: 5

ACon977

Senior Chief Petty Officer
Joined
Nov 21, 2017
Messages
759
I couldnt thank you all enough for your help through this. The advice that I have gotten on here has been spectacular and I apologize that it took so damn long. But here we are, one more iBoats approved old boat back on the water again thanks to some blood, sweat, and so much time.

Thank you for keeping me accountable and I appreciate you all staying attentive as I rambled on about this or that

:bounce: :rofl: :peace:
 

ACon977

Senior Chief Petty Officer
Joined
Nov 21, 2017
Messages
759
Hi Austin. Check this out. PIcs of a fully restored Tru Trac II were posted in the Centurion Facebook group. Check out the air scoop on this boat, with gator step material on it. Pretty sharp!

Super cool front scoop! I ended up just staining mine with Teak oil and called it a day... May have a few scraps left from the floor to make it match
 

archbuilder

Vice Admiral
Joined
Sep 12, 2009
Messages
5,697
Well congrats on the Splash and the proposal.....that maybe a first on here! The boat looks awesome!

I don't know a lot about those manifolds, but after my experience it might not hurt to pull them to make sure you aren't getting any water in the exhaust side until after the vertical dump section. That was an expensive learning experience for me lol!

Thanks for sharing the build, keep any of the updates / improvements coming!
 

ACon977

Senior Chief Petty Officer
Joined
Nov 21, 2017
Messages
759
Well congrats on the Splash and the proposal.....that maybe a first on here! The boat looks awesome!

I don't know a lot about those manifolds, but after my experience it might not hurt to pull them to make sure you aren't getting any water in the exhaust side until after the vertical dump section. That was an expensive learning experience for me lol!

Thanks for sharing the build, keep any of the updates / improvements coming!

Thanks so much Arch!

Looks like the cracks were just on the water side when I pulled them off for the repair. Definitely something to keep an eye on, as Im sure some water may nestle in there before winter. Will likely replace them this winter.. they are a tad pricey if I remember right.. 150 a pop?
 

ACon977

Senior Chief Petty Officer
Joined
Nov 21, 2017
Messages
759
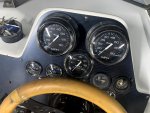
And of course, the projects will likely never be done! We bought new speakers since the old ones were underpowered and the fascia was cracking. You can also see the metal accent pieces we bought rather than trying to reuse the old vinyl.
IMG_20200714_181140.jpg

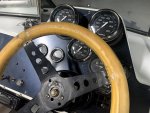
Also got a new steering wheel which looks super sharp with the Centurion logo. Unfortunately it was a spline shaft and our old one was keyed... So I bored out the splines, and then drilled a pilot hole, then bigger hole through where the keyway was supposed to be, then got a little milling bit for my dremmel tool and cleaned it up. Worked surprisingly well!
IMG_20200715_133854.jpg
 

Timr71

Petty Officer 1st Class
Joined
Jul 19, 2012
Messages
326
Wow! It looks great. Congrats too! Boat and Captain all in one swoop. Looks like some glass water on your lake as well. That'll need to be cut up with your ski. Enjoy. It's been a fun ride. I'll look you up if we ever get to travel again. Enjoy the boat.
 

mickyryan

Rear Admiral
Joined
Apr 18, 2016
Messages
4,214
tad pricey 150 a pop ... bro i paid 950 for my ls ones and that wasnt even all the parts and pieces man up pay the 150! also the pvc is wrong it should be fiberglass exhaust tubing all the way back or exhaust hose that's rated for exhaust :) other then that man looks decent hope you guys are having a blast and best of luck on your new position of manslaver erm ... husband .... yeah yeah thats what i meant :)
 

ACon977

Senior Chief Petty Officer
Joined
Nov 21, 2017
Messages
759
tad pricey 150 a pop ... bro i paid 950 for my ls ones and that wasnt even all the parts and pieces man up pay the 150! also the pvc is wrong it should be fiberglass exhaust tubing all the way back or exhaust hose that's rated for exhaust :) other then that man looks decent hope you guys are having a blast and best of luck on your new position of manslaver erm ... husband .... yeah yeah thats what i meant :)

Haha I have no idea what they cost 150 want even a ballpark guess. I thinking that I need new ones because I'm not getting as much water out the back as I would like. If they are 950 a piece... Phew that's a rough sell. But may have to be something to put aside for.

Good thoughts on the exhaust. Doing hose the whole way I struggled to find stuff that's long enough. And what do you mean with fiberglass exhaust tubing? Haven't heard of that.
 
Status
Not open for further replies.
Top