1987 Ski Centurion Tru Trac II - First Time Rebuild - Floor, Engine, Dash, etc.

Status
Not open for further replies.

ACon977

Senior Chief Petty Officer
Joined
Nov 21, 2017
Messages
759
The only time I could imagine that corner to be an issue is when you're looping back around to pick up a downed skier, and then pulling out the slack... My first thought was building up the glass around thatseat back area, almost like a reverse good scoop, but the second pic showed that it's be hard to make look right.
W
may work though, is a custom fabric cover to house your Bimini when not in use, as well as cover up the gaps between the cap and seat backs. Could either have it sewn onto the seat backs, or a zipper sewn on to seat back, and a few snaps into the cap? Even if you don't plan on a Bimini, the fabric cover may work?

I wish I knew how to doodle better

Yea I agree that this could be a good option, although Im not sure I want to mess with adding glass. The snap cover idea isnt a bad one either, But I think it would take away from the aesthetic slightly. and potentially be harder to integrate
 

ACon977

Senior Chief Petty Officer
Joined
Nov 21, 2017
Messages
759
I agree with Froggy, you're best bet is to take material away from the bottom of the seat back until you can get the top to be flush with the fiberglass.

Your only other option is to kick the bottom of the seat back forward and an inch or two. This will change the angle of the seat back and allow the top to drop down until it's flush. Hopefully this won't be too much, if you go this direction. You'll have to move the seat bases forward too. And therefore the entire seat is moving an inch or so closer to the doghouse.

Hmm yea I guess I didnt look at what I would need to take off in order to have it fit correctly. Its only 1/2" or so. Could getaway with a pretty simple modification
 

Woodonglass

Supreme Mariner
Joined
Dec 29, 2009
Messages
25,927
Now that I see the predicament i'm in agreement that your only solution is to remake the dimensions of the rear pad.
 

ACon977

Senior Chief Petty Officer
Joined
Nov 21, 2017
Messages
759
Hey all,

its been a while but I haven't forgotten about the boat or this thread.

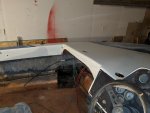
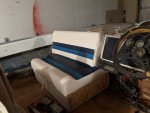
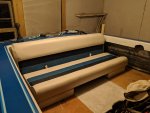
When investigating the back seat cushion, which was sitting high, I realized that the base piece is a solid piece of molded plastic, which would require restitching.. and basically defeats the purpose of buying prefab seats.
IMG_20190910_201928-1612x1209.jpg

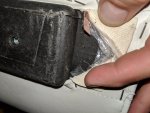
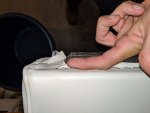
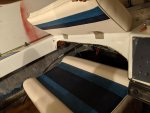
So. Although Im not proud, and my change my mind later.. I think we are going to just deal with the back seat for now and let it be. the height differential isnt more than a finger, as shown below. but in an effort of keeping progress moving forward, its going to be put to the side and see if it bothers us that much once its in use.

IMG_20190910_222829-1612x1209.jpg

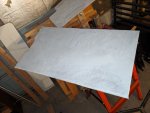
And finally the speakers that were in the boat were a nasty tan color. so I quickly prepped, painted and sealed. May replace them all later, but for now. they look better than before.

IMG_20190910_201959-1612x1209.jpg
 

Attachments

  • IMG_20190910_201941-1612x1209.jpg
    IMG_20190910_201941-1612x1209.jpg
    295.1 KB · Views: 2
  • IMG_20190910_222810-1612x1209.jpg
    IMG_20190910_222810-1612x1209.jpg
    470.1 KB · Views: 2
  • IMG_20190910_222819-1612x1209.jpg
    IMG_20190910_222819-1612x1209.jpg
    461.8 KB · Views: 2
  • IMG_20190910_202029-1612x1209.jpg
    IMG_20190910_202029-1612x1209.jpg
    452 KB · Views: 2

Timr71

Petty Officer 1st Class
Joined
Jul 19, 2012
Messages
326
Yeah, this looks like good progress! I saw that Colorado received their first snow yesterday too.
 

ACon977

Senior Chief Petty Officer
Joined
Nov 21, 2017
Messages
759
Yeah, this looks like good progress! I saw that Colorado received their first snow yesterday too.

Yea ABasin got some "white stuff" last month, although lots of people are calling it hail, but it got a ton of people excited.

Just made me feel like this summer is coming to a close and reminding me the boat isnt as ready as I was hoping...
 

ACon977

Senior Chief Petty Officer
Joined
Nov 21, 2017
Messages
759
Looks good! Sometimes you have to just run with something, other wise the project comes to a halt. Keep up the good work!

Thanks! Honestly, it will probably bother me in the future, but we can build a back cushion custom during the winter or whatnot and swap it out. As of now, progress needs to take precedent.
 

ACon977

Senior Chief Petty Officer
Joined
Nov 21, 2017
Messages
759
Hey All,

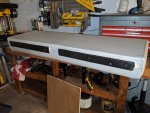
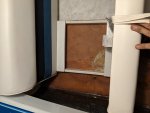
Another update. Got a working weekend with the Admiral's parents in town, seat base for the passenger is put together and first coats of paint are on. Rear gas tank separator is up and has its marine paint on it. Rear seat bases have their primer coat.

IMG_20190922_193117-1612x1209.jpg


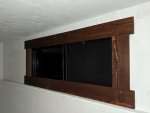
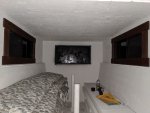
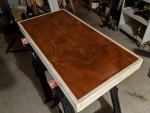
In addition to some boat work I spent part of sunday working on our little camper conversion. Got the window frames cut sanded and stained, table stained and painted, and a few other small bits and pieces together. The Admiral got around to making some cushions for the benches and we are planning on doing a chalkboard (scoreboard for games) on the back wall, I made a frame that ill hang after a few coats of the blackboard paint.

IMG_20190922_193437-1612x1209.jpg

IMG_20190922_193443-1612x1209.jpg
 

Attachments

  • IMG_20190922_193019-1612x1209.jpg
    IMG_20190922_193019-1612x1209.jpg
    327.5 KB · Views: 1
  • IMG_20190922_193025-1612x1209.jpg
    IMG_20190922_193025-1612x1209.jpg
    378.9 KB · Views: 1
  • IMG_20190922_193145-1612x1209.jpg
    IMG_20190922_193145-1612x1209.jpg
    368.8 KB · Views: 1
  • IMG_20190922_193037-1612x1209.jpg
    IMG_20190922_193037-1612x1209.jpg
    357.7 KB · Views: 1
  • MVIMG_20190922_193051-1612x1209.jpg
    MVIMG_20190922_193051-1612x1209.jpg
    350.5 KB · Views: 1
  • IMG_20190922_193112-1612x1209.jpg
    IMG_20190922_193112-1612x1209.jpg
    378.3 KB · Views: 2

ACon977

Senior Chief Petty Officer
Joined
Nov 21, 2017
Messages
759
I also cleaned off the excess silicone from the rub rails and tried to get them looking prettier, no real chance of that, they are much more beat up than I remember. After looking at replacement options, I dont think it is worth $350 to replace them all. So probably a quick touch up with black paint and put in a new insert.

The profile is displayed below. Anyone know what model insert to get? During deconstruction I didnt save any of the old insert and forgot to take pictures/measurements... always wish you could go back.

IMG_20190921_133235.jpg


I looked here on iBoats and came up with the following product. Although I dont believe mine are 1 3/16"

https://www.iboats.com/shop/1-3-16x-1-2-flexible-vinyl-insert-v12-4144-legacy-imf-271893.html
 

Timr71

Petty Officer 1st Class
Joined
Jul 19, 2012
Messages
326
This is the rub rail kit that most closely matches the stock one. I think this is the one that went back on my boat too. I'm not 100% sure since I didn't buy mine. Maybe this will help you. one buy over on the Centurion crew.com board did confirm that he too thought that this was the closest to stock. (this link might get removed by the mods, sorry if it's a violation)
 

ACon977

Senior Chief Petty Officer
Joined
Nov 21, 2017
Messages
759
Thanks Tim, Taco was the brand that I was looking at on Iboats as well. seems like that full replacement is pretty damn cost effective though. Although they are out of stock at the moment
 

Timr71

Petty Officer 1st Class
Joined
Jul 19, 2012
Messages
326
Hi Austin!

[I'm hoping to not get dinged by a MOD for bumping an old thread]

So, I know it's snow ski season, but I'm wondering...are you going to water ski behind this boat this summer? Now's a good time to be thinking along those lines. What do you have left to finish?

Hope all is well. I just got back from snow skiing in Sun Valley, ID about a week ago. I might get out again on my snow skis again this season, but my slalom ski is waiting patiently.
 

ACon977

Senior Chief Petty Officer
Joined
Nov 21, 2017
Messages
759
Hey Tim (and anyone else who is still listening)!

Sorry for the delay, unfortunately I've been having car issues and trying to chase down electrical bugs that the dealer and shops cant find. Super frustrating. Although thats what I get for having a 13 y/o jeep with 165k on her. Not the most, miles, but getting up there.

Also been snow skiing most weekends, you caught me, we've got about 18 days on the mountain so far... We did a trip to Steamboat, CO and then also to Big Sky, MT. Both were fantastic and love knocking some destinations off our list. Back country this year started rocky and has had very high avalanche danger for most of the year, so less on skins this year than last.

Regarding the boat, because thats what this forum is for... IVE BEEN A LAZY BUTT. and its been cold, and I've been working on that damn camper trailer more than I expected since some of the wiring was messed up and I had to tear out some of the walls I put up. But all those "and"s sound a bit like excuses.
Apologies to all, and thank you for those who are still following along. I refuse to let this project die, and am going to give it a good push to get it in the water by this summer.

I had presidents day off yesterday and rather than going up into the mountains to play in the 18" of fresh powder (which my friends sent me many a pic/vid of) I got some work done on the boat, cleaned the garage, and re-setup my bench. Here is the list of things that Ive gotten done since my last post (apologies for the lack of pics):
  1. Got the seat base mounts attached to the bases and set in place. Just an extension of the pics a few posts ago. But final stages before screwing them down.
  2. installed new electrical relay.
    1. when I was originally working on the engine, I wasnt getting power to my plugs, hoping that this relay was the issue, still debug left to do on the engine.
  3. installed new resistor on motor
    1. again, easy electrical component to replace and try to troubleshoot electrical
    2. probably not root cause but the old one was very fragile and corroded
  4. mounted steering cable and adapter
  5. mounted throttle cables to throttle body
  6. installed throttle body
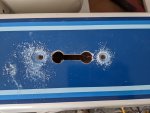
  7. installed rear cleats
    1. These are the same ones that Tim suggested and they look great!
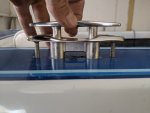
    2. IMG_20200217_150218.jpg
    3. IMG_20200217_150417.jpg
    4. IMG_20200217_150215.jpg
    5. these were more of a hassle than I expected. But hoping they will aid in "bumping" the rope over the rear seats.
      1. May have to install something else like suggested by others.
  8. Drilled out tower mount holes
  9. Cleaned and greased tower mounts
    1. when I took these off, most were seized. So I removed corrosion and added grease to the contact points in order to allow for actual functionality.
  10. installed tower mounts

The "recently completed" list looks longer than it really is, but its mostly small stuff, here is the real list of TO-DO:
  1. plug and glass foam holes
    1. where I drilled through the floor to pour foam below the deck
  2. Paint floor and hull walls
    1. went with an epoxy paint as recommended on this forum
  3. Rub Rail install
    1. I cleaned up the rub rail and need to buy a new insert for it.
  4. mount seats to floor
    1. although I wanted to glass the bases down, I am realizing that the temp is not conducive to glassing in the winter.
    2. not super happy about just using brackets, but if it bothers me enough, its something that I can realistically redo later.. although it would certainly be a pain.
      1. I may mount the passenger seat via glass, because this would be a permanent feature.
  5. Welsh Plugs
    1. looking at the engine this weekend I realized that after bashing my hand putting in the port side, I didnt finish putting back on the starboard side.. so that was dumb. Now going to be a royal pain to get to since the engine is back on its mounts.
      1. Anyone have a good technique for doing this in the boat?
  6. Engine Debug
    1. As mentioned earlier, the engine was turning over but didn't have any spark at the plugs. Trying to determine issue, quite a bit was done to this engine, but not sure if it was running before.... More on this when I get to it.
  7. install engine hood
    1. need to do engine debug and welsh plugs before this to have maximum access to the engine components.
  8. install foam flooring
    1. we purchased rolls of foam flooring which will need to be cut and fitted.
  9. New glass for windshield
    1. one of the windshield panes was broken
  10. install windshield
  11. dash wiring
    1. I had to cut a lot of the wiring when I removed the cap of the boat, hopefully my labeling was good enough to put it back together.
  12. Side upholstery
    1. upholstery for the sides of the boats were 100% rotten, looking at the admiral to retrofit some new ones.
  13. Speaker install
    1. I repainted the existing speakers but need to run new wire and install. (hopefully they work)
      1. will test the sound system before install of everything.
      2. need to determine if either of the 2 receivers in the boat work at all.
  14. Wood accent trim
    1. trim pieces have been sanded and stained, just need to be reinstalled
  15. Decals
    1. looking at getting some new decals for the boat, need to just pull the trigger on some
    2. some buffing still needs to take place prior to these going on.
Big plans for this boat, and super frustrated at how many/long my delays have been with no progress. BUT not giving up yet. Thanks for all of your support and I hope to be more active in the coming future!
 

archbuilder

Vice Admiral
Joined
Sep 12, 2009
Messages
5,697
Sounds like you are making progress austin. i an having a hard time reading your pm, will try it on my laptop later. looking forward to more updates!
 

ACon977

Senior Chief Petty Officer
Joined
Nov 21, 2017
Messages
759
Sounds like you are making progress austin. i an having a hard time reading your pm, will try it on my laptop later. looking forward to more updates!

Thanks! Feels like a good re-start, but not good progress for 4 months worth...

Regarding the PM, looks like my rub rail is 1" wide and about 1/4" deep. Even on my laptop the PM was glitching out.
 

archbuilder

Vice Admiral
Joined
Sep 12, 2009
Messages
5,697
is that the rub rail size or the channel for the insert in the rub rail? i need to know the height if the channel.
 
Status
Not open for further replies.
Top