1987 Ski Centurion Tru Trac II - First Time Rebuild - Floor, Engine, Dash, etc.

Status
Not open for further replies.

ACon977

Senior Chief Petty Officer
Joined
Nov 21, 2017
Messages
759
Too funny, after poking through a few videos I realized that I had already subscribed to his channel! Maybe I did watch a few more in my original restore searches.
 

Timr71

Petty Officer 1st Class
Joined
Jul 19, 2012
Messages
326
Sorry to hear about your wife, hopefully it was something relatively simple.

Thanks, it was just elective sinus surgery...and it went really well. Tomorrow is supposed to be the worst day of her recovery, so I'll either be home taking care of her and/or I'll get a quick run down to the lake. We'll see. Supposed to be stormy in the morning so the lake might be less appealing.
 

ACon977

Senior Chief Petty Officer
Joined
Nov 21, 2017
Messages
759
Thanks, it was just elective sinus surgery...and it went really well. Tomorrow is supposed to be the worst day of her recovery, so I'll either be home taking care of her and/or I'll get a quick run down to the lake. We'll see. Supposed to be stormy in the morning so the lake might be less appealing.

Glad to hear it was something elective and it went well!

And stormy weather means no other boats on the lake... even if you could get a little wet.
 

Timr71

Petty Officer 1st Class
Joined
Jul 19, 2012
Messages
326
Hey Austin, I talked with my cousin a bit last night about steering cables. He said a couple of things, 1. The original manufacturer doesn't exist and the remains of the company were purchased by Sierra...I think that's what he said. 2. matching up part numbers is a challenge so just measuring the length of the cable and starting from there is the best bet. 3. We did utilize that adapter (shown in the video that you linked to) when hooking up new cables to the steering (helm) components.

I don't know how much of a help any of that is, but it's what I found out. Sounds like you have the steering cable thing going in the right direction anyway.
 

ACon977

Senior Chief Petty Officer
Joined
Nov 21, 2017
Messages
759
Hey Austin, I talked with my cousin a bit last night about steering cables. He said a couple of things, 1. The original manufacturer doesn't exist and the remains of the company were purchased by Sierra...I think that's what he said. 2. matching up part numbers is a challenge so just measuring the length of the cable and starting from there is the best bet. 3. We did utilize that adapter (shown in the video that you linked to) when hooking up new cables to the steering (helm) components.

I don't know how much of a help any of that is, but it's what I found out. Sounds like you have the steering cable thing going in the right direction anyway.

Thanks for following up Tim! Its always good to have confirmation that I'm going in the right direction. I ordered the cable and adapter from the store here on iBoats! Great price and should be delivered by the time I get back from vacation.

I actually ordered a bunch of stuff for the boat & engine to be delivered by the time we get back lol, Based on some research I got a new Starter relay, Ballast resistor, ignition switch (the boat had no key when we bought it), wiring, wire end connectors, spark plug tester, new plugs, new exhaust (as shown on here), and then the new steering cable. Hopefully I can really get on the progress again now that I have new components ready to be installed. Its been a whirlwind this past month of traveling on the weekends and being busy during the week. Ambition to get things done is higher than my calendar allows.
 

Timr71

Petty Officer 1st Class
Joined
Jul 19, 2012
Messages
326
Hang in there...I know that feeling. I always wanted to be further ahead than we were. And, I wanted the boat to be in usable (read) skiable condition so we could work during the day and ski a set in the evening. But often that just doesn't work out, especially when you have engine parts all over the garage. Good luck!
 

ACon977

Senior Chief Petty Officer
Joined
Nov 21, 2017
Messages
759
Haha that's exactly where I am at! I have people asking all the time when it'll be done and I just have to keep pushing them back. But all in good time. Now that its apart I would rather get everything i want done. Once its put back together I dont foresee us tearing back into it too far.
 

ACon977

Senior Chief Petty Officer
Joined
Nov 21, 2017
Messages
759
Well sorry for the long time with no updates. We went and flew back to the midwest for 10 days to visit family and go to a wedding. Fantastic and exhausting trip. But I did get back on the boat tonight and finished glassing up the back of the stringers to the transom. Feels good to have the stringers glassed in.

Next work is laying out the bulk heads, installing the exhaust ports, getting the engine mounts back in and then doing the cables.

I also got SO much delivered when we were on vacation. Always a good sight to have a pile of boxes filled with boat stuff waiting for you when you come home.
 

Timr71

Petty Officer 1st Class
Joined
Jul 19, 2012
Messages
326
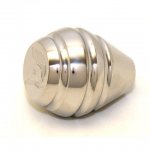
Yes! Now get to work! Just kidding...it was killing me that there's no updates to this thread. Some pics would be nice too. I haven't been down to the boat the past two weekends, and I do have more stuff to do on mine too. I did pick up this shift nob, and I'm excited to install it and use it. Gotta throw on the bling when you can. BTW, great lakes skipper has a bunch of these. It's crazy the stuff they get there. These came stock on the Centurion Enzo I believe.
 

Attachments

  • photo297607.jpg
    photo297607.jpg
    21.4 KB · Views: 0

ACon977

Senior Chief Petty Officer
Joined
Nov 21, 2017
Messages
759
Yes! Now get to work! Just kidding...it was killing me that there's no updates to this thread. Some pics would be nice too.

Believe me Tim, its been killing me to not be doing much additional work on the boat in the past few weeks. Too much travel to see family, which is always a good thing, but takes up a bit of free time. I also play soccer on Mondays and kickball on Thursdays which leaves essentially Tuesday Wednesday to work, and I haven't always been terribly motivated :confused:

I haven't been down to the boat the past two weekends, and I do have more stuff to do on mine too. I did pick up this shift nob, and I'm excited to install it and use it. Gotta throw on the bling when you can. BTW, great lakes skipper has a bunch of these. It's crazy the stuff they get there. These came stock on the Centurion Enzo I believe.

A little bling is never a bad idea! If it makes you happy when you're behind the wheel then its worth the money. Having a boat isn't a retirement plan, it stands for Break Out Another Thousand :laugh:
 

ACon977

Senior Chief Petty Officer
Joined
Nov 21, 2017
Messages
759
Hey All!

Been too long, and I hope you guys haven't given up on me yet. We finally spent a weekend at home! what a concept.

The Admiral's parents came to town and wanted to help us out on the boat. So I have a full 10hr day of work to update everyone on. Here is an overview of everything we accomplished. I will put out a post on each step (some combined) with pictures I took.

1. Cut the bulk heads for the front, and in the rear of the boat.
2. Hoist the engine and back the boat underneath.
3. Engine alignment
4. Engine Mount & Angle Iron Holes
5. Resin bond and hole fill
6. Swim platform sand and teak oil process
7. Decal Removal
8. Engine Cover vinyl
9. Exhaust Ports
 

ACon977

Senior Chief Petty Officer
Joined
Nov 21, 2017
Messages
759
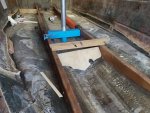
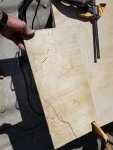
So first off, we took some 3/4" ply and cut them to approximate size for the front and rear bulk heads. The bulk head in the front is the only one I took pictures of, it is in front of the pylon and keeps all the foam in the bow from drifting down into the cavity where the engine sits.

I rough cut a 10" x 21" rectangle and then drew lines every 1" or so in order to mark points along the profile. We then laid the board down on top of the stringers to align it in the right orientation. After that we took a tape measure and measured the depth of the hull from the top of the stringers at each line we had drawn on the board; and marked the board at the distance from the edge. This created an array of points which shaped up to being pretty close to the profile.

fetch


I cut the profile with my jigsaw (saber saw) and then put it back into the boat to see where it had contact points. I ended up shaving the sides into more of a V shape, and marked a few spots where I needed to take more wood away.

At the end of all that I took my 2.5" hole saw blade and cut a hole into the bulk head for the hose which has my cables running through. it used to be down in the bottom of the bulkhead, but since there will be water getting into this area I want to keep my cables and wiring up off the hull as much as possible.

fetch


The rear bulk heads were very similar process but a much simpiler design. I cut two 5" x 20" sections and then fit, marked the contact points, jig saw, and refit. Few iterations of this and they were at the right profile.
 

Attachments

  • photo298650.jpg
    photo298650.jpg
    940.6 KB · Views: 0
  • photo298651.jpg
    photo298651.jpg
    653.7 KB · Views: 0

ACon977

Senior Chief Petty Officer
Joined
Nov 21, 2017
Messages
759
Next up is getting the engine back into the boat to continue on the mounting process.

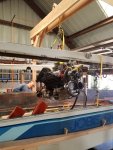
I started by wheeling the dolley with the engine mounted to it under the hoist. Using the strap puller over this amount of distance I wish I had purchased a chain hoist. My thought was that I would use the strap puller for more after this project... but dang. it was a lot of effort to lift the engine up, or down.

once the engine was as high as I could get it (by standing on a stool to keep cranking) I hooked up the jeep and pulled the hull from the other side of the garage. Pulling it out was really tight, and getting it in... was even tighter. Due to the sawhorse lift system I had put together to hold the cap up i needed to get the whole trailer and boat to swing in the alley and come into a gap with 3" on either side of the tires. Needless to say, it took me a few tries, but I did get it. And then realized that the boat's ass was up in the air and the engine wouldnt make it over the transom. So we unhooked the trailer and lifted the nose of the boat over our heads and scooped the transom under the engine. It worked. but DANG is this thing about to be heavy haha.

But we did get it in. go us lol.

20180811_154419-1512x2016.jpg
 

Attachments

  • 20180811_120036-2016x1512.jpg
    20180811_120036-2016x1512.jpg
    561.7 KB · Views: 2
  • 20180811_120034-2016x1512.jpg
    20180811_120034-2016x1512.jpg
    674.9 KB · Views: 2
  • 20180811_120029-2016x1512.jpg
    20180811_120029-2016x1512.jpg
    663.2 KB · Views: 2

ACon977

Senior Chief Petty Officer
Joined
Nov 21, 2017
Messages
759
Next up, with the engine back in the boat was time to align the engine to the drive shaft.

This I was a little nervous about since all the mounts were pretty old, so last week (maybe 2 weeks ago :eek: :blue:) I took them apart and cleaned up the oxidization and got all the adjustments working the way they should. WHAT A GOOD IDEA. It wasnt too difficult to move the engine and mounts around... but I cant imagine what effort it would have taken if the adjustments and slides were seized.


Lowering the engine onto the angle iron was easy enough, although again, wish I had the chain hoist. from there I adjusted the straps on the engine so that it would pick up almost square, and then put a little pressure on the strap. This allowed for easier moving of the engine.

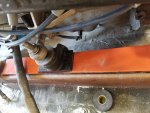
I had a 4' 3x3 board that became my pry bar. Being sure to ONLY pry on parts of the engine, mounts, or stringers. There is a lot of cabling, hoses, wire, or thin sheet metal that would have certainly bend/broken. I did this to get the engine mounts mated up to the angle iron as best I could, and then clamped them to the stringers so that they would somewhat stay in place.

I did the best I could to eyeball the side to side alignment of the engine to the shaft. Pulling that coupling up to meet the engine/trans helped to see if I needed to rotate one way or another, etc. On my mounts there were slides which are locked into place with a bolt that has a half moon cut out of them. They fit into the "slide" hole and when tightened, will bite onto the shaft that is your side to side adjust. with the mounts fixed, i pried the engine block back and forth until the alignment was straight-ish.
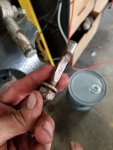
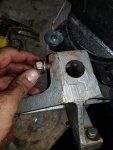
20180718_194740-1512x2016.jpg20180718_194805-1512x2016.jpg

After the engine was square to the drive shaft I started adjusting the height of the mounts to have the angle of the engine match that of the shaft. This was done with the rear mounts by rotating the center threaded rod to have the mount piece with threads on it move up and down. This was a pretty simple adjustment. Once it was in a good spot I tightened the Jam nut on top down and tightened up the side/side slides.
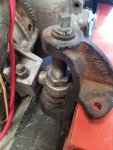
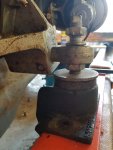
20180811_130059-1512x2016.jpg20180811_130104-1512x2016.jpg

few tweaks here and there and I got the engine shaft within 0.005" with my feeler gauge. I want to say that 8 thousandths is what I read as the good limit. So I'm happy with it.
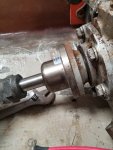
20180811_130111-1512x2016.jpg
 

Attachments

  • 20180811_130111-1512x2016.jpg
    20180811_130111-1512x2016.jpg
    544.5 KB · Views: 0
  • 20180811_130114-1512x2016.jpg
    20180811_130114-1512x2016.jpg
    705.4 KB · Views: 0
  • 20180811_130114-1512x2016.jpg
    20180811_130114-1512x2016.jpg
    705.4 KB · Views: 0

ACon977

Senior Chief Petty Officer
Joined
Nov 21, 2017
Messages
759
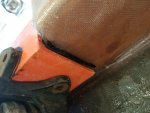
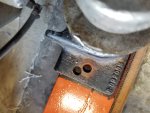
After all that excitement it was time to mark the engine mounts, drill holes into the angle iron and stringers, and then attach everything with resin.

I started by tightening down all my adjustment points on the mounts so that when I picked the engine back up and set it back down it would be back to the accuracy I had. After everything was tight I took a sharpe and marked where the angle iron was on the stringers, and then where the mounts were on the Iron, and most importantly, where the holes need to be.

20180811_144307-1512x2016.jpg20180811_173041-2016x1512.jpg

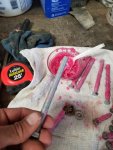
After I got them all in I took some acetone and cleaned off the end of the bolts to remove any resin that they picked up on their way through.

20180811_173032-2016x1512.jpg
 

Attachments

  • 20180811_144315-2016x1512.jpg
    20180811_144315-2016x1512.jpg
    467.9 KB · Views: 1
  • 20180811_144320-2016x1512.jpg
    20180811_144320-2016x1512.jpg
    750.6 KB · Views: 1
  • 20180811_144323-2016x1512.jpg
    20180811_144323-2016x1512.jpg
    518.7 KB · Views: 1
  • 20180811_155026-1512x2016.jpg
    20180811_155026-1512x2016.jpg
    623 KB · Views: 1
  • 20180811_155023-1512x2016.jpg
    20180811_155023-1512x2016.jpg
    847.8 KB · Views: 1
  • 20180811_160139-2016x1512.jpg
    20180811_160139-2016x1512.jpg
    691 KB · Views: 1
  • 20180811_160144-2016x1512.jpg
    20180811_160144-2016x1512.jpg
    763.4 KB · Views: 1
  • 20180811_160135-2016x1512.jpg
    20180811_160135-2016x1512.jpg
    1,016.5 KB · Views: 1
  • 20180811_163517-1512x2016.jpg
    20180811_163517-1512x2016.jpg
    639.1 KB · Views: 1
  • 20180811_163513-1512x2016.jpg
    20180811_163513-1512x2016.jpg
    674.1 KB · Views: 1

ACon977

Senior Chief Petty Officer
Joined
Nov 21, 2017
Messages
759
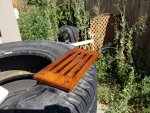
Last few items. We sanded down the old swim platform which someone had put some sort of a lacquer on. We bought a 3 stage teak oil treatment that I think looks much nicer.
There is also a piece of wood that acts as an exhaust port cover on the engine cover that we sanded and stained to match.

20180811_160851-2016x1512.jpg20180811_160859-2016x1512.jpg
 

ACon977

Senior Chief Petty Officer
Joined
Nov 21, 2017
Messages
759
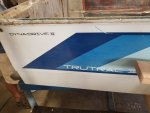
During the process of aligning the engine we also got the decals off the boat. ready for cutting, buffing, and waxing and polishing once the cap is back on.
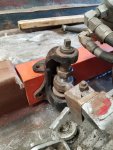
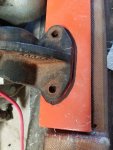
20180811_153926-2016x1512.jpg20180811_153931-2016x1512.jpg
 

ACon977

Senior Chief Petty Officer
Joined
Nov 21, 2017
Messages
759
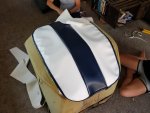
And the admiral and her mom tackled the engine cover. Looks very clean and sharp. I'm impressed.

96802e0e-f2ac-4429-9475-9b4784424eb1.jpg
 

Attachments

  • 20180811_160928-2016x1512.jpg
    20180811_160928-2016x1512.jpg
    614.6 KB · Views: 1
  • 1a89e89d-437b-4fdf-9d80-66891c84e897.jpg
    1a89e89d-437b-4fdf-9d80-66891c84e897.jpg
    967.3 KB · Views: 1
  • faddd6c1-9bdb-43cf-b386-86b7a87bcd79.jpg
    faddd6c1-9bdb-43cf-b386-86b7a87bcd79.jpg
    753.6 KB · Views: 1

ACon977

Senior Chief Petty Officer
Joined
Nov 21, 2017
Messages
759
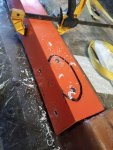
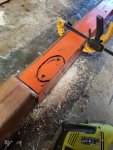
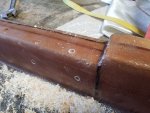
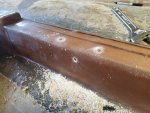
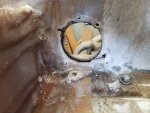
And lastly. we got the exhaust port area cleaned up and drilled the new holes for the new shiny exhaust ports. I also filled the area around the ports with some thickened resin since there was a little bit of rot around this area. Luckily this wont be taking any load.

20180811_183325-2016x1512.jpg20180811_183334-2016x1512.jpg20180811_183330-2016x1512.jpg

When I mount the ports I will use a high temp silicone as my waterproof gasket and we should be good to go.
 
Status
Not open for further replies.
Top