1987 Searay Seville Cuddy Restoration - stringer and engine mounts

Broaters

Petty Officer 2nd Class
Joined
Jul 31, 2017
Messages
139
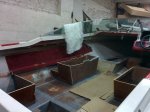
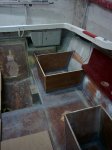
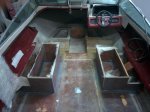
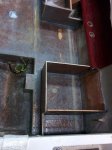
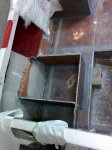
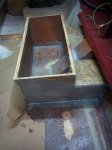
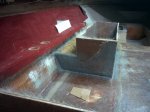
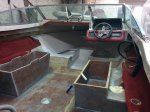
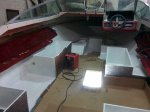
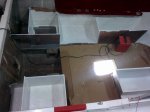
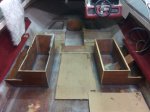
Time for the seat bases to go in.
we wanted to glue them after the complete glassjob of the floor with the idea to create a uniform barrier between the seats wood and the deck wood. it was not done like this from factory but we considered it a reasonable upgrade on a durability standpoint.
We used PB to glue the seat bases as we were out of polyester glue paste. we did the filleting at the same time and come with the biax tape to tab it as the PB was still fresh. It worked pretty well and avoided the painful phase of regrinding the PB edges before glassing.

I don't know if you guys managed to do it but each time we are doing PB filets and let them cure we always ends up with Sharpe edges or weird spots that need to be grinder before glassing.

as the floor was still tacky from the covering we used cardboard sheets to walk on.
2019-06-05 23.24.25.jpg

2019-06-05 23.25.22.jpg


2019-06-05 23.24.45.jpg

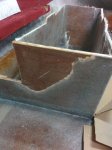
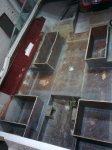
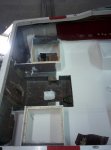
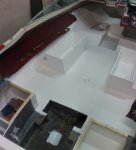
We have reproduced the same pattern for the seat base except for the opening on the 2 front seats that we will do with some hatches later on
 

Broaters

Petty Officer 2nd Class
Joined
Jul 31, 2017
Messages
139
There was a heavy rain period around June and the drain/sewer of the warehouse did not worked ok so we ended up with a lot of humidity in the work place and... a very nice smell of ...rats I guess they came from the flooded sewer and found a very comfortable spot in the old carpets and other debris that were on the sided of the boat from the early demo work.

unfortunately we had to get rid of them before they ate the seats cushions and covered the place with poops.
2019-06-10 14.28.24.jpg

2019-06-10 14.28.36.jpg

2019-06-10 14.28.41.jpg


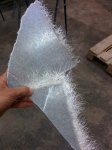
to avoid the impossible U-turn around the top corner of the bases we let the CSM cured with extra length to be trimmed out later.
 

Attachments

  • 2019-06-10 14.05.26.jpg
    2019-06-10 14.05.26.jpg
    474.3 KB · Views: 0

Broaters

Petty Officer 2nd Class
Joined
Jul 31, 2017
Messages
139
Next work session was a big throw back and a serious hit to the moral.

We started to trim the excess of CSM from the seats with a oscillating tool to avoid excessive dust from the grinder and the glass layers just peeled of the wood... :-(
This happens to several places but not all of them.

2019-06-12 18.58.07.jpg

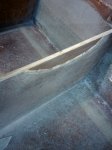
the peeled of piece of composite is very strong and did not crack at all so the issue is really the bonding of the 2 layers to the wood and not the bonding of the glass layers together.


2019-06-12 18.59.45.jpg


we finished the job with the cutting disc on the grinder to avoid the vibration from the oscillating tool. It helped to contain the delamination.

after a great stress and some ugly words thrown aver the work place we grinded the damaged area to re-glass and feathered the edges of the cut.

2019-06-12 18.59.53.jpg
 

Broaters

Petty Officer 2nd Class
Joined
Jul 31, 2017
Messages
139
After some trials and discussion with the supplier we found the culprit of this non adherence:
we are using a polyurethane primer on the wood before laminating. This must be covered while this is still tacky to the touch but due to late hour on the seats work session we glassed them few days after the primer coating.
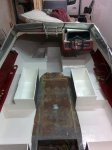
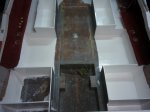
all of these spots are non adherent. after sanding out the primer and redoing it right the adherence is back.
so we spent another work session re-doing what was wrong and also closing the side of the front seats.

2019-06-12 22.11.28.jpg

2019-06-12 23.32.55.jpg

Not sure why these front seats base were linked to the hull's side? these small boxes are filled with flotation foam. so we re-did the same.

here is the final look with all side covered and the boxes closed

2019-06-12 23.46.55.jpg
 

Broaters

Petty Officer 2nd Class
Joined
Jul 31, 2017
Messages
139
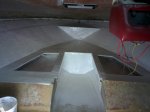
Initially the side walls of the cabin were covered with some light gray carpets that we ripped off during the demo.
we have not decided yet how they will be in the end. so for now we cleaned the remains of glue and are gel coating the entire cabin. eventually some light at the end of the tunnel :)

We had some trouble curing the gelcoat when we did the fuel tank compartment but it was way colder in the warehouse. this time the temp is close to 25°C and we catalyse the gelcoat/topcoat to 2% of MEKP. It seems to work ok.

we do it in 2 steps:
first is laminating gelcoat (unwaxed) applied with a brush roller.
second is a topcat (waxed) applied very thick with a large brush.

next pictures are first coat only so you can still see the base color.

2019-06-16 18.38.13.jpg


foaming of the side boxes. nothing special

2019-06-16 18.43.29.jpg
 

Broaters

Petty Officer 2nd Class
Joined
Jul 31, 2017
Messages
139
The 2 next sessions were about applying the first coat all around and the second coat where the initial one has setup.
More tricky as we initially though due to the amount of gelcoat to be mixed, the fast cure time due to the temp and the confined space to work at 2 people in the boat without stepping on each other.
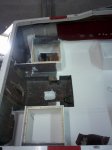
We used the small electric heater in fan only mode to evacuate the styrene gas from this huge batch of poly.

first coat everywhere:

2019-06-19 19.14.11.jpg


2019-06-19 19.14.50.jpg

We avoided the engine bay to keep an escape path while completing the main deck.

we also avoided the rear left seat base to allow later attachment of the trim pump and battery support.

The transom as well as we may have some flattening to spec to do.


Second coat of waxed topcoat on the side of the main deck
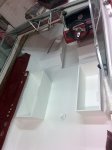
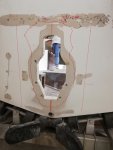
2019-06-19 22.44.20.jpg

2019-06-19 22.44.26.jpg

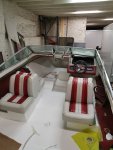
We completed the rear seat bases with a 30x30mm cleats for the cushions and some side plates that were in the initial setup
still to be gelcoated and finished the 2 coats of the center deck.

2019-06-26 21.43.55.jpg


global overview

2019-06-26 21.44.03.jpg

That's all for now... I'm off in Holliday for one more week and my brother is off till the end of July.
We will resume work early august and try to keep a more regular posting pace.
 

JASinIL2006

Vice Admiral
Joined
Feb 10, 2012
Messages
5,673
Looking good! It looks like you might done making fillets, but if you do any more (and for the benefit of those who may be starting their own projects), one way to reduce the sharp points on fillets is to brush the fillets with catalyzed resin on a chip brush before the fillet cures. That gives you a nice smooth fillet surface, without any sharp points.
 

Panoguy

Petty Officer 2nd Class
Joined
Jul 29, 2011
Messages
150
Glad to see that you worked-thru the adhesion issue on your seat bases. Looking good!!

...one way to reduce the sharp points on fillets is to brush the fillets with catalyzed resin on a chip brush before the fillet cures. That gives you a nice smooth fillet surface, without any sharp points.

Grrrr.... Wish I knew-about this idea when I did my fillets!!! Oh well.
 

Broaters

Petty Officer 2nd Class
Joined
Jul 31, 2017
Messages
139
one way to reduce the sharp points on fillets is to brush the fillets with catalyzed resin on a chip brush before the fillet cures. That gives you a nice smooth fillet surface, without any sharp points.

Will definitely try that next time !! thanks for the tips
 

Broaters

Petty Officer 2nd Class
Joined
Jul 31, 2017
Messages
139
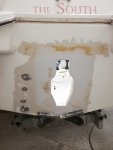
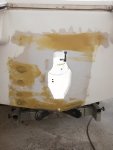
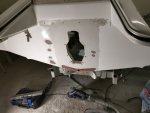
One point that we keep turning around and around is the transom flatness.

It seems that our clamping was a little weak and the inner grinding of the hull was not perfect either. we ended up with a littler concave shape on the outer face.

I used the Mer riser spec and draw 2 vertical lines in between which we are supposed to be flat within 2mm.
The hand drawn potato is where it is close to the 2mm limit, so we would have to correct the center area of the potato.

IMG_20190620_190527.jpg

How do you guys address this issue?

My first idea was to grind down the gelcoat and to use a fiber reinforced poly compound same as we did to fill some hole inside the boat. Is it a good idea?
other plan would be to grind more and then to add layers of glass and just smooth it out with fairing compound before re-gelcoating.

The overall plan is to get the outer face flat before working on the inner face to get the appropriate thickness and parallelism.
does it sounds ok?

advices much wanted :)

cheers
 

AShipShow

Lieutenant Commander
Joined
Jul 8, 2016
Messages
1,792
Baylinerchuck had to do this on his boat.. I believe he used homemade fairing compound (poly resin, phenolic microballoons or glass bubbles, and cabosil.

You don't need to go absolutely nuts with it... Merc only requires the transom be flat and parallel in the area that the plate and gimbal housing mount to... So don't use a 4' level as a straight edge... use something that only spans the opening by 6 or 7 inches per side.
 

Baylinerchuck

Commander
Joined
Jul 29, 2016
Messages
2,726
MadProps is correct. I had the same issue with my Chaparral. It was not flat enough according to Mercruiser spec in their installation manual. I think they want it within 1/16”. I decided to feather mine out further than the mounting area. You do not need to grind off the gel coat as long as it’s not cracked. I used a 32 grit flapper wheel to only rough up the area I need to apply faring compound. I did not want to use an off the shelf automotive body putty since this is below the water line. Using resin, phenolic micro balloons, and some cabosil to thicken it to a paste I made this faring compound. I got the recipe from Woodonglass. This stuff sands like a dream. Once smooth and in spec, I applied gel coat feathering into the existing. It really turned out good, and no leaks.

Check out my link so so you can see it in action. Good luck, and great job thus far. Looking good.
 

Broaters

Petty Officer 2nd Class
Joined
Jul 31, 2017
Messages
139
hey MadPropsBaylinerchuck thanks for the quick answer.
I've been through your post and saw the transom fairing part. Looks exactly what we have to do.
also seen the fairing recipe you mentioned from WOG. Actually we have already used this kind of formula without knowing it.

we made some filler compound using poly resin, glass microspheres and cabosil instead of PB to fill some voids on the wood before glassing. I was not considering it strong enough to fair the transom but since you have good experience with it, we'll definitively give it a try.

as for the span I'm looking for 210mm on each side where MERC requires 203mm so it does not give us too much of work.

This will probably be the next job on the boat while the brother will work the inner gelcoating.
 

Broaters

Petty Officer 2nd Class
Joined
Jul 31, 2017
Messages
139
here is the summary of the last work on the boat.

the gelcoat is nearly finished on the inside of the boat, only the transom and the area where we will need to install the battery and trim pump are not covered yet.

2019-06-26 21.43.55_r.jpgIMG_20190908_142207_r.jpg
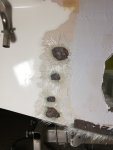
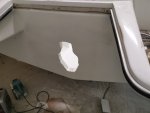
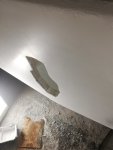
Thats what scarried me :), it was already curing and we tried to smooth it ending up with this messy blobs.

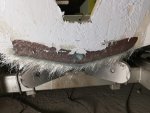
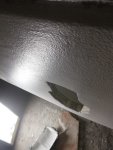
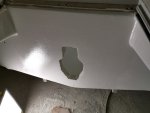
at this stage we corrected the hole with some fiber patches IMG_20190904_204712_r.jpgIMG_20190904_204716_r.jpg

we painted theh repaired spots with waxed gelcoat to be able to sand them down on the next days...

here is how it looked after a first coarse sanding
IMG_20190924_192548_r.jpg
we finished the smoothing with fine fairing compound hence the brown color

IMG_20190924_194516_r.jpg
after that 2 coats of unwaxed gelcoat and one of waxed on top of it

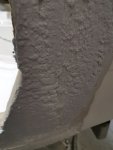
The curing was complete and fully hard but it looked like orange peel. not sure if it is always the case or not ?
we applied the gelcoat with a foam paint roller maybe not the best tool.

IMG_20190924_221817_r.jpg
fun to sit in the boat again !!
 

Attachments

  • 2019-06-26 21.45.41_r.jpg
    2019-06-26 21.45.41_r.jpg
    154.8 KB · Views: 0
  • IMG_20190904_190608_r.jpg
    IMG_20190904_190608_r.jpg
    166.8 KB · Views: 0
  • IMG_20190924_222359_r.jpg
    IMG_20190924_222359_r.jpg
    111.1 KB · Views: 0
  • IMG_20191002_192640_r.jpg
    IMG_20191002_192640_r.jpg
    151.3 KB · Views: 0
  • IMG_20191002_184343_r.jpg
    IMG_20191002_184343_r.jpg
    157 KB · Views: 0
  • IMG_20191001_154149_r.jpg
    IMG_20191001_154149_r.jpg
    172.6 KB · Views: 0
  • IMG_20191001_155423_r.jpg
    IMG_20191001_155423_r.jpg
    166.6 KB · Views: 0
Top