1985 Bayliner 2750 Ciera Sunbridge Resto

eggs712

Petty Officer 1st Class
Joined
May 8, 2012
Messages
342
yea, your on the right track with painting aluminum... I don't know if dish soap really does much other than get rid of any grease or oil, but I usually just use acetone for that..

The key is the primer... self etching primer is decent, but for the most durability and adhesion, you want to use a zinc chromate primer... not the easiest thing to find but amazon has it and I think napa also sells it in a rattle can...
Thank you for that sir, I have a can of the zinc chromate primer ordered now. I'll stick to rattle cans, as I'm abhorrent at painting.

This project is gonna hurt my wallet, already paid $300 just for new thru-hulls. Boating and fishing are just so addictive though...
 

eggs712

Petty Officer 1st Class
Joined
May 8, 2012
Messages
342
I got a couple days of boat work in this weekend.
After shop-vaccing the engine bay and cabin, I started ripping out all the carpet, but will need a second hand for finishing that job due to hardware requiring a backer screwdriver on deck.
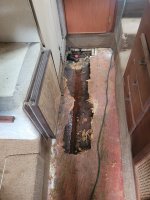
Next, by hand/foot, started removing the rotten wood in the cabin. Bayliner used an isolated compartment for head drainage, which seems like a recipe for rot from day one. There were 10 gallons of water trapped, and Bayliner also neglected any kind of floor drain in the cabin coupled with using carpet.
20220904_142256.jpg

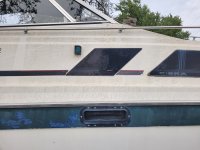
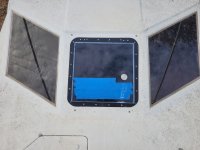
Next, I reglazed the top cabin windows (tempered glass, not sure if they're original) with double-sided tape and Dow 795 silicon, as well as the starboard cabin windows (acrylic/plexiglass).
Instead of replacing the large window with the chip, I decided to sand that corner to hide the chip with a cordless grinder and a flap disc.
Before:
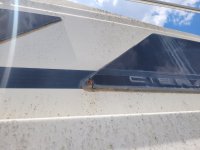
20220701_150217.jpg
After:
20220904_171334.jpg
(Was too dark to take a pic of the corner I sanded)
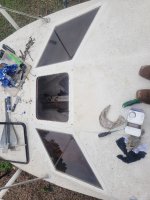
20220904_152717.jpg
I made a mistake of using clear double-sided tape on these windows, so it doesn't look great to me.
A trick I found to quickly remove old double-sided tape was to very carefully use my cordless grinder with a worn flap disc; only go deep enough to just barely scratch the gelcoat without going outside of where your bedding will be.

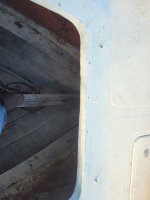
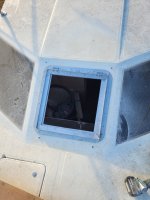
The ~4" of wood around the fore-deck hatch were mostly mulch, so I'll replace that (not sure exactly how yet) soon after fabbing the new hatch.
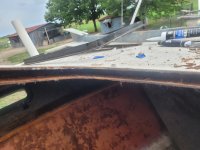
20220904_152634.jpg

Last thing, I thought it odd that the structure around the old large plexiglass window is cored with some kind of foam
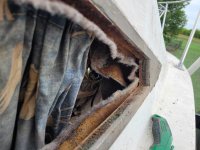
20220904_173352.jpg
 

eggs712

Petty Officer 1st Class
Joined
May 8, 2012
Messages
342
Work has sent me all over the place the past month, but I've worked on some parts in the parking lot as time/weather allows.
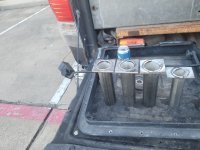
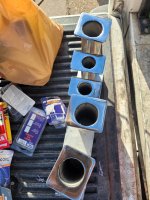
I got some free stainless steel drops at work. It's 304 SS, and while I'd prefer 316, I'll take free material any day.
First step, stick welded the beveled topside with 308 rod:
20220927_184639.jpg
Next, I knocked down the welds then sanded with a 120 grit flap disc. I then used a soft pad on the grinder to work up to 600 grit on the entire piece. Finally, I used green buffing compound on the topside for a near mirror-polish. Coated with wax and wrapped in blue tape for protection.
20221001_170654.jpg

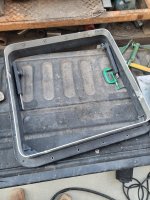
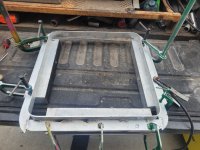
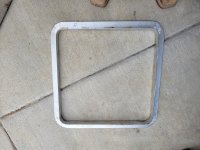
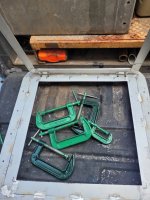
The fore hatch parts are all cut out of aluminum (another free score), just waiting for a zero wind day to TIG it all together.
 

eggs712

Petty Officer 1st Class
Joined
May 8, 2012
Messages
342
I finally had a few days at home to work on the boat last weekend. I cleaned out the rotten fore hatch wood with a dyna-file, then stuffed it with new strip of 3/4" ply and PB. I found a great local glass supplier, but they only sell 10 pound bags of cabosil, so I bought a quart of pre-made PB.20221013_174732.jpg
I finished fabricating the hatch itself while at home (was too windy to weld prior)
20221006_183753.jpg

20221007_123541.jpg

20221007_163528.jpg

20221009_125239.jpg

20221013_174855.jpg

I still have to install the handle latches, adjuster/stay support, and glass to be done.
Next, I replaced the acrylic window on the port side and discovered that the small window was a fake, only there to match starboard windows; I decided to completely omit it.20221013_171555.jpg

The new acrylic looks soo nice and shiny versus older, crazed stuff that I wish I'd just replaced them all!

The rest of the weekend was spent removing cabin carpet. The factory made some areas a PITA and the non-factory carpet was installed with a crazy amount of staples, so that took forever and I still have further to go.
 

Drivewayboater2

Petty Officer 1st Class
Joined
Aug 21, 2019
Messages
334
Nice on he hatch and side windows. looking good. something about fabricating stuff is so rewarding. I felt the same way when I did my side windows. All shiny and new. Then I realized I’m gonna have to wet sand compound and polish the hull at some point. Will you cover the windows when you do yours?
 

eggs712

Petty Officer 1st Class
Joined
May 8, 2012
Messages
342
Nice on he hatch and side windows. looking good. something about fabricating stuff is so rewarding. I felt the same way when I did my side windows. All shiny and new. Then I realized I’m gonna have to wet sand compound and polish the hull at some point. Will you cover the windows when you do yours?
It was tricky making that part because I'm replicating what is cast or extruded normally, but paying $1K for a nice hatch seemed crazy.

And that is a good point on the windows, I was more worried about weatherproofing and didn't think that far ahead honestly. I wonder if blue tape will be adequate?
 

eggs712

Petty Officer 1st Class
Joined
May 8, 2012
Messages
342
I've been doing more fishing than working on the boat lately, but I did finish the fore hatch. I used a 1/4" Taco marine hatch gasket under the lid and sealed everything except the glass with 4200.
20221023_175656.jpg

I also wanted to see why the PO painted ugly green on the side of the boat, so I removed some of it. Scraping and solvents weren't working at all, so I resorted to sanding with 400 grit paper on a random orbital sander.
20221106_172927.jpg
Sanding was still very slow, so I stopped and will try using oven cleaner and/or a paint stripper on the rest of it.
Good news though, the gelcoat underneath is plenty thick and I brought a section of it back to looking nice. Sanding up from 400 grit did take forever though.
20221106_145125.jpg

You can also see that I removed the name "U2" from the stern. I'm not sure why anyone would ever name a boat after a band like that LOL
 

Drivewayboater2

Petty Officer 1st Class
Joined
Aug 21, 2019
Messages
334
looking good. Sweat equity paying off. If you intend to remove the blue and red pistriping I used heat gun ( not on full) and flat blade. Made it easy!
I used this soy based stripper with great success.
1973E104-D712-4692-8CF0-F5599929B9E0.jpeg
 

eggs712

Petty Officer 1st Class
Joined
May 8, 2012
Messages
342
looking good. Sweat equity paying off. If you intend to remove the blue and red pistriping I used heat gun ( not on full) and flat blade. Made it easy!
I used this soy based stripper with great success.
View attachment 372688
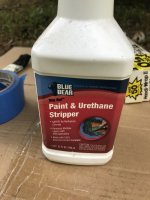
I started using Klean-strip paint & varnish stripper yesterday, and it's working okay. It makes some paint bubble up within an hour; it's taking a few coats of stripper, but it'll save a lot of sanding. The oven cleaner seemed too harsh; it dripped and left yellow streaks on the white gelcoat that didn't wipe off.

And yessir, already started on my pinstriping yesterday doing just that!
 

eggs712

Petty Officer 1st Class
Joined
May 8, 2012
Messages
342
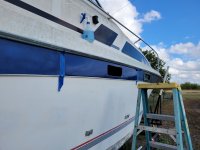
I forgot to take a pic, but while finishing paint stripping yesterday, I found a 4 foot section of repair that was done poorly (long spider cracking underneath on the white gelcoat). It was a painted-over repair and the stripper took it right off. Also, some spots appear to have had some sort of automotive metal-flake paint and clear coat over some small repairs. This is only on the port side.

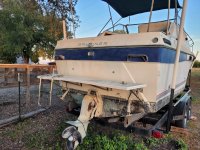
Anyway, when I eventually have to try and match the blue, am I better re-gelcoating the blue on that entire side of the boat? I'm concerned about hiding the color-matching, which I'm reading is damn near impossible.
 

mickyryan

Rear Admiral
Joined
Apr 18, 2016
Messages
4,214
not positive but i believe your hull design was same as mine on trophy, the reason the front has a second bilge pump is because in water the hull seems to collect water there by design so it had to have separate pump also the reason we got to put nose so high on land lol
 

eggs712

Petty Officer 1st Class
Joined
May 8, 2012
Messages
342
not positive but i believe your hull design was same as mine on trophy, the reason the front has a second bilge pump is because in water the hull seems to collect water there by design so it had to have separate pump also the reason we got to put nose so high on land lol
Lol glad it's not just me. I have to vacuum water out of the bow all the time even with proper weep holes to the bilge.
 

mickyryan

Rear Admiral
Joined
Apr 18, 2016
Messages
4,214
yep they appear to have like a bulb down there that sits lower then the keel of boat , got mine at about 2 oclock for storage lol
 

eggs712

Petty Officer 1st Class
Joined
May 8, 2012
Messages
342
Just read through your Trophy thread Mick, great work! How does your boat handle chop? Also, I'm probably going to take a page out of your book and use as much PVC for non-structural parts as possible, especially in the head (worst constructed part of my boat IMO). What thickness of PVC board did you typically use?
 

mickyryan

Rear Admiral
Joined
Apr 18, 2016
Messages
4,214
1/2 if it required strength i doubled it use tortch and clean it and get rid of the casting oils then scuff really good and poly resin will stick as well as epoxy of course
boat handles well yours is bigger so im sure it will do even better,
 

mickyryan

Rear Admiral
Joined
Apr 18, 2016
Messages
4,214
i went with a poly tank because i never wanted to be that deep in the boat again, it does have a slight gas smell inside boat but i have used a sniffer and although i could smell it the sniffer barely registered. and it was only for first 6 months or so
 
Top