1984 Starcraft 16ft Glutton for Punishment [Splashed July 2019]

Status
Not open for further replies.

SHSU

Lieutenant Junior+Starmada Splash Of The Year 2019
Joined
Mar 8, 2017
Messages
1,725
Lots of guys use the supertech 2 stroke oil (warren oil) The xlf is a good oil as far as im concerned but if your having issues oil brand is normally the last thing id ever look at .What people use for oil and whats best is fodder for millions of pages of arguments with very little proof to back anything up.Now if it would ever stop raining maybe id get something done,this summer sucks.


LOL, so true. You can find anything to back up an argument on the internet. Plus someone to tell you its wrong.
 

EchoNovember

Petty Officer 1st Class
Joined
May 25, 2017
Messages
315
The oil argument exists for motorcycles, boats, cars, anything with an engine.

My biggest reason for switching is to hopefully reduce smoke output.
 

82rude

Rear Admiral
Joined
May 8, 2012
Messages
4,082
The oil argument exists for motorcycles, boats, cars, anything with an engine.

My biggest reason for switching is to hopefully reduce smoke output.

That is a valid objective for sure.I use to use an oil in my old 90 evinrude called g-oil It was a synth oil made from cow tallow and other synth stuff and smelled like french fries in oil.Biggest issue was it made me hungry and guys would follow me around and shout out orders to me,lol.
 

SHSU

Lieutenant Junior+Starmada Splash Of The Year 2019
Joined
Mar 8, 2017
Messages
1,725
That is a valid objective for sure.I use to use an oil in my old 90 evinrude called g-oil It was a synth oil made from cow tallow and other synth stuff and smelled like french fries in oil.Biggest issue was it made me hungry and guys would follow me around and shout out orders to me,lol.


:rofl:
 

SHSU

Lieutenant Junior+Starmada Splash Of The Year 2019
Joined
Mar 8, 2017
Messages
1,725
Ok, so its been a while since I posted project pics, so here are some updates:

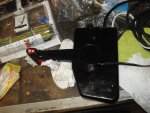
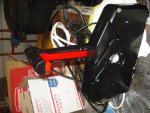
Finished the control box:

DSC03487.JPGDSC03490.JPG

Another rivet picture:
DSC03496.JPG


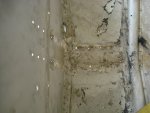
Removed the Knee bracket (Before)

DSC03504.JPG

Under the Knee bracket:

DSC03508.JPG

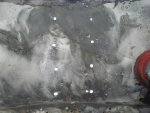
After Cleaning (Note I have one to many holes....):
DSC03509.JPG
Going to seal with some JB weld or brazing sticks

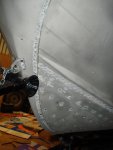
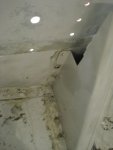
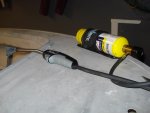
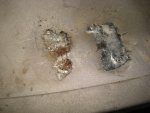
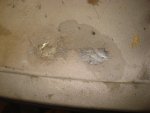
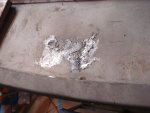
Decided I would start trying some Aluminum Brazing sticks to fill some holes on the gunwale. Not as pretty as I would like and not sure if I am going cover with something. But in case anyone else is thinking about it:

DSC03515.JPGDSC03512.JPGDSC03513.JPGDSC03514.JPG


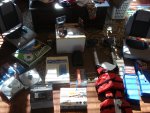
And Finally, pics of some stuff I got from Gander Mountain closeout. Going back for some more.
DSC03510.JPG
 

82rude

Rear Admiral
Joined
May 8, 2012
Messages
4,082
I see west marine has a kit now that you mix and put in a syringe then you heat up rivet with a heat gun or propane torch then inject a bit of the mixture and it sucks into the rivet like doing plumbing pipes and seals it up.Interesting.
 

EchoNovember

Petty Officer 1st Class
Joined
May 25, 2017
Messages
315
Can you link that or post the name of the product so we can find it? That sounds interesting...
 

82rude

Rear Admiral
Joined
May 8, 2012
Messages
4,082
Yes thats it ,looks good for know leakers expecially if your not doing a total rerivet job .SHSU what did you use to clean the inside of the boat looks like you got her pretty clean.Sorry i never noticed in your pics you must of had the 2 center i beams correct?Could you post a link to that fasco stuff thanks?You can put it in my thread if you want to .
 
Last edited:

Watermann

Starmada Splash of the Year 2014
Joined
Jan 12, 2013
Messages
13,787
Nice work uncovering that damage under the knee brace, so many guys overlook that step.

fetch


Something for you to think about as an alternative to heating that area so close to the transom seam and trying to just plug the hole. The knee brace takes some pretty strong forces from the motor and that area is obviously weakened with pitting and a hole. One of the accepted practices is to use an oversize patch over the area on the outer hull under the effected area. The patch effectively reinforces the knee brace base and distributes the forces.

[USER][/USER] can show you some pics of his work to form the patch and secure it to the hull. I think his thread has had the pics eaten by PB but he's been helping others by posting the pics to their threads.
 

SHSU

Lieutenant Junior+Starmada Splash Of The Year 2019
Joined
Mar 8, 2017
Messages
1,725
Yes thats it ,looks good for know leakers expecially if your not doing a total rerivet job .SHSU what did you use to clean the inside of the boat looks like you got her pretty clean.Sorry i never noticed in your pics you must of had the 2 center i beams correct?Could you post a link to that fasco stuff thanks?You can put it in my thread if you want to .


Since I was going to be re-riveting I wanted to make sure I had a clean boat. I paid a couple hundred to have her completely media blasted. That is how she got so clean, and yes I removed the two center beams. I found one additional one up under the bow piece as well. Once I get everything re-riveted I will reinstall.

See below link for Fasco:
http://fascoepoxies.com/Fasco-9xw-Steel-Flex-Epoxy-Coating-White.html
 

SHSU

Lieutenant Junior+Starmada Splash Of The Year 2019
Joined
Mar 8, 2017
Messages
1,725
Nice work uncovering that damage under the knee brace, so many guys overlook that step.

fetch


Something for you to think about as an alternative to heating that area so close to the transom seam and trying to just plug the hole. The knee brace takes some pretty strong forces from the motor and that area is obviously weakened with pitting and a hole. One of the accepted practices is to use an oversize patch over the area on the outer hull under the effected area. The patch effectively reinforces the knee brace base and distributes the forces.

[USER][/USER] can show you some pics of his work to form the patch and secure it to the hull. I think his thread has had the pics eaten by PB but he's been helping others by posting the pics to their threads.


For some reason, I think some of your post is missing.

That is a good point I hadn't thought of, but I can't take all the credit. My knee brace is broken and had to remove it anyways. That is why i found it.... Looking at it, it looks almost to clean to be normal pitting Almost like some drilled a hole and missed what they were aiming for. The extra piece under that knee bracket to seal the hole, are you thinking welding or riveting it into place?
 

Watermann

Starmada Splash of the Year 2014
Joined
Jan 12, 2013
Messages
13,787
Yeah for some reason the classiccat didn't make it through. I would personally bed the patch in 5200 and solid rivet it in place. No way I would weld that close to the transom seam, you would burn out the sealer in the seam. It's acknowledged in most boat restoration circles that welding on a riveted boat is the last resort.

There are some other pits that are pretty large and in the pic that extra hole doesn't look drilled, it's not round.
 

EchoNovember

Petty Officer 1st Class
Joined
May 25, 2017
Messages
315
For some reason, I think some of your post is missing.

That is a good point I hadn't thought of, but I can't take all the credit. My knee brace is broken and had to remove it anyways. That is why i found it.... Looking at it, it looks almost to clean to be normal pitting Almost like some drilled a hole and missed what they were aiming for. The extra piece under that knee bracket to seal the hole, are you thinking welding or riveting it into place?

Why not rivet? What's another rivet after doing 1,000+? :rofl:
 

EchoNovember

Petty Officer 1st Class
Joined
May 25, 2017
Messages
315
All of this is making me nervous about when we do our restoration...

Is that pitting from saltwater? We've been rinsing out our bilge with house water as a preventative for invasive species, as we had splashwell separation. Starting to wonder if we should continue that to wash out anything corrosive.
 

82rude

Rear Admiral
Joined
May 8, 2012
Messages
4,082
Wish i would of seen your post about the fasco epoxy sooner SHSU.I might of not bought the gluvit atall and just did what your thinking of doing ,coating the inside and outside.Gluvit is a well regarded and proven product so i dont feel too bad but its 4 time more expensive also! Too sick to work today (face and tooth infection)
 

SHSU

Lieutenant Junior+Starmada Splash Of The Year 2019
Joined
Mar 8, 2017
Messages
1,725
Yeah for some reason the classiccat didn't make it through. I would personally bed the patch in 5200 and solid rivet it in place. No way I would weld that close to the transom seam, you would burn out the sealer in the seam. It's acknowledged in most boat restoration circles that welding on a riveted boat is the last resort.

There are some other pits that are pretty large and in the pic that extra hole doesn't look drilled, it's not round.


Thanks WM, after looking at it again I can see it as not being drilled. I do have some pretty bad pitting. I like your idea. Do you just do the hole or like a 12 x 12 sheet?

Why not rivet? What's another rivet after doing 1,000+? :rofl:


LOL, its the 2001 that will kill me!!!

Really, I just want to make sure that I have made a good repair so it wont fail.

All of this is making me nervous about when we do our restoration...

Is that pitting from saltwater? We've been rinsing out our bilge with house water as a preventative for invasive species, as we had splashwell separation. Starting to wonder if we should continue that to wash out anything corrosive.

Yes, this boat only saw water in the Gulf of Mexico. I don't think the original owner took very good care of it..... From what I have seen of your boat, you wont have nearly as many issues as I have.

Wish i would of seen your post about the fasco epoxy sooner SHSU.I might of not bought the gluvit atall and just did what your thinking of doing ,coating the inside and outside.Gluvit is a well regarded and proven product so i dont feel too bad but its 4 time more expensive also! Too sick to work today (face and tooth infection)

Ya, I got the idea from a thread Woodonglass suggested it in and Watermann pointed me to another thread where somebody else used it. I know Gulvit is the go to for many people; however, if i can get the same result with Fasco, then why not try it. Plus it is used on the bottom of air boats so you know it gets abused.

I hear you on life getting in the way and being sick, I "sprained (my) spine" at work. Before you ask, it was a very manly stretch I was doing in my chair and felt something pop... Doc told me to take it easy and gave me some nice meds!!! Got some movement of my head back so am definitely on the road to recovery.

With life getting in the way, I haven't been able to build the cradle for the boat to sit on so we could finish the bottom. Instead, I have been doing some shopping and picked up more goodies from Gander Mountain. After all the concerns I had about the bracket and its cost, it rang up at $45. So I got everything I wanted today for under $100!!!
 

82rude

Rear Admiral
Joined
May 8, 2012
Messages
4,082
Back problems can be brutal ,crippling.i may just get a quart or 2 of the fasco and coat the underside anyways as the quart of gluvit probaly wont last forever doing the inside rivets..Actually it was the ludicrous local pricing of the gluvit which made me only buy 1 quart. 98 cnd.
 

Watermann

Starmada Splash of the Year 2014
Joined
Jan 12, 2013
Messages
13,787
I don't know what the exact dimensions would be for the patch plate but it should be large enough to cover the pitted area with some overlap into good material. I picture the repair patch to be more of a rectangle. I think I would do some filler work on the hole and pitting too with some marine tex or JBW just so there isn't the off chance corrosion will start again in those pits. After it's nice and smooth it's up to you then but I would think about priming and painting it as well to add a layer of protection.
 

SHSU

Lieutenant Junior+Starmada Splash Of The Year 2019
Joined
Mar 8, 2017
Messages
1,725
Back problems can be brutal ,crippling.i may just get a quart or 2 of the fasco and coat the underside anyways as the quart of gluvit probaly wont last forever doing the inside rivets..Actually it was the ludicrous local pricing of the gluvit which made me only buy 1 quart. 98 cnd.


Ya, its a pain in the neck (Pun intended) :lol:

So doing my DD on fasco, it will not last forever, but the airboat guys are also running over some pretty rough stuff too. I am thinking, apply it like fasco suggests and I should be fine for years
 
Status
Not open for further replies.
Top