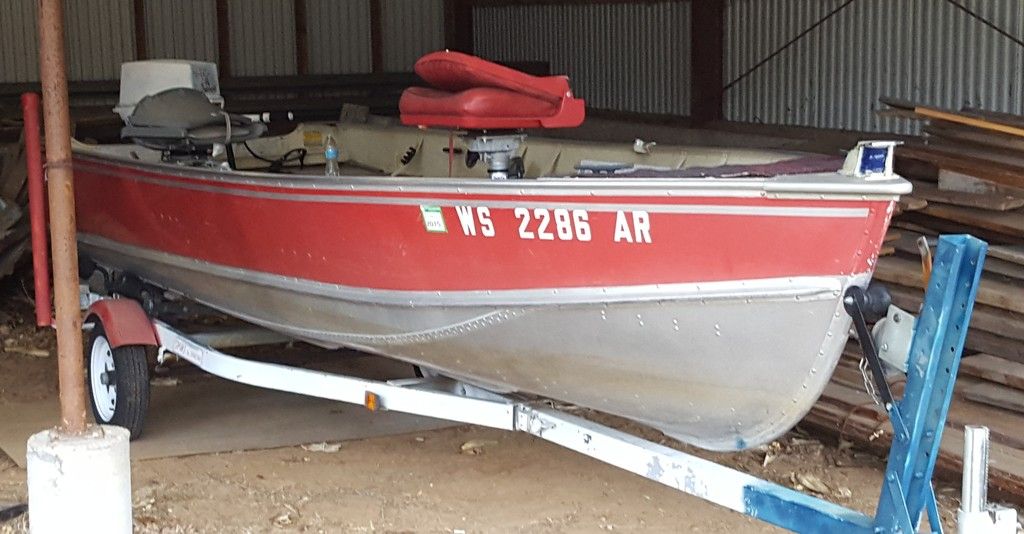
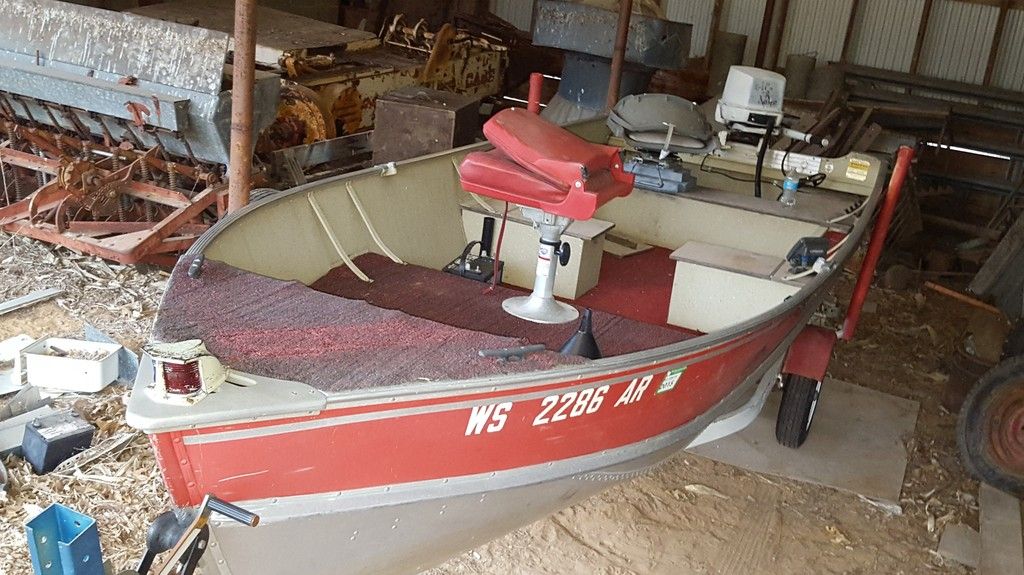
1984 16 foot Lund... Utility restoration

Joined
May 12, 2013
Messages
62
Just bought a new boat. It's a 1984 16' aluminum Lund with a 1977 35 HP Johnson.
I believe it's a pro angler from that era, but the title isn't specific. It took me 3 days to get the motor running because the neutral start switch was faulty. Now I have the issue rectified and it runs and idles smoothly. It still needs a carb tune up or cleaning, but I was forced to rewire the entire motor because the wires were so corroded and frayed. I'll post pictures later this morning. my first issue to tackle will be the spongy floorboards. I don't see any other Pro Anglers in the forums. Can anyone suggest he best way to get the floor out without destroying it?.....I'd like to use it as a template.
I'm fairly certain the bottom rivets and seems are good. After all of our snow melted there was two feet of water in the bottom for roughly a week.
 
Last edited:

Woodonglass

Supreme Mariner
Joined
Dec 29, 2009
Messages
25,927
Saving the old deck to use as a template is not that critical. It's fairly easy to make a template using cardboard strips and masking tape.;)

Making-a-template.jpg
 
Last edited:
Joined
May 12, 2013
Messages
62
Can anyone tell me if this is a Pro Angler.....I chose this model from descriptions of images on the internet. As I posted earlier, the title isn't model specific.....
It only says....16' aluminum hull boat where the model description should be.


Joined
May 12, 2013
Messages
62
Yes that's what I think as well... Either a mr. Pike a Pro Pike.
My concern is over engine ratings. Right now there's a 35 HP motor hanging on the back end.
 

fhhuber

Lieutenant
Joined
Jun 19, 2014
Messages
1,365
Hull is aluminum = all the wood is bolted/screwed in. Grind off bolt heads if they won't just unscrew.

You may have to get aggressive with a knife cutting up carpet to find the bolts/screws...

Should be really easy to get the pieces out in good enough shape for use as patterns if they aren't crumbling.

Looks like a basically sound aluminum hull... replacing all the wood (NO PRESSURE TREATED GREEN OR BROWN!) after applying Woodonglass's preservative mix to the new wood....should have the hull fixed for many years.

Hopefully the engine will last that long...
 
Joined
May 12, 2013
Messages
62
Thanks so much bonz_d...
That's very very helpful...
Question... How are you guys posting the links to your builds in your signatures? Are they HTML tags?
Thanks in advance....

I'll be starting a teardown this week if the weather permits. We have 12 inches of snow on the ground right now in Wisconsin. I'm so ticked off. It was 65 degrees last week
 

bonz_d

Vice Admiral
Joined
Apr 22, 2008
Messages
5,276
When I replaced the plywood in that Lund I did it in 3 pieces so as not to have to remove those seat boxes. The pcs. in the front of the split seat was cut as one pcs. and slid under from the front. The rear section was done in two pcs. and each pcs was slide under from the middle. All three pcs butted up flush to each other and had another 3" strip of ply screwed to the bottom to fasten them together.

I used 5/8" BCX from Menards and it was very sturdy. There are pictures of the hull with the plywood out in the link I posted.
 

bonz_d

Vice Admiral
Joined
Apr 22, 2008
Messages
5,276
I know them both well. You will enjoy that Lund, I did mine and now my little brother is lovin it! It also performed very well with the 35hp Evinrude on it.
 
Joined
May 12, 2013
Messages
62
I just looked at the floors and it seems the center section of bad flooring was riveted along the stringers....lengthwise along the edges and down the center....It looks as if the front section of floor has been replaced, but is still failing and is spongy.
I've read through your post Bonz_d....any of this sound familiar....šŸ˜‰???
It may be warmer tomorrow.... I'll be more motivated to start ripping stuff out then. I'm very anxious, but not with all this bad weather hammering us today.
I'm going to post pictures...I know that you guys appreciate pictures for some reason.
 
Last edited:

bonz_d

Vice Admiral
Joined
Apr 22, 2008
Messages
5,276
The ribs in your 16 should be exactly the same as pictured on my 14. Determine the thickness of the ply used and then what I did was set the circle saw to just shy of cutting thru. Then I cut the ply up the keel and broke it out..
 
Joined
May 12, 2013
Messages
62
I've already started taking the boxes off of mine. so it should be as simple as measuring and cutting. I'll subtract for the thickness of carpet to get it nice and snug. I've already priced the plywood,but I thinkI need to look into some waterproofing methods. I need to try to do this on the cheap. if I can make it a removable floor slash relatively easy to remove flooring. I'll be able to come back in the fallfor a nice new paint job.
 

fishin98

Chief Petty Officer
Joined
Nov 28, 2009
Messages
521
I just completed a redo of a 1988 Alumacraft Lunker V14....it's down on page 8, Our boats are similar, the floor was riveted to the ribs, I had to drill everyone of them out. Save your floor sections as you can use them for the pattern. I used 19/32 BCX plywood from Lowes, I also used the Marine carpeting from Lowes 6' x 20' for $156. Now is the time to re wire and do any up grades. Go down and check out my thread. BTW.. I grew up in Racine county, now retired to FL, still get up that way to fish for walleyes. Hey Bonz_d wondering where you were.
FISHIN
 

Frey0357

Petty Officer 1st Class
Joined
Mar 13, 2014
Messages
313
FGuy....the name cracks me up!

As for sealing methods, WoodOnGlass has a cocktail of sorts that is excellent for sealing wood and is very inexpensive compared to Epoxy. Don't get me wrong epoxy is THE best, but this is a close second (IMHO). This is what I used on my boat transom, and it turned out excellent! You will mix all of these together and then simply apply it, and let it set (dry). 3 coats of this followed by 2 heavy coats of straight Spar (little green can) and it is all sealed...All of this for under $20.00!!!

IMG_1674_zpscj8fduh6.jpg


Thanks,
Frey
 
Last edited:
Joined
May 12, 2013
Messages
62
yeah I just went out and checked on the Fasteners connecting everything to the ribs and storage boxes. Some of the hardware Canby ground off with an angle grinder but some of them are in difficult places so it may take me a while to get the flooring out. It's half inch plywood at the moment. so I'll go get some today but it's too cold out right now to do any serious work on it. yeah I saw that waterproofing concoction. I think I'll give it a shot.
 
Top