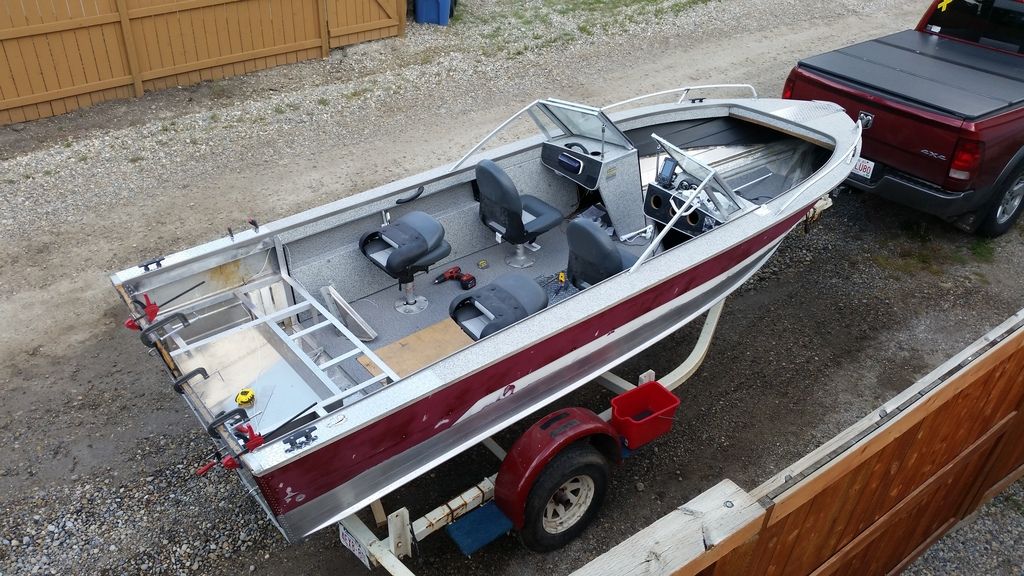
1981 Starcraft Super Sport 180 - Gonna try a Restore

Candutch

Chief Petty Officer
Joined
May 8, 2015
Messages
637
hanks fellas. Rob, the diamond plate on the bow is loose, once the rub rails are back on I will fit it properly. Budski I got mine at Rona as well, not as good a deal as you though, I paid 9 bucks a foot for end of roll.
I was also trying to figure out how I was going to stop water from getting under the floor from those taper lock pedestal bases. Of all things I considered this was what I ended up using.
View attachment y4m5Zn7014XbO6Q0jCgibEGxCpXPYR4BDvjUsHHF8PjzLsqb27-8tnnHfEmv5kSILY9P1leVD70xqGCFv7lT1MwUGSY1GJ2Cktfg

They fit perfect in the hole, a little 5200 on both sides and they are totally sealed.
 
Last edited:

Decker83

Commander
Joined
Apr 5, 2011
Messages
2,593
You made a lot of great progress.. Consoles look outstanding.. The diamond plate looks great..
Nifty ideal on the seat mounts..
 

Candutch

Chief Petty Officer
Joined
May 8, 2015
Messages
637
Well its been a couple weeks since I've updated my progress. Not a lot happening on the paint or gluing vinyl since the temps have dropped to much. I did get the consoles installed, windshield and passenger dash panel in. I wrapped the dash in vinyl carbon fiber wrap and covered it with 3mm lexan. The trim fits nice and snug and with the bead of silicone on the inside edge of the trim no water should get in between the lexan and dash.

View attachment y4mb5JczK18Ofi6fod6vqujyDHO1i5uw0STcuu_VJQNaC8RT0nxV4fpDaWXHN4SxA35gTG6BQrkmIws-HcvXeqj4HNd9LTI_V0IKView attachment y4mNWIMTzI5_8Xbzc4aAPesIRNHrQgwv-hw3o91cstvepj2DW2lmVKkZ_KJ9KccDanylG63nHCmSDSyiD8BKyTR4O-PB4jVe1is2

I also painted the starcraft emblem and steering wheel center.


I have 6 days off coming up so hopefully I will get the side panels in and get the hull prepped for paint.
 
Last edited:

budski

Lieutenant Commander
Joined
Sep 12, 2012
Messages
1,845
The dashes look great as well as the starcraft decals Rob, nice to see you back at it.
 

Candutch

Chief Petty Officer
Joined
May 8, 2015
Messages
637
Thanks Budski, hayko and decker.
Now that I've caught up reading all the new posts here time to update mine since it's been awhile.
I've managed to get my side panels in, wiring run, driver's console on, drain tubes in and aluminum skin on the transom. Also fit and drilled the holes for my kicker bracket and boarding ladder.
I used the ball peen hammer trick for the drain tubes, I just used a 1/2 inch thick piece of sell clamped over the splashwell side of the transom and used another hammer to pound in the ball and the slowly work out the flare until I could tap it flat. Of course I put a big blob of 5200 around the tube before pushing it in.

View attachment y4mWh8GuisxXS069VgV08mWYMkqfFfBzQSmwq0F4GhkklQ9ieITxnH1JZHTzsN9xDNGD-43ownsRorG4wXCzSKAqT1HFRtSYqK8A

View attachment y4mAwWB2zo9ss8YTWOFXBvQnV34xTXmDn4BlVHhGszuiD7w9EW232xqvyKQQVKuMqe1-MBNSP2VpbIzRpuC_y2NyLZdjesbfaUBN


View attachment y4mXQ4tsKiih5X5sOar5XbzwVt6F7WH49K06N7b-4zrYF7R2KEJhcICGylmuO_ojbZ12QVudQk0injclldeVH0Jvd54WMA0NzdnNView attachment y4myDx1eQxll2f3_l9puw_k2k7rrrDFAFwc6wPkPJNW1rT8SaodNG4i1P3LhtDxxS8mGSPid4Kf7SEKfBqaukTo1r0MRpVK7P-jUView attachment y4mcgeSmaXPKp7-T6kZYERfCCrbY74ED9ArS0OD7wXbAawNaeyk1B35wVtmUFzcEyD79Ls3sb6fonIaqdNsh8tl-1EsqkH3AHFU3

I also got the seats installed. I found the front ones too high so I pulled out the tube that allows the seat to be raised and mounted the seats without. Looks like stadium seatin now with the passenger seats higher but I think it will work out pretty good. Now the passengers can see as well and with those being low backs the seat backs are the same height.
 
Last edited:

Candutch

Chief Petty Officer
Joined
May 8, 2015
Messages
637
Forgot to add that I completely covered the 1/8 inch aluminum skin with 5200 using a v notch trowel so it should be on there pretty good. All snuggled down through the existing bolt holes and clamps.
 

budski

Lieutenant Commander
Joined
Sep 12, 2012
Messages
1,845
That is nice, really great job on the transom, I like the way you brought the skin down for the main motor bolts.
 

oldhaven

Chief Petty Officer
Joined
Aug 30, 2015
Messages
576
Forgot to add that I completely covered the 1/8 inch aluminum skin with 5200 using a v notch trowel so it should be on there pretty good. All snuggled down through the existing bolt holes and clamps.

Nice job on that plate. I did a similar one and found that the clamps and bolts need to remain in place for a week or more to assure complete adhesion of the 5200, though I used the slow cure type. I started to remove clamps after a couple of days and saw some movement of the 1/8 plate due to a slight bow in the original skin, so I waited longer and now all is good.
 

dozerII

Admiral
Joined
Oct 25, 2009
Messages
6,527
Interior is looking awesome Rob, really good job on the transom skin it end all problems there.
 

Decker83

Commander
Joined
Apr 5, 2011
Messages
2,593
These ole boats sure shine up good..
Using all that 5200, that new skin has now become one with the transom..:hat:
 

Candutch

Chief Petty Officer
Joined
May 8, 2015
Messages
637
That is nice, really great job on the transom, I like the way you brought the skin down for the main motor bolts.

Thanks Budski, I honestly couldn't think of any other way to do it since the floor was already in.
 

Candutch

Chief Petty Officer
Joined
May 8, 2015
Messages
637
Nice job on that plate. I did a similar one and found that the clamps and bolts need to remain in place for a week or more to assure complete adhesion of the 5200, though I used the slow cure type. I started to remove clamps after a couple of days and saw some movement of the 1/8 plate due to a slight bow in the original skin, so I waited longer and now all is good.

Thanks OH, I would have made it similar to yours using the transom bracket to bolt the bottom of the skin but I didn't realize I could ne get at it until it was too late. I used the slow cure 5200 as well so I'll be waiting the week at least before I start removing bolts and clamps.
 

Candutch

Chief Petty Officer
Joined
May 8, 2015
Messages
637
Well the old boat got a chance to see the light of day for the first time since last summer. I pulled it out to wash it up in preparation for paint. Once I washed it I noticed that there were a bunch of areas that needed more feathering. After another hour of sanding and not getting good results I decided that the only way I would be happy is to strip it all off so painting is going to be held up for at least a couple of weeks now.

I did manage to get the front deck cut, installed the knee brace with the help of my boy, bilge pumps installed, starboard rod holder in, cable hole cut in splashwell, installed the cleats, bow rails, vhf, lowrance, vhf antenna and controls.
The switches and holder came in last week so I fit the holder into the dash and it turns out the switches didn't fit, I should have test fit that before I cut the hole in the dash. Then when I pulled the holder out I cracked the lexanšŸ˜ . I ended up drilling stop holes at the end of the cracks and using some diamond plate for a new holder that would cover the cracks.
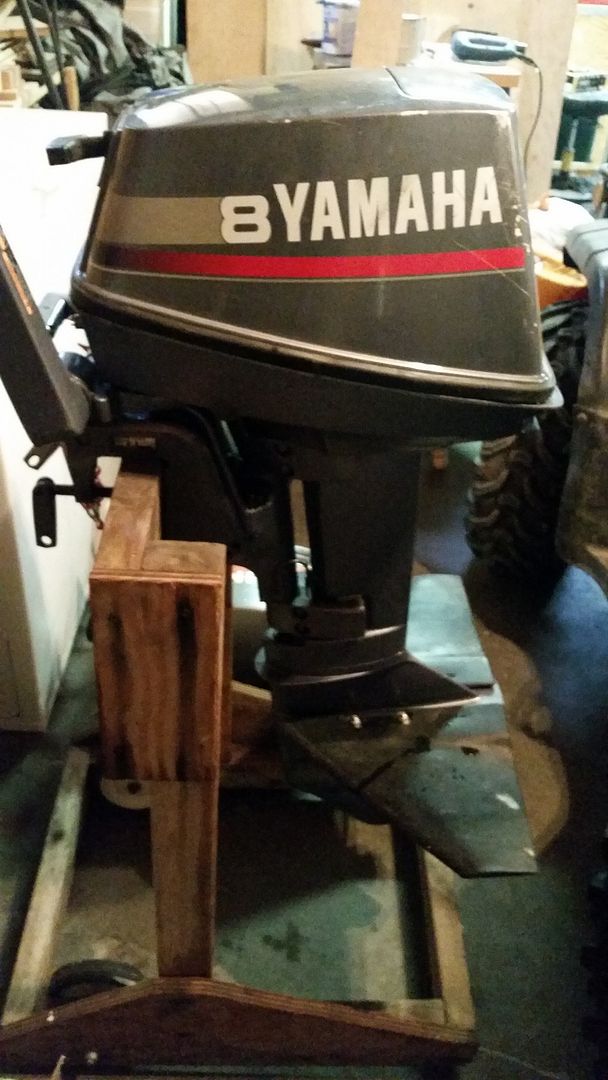
Thought I had a photo of that but guess not, will post one up later. I also scored on a new to me yamaha 8hp this weekend. It will serve as both the kicker for this and as the main on my inflatable. Now I have to clean up the 4hp mariner and sell it to recover some boat money.

 
Top