Well, finally able to post some updates and finally get back on here as often as I'd like. Had some work issues that took up all my time the past couple weeks and only got a few things done.
The first tall stringer is in place, along with the transom. I wanted to guy the boat entirely, but with a flimsy as it would be, I want to get both tall stringers in first before I entirely tub the hull so it holds shape better.
Transom went in without a hitch, and just had to get into the first tall stringer. The process I used was a follows:
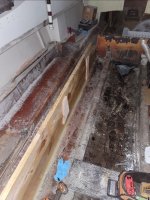
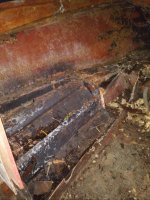
- cut out and cleaned stringer until bare hull
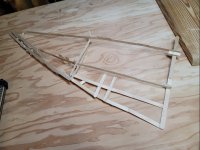
- mapped the stringer curves with popsicle sticks and hot glue.
- cut out stringer from southwest pine kiln dried lumber. Completely coated stringer lumber in resin until nice and heavy coated for waterproofing.
- due to the length of the boat, the stringer needed to be built in 3 sections (the cost, and sourcing unavailability in my area prevented us from going the pure plywood route). This means I have two areas where butt blocking/sistering needs addressed. One joint is midship, and the other is up near the first 3' of the stringer in the cuddy area. Surprisingly, the manufacturer just had 4 different sections SITTING in the stringer caps, with no blocks, no gluing together, and literally just dry butted up against each other. I suppose they were relying on the hulls strength more than they were the wood underneath the glass?
- adding the plywood sandwich sisters in the front is going to add around 60lbs to the front cuddy area of the boat. But, I figure it's STILL lighter than when this entire thing was waterlogged and mushy. So, I'll just have to factor that weight in. I don't think 60lbs should make or break anything. I just wanted the bow area of the sole to be rock solid due to crashing of waves and etc.
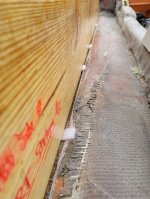
- I bedded the stringer on hairy PB, using little foam 1" squares about 1/8-1/4" thick as spacers to space it off the hull (I may or may not have accidentally forgot one or two of the spacers under the stringer, and they cured inside the resin)...

- I glued the butt ends of the three sections of stringer using hairy PB, and sistered them in place. The front section in the cuddy, I used an extra large 3/4" Marine Plywood designed sister on each side, and normal 2x10" butt blocks for the middle joint at midship at around a 1:3 ratio. That joint is going to be stronger than anything else in the boat FOR SURE...
- I kept the joints near where bulkheads are going to be, so I'd have extra support sideways as well, in addition to the butt blocks.
- After putting in the stringer, I glued the joint to the transom using thick hair PB, and the stringer feels strong as a rock!
- I then put the second tall deck support section on top of the stringer to gain full height deck support like the stringer originally had.
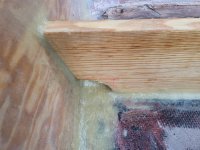
- I cut open a rear water drain channel against the transom at the floor of the sole of the boat, and made it a 3.5" round area. So, any water that makes it into in-between the outer stringer and gunwhale, can just run into the bilge via the transom area and get pumped out.
Next step is the stringer on the mirror side. Then, the hull will have enough fore to aft shape stiffness for me not to worry about the rest of the build by tubbing everything else out. THEN the fun begins and should go a lot quicker.
View attachment 351272
Spacing the stringer.
View attachment 351273
Transom connection and water drainage channel.
View attachment 351274
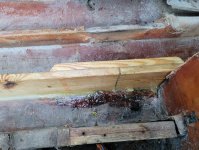
The midship stringer with one sister in place. Mechanically fastened with 12 screws as well as Hairy PB surfaces together. Rounded off the ends and edges to make filleting and laying glass easier.
View attachment 351275
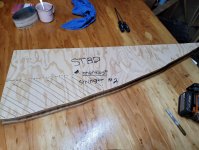
Front template for plywood sisters of the front of the stringer section.
View attachment 351276
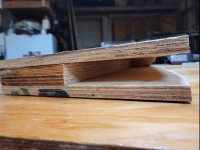
Plywood sisters. The lined marked area (with the diagonal lines) is where the stringer will be inserted into the sisters/where the sisters are sandwiching the stringer. Stringer will be in contact on 3 sides, because the top is going to also be connected via HairyPB for whatever little extra strength that may or may not provide.
View attachment 351277
Where the stringer will be inside the sisters.
View attachment 351279
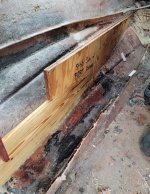
This is the front portion of the stringer without sisters yet. All bedded and resin'd in.
View attachment 351278
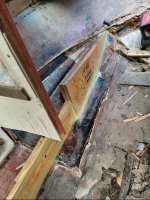
This is the front 3rd of the stringer, now with sisters in place. They are attached mechanically and with Hairy PB.
View attachment 351280
This is the deck support portion of the stringer. Bedded on top with Hairy PB and mechanical side supports will be removed when glassing in entirely. Everything is resin coated thus far and seems to be going good.
I can't believe how much support just one stringer have to the hull! It's just amazing how this thing even floated and was running the seas in the condition it was in!

I feel the new front stringer will be just fine, especially considering this was the original front stringer -
View attachment 351282
The original stringer...


