1980 Starcraft SS160 Restoration

66Holiday924

Chief Petty Officer
Joined
Aug 21, 2017
Messages
525
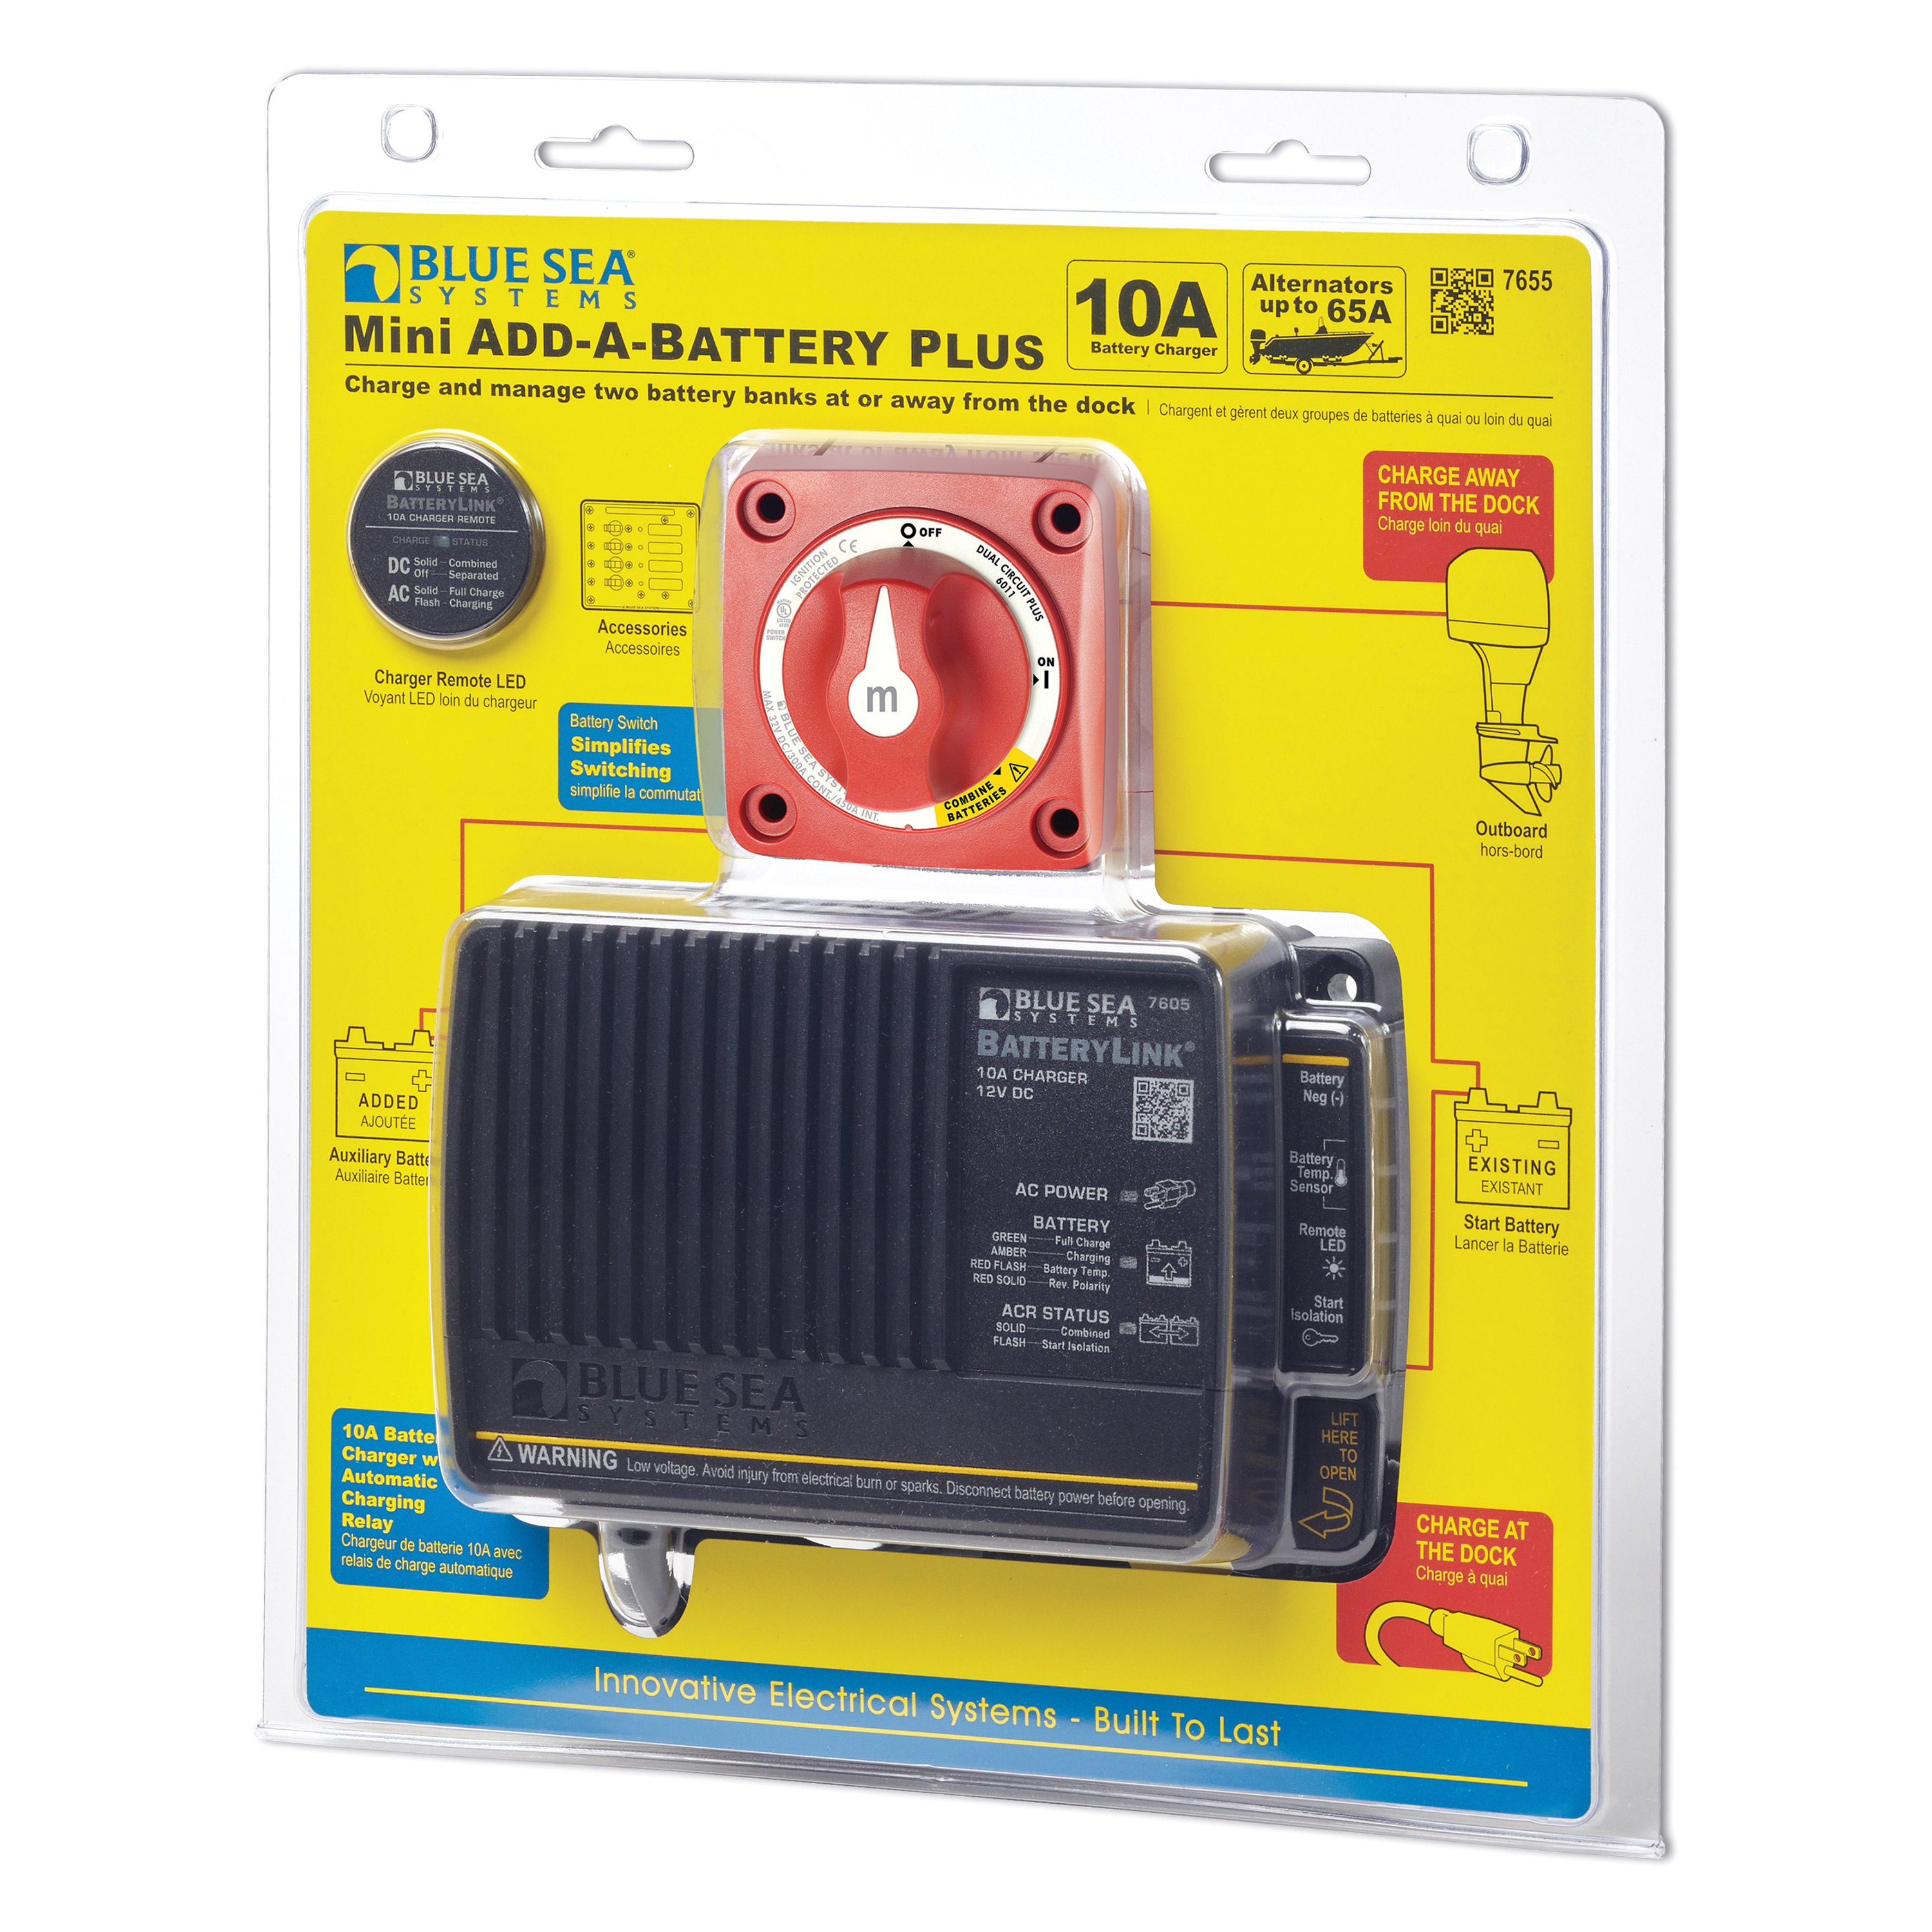
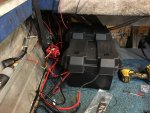
I'm saying, if you didn't have the trolling motor, your boat should be able to operate with no problem on one battery. You should be able to fish for hours listening to your radio, fish finder going, ship to shore on, and still be able to start your boat, no problem. Marine electronics don't use much power. So I'm saying a second battery just for the trolling motor.

If you want to do 3 batteries, I would have it set up so that the 3rd battery is easily accessible and taken on and off the boat whenever you use it to fish. I would keep the 3rd battery on a shelf in the basement, on a tender, otherwise there is no way to keep it charged. Unless you're docked and have shore power, your options are kind of limited. You could run an extension cord to the boat and keep a tender on it while it's trailered at your house, so all you have to do is unhook the tender and go... If you get a battery tender it will tell you if the battery is good too. It'll have a green light for good, amber for bad.
 
Last edited:

66Holiday924

Chief Petty Officer
Joined
Aug 21, 2017
Messages
525
Does your Add a Battery switch have the emergency function? It should have an option on the switch for emergency starts. In that position it draws from both batteries and should start your boat.
 

baldwibr

Petty Officer 2nd Class
Joined
Sep 1, 2017
Messages
128
Does your Add a Battery switch have the emergency function? It should have an option on the switch for emergency starts. In that position it draws from both batteries and should start your boat.

Yes, there is the combine feature. This is the switch I have as part of the Blue Sea Systems Mini Add-A-Battery Plus package.
7655.jpg


I know it seems like overkill, but I've almost been stranded with my father-in-law just running fish finders and fishing for 6 hours and it killed the starting battery. I also fish for walleye at night and will be running nav lights on top of the fish finders as well. I've replace the nav bulbs with LED bulbs and the gauge bulbs also with LED bulbs to help extend my battery life.

I'll have 2 on-board chargers. The two bank charger you see above for the starting and house batteries, and another single bank 10 amp charger for the trolling motor battery. I've installed a thru-hull outlet so I can just plug a 20 amp extension cord into the boat and it will power the two on-board chargers. I can plug it into my garage when parked there, or when I'm docked. No need to remove batteries.
 

baldwibr

Petty Officer 2nd Class
Joined
Sep 1, 2017
Messages
128
Worked on the boat some tonight. I got all the small wires on the battery charger/ACR hooked up to it. That's the negative, temp sensor, ignition isolation, and LED indicator output.

Battery Switch.jpg

I got a pull wire ran so I can tape a wad of wires to pull through my cable wrap up to the helm. That'll have to be another day.
 

Attachments

  • Onboard Charger.jpg
    Onboard Charger.jpg
    974.3 KB · Views: 2
  • wire.jpg
    wire.jpg
    848.3 KB · Views: 2
  • Wire Fuse table.jpg
    Wire Fuse table.jpg
    80.2 KB · Views: 2

66Holiday924

Chief Petty Officer
Joined
Aug 21, 2017
Messages
525
Sounds good. The through hull outlet sounds like a neat idea. I agree, and understand that whatever you do there's a certain level of safety that you must obtain to feel good about what you're doing. You definitely don't want to be stranded at night. Where are you fishing for walleye at night? Erie? I definitely understand that you don't want to be stranded in the dark. In that case I would probably have 3 batteries too. Your work is looking great, especially after tearing apart my birds nest of wiring yesterday... I definitely have a re-wire in my future. I'm contemplating two batteries but I don't really plan on going on Erie, much.
 
Last edited:

baldwibr

Petty Officer 2nd Class
Joined
Sep 1, 2017
Messages
128
I fish walleye on the St. Clair River in the spring and fall. I haven't fished Erie yet, but I'd like to try it at some point. I always see the monster perch and walleye people pull out of there. I'd like to get out on Lake Michigan to fish for jumbo perch this year.

Last night I was able to pull the wires that go from the aft to the helm using a 1" cable wrap. I ran them through the starboard gunwale and left the transducer wire to run alone along the main chine to prevent electromagnetic interference.

finsihed batteries.jpg
So now I have to wire up the fuel sender and the rear lights and try to tidy up the back end of the boat. It's time to start making a template for the instrument panel.
 

Attachments

  • steering placement.jpg
    steering placement.jpg
    903.3 KB · Views: 2
  • rear batteries.jpg
    rear batteries.jpg
    1 MB · Views: 2
  • rear wiring.jpg
    rear wiring.jpg
    1.3 MB · Views: 2

Watermann

Starmada Splash of the Year 2014
Joined
Jan 12, 2013
Messages
13,753
The battery ground is all you need, don't run grounds to the hull as each powered item gets it's own battery ground as does the motor.
 

Renderwurx

Petty Officer 2nd Class
Joined
Aug 14, 2017
Messages
189
Then I was able to get all the small wires up and out of the way. I also tucked the steering cable up out from view as well (more on this further down). I finished making my negative leads that will run from the negative bus bar to each of the batteries and to the hull so ground the hull.

As Watermann stated, there is no need to ground to hull, in fact, it's a VERY bad thing to do. I opens your hull up to galvanic corrosion. It's one of the major causes along with dissimilar metal contact and pressure treated wood.

The whole reason you have a negative bus bar is to create closed circuit wiring and negate the need for a ground system.

This is what grounding a hull can cause:

ZTCpD5g.jpg
 

baldwibr

Petty Officer 2nd Class
Joined
Sep 1, 2017
Messages
128
That makes sense. Thank you Watermann and Renderwurx for the explanation. Wasn't planning on terminating any of the connections to the hull but instead use negative bus bar. But most of the electrical diagrams I saw online (including the manual for my onboard charger) showed a ground. I will be sure not to ground the bus bar or anything to the hull. :thumb:

diagram.jpg
 

baldwibr

Petty Officer 2nd Class
Joined
Sep 1, 2017
Messages
128
I've made a decision!! I've decided to take the patience route and make the console faces from aluminum.

dash mockup.jpg

I took a sheet of 1/8" fiberboard to mock-up the dash layout and try it in place. The only hole saw size I didn't have was the tachometer size. Oh well. It's a good thing I did because the gauges on the left side were hitting the flange on the console, so the final design moved them in about 3/4". I also decided to move the steering wheel 3/4" closer to the gunwale as well.

dash design.jpg

So I traded my buddy some help cutting down some trees in exchange for him laser cut some dash faces and anodize them in black with a brushed finish. I'm hoping we'll be able to laser etch some switch labels too. It'll take a few weeks, but I think it's going to look slick.
 

Monmouth00

Petty Officer 2nd Class
Joined
Nov 26, 2017
Messages
198
So I traded my buddy some help cutting down some trees in exchange for him laser cut some dash faces and anodize them in black with a brushed finish. I'm hoping we'll be able to laser etch some switch labels too. It'll take a few weeks, but I think it's going to look slick.

If that's all it took, tell your buddy I'm pretty good with a chainsaw too.... I want a custom made dash, darnit!
 

Watermann

Starmada Splash of the Year 2014
Joined
Jan 12, 2013
Messages
13,753
Yeah I'll be looking forward to seeing the finished dash panel, sounds awesome.
 

baldwibr

Petty Officer 2nd Class
Joined
Sep 1, 2017
Messages
128
Well it was warm and sunny here in Michigan this weekend so I was able to pull the boat out and do a little work. Still waiting on an ETA for when the dash will be done, so I turned my attention to the aft of the boat.

impeller.jpg


fuel filler.jpg

Then I drill the holes and installed the fuel filler, tank vent and the thru hull fuel fitting. It was painful to drill holes in the hull, but it must be done.

thru hull fuel.jpg

I got a buddy coming over this week so I'll have an extra set of hands. I need to decide where and how I'll mount the interior lights. More to come.
 

Attachments

  • old impeller.jpg
    old impeller.jpg
    873.6 KB · Views: 4
  • lower unit 1.jpg
    lower unit 1.jpg
    964.1 KB · Views: 4
  • motor up.jpg
    motor up.jpg
    1.4 MB · Views: 4
  • lower unit 2.jpg
    lower unit 2.jpg
    1.6 MB · Views: 4

Watermann

Starmada Splash of the Year 2014
Joined
Jan 12, 2013
Messages
13,753
Forward progress and keeping the momentum up is the way to go. All those small jobs add up big time.
 

66Holiday924

Chief Petty Officer
Joined
Aug 21, 2017
Messages
525
Nice progress! I'm looking forward to seeing the custom dash. I know a lot of people and builders wire the bilge pump directly to the battery, so it is always working.
 

nrf414

Chief Petty Officer
Joined
Feb 16, 2008
Messages
573
Nice work baldwibr I really like the location you choose for fuel filler hardware. Mine was already in the splashwell not far from yours. Hoping I can fill the tank without climbing in the boat with a drippy fuel hose. You will be able for sure. 👍🏻
 

baldwibr

Petty Officer 2nd Class
Joined
Sep 1, 2017
Messages
128
Click image for larger version  Name:	raw dash.jpg Views:	1 Size:	1.43 MB ID:	10549004

So my buddy sent me a teaser picture. :D 
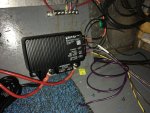
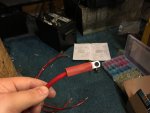
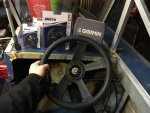
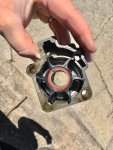
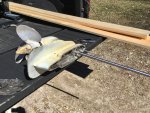
It still needs to get it anodized and labels etched, but it's progress!!

Click image for larger version  Name:	wiring.JPG Views:	1 Size:	1.95 MB ID:	10549005

So I got out in the boat for a couple hours and put together some wiring harnesses for the fuel sender and interior lights. Slow and tedious but it's steady progress.

Horn.jpg Also, I picked up a horn for the boat, but I'm wondering where the best place to put it is? Right up on the bow on the port side of the Nav lights? Or along the gunwale just in front of the windshield?
 
Last edited:

BWR1953

Vice Admiral
Joined
Jan 23, 2009
Messages
5,866
Hey, slow and steady can win the race! You're doing great! That dash is gonna look awesome.:joyous:
 
Top