1980 Starcraft SS160 Restoration

BWR1953

Vice Admiral
Joined
Jan 23, 2009
Messages
5,866
So I've been going back and forth about whether to make the new console faces machining 1/4" aluminum and having them anodized, or do build them from wood.

The anodized aluminum would look slick and last forever, but it really wouldn't tie into anything else on the boat, unless I were to also machine some other accent parts for around the boat to match.

On the other hand, my father rebuild his console faces last year using a bamboo wood and sealed using an outdoor urathane. I think this also looks pretty sweet and I can make some matching bamboo step pads and other accents to match. Thoughts? Opinions?


And I'm gonna suggest going with the aluminum dash, but painted to blend with the rest of the boat. I'm seriously considering doing that instead of using wood on my Kingfisher.
 

66Holiday924

Chief Petty Officer
Joined
Aug 21, 2017
Messages
525
Nice progress. My vote is for the bamboo and using whatever is necessary to make it as low maintenance as possible.
 

Watermann

Starmada Splash of the Year 2014
Joined
Jan 12, 2013
Messages
13,753
To each his own, if you're into the wood look that's great.I'm not into the look but I can really appreciate when something is done well.

I decided to put the tilt switch on my SS up in the SW starboard side rather than the motor, didn't want to bore holes and run wires into the old Merc.
 

baldwibr

Petty Officer 2nd Class
Joined
Sep 1, 2017
Messages
128
I decided to put the tilt switch on my SS up in the SW starboard side rather than the motor, didn't want to bore holes and run wires into the old Merc.

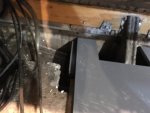
I checked it out on your post and that's not a bad idea. I'll have to see if that's a better option for me.
 
Last edited:

nrf414

Chief Petty Officer
Joined
Feb 16, 2008
Messages
573
Definitely a good idea to have one accessible somewhere near stern of boat. I'm also going to put one up at bow so when I'm trolling I don't have to leave my seat to raise or lower motor.
 

Decker83

Commander
Joined
Apr 5, 2011
Messages
2,592
I really like the look of the bamboo your father did.. I have seen a lot of great looking consoles here on I-boats.
I would do some research and see what you like and then customize it to your liking. You are the one who will be sitting behind the wheel looking at it.
 

baldwibr

Petty Officer 2nd Class
Joined
Sep 1, 2017
Messages
128
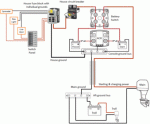
So I have been trouble finding a wire diagram to charge 3 batteries from the same engine. I bought a Blue Sea Add a Battery kit which comes with an ACR to charge the starting battery and a house battery. I have another battery that runs my 12v MinnKota Powerdrive trolling motor that I thought would be nice to allow the alternator to charge that one as well. I could only find the diagram below but this configuration doesn’t allow the alternator to charge the trolling motor battery.

7EA2A5D9-31F2-4B26-8A9E-159CA2537844.gif

I was thinking about adding another manual battery switch at the house battery positive side so I could select either the house battery or the trolling motor battery to be selected by the ACR to be charged. Thoughts or other solutions?

Is it even worthwhile to have the alternator charge the TM battery? I figure it’d allow me to fish a little longer if I’m out for a while at a time if I really wanted to without risking a dead battery. Thoughts?
 

baldwibr

Petty Officer 2nd Class
Joined
Sep 1, 2017
Messages
128
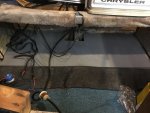
Although it was a busy weekend, I still found a little time to cut my rear floor boards that needed to be replaced. I cut them out of the remaining 3/4" marine ply I had left over from the transom. I had to do it in 2 pieces since I didn't have a single piece long enough. I gave them several coats of an oil based exterior paint. I figured this should hold up enough until I replace the entire floor in the future.

Click image for larger version  Name:	first_floor.jpg Views:	1 Size:	851.9 KB ID:	10541548

image_285696.jpg

Speaking of bilge pump, the listing for the pump I bought said the outlet was 3/4". Well, it was actually 1 1/8" so that's being returned while I ordered another one.

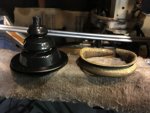
I also picked up this rubber boot for the splashwell to help keep water out and make it look a little neater- even though it's lipstick on a pig at this point. Better than the only piece of RV water hose that was there before!

Click image for larger version  Name:	rubber_boot_sw.jpg Views:	1 Size:	892.7 KB ID:	10541547

Finally, I figured I better start planning my instrument panel so I get it started since most of the electrical work revolves around having this installed. I'm going to try to go back to the original panel size on both sides. I also ordered LED replacement bulbs for all the gauges and Nav lights to reduce power consumption.

Still need to figure out the trolling motor battery issue on the previous post so if you have thoughts or ideas, let me know.
 

Attachments

  • first_floor.jpg
    first_floor.jpg
    851.9 KB · Views: 4
Last edited:

Watermann

Starmada Splash of the Year 2014
Joined
Jan 12, 2013
Messages
13,753
I know what you're thinking with the batteries and it sounds like a good idea. Just remember that the stator on your 70 probably maxes out at 9 amps at WOT. That would take quite some time to charge a drained TM battery but would obviously add some power to it but not like a 90 amp car alternator.

Guess what I'm saying is I'm not sure it's going to work out very well for the trouble and expense.
 

baldwibr

Petty Officer 2nd Class
Joined
Sep 1, 2017
Messages
128
The motor manual I have says it's a 10 amp alternator, so you're right, it probably wouldn't do much.

motor manual.jpg
 

baldwibr

Petty Officer 2nd Class
Joined
Sep 1, 2017
Messages
128
So I took Watermann idea of the trim switch on the side of the splashwell. I got it all spliced in using some butt splices creatively.


trim wiring.jpg

So next on the list is to do the main batteries wiring.
 

Watermann

Starmada Splash of the Year 2014
Joined
Jan 12, 2013
Messages
13,753
Wow that looks like 12 ga primary wire to the switch! 16 may even be overkill for the TnT switch wiring. I think the main power from the battery to the relays is 12 or 10 ga. Does your set up not have separate relays for the TnT?
 

Renderwurx

Petty Officer 2nd Class
Joined
Aug 14, 2017
Messages
189
I noticed the same thing. Looks like he is running power straight to the TnT motor and bypassing the relays. It's a LOT of current to be running through a switch.

Dangar Marine on Youtube has an excellent video about this stuff... and even shows how to make your own remote TnT switch complete with relays.

https://www.youtube.com/watch?v=T0Vf7mSUlUY
 

nrf414

Chief Petty Officer
Joined
Feb 16, 2008
Messages
573
I noticed the same thing. Looks like he is running power straight to the TnT motor and bypassing the relays. It's a LOT of current to be running through a switch.

Dangar Marine on Youtube has an excellent video about this stuff... and even shows how to make your own remote TnT switch complete with relays.

https://www.youtube.com/watch?v=T0Vf7mSUlUY

Good stuff. Inspired me last year to really take my time with Electrical. Watched most of his vids
 

baldwibr

Petty Officer 2nd Class
Joined
Sep 1, 2017
Messages
128
Wow that looks like 12 ga primary wire to the switch! 16 may even be overkill for the TnT switch wiring. I think the main power from the battery to the relays is 12 or 10 ga. Does your set up not have separate relays for the TnT?

Yeah, the unit is pretty old, There are no relays on it. The 10-3 goes straight to the motor. It is what it is at this point. Would it be worth spending the money on relays?
 

Watermann

Starmada Splash of the Year 2014
Joined
Jan 12, 2013
Messages
13,753
Watch the video Renderwurx posted to see if you want to go that route, but yeah that's a bunch of current to run through the switch. So what do you have to trim the motor from the helm?
 

66Holiday924

Chief Petty Officer
Joined
Aug 21, 2017
Messages
525
Does your add a battery kit have the sensor in it? The Blue Seas kits I've seen have a sensor that will always keep the primary battery charged so you can always start your boat. If you run the trolling motor off the house battery and it dies, you can start your boat and recharge it? The specs for the trolling motor should tell you how many hours you can get off what battery. Your other electronics combined don't use very much.

I don't think you need three batteries. I don't think they would design the trolling motor like that. They know we run radios and fish finders, and I'm sure they design the motor with that in mind
 
Last edited:

baldwibr

Petty Officer 2nd Class
Joined
Sep 1, 2017
Messages
128
Watch the video Renderwurx posted to see if you want to go that route, but yeah that's a bunch of current to run through the switch. So what do you have to trim the motor from the helm?

I have a switch built into the throttle lever on the control box. It has the 12ga ran all the way to it.

wAAACH5BAEKAAAALAAAAAABAAEAAAICRAEAOw==
​​

66Holiday924 The battery kit has a sensor in it (automatic charging relay) and it does charge the starting battery first. Once it senses a full charge on the starting battery, it will switch to a second battery, normally your house battery. I could connect this side of the charger to the trolling motor battery instead of the house battery, but to Watermann 's point, it would take a while at 10A charging (at wide open throttle) to recharge the battery. It also doesn't charge until the motor is above 1000 RPM.

So I’d rather have a battery specifically to drain on the trolling motor which would leave the starting battery for the engine and a house battery to still operate lights, fish finders, etc. This will leave the option of another power source should the starting battery fail or need an extra power boost (I can combine the batteries using the switch). That way I won’t get stranded out on the lake or have my nav lights too dim in the dark. I'd rather fish with no trolling motor than no lights or fish finder/navigation. Plus, I already have the 3 batteries.
 
Top