1979 Starcraft 16’ SS Refresh

Moserkr

Chief Officer + Starmada Splash Of The Year 2021
Joined
Nov 23, 2020
Messages
835
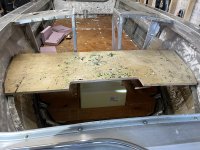
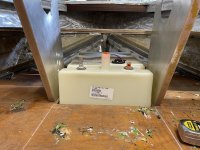
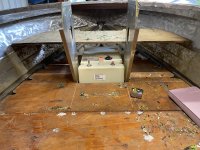
Gotcha! Thanks. Never heard of those before but i like those too. I will have to look into that for my seat bases. For now, going to see where the tank lands then figure it out. Should have plenty of time with all the AL fabricating i will have to do.

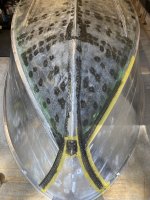
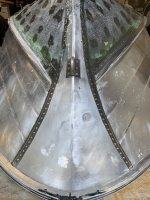
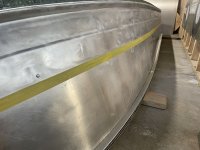
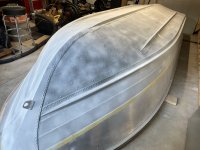
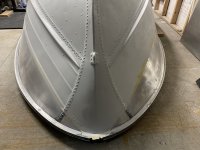
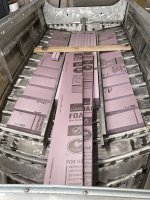
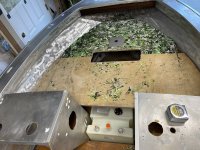
I did get another 1/3 of the puttying done, so that makes 2/3 done! Will do the other 1/3 early tomorrow and hopefully sand em all down by days end. Trying to move fast but the learning curve slows me down usually. Will update again tomorrow!
 

Moserkr

Chief Officer + Starmada Splash Of The Year 2021
Joined
Nov 23, 2020
Messages
835
Live update!!

Final putty on the SW, gunnels, and consoles is drying. Will sand that down later this afternoon!

While I did putty, my Dad cut a bunch of foam for under the floors! Hopefully I have enough in there. He didnt want to stuff outside the 2 center stringers with triangle pieces because of time/effort it would take, so we settled on squares and rectangles instead. It leaves more dead space but thats ok. I will easily use 2 full 2”x4’x8’ sheets, and will have to get one more to do under the gunnels and the bow area when i get to those steps. Estimating that to be 12+ cubic feet of floatation.
 

Attachments

  • B0A6A009-161D-4F2E-9A9C-C9F3DE165E02.jpeg
    B0A6A009-161D-4F2E-9A9C-C9F3DE165E02.jpeg
    2.3 MB · Views: 10
  • 9B9C9E94-2A1B-4C83-A53E-46A1090EA067.jpeg
    9B9C9E94-2A1B-4C83-A53E-46A1090EA067.jpeg
    1.9 MB · Views: 11
  • 09143956-30B4-4AF1-BC8A-521CDE667161.jpeg
    09143956-30B4-4AF1-BC8A-521CDE667161.jpeg
    2.1 MB · Views: 13
  • 6FFEA68A-6525-4B7B-8CAC-70E66695946D.jpeg
    6FFEA68A-6525-4B7B-8CAC-70E66695946D.jpeg
    1.9 MB · Views: 12
  • 547A0597-EBE4-461D-AAD3-15D57A149254.jpeg
    547A0597-EBE4-461D-AAD3-15D57A149254.jpeg
    1.7 MB · Views: 12

Moserkr

Chief Officer + Starmada Splash Of The Year 2021
Joined
Nov 23, 2020
Messages
835
Ended the day with a lot of foam done, and half the floors prepped for install tomorrow. When we first tried to fit the floors, we found out the PO had made the floors 2” too wide. They went past the chine and rested on whatever that out-dent is after it lol. So when the floors screwed down before, they never touched the ribs and had to bow inwards to touch the center stringers! A little measuring, a circular saw, and we cut the floors to fit properly. Then drilled a bunch of holes so that they actually attach to each rib, not half of them... Laid some new epoxy on the cut edges and any holes or spots that needed attention. Install should be fairly easy tomorrow. After that, Id like to flip the boat and paint the bottom unless Im missing something else.

Thanks for stopping by n have a good weekend! Another update coming tomorrow 😎
 

Attachments

  • 159C8D13-1A77-4CD4-954A-88F22762FFDB.jpeg
    159C8D13-1A77-4CD4-954A-88F22762FFDB.jpeg
    4.5 MB · Views: 9
  • 0ECDD3B3-46DF-4721-A41F-15EAFBF3396B.jpeg
    0ECDD3B3-46DF-4721-A41F-15EAFBF3396B.jpeg
    4.1 MB · Views: 9
  • 38431BAE-6937-4746-B356-EA41B8C8AF30.jpeg
    38431BAE-6937-4746-B356-EA41B8C8AF30.jpeg
    2.9 MB · Views: 9
  • 089C1EDF-BB22-4F61-BD8E-D0853E357593.jpeg
    089C1EDF-BB22-4F61-BD8E-D0853E357593.jpeg
    1.8 MB · Views: 9

SHSU

Lieutenant Junior+Starmada Splash Of The Year 2019
Joined
Mar 8, 2017
Messages
1,665
Move along!!

How are you going to secure the flooring? Counter sunk rivets covered with epoxy or just leaving them exposed?

SHSU
 

Moserkr

Chief Officer + Starmada Splash Of The Year 2021
Joined
Nov 23, 2020
Messages
835
Yes sir!!! Having my Dad here was a huge help. Would have taken me all weekend to do what we did in one day. 16 man hours today...

Floor will be secured with the LF rivets, not counter-sunk. Could have sunk them in but the LF heads are so low profile, and the hydroturf is 6mm thick foam. Even if you feel the rivet heads it will be minimal, plus i like the idea of being able to find them easily if I need to take out the floors for some reason. Also less work lol.

I will be coating them in 5200 before setting them in to make sure water stays out. The flooring was in good shape so Im happy there. Looking forward to having floors and the outside painted!!
 

Moserkr

Chief Officer + Starmada Splash Of The Year 2021
Joined
Nov 23, 2020
Messages
835
Half the floors are in!!! (Covered in white sealant) The rest of the wood that the consoles sit on and gas tank sits between, foward to the bow, are just being test fitted. Really like how the gas tank sits and i have lots of room to work with. All the PO’s wood floors were too wide so everything has been modified. Need to decide whether to paint first or finish the lowest floor level out to the front before i roll it over. Still need to sand all the putty too but making progress!!! The admiral was happy to see the progress and my first mate was playing all over the newly installed decks 😁
 

Attachments

  • 144BB2E3-6D0B-410B-9C12-0C0943694FBE.jpeg
    144BB2E3-6D0B-410B-9C12-0C0943694FBE.jpeg
    2.4 MB · Views: 22
  • 94B642DB-7187-4B29-802D-EA878ABC90DA.jpeg
    94B642DB-7187-4B29-802D-EA878ABC90DA.jpeg
    3.2 MB · Views: 22
  • 1A6C21B9-6918-41CB-831B-236F170CC0AE.jpeg
    1A6C21B9-6918-41CB-831B-236F170CC0AE.jpeg
    2.2 MB · Views: 17
  • B7F7B2CA-3678-474D-AA43-ADC8CF3EED2F.jpeg
    B7F7B2CA-3678-474D-AA43-ADC8CF3EED2F.jpeg
    4.5 MB · Views: 15
  • D531E81E-A5B4-482B-BA62-4DA40F8BA319.jpeg
    D531E81E-A5B4-482B-BA62-4DA40F8BA319.jpeg
    3.9 MB · Views: 15
  • 90A0EC02-E5E2-4B3D-A7A2-33942F068942.jpeg
    90A0EC02-E5E2-4B3D-A7A2-33942F068942.jpeg
    1.4 MB · Views: 16
  • DDE543A1-C5B5-44A0-8C69-5256D986E741.jpeg
    DDE543A1-C5B5-44A0-8C69-5256D986E741.jpeg
    4.1 MB · Views: 21
  • 6CF01045-D42D-48EA-97E3-06324494BF70.jpeg
    6CF01045-D42D-48EA-97E3-06324494BF70.jpeg
    3.5 MB · Views: 20
  • 130829EA-C3BA-42DA-9582-472BA3ED27B7.jpeg
    130829EA-C3BA-42DA-9582-472BA3ED27B7.jpeg
    3.3 MB · Views: 18
  • 832AAAE6-6694-4E23-818D-FF67D3683DF4.jpeg
    832AAAE6-6694-4E23-818D-FF67D3683DF4.jpeg
    3.7 MB · Views: 15
  • D3FACCEA-3075-4973-B660-9786ACB48AB6.jpeg
    D3FACCEA-3075-4973-B660-9786ACB48AB6.jpeg
    1.8 MB · Views: 13
  • 38A0BDBB-F420-4191-9FD0-06F4766417FB.jpeg
    38A0BDBB-F420-4191-9FD0-06F4766417FB.jpeg
    3.6 MB · Views: 20

SHSU

Lieutenant Junior+Starmada Splash Of The Year 2019
Joined
Mar 8, 2017
Messages
1,665
Really like that fuel tank build, any pictures showing support below? Looks like you got plenty of room for the piping. That would have been a lot cheaper if I could have done a permanent front deck and used a similar method design.... But happy Admiral is a happy ship!!!

SHSU
 

Moserkr

Chief Officer + Starmada Splash Of The Year 2021
Joined
Nov 23, 2020
Messages
835
Thanks! No pics of the support because it doesnt exist yet. The fuel tank was just resting directly on the ribs, but i have been thinking about the support system. I was just setting it up to see how it looks, and to make sure my measurements werent way off!! I do have ~3” above the fill/feed for lines, and ~6” from the tank body to the casting deck floor. Benefit to the belly tank would be even more room though, but it just worked out that it was cheaper for me and the boat already had a casting deck. Also nice that the fuel tank is surrounded by one solid piece of floor. I do like having a lot of fuel over the belly tanks though.

Last few days have been spent sanding, cleaning, organizing, and prepping. Goal is to continue that until saturday when I can hopefully paint the bottom! My friend did come over today for a few cold ones and we flipped the boat. Before that i got the extra transom sheet prepped, then installed it and the transom with a few bolts. Figured it added structure for the flip, which went well. Floor and transom definitely added a little weight though. Should have taken more pics today but it was a grind with all my normal work plus boat work.

Little nervous about painting but just going to do it and hope for the best lol. Have looked at some different methods and feel most comfortable with a good old fashioned paint brush. I did paint houses for a bit and have done random projects. So, will follow the roll/tip method in @Woodonglass ‘s post, except brush not roll. Brush/tip? Lol. Wish me luck haha. Going to prep a bunch, write down my mixes/plan, and go slow with thin layers. If it looks half as good as his I will be happy.
 

Attachments

  • 4E44C2BB-CB38-4896-85CC-44FF0989ECDE.jpeg
    4E44C2BB-CB38-4896-85CC-44FF0989ECDE.jpeg
    1.8 MB · Views: 20
  • EB4F3C4E-C46A-4E29-94A8-262564C584F5.jpeg
    EB4F3C4E-C46A-4E29-94A8-262564C584F5.jpeg
    2.1 MB · Views: 19
  • E9A1C6C3-E411-4454-9C5E-2F0E239820D2.jpeg
    E9A1C6C3-E411-4454-9C5E-2F0E239820D2.jpeg
    2.7 MB · Views: 21
  • CCCBAFD2-041B-4C16-B159-9273F7F55EFD.jpeg
    CCCBAFD2-041B-4C16-B159-9273F7F55EFD.jpeg
    1.9 MB · Views: 20

ShoestringMariner

Lieutenant Commander
Joined
Apr 18, 2015
Messages
1,563
Sitting in the boat right now, seats removed. Gas tank and auxiliary battery are out, as well as some foam and other boards. Gas tank was fun getting out being half full (9 gal) - used a skateboard to get it outside and into the gravel. Not sure what to do with the remaining fuel but given that the tanks all rusted, I wouldnt run it so maybe i will carefully add it to some burn piles. Going to start labeling my rats nest of wires so I can pull the main battery and the consoles out tonight. Dont mind the crazy wires - all will be replaced if needed and many are spliced together so... If that goes well I may even have the floors out too!! Better go on a beer run quick so i am motivated to work more haha. Admiral is having her cousin and sister/nephew over so Im better off out in the garage. Will give a live update here in a bit once my taste buds are satisfies. Admiral took a look and is excited too!! Even said she will polish the windshield frame... 😃
Love that banjo wheel!!!

how do you feel about the flooring? (Traction and product quality, not color) I think I saw similar product used on tiny boat nation. It comes in a teak pattern. Could be kind of cool for my next project
 

Moserkr

Chief Officer + Starmada Splash Of The Year 2021
Joined
Nov 23, 2020
Messages
835
@ShoestringMariner I loved the flooring (minus the color) so much so that I am doing it again! I guess its called hydroturf. Im convinced its all made in the same factory overseas, so i got the unnamed “knock off” version from the big online jungle retailer. I made sure to get it from a place I could return it to if it didnt meet expectations. The new flooring I got is the teak pattern like you are wanting. I think its looks great. Its 6mm thick foam so its super comfy to walk on and I like to be barefoot on my boat. Lots of traction with it - actually hoping to have a little extra for a few traction pads on my gunnels and bow. Durability is great too - i have dogs on my boat and did not notice any tears or punctures in the old green stuff from it. The only thing that hurts it is gasoline - it will bubble up. But its closed cell so once it dissipated I stapled down that section and it went back to normal. Closed cell also means it adds floatation and doesnt absorb water. I could wash out my boat with a hose and it would be dry in minutes. Cant wait to get it in!! Most guys do the vinyl on here and I didnt like that. Only vinyl on my boat will be the seats and side padding. So far I have not seen a starcraft rebuild that uses it which is surprising to me! Hydroturf was originally used on jetskis. Its actually a big thing to use camo colored hydroturf in duck hunting boats!! If its tough enough for guys like me duck hunting, then its tough enough for anything...
 

Attachments

  • 5B5799D4-A1EF-40CD-B79E-049A8FCA8E8A.jpeg
    5B5799D4-A1EF-40CD-B79E-049A8FCA8E8A.jpeg
    3.9 MB · Views: 6
  • C1118759-347D-4C78-87AD-202C0ED0D9DE.jpeg
    C1118759-347D-4C78-87AD-202C0ED0D9DE.jpeg
    1.8 MB · Views: 6

ShoestringMariner

Lieutenant Commander
Joined
Apr 18, 2015
Messages
1,563
@ShoestringMariner I loved the flooring (minus the color) so much so that I am doing it again! I guess its called hydroturf. Im convinced its all made in the same factory overseas, so i got the unnamed “knock off” version from the big online jungle retailer. I made sure to get it from a place I could return it to if it didnt meet expectations. The new flooring I got is the teak pattern like you are wanting. I think its looks great. Its 6mm thick foam so its super comfy to walk on and I like to be barefoot on my boat. Lots of traction with it - actually hoping to have a little extra for a few traction pads on my gunnels and bow. Durability is great too - i have dogs on my boat and did not notice any tears or punctures in the old green stuff from it. The only thing that hurts it is gasoline - it will bubble up. But its closed cell so once it dissipated I stapled down that section and it went back to normal. Closed cell also means it adds floatation and doesnt absorb water. I could wash out my boat with a hose and it would be dry in minutes. Cant wait to get it in!! Most guys do the vinyl on here and I didnt like that. Only vinyl on my boat will be the seats and side padding. So far I have not seen a starcraft rebuild that uses it which is surprising to me! Hydroturf was originally used on jetskis. Its actually a big thing to use camo colored hydroturf in duck hunting boats!! If its tough enough for guys like me duck hunting, then its tough enough for anything...
That’s awesome. Can’t wait to see how it turns out. I picked up Nautolex for my project. I find it can be a little slippery.
I guess you have to be a little careful with the gasoline. But I think you’re putting in a gas tank anyway?
 

Moserkr

Chief Officer + Starmada Splash Of The Year 2021
Joined
Nov 23, 2020
Messages
835
I cant wait either!! Haha. I didnt want nautolex mainly because its not padded, and the Admiral and I like the “teak” look. Slippery would be even worse. I am putting in a below deck gas tank and having the fill/vent on the gunnel. I was going to do hydroturf all the way down the gunnel but didnt want it around my fuel fill. So it will be well protected from spills. My last fuel tank sat on the hydroturf under the splashwell and it was old n rusty so gas leaked through a hole in it lol. Lesson learned but thats ok - replacing everything anyway.
 

Moserkr

Chief Officer + Starmada Splash Of The Year 2021
Joined
Nov 23, 2020
Messages
835
Been sanding and prepping all week! Mostly ready, just picked up the last few items for painting including majic reducer. Really hoping I dont mess it up!! Today I finished the majority of the sanding, and put coat-it on all the rivets I replaced. Now every rivet is coated inside and out!! I still have some coat-it left that will be used to seal up the transom once its installed before I paint the inside. I did use some coat-it all the way up the bow seams and tested taping it off with frog tape. It work surprisingly well! Glad i got it for painting as Ive had paint go through the blue tape before. Tomorrow will be the final prep, and saturday is the big day 😳
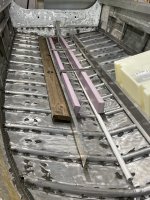
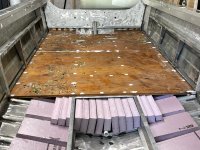
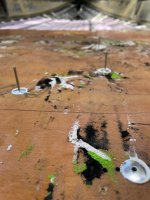
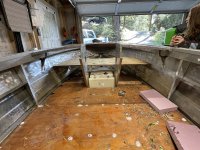
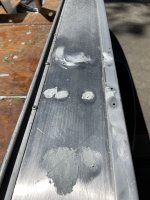
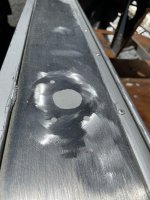
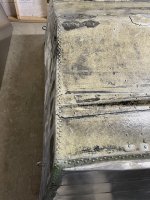
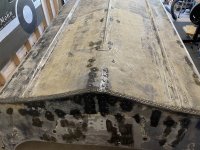
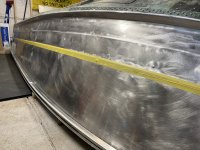
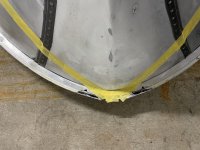
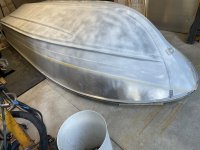
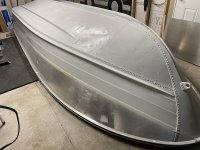
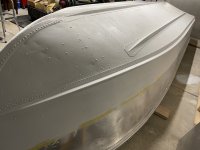
. I did notice tons of dents and a few scratches in the bottom of the hull. She will never be smooth and purtty down there so just hoping the paint sticks well lol. Will take pics and update in a few days!!
 

Attachments

  • 39BD9FE9-F48F-4567-90AA-2C4B8C931828.jpeg
    39BD9FE9-F48F-4567-90AA-2C4B8C931828.jpeg
    2.4 MB · Views: 17
  • 2A8DC7BF-92D7-4C35-8C67-3213360FDDE4.jpeg
    2A8DC7BF-92D7-4C35-8C67-3213360FDDE4.jpeg
    2.8 MB · Views: 17
  • C73CB094-F0E8-46C9-BB68-FC6E7F1D9DFB.jpeg
    C73CB094-F0E8-46C9-BB68-FC6E7F1D9DFB.jpeg
    2.4 MB · Views: 17

SHSU

Lieutenant Junior+Starmada Splash Of The Year 2019
Joined
Mar 8, 2017
Messages
1,665
Just remember we are our own greatest critics. Once in the water, nobody will see the bottom. Leave mistakes and runs to dry if already started. Come back when they are truly cured (Not just dried), sand it smooth and paint over if needed.

You will do great. If not, I don't mind being a chair manager again. :D

lol

SHSU
 

Moserkr

Chief Officer + Starmada Splash Of The Year 2021
Joined
Nov 23, 2020
Messages
835
Thanks @SHSU Just finished the final sand, wash, vinegar spray, and now its taped. Having a beer while it dries well, then its getting primer today! First, spraying rattle can aluminum etching primer. Then instructions on the actual primer can say prime and let dry overnight. I believe the woodonglass method is prime, wait 2-4 hrs, then paint. Going to follow instructions on the can, and dry overnight. Temp and humidity is perfect - 70* at 36%. I just want it to stick lol. Dont care about runs much but with a brush I will get most of them. One benefit to having the whole hull covered in coat-it is that there are no gaps for excess water or paint to hide. Everything is dry, sealed and fairly smooth. Spent 4 hours sanding and cleaning. Hoping it pays off. Beers about empty so here goes nothing lol.
 

Attachments

  • 014925F3-744F-4D2C-84E1-B30F399C4D08.jpeg
    014925F3-744F-4D2C-84E1-B30F399C4D08.jpeg
    4.3 MB · Views: 7
  • FCA2AB8A-2E24-438A-AEC5-DA592FF6F376.jpeg
    FCA2AB8A-2E24-438A-AEC5-DA592FF6F376.jpeg
    5.2 MB · Views: 7
  • 742FAF80-DE08-438A-B039-5F0C66026721.jpeg
    742FAF80-DE08-438A-B039-5F0C66026721.jpeg
    4.7 MB · Views: 7
  • 2561BE83-FFDA-48D9-9DC5-7E80D03582CF.jpeg
    2561BE83-FFDA-48D9-9DC5-7E80D03582CF.jpeg
    4.2 MB · Views: 7

Moserkr

Chief Officer + Starmada Splash Of The Year 2021
Joined
Nov 23, 2020
Messages
835
K wobbly pop numero dos. Self etching primer has been down for around 20 min. Starting to stir normal metal primer. All primer is rustoleum.
 

Attachments

  • 58D377EE-5474-4462-9F78-9536614A98FC.jpeg
    58D377EE-5474-4462-9F78-9536614A98FC.jpeg
    3.6 MB · Views: 4
  • 70ECA170-4664-4BCE-8488-AD2BF8DFCD8D.jpeg
    70ECA170-4664-4BCE-8488-AD2BF8DFCD8D.jpeg
    3.3 MB · Views: 4

Moserkr

Chief Officer + Starmada Splash Of The Year 2021
Joined
Nov 23, 2020
Messages
835
One coat of primer is on. Took more than I thought and went on thicker than I was hoping for, so next time will thin with mineral spirits per the optional directions. May do another tomorrow, may not. Looks very well covered and seems to be sticking well. See y’all tomorrow for paint!
 

Attachments

  • 7D5F69D6-2253-4936-8E82-1FCB0B7CDC8A.jpeg
    7D5F69D6-2253-4936-8E82-1FCB0B7CDC8A.jpeg
    4.4 MB · Views: 7
  • 13C8E4CF-70B3-4190-8AAD-A65CFD087FF2.jpeg
    13C8E4CF-70B3-4190-8AAD-A65CFD087FF2.jpeg
    4.2 MB · Views: 7
  • 977B93DC-0AF7-44FE-BF14-44602A4A11D8.jpeg
    977B93DC-0AF7-44FE-BF14-44602A4A11D8.jpeg
    3.9 MB · Views: 7

ShoestringMariner

Lieutenant Commander
Joined
Apr 18, 2015
Messages
1,563
One coat of primer is on. Took more than I thought and went on thicker than I was hoping for, so next time will thin with mineral spirits per the optional directions. May do another tomorrow, may not. Looks very well covered and seems to be sticking well. See y’all tomorrow for paint!
Looking good!
 

Watermann

Starmada Splash of the Year 2014
Joined
Jan 12, 2013
Messages
13,753
Sounds more relaxed than my crazed mad man all in one day paint jobs. LOL

One thing I would do is get that boat up off the ground, I laid the 16'r over tables draped in drop cloth. Also more lighting will help too.
 

Moserkr

Chief Officer + Starmada Splash Of The Year 2021
Joined
Nov 23, 2020
Messages
835
Thanks @Watermann Was definitely not relaxed lol, but feeling better today. Not pictured were 2 rechargeable bright LED dual COB lights, and they definitely provide enough light. Ill get a pic with them on once the first coat of paint is on. Would have liked to have the boat higher up but I lack the tools needed to do it - no heavy duty enough tables or saw horses. Its tight and low but doable. I was planning on doing an all day paint marathon today, but when reading the primer can it said dry overnight. Paint cans say let primer dry 24 hrs... Leave it to the same manufacturer (rustoleum) to have conflicting instructions lol. Woodonglass’s method said 2-4 hrs but he is in the florida heat during his painting, where Im in the mountains. So i am waiting for the temps to rise just a hair and the spots where the primer was slightly thicker to dry more.

I read a post yesterday where you said you wouldnt use rustoleums aluminum primer because its urethane based. Well... too lte now - its under my main primer so i hope it holds lol. Put it on the coat-it and bare aluminum sides. Ran out so I will get actual SE primer for the rest of the boat.

I can see paint brush strokes in the primer and its due to me not knowing that when using the tip method, to use a DRY brush lol. I just used the same wet brush. Oh well, its actually pretty smooth to the touch. I went over the primer with the LED light and some 320 grit sandpaper to knock off any nubs sticking up. Will wipe down with acetone and mineral sprits mix before painting. Only focused on the visible sides - the bottom of the boat has dents and patches of coat-it all over it so its about as smooth as a wooden roller coaster lol. Going to let that be. But the sides do look decent.

I also picked up a small 4” roller this morning with some quality smooth rollers, and will try the roll/tip method for the paint. Mainly it just goes faster than the brush, but I think now that I know to tip with a dry brush, i should have less brush marks. Wish me luck!! At least it seems to be sticking well which was my main concern. The rest I can live with and so far no runs!! Just a few spots on the bottom had a little too much primer but the sides look great 😁.
 
Top