1979 Starcraft 16’ SS Refresh

Moserkr

Chief Officer + Starmada Splash Of The Year 2021
Joined
Nov 23, 2020
Messages
869
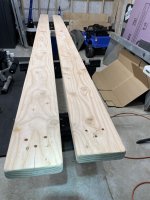
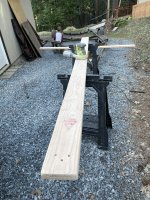
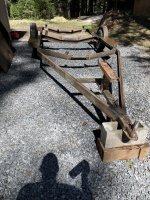
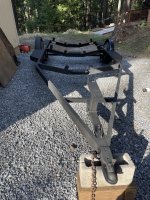
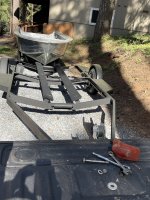
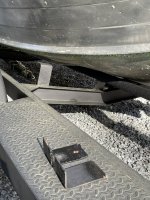
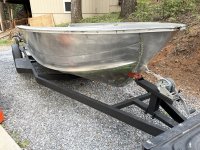
Had a busy weekend with family n friends so not a whole lot of progress unfortunately. Coated the new bunk boards with some spar and prepped the trailer for paint. Brushed a bunch of rust spots off, took off all the lights, and scraped old stickers off. Just needs a pressure washer bath, then ill hit it with spray paint. Not doing anything special beyond that for paint. Hoping to have the boat on it by the end of the week and then ill get back to working on the boat.
 

Attachments

  • 3F8424B3-E93C-4020-8AC4-30998E0F3A8B.jpeg
    3F8424B3-E93C-4020-8AC4-30998E0F3A8B.jpeg
    1.7 MB · Views: 3
  • 015087F8-D740-41EA-85EC-71C5A23771D6.jpeg
    015087F8-D740-41EA-85EC-71C5A23771D6.jpeg
    3.7 MB · Views: 3

SHSU

Lieutenant Junior+Starmada Splash Of The Year 2019
Joined
Mar 8, 2017
Messages
1,724
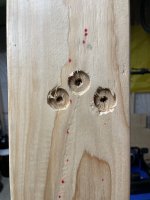
I am guessing you are countersinking the bolt heads?

SHSU
 

Moserkr

Chief Officer + Starmada Splash Of The Year 2021
Joined
Nov 23, 2020
Messages
869
I am guessing you are countersinking the bolt heads?

SHSU
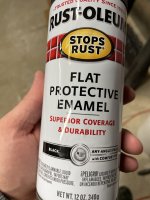
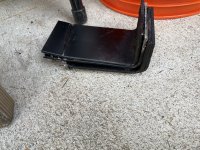
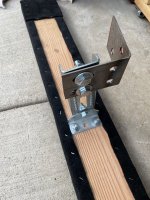
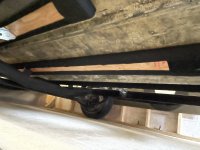
Absolutely!! Ive seen what exposed bolts do to the bottoms of these poor tin boats. The new old trailer had screws into unsealed wood, and they were so rusted i cut half off with the grinder. But other than where the bunks attach, she had very little rust and its mainly a surface rust - patina? - that im going to cover with a flat black enamel from rustoleum. Same with the boat, hoping whatever i paint can easily be touched up.

Any tips of how to access the bolts once i glue/staple the carpet on? Last bunks i built had brackets, and these new ones have to bolt directly to the trailer. So far my thought is just cut a slit for access with a socket, and then seal it back up with some 5200 or glue.
 

Attachments

  • E2C55456-AF32-4A55-B7D2-369216C18EFF.jpeg
    E2C55456-AF32-4A55-B7D2-369216C18EFF.jpeg
    2 MB · Views: 0
  • D1EE6512-06AE-4CCE-926B-C93A7094C11D.jpeg
    D1EE6512-06AE-4CCE-926B-C93A7094C11D.jpeg
    1.6 MB · Views: 0

Moserkr

Chief Officer + Starmada Splash Of The Year 2021
Joined
Nov 23, 2020
Messages
869
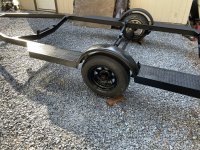
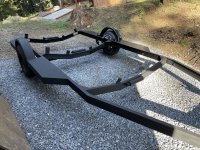
Was able to wash and paint the new old trailer today! I think it turned out pretty good and really didnt try to make it “perfect”. It will do. The admiral showed her approval so thats what counts the most! Even my first mate was happy to help paint it haha. Heres the before/after shots. Took 4 cans of paint to mostly finish and i need one more for touch ups. Will try to get 2/4 bunks on tomorrow, and hopefully the lights and other 2 bunks shortly after. Boat could be on it very soon!!
 

Attachments

  • 7EBB3F79-ED80-4186-8E5D-EBE6BC42B33E.jpeg
    7EBB3F79-ED80-4186-8E5D-EBE6BC42B33E.jpeg
    4.1 MB · Views: 16
  • 222E22CF-76E8-4332-B585-AC0C204D42B7.jpeg
    222E22CF-76E8-4332-B585-AC0C204D42B7.jpeg
    3.7 MB · Views: 16
  • 62EB2210-7C14-4A6D-A9EA-4AB9DEDAF29E.jpeg
    62EB2210-7C14-4A6D-A9EA-4AB9DEDAF29E.jpeg
    4.1 MB · Views: 17
  • 09AE5EAE-7CF3-4A07-9A71-61F8F1E5610F.jpeg
    09AE5EAE-7CF3-4A07-9A71-61F8F1E5610F.jpeg
    3.9 MB · Views: 17

SHSU

Lieutenant Junior+Starmada Splash Of The Year 2019
Joined
Mar 8, 2017
Messages
1,724
Is it just me or are the tires slopped inward at the bottom?

As for the bolts, can you use a carriage bolt or something similar?

SHSU
 

Moserkr

Chief Officer + Starmada Splash Of The Year 2021
Joined
Nov 23, 2020
Messages
869
@SHSU Good info on the carriage bolts! Just 6 hours too late for one bunk lol. Bought some for the other.

As far as the wheels go, the pics definitely make it look off. The left tire in the pics (passenger) is perfectly straight. The right tire in the pics (driver) is just slightly off it seems, but the wheel well cover around it isnt perfectly straight either so... i need to get it on my flat driveway and off the rocks to really find out. Ill take a tape measure to it. The axle is beefy and looks straight as an arrow. We shall see probably tomorrow when I pull the boat onto the trailer in the driveway. Working on the second bunk and then lights right now.

If it is bent, whats the fix??
 

Moserkr

Chief Officer + Starmada Splash Of The Year 2021
Joined
Nov 23, 2020
Messages
869
Did a little HW regarding the wheel possibly being slightly bent inwards. If it doesnt sit flat with weight on it, as sometime axles are manufactured to do that, then its bent. Not worried if i have to take a BFH or saw/welder to it, but we will see how it goes. If tire wear is excessive, then I will know for sure.

Got the other center bunk on so shes looking more like a boat trailer! The carriage bolts were not any easier than the regular bolts, but i didnt have to cut the bunk carpet so that was good. Wish I could have gotten to the lights too but just didnt have time so that will happen tomorrow. Hoping to be able to test fit the boat and outer bunks tomorrow if all goes well. Also have to finish burn piles and get my normal work done too so no shortage of $/:! to do. Will try to post daily project updates until she is done!!

Going to go meet with the boys today who bought my old boat, give them some extra pieces I have left over from my build, and talk to them about what they want to do with their boat. I offered to help them fix up theirs once im done with mine. Mainly help em seal their transom n floor, make aure everythings solid, and wire some lights for safety/duck hunting. Should be fun!
 

Moserkr

Chief Officer + Starmada Splash Of The Year 2021
Joined
Nov 23, 2020
Messages
869
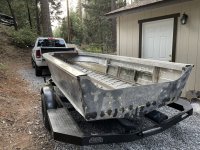
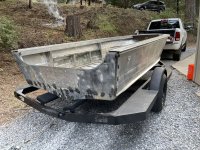
Put a bit of work in today, leap-frogging the boat onto the new trailer. Have to say I am stoked how it turned out so far!! One major issue was the welded outside bunk brackets - they would have scraped the hull if I didnt remove them... so a few batteries on the angle grinder later, no more outside brackets. They will be replaced by adjustable brackets, hopefully tomorrow. I never got the trailer wired though, turns out the original lights I ordered were junk. Ordered some better quality ones instead.

Plan for tomorrow is attach the new outside bunks, and move the winch post/boat back 8” on the trailer so it sits properly. Then if I have time, attach and drill out the transom holes. Moving along... 😎
 

Attachments

  • 590C157A-5D25-45F7-B32C-38D19279F081.jpeg
    590C157A-5D25-45F7-B32C-38D19279F081.jpeg
    2.3 MB · Views: 24
  • 12BA82A7-3EF7-4EBA-A91C-76FD62110B8D.jpeg
    12BA82A7-3EF7-4EBA-A91C-76FD62110B8D.jpeg
    2.1 MB · Views: 25
  • C7EE61B5-2D7D-4D66-A135-714146BC93BA.jpeg
    C7EE61B5-2D7D-4D66-A135-714146BC93BA.jpeg
    5.4 MB · Views: 24
  • 28DFFFCF-5067-4ECA-931F-035C136DBCF1.jpeg
    28DFFFCF-5067-4ECA-931F-035C136DBCF1.jpeg
    6.2 MB · Views: 22
  • A00D6CDF-89FD-490D-96CE-11F54526C8A6.jpeg
    A00D6CDF-89FD-490D-96CE-11F54526C8A6.jpeg
    5.8 MB · Views: 21
  • C0E935DD-DE94-4AD5-9BE7-C3A7C824B15D.jpeg
    C0E935DD-DE94-4AD5-9BE7-C3A7C824B15D.jpeg
    5.6 MB · Views: 23
  • F914D573-E559-4ABE-A1AB-EF18707517A9.jpeg
    F914D573-E559-4ABE-A1AB-EF18707517A9.jpeg
    1.8 MB · Views: 24

Moserkr

Chief Officer + Starmada Splash Of The Year 2021
Joined
Nov 23, 2020
Messages
869
One day, 3 items on the list down. Outside bunks are on the trailer and that was the big ticket. Also moved the winch post and boat back 8” so it sits on the trailer right. Last, added the jack (yesterday) so I can move the trailer easier. Been racing weather all day so happy to have everything done on the trailer except the lights and axle. Did not get many pics but hard to see regardless so will take some later. She is way more stable and supported now with 36 feet of 6” wide bunks to rest on.

Tomorrow will be raining with a chance of snow, so the boat is taking up the whole garage on its new trailer. Luckily the trailer has nice side steps and sits so low, I can move around it much better. Sits lower than I thought it would so it made adding the outside bunks interesting. I know the brackets are not made to be used like that but it works for now. Plan of attack will be add the few braces i have left and to see if I can get transom holes drilled. Keeps getting kicked down the road!
 

Attachments

  • 87F5B852-2B08-4E74-A4D8-BD1C78CE7B1B.jpeg
    87F5B852-2B08-4E74-A4D8-BD1C78CE7B1B.jpeg
    4 MB · Views: 14

Watermann

Starmada Splash of the Year 2014
Joined
Jan 12, 2013
Messages
13,787
I really like this trailer set up, that's what I look for in my new ones too low slung bunk with side steps by the fenders. (y) Large full size wheels and tires are nice to have too. :)
 

Moserkr

Chief Officer + Starmada Splash Of The Year 2021
Joined
Nov 23, 2020
Messages
869
@Watermann Absolutely! The low slung wide trailer is where its at. Overkill for the boat but looks good and holds her so nice. Should ride well too. New lights came in and look good so thats on the list again this week.

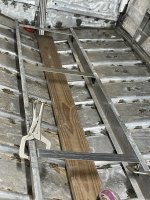
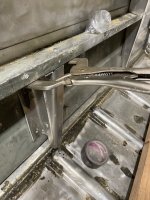
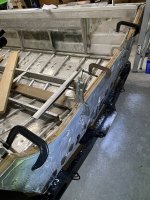
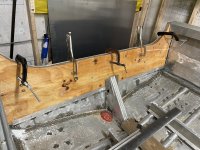
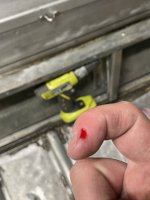
Another day in the shop working yielded some decent results! Put in my braces between the 2 center stringers. Then finished the brackets on my gunnels. Everything is much more solid with just a little flex. Almost sent a drill bit under my nail too but glad it missed! Wont make that mistake 3 times haha.

Finally got to drilling the holes out in my transom! Only got halfway done though because I ran out of time and we had dinner reservations. Wont take me long to finish though. This next week will be a challenge to get what I want to do completed. Goals are: finish drilling transom, wash boat, patch holes with putty. Then if theres time start adding foam and floors!! Ive been pushing towards painting so my list is getting shorter fast. I like seeing pieces go from the pile to being installed. Staying on track is a grind but motivation is high. Have a great week guys! Will update again when more gets done.

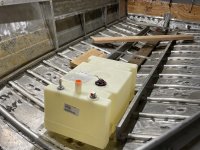
Set the gas tank in there for fun and to get ideas. I have a decent plan in mind for its installation. Will elaborate once I get closer to its time.
 

Attachments

  • EF7B5DE6-B9CF-491B-82A6-C563197A850D.jpeg
    EF7B5DE6-B9CF-491B-82A6-C563197A850D.jpeg
    1.9 MB · Views: 23
  • 5DB87B02-5550-4D14-8423-25DB0AE875CC.jpeg
    5DB87B02-5550-4D14-8423-25DB0AE875CC.jpeg
    1.8 MB · Views: 22
  • 1F46EB65-FDA1-453C-9D0B-99E3B901B3AF.jpeg
    1F46EB65-FDA1-453C-9D0B-99E3B901B3AF.jpeg
    1.1 MB · Views: 24
  • 08D3C5B2-AC49-4C82-864C-A92CBF745BEF.jpeg
    08D3C5B2-AC49-4C82-864C-A92CBF745BEF.jpeg
    2.6 MB · Views: 24
  • 3DFDC62E-51CC-4392-90BC-A151406C02BE.jpeg
    3DFDC62E-51CC-4392-90BC-A151406C02BE.jpeg
    5.2 MB · Views: 23
  • A69E6AB4-0B02-48A6-A913-39DCC5D0A792.jpeg
    A69E6AB4-0B02-48A6-A913-39DCC5D0A792.jpeg
    3.7 MB · Views: 25

SHSU

Lieutenant Junior+Starmada Splash Of The Year 2019
Joined
Mar 8, 2017
Messages
1,724
Looking good, what you planning for support under the fuel tank?

SHSU
 

Moserkr

Chief Officer + Starmada Splash Of The Year 2021
Joined
Nov 23, 2020
Messages
869
@SHSU Thanks! Just got the transom completely drilled out today and cleaned out the boat for its bath tomorrow.

For the fuel tank, I need to keep it as low as possible since I only have a few inches of clearance on top. All the supports and base plate will be made from the same 1/8” AL sheet that Ive used for the rest of the project. Right now im thinking of using a sheet cut to the size of the bottom of the fuel tank, with a middle support underneath tied into the ribs for support. This main support sheet under it would have strips of neoprene for it to rest on. Then brackets along the front and rear holding it from sliding, also padded with neoprene, and straps holding it down. Should allow me to remove it then if needed too. The gas tank supports and installation will come after paint and half the decks/foam being installed, up to the consoles.

Not sure if anyone noticed, but plans did change when it came to reinforcing the hull. I mainly focused on the gunnels knowing i walk on them and will have downriggers attached. My chine rivets were all perfect and I put her through abuse last year with most of her structure compromised so im not sweating skipping that part. I believe big water and bigger boats are more subject to failure there, or user error being in water beyond the boat’s capabilities. I will still tie the gunnel wood and deck together, and reinforce a lot of other above deck areas, hopefully acting like a lesser version of chine reinforcement. If i do run into issues then there will just another tear down and rebuild... I recently went through your build again @SHSU and I dont believe you did any chine reinforcement, so unless i missed something, that was part of my decision not to do that extra work. Also the interest of time... i would have been set back a few weeks to get that done.

Steps before paint:

Starting tomorrow I will get the boat washed and prepped for the putty to fill holes. Lots of PO mounting holes to fill... Will also do a second round of coat-it to cover a few rivets I missed and some holes getting the putty.

After that its foam and decks! If Im lucky I will get that done before the weekend. My deck wood is already sealed so its mainly foam and then making sure the decks are sealed to my standards. Some holes in the deck need filling from where I took out the PO’s screws that held it in before. Its all new 3/4” cdx and was epoxied so im feeling good about that install coming up!
 

SHSU

Lieutenant Junior+Starmada Splash Of The Year 2019
Joined
Mar 8, 2017
Messages
1,724
For the fuel tank, I need to keep it as low as possible since I only have a few inches of clearance on top. All the supports and base plate will be made from the same 1/8” AL sheet that Ive used for the rest of the project. Right now im thinking of using a sheet cut to the size of the bottom of the fuel tank, with a middle support underneath tied into the ribs for support. This main support sheet under it would have strips of neoprene for it to rest on. Then brackets along the front and rear holding it from sliding, also padded with neoprene, and straps holding it down. Should allow me to remove it then if needed too. The gas tank supports and installation will come after paint and half the decks/foam being installed, up to the consoles.
You are thinking along what I was thinking for support. Biggest thing is that center brace. Properly secure that to prevent it from bouncing would be a concern from me.

Other thought on it is straps you are going to use, how many and where? I ask because (If I remember correctly) the 18 gallon tank will be about ~113 lb filled, so not something you want shifting on you during a hard acceleration or deceleration.

Not sure if anyone noticed, but plans did change when it came to reinforcing the hull. I mainly focused on the gunnels knowing i walk on them and will have downriggers attached. My chine rivets were all perfect and I put her through abuse last year with most of her structure compromised so im not sweating skipping that part. I believe big water and bigger boats are more subject to failure there, or user error being in water beyond the boat’s capabilities. I will still tie the gunnel wood and deck together, and reinforce a lot of other above deck areas, hopefully acting like a lesser version of chine reinforcement. If i do run into issues then there will just another tear down and rebuild... I recently went through your build again @SHSU and I dont believe you did any chine reinforcement, so unless i missed something, that was part of my decision not to do that extra work. Also the interest of time... i would have been set back a few weeks to get that done.

You are correct, I didn't, but don't think it was suggested either at the time on the SS16s.

SHSU
 

Moserkr

Chief Officer + Starmada Splash Of The Year 2021
Joined
Nov 23, 2020
Messages
869
Starting at the very bottom, was actually thinking of using the original small center stringer as the center fuel tank support. I would just cut it way down, bend the top back to a Z, and rivet it to the AL bottom plate. The bottom plate would cover the whole base of the fuel tank and tie into the 2 center stringers, as well as the ribs. Id use AL to brace the front and back too so it cant slide.

For the straps, I was thinking I could do 2 small ratchet straps, across where moeller made indents for them. What the strap hooks to on the boat, Im not sure of yet. Something solid so the weight doesnt tear it apart lol. You were very close, its 19 gallons so I estimated it around 125 lbs. I guess I could build 2 AL brackets that would hold it down and be secured with bolts to make it removable. The fuel tank has the 4 tie down points on the side for the moeller kit thats only $20. Im guessing that would be sufficient if they make it for it so a third option? Kinda guessing here so open to suggestions.

I wont know exactly where the tank sits until I get the floors done up to the console area. Id like to paint the bottom at that point too before I get the fuel tank in.

Im comfortable right now with not adding chine braces just based on my own experience. If its highly recommended now then I may consider it. But with 10% of my rivets compromised prior to the resto, not one of the chine rivets took damage, even when i purposefully hit large wakes/chop hard to see if I could find weak rivets. Looking back, not a smart idea as it probably broke good rivets too, but it certainly was a test.
 

Moserkr

Chief Officer + Starmada Splash Of The Year 2021
Joined
Nov 23, 2020
Messages
869
Well... should have ordered a rub rail a LONG time ago... figured it would only take a few weeks like their website says from wefco. Way off. Order is placed but they are behind by 6-8 week!! So I wont have a rub rail for probably a few weeks after my potential splash date... or it will be close. Oh well. Not going to sweat the small stuff. If anyone needs a rub rail I would order one now too!!
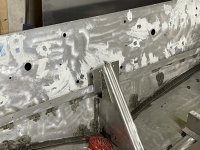
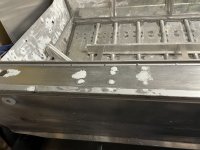
Using my lunch time to go spray down the holes that need to be filled with some vinegar water. Its already nice and clean from the wash yesterday, just want maximum adhesion. After that will let it dry and sand it later today or tonight. Going to put a very thin aluminum backer plate on all the holes, held in place temporarily by duct tape. Hoping that gives it enough reinforcement and lets the putty adhere in the hole as well as to the AL plate. Some holes on the transom will be covered in coat-it too after they have cured and been sanded. Originally I was going to do rivets with a backer plate but I dont have the space for that with my transom wood being so tight. Will see how well it works or if I need to go to plan B.
 

SHSU

Lieutenant Junior+Starmada Splash Of The Year 2019
Joined
Mar 8, 2017
Messages
1,724
I would agree that Moeller's strap points will be fine, its figuring out where on the boat that you will secure it that has me interested. Depending on your flooring, you might be able to do t-bolts through the plywood. I would stay away from anything just "screwed" for the amount of weight it will be.

SW
 

Moserkr

Chief Officer + Starmada Splash Of The Year 2021
Joined
Nov 23, 2020
Messages
869
I’m guessing you meant u-bolts? I like that idea. Would be much more secure going to the floor. Will probably have the one in front go to the wood floor, the one in back will have to go to the stringer? Not sure where else it could go. May not be an issue. Will know soon exactly where it will sit and whats around it. Floor will be 3/4” cdx with a coat of epoxy and LF rivets holding it down.

Was able to get some putty done today. Will have to finish tomorrow. May try to sand what i did today, I remember something about it being really hard to do of you wait too long? Ill check it n if it feels right, Ill get it done. Goal is to do a little coat-it by weeks end, then this weekend... Dad will be in town over the weekend so that will be a big help with foam/floors!!
 

Moserkr

Chief Officer + Starmada Splash Of The Year 2021
Joined
Nov 23, 2020
Messages
869
Forgot slow drying photos... I was lucky enough to have minimal corrosion. Worst spots were on the transom, and only 2-3 were the size of a pinhead that went halfway through the hull.
 

Attachments

  • 276E35B2-B23F-473E-8CE9-94361C2C8D6D.jpeg
    276E35B2-B23F-473E-8CE9-94361C2C8D6D.jpeg
    2.6 MB · Views: 19
  • 13AA6EF2-D7A6-4B9B-8AE4-67CA09BCDDC7.jpeg
    13AA6EF2-D7A6-4B9B-8AE4-67CA09BCDDC7.jpeg
    2.9 MB · Views: 20
  • 387CB5AC-119E-4A01-AC57-E4A933C37EAD.jpeg
    387CB5AC-119E-4A01-AC57-E4A933C37EAD.jpeg
    2.5 MB · Views: 20
  • 95BA2748-1E6A-4FFE-8447-7E365024F39D.jpeg
    95BA2748-1E6A-4FFE-8447-7E365024F39D.jpeg
    4.1 MB · Views: 20

SHSU

Lieutenant Junior+Starmada Splash Of The Year 2019
Joined
Mar 8, 2017
Messages
1,724
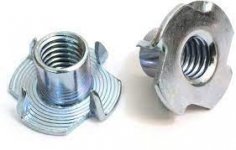
I like the U-bolt idea better. The T-nuts are used to provide a "nut" that you can't get to. Used them for the seat bases.


download.jpg


SHSU
 
Top