1978 Starcraft Tri-Hull Rebuild Project

monnewbie3

Petty Officer 3rd Class
Joined
Sep 12, 2011
Messages
90
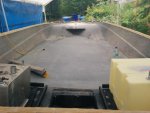
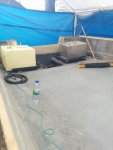
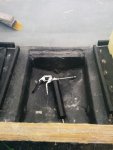
After lots of sanding we started the 2nd layer of CSM (with 6oz on top for finish)
XZkNyR6.jpg

jqAlKAZ.jpg

Started clean up (with acetone)...Still Lots of dust to clean up from the 8 hours of the sanding prep work (60 Grit Flap + Grinder and 60 Grit + Orbital sander).
FKze4DD.jpg


I threw some Evercoat Skid No More on, I'll head back up tonight to see how the adhesion is going, if all is good then I'll carry on.. If not I'll have to sand off the No Skid and start prep all over.

More to come.

-M
 

Woodonglass

Supreme Mariner
Joined
Dec 29, 2009
Messages
25,928
Uhmm it appears you're using West System 105 epoxy. Do you realize it's not necessary to use CSM or 1708 with Epoxy? The epoxy contains NO styrene which is necessary to break down the fibers in the CSM. CSM adds almost nothing in strength to your boat. You'd be much better off just using a 6 to 8oz fabric on your deck and using a 50" width instead of the narrow widths.
 

monnewbie3

Petty Officer 3rd Class
Joined
Sep 12, 2011
Messages
90
Uhmm it appears you're using West System 105 epoxy. Do you realize it's not necessary to use CSM or 1708 with Epoxy? The epoxy contains NO styrene which is necessary to break down the fibers in the CSM. CSM adds almost nothing in strength to your boat. You'd be much better off just using a 6 to 8oz fabric on your deck and using a 50" width instead of the narrow widths.

Thanks for the reply.

And yes you are correct.. however the 2 layers of CSM + Epoxy is for strength in terms of people dropping things on my deck and water tightness.
The 1708 gives the deck alot of strength combined with the marine foam etc.

For my Purpose I believe the Epoxy + CSM is a better choice (flat surface so it doesn't need to conform for bends and curves, I'm content with it being suspended in the epoxy), though it is about 3x the cost.

-M
 

DerekG

Seaman
Joined
Mar 22, 2014
Messages
50
Just checking in on the progress. Its looking great so far! Once the floor is in the major part is over and it really starts feeling like a boat again instead of an endless project. Excited to see how things finish up.
 

monnewbie3

Petty Officer 3rd Class
Joined
Sep 12, 2011
Messages
90
Just checking in on the progress. Its looking great so far! Once the floor is in the major part is over and it really starts feeling like a boat again instead of an endless project. Excited to see how things finish up.

Hey Derek,

She's almost done.. Just have to do some interior work, I'll try to mass upload the photos today.

Cheers
 

monnewbie3

Petty Officer 3rd Class
Joined
Sep 12, 2011
Messages
90
No Title

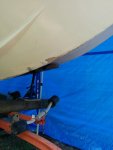
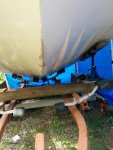
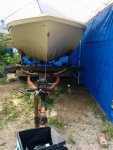
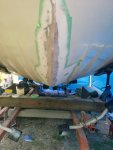
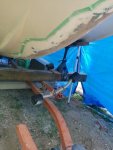
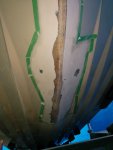
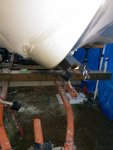
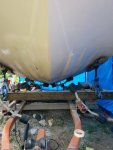
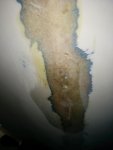
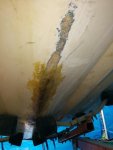
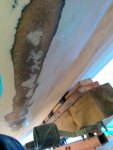
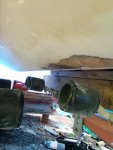
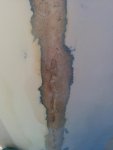
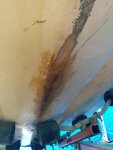
Had to get the boat lifted up to start grinding out the Keel Damage..
 

Attachments

  • photo208288.jpg
    photo208288.jpg
    40.8 KB · Views: 0
  • photo208289.jpg
    photo208289.jpg
    34.2 KB · Views: 0
  • photo208290.jpg
    photo208290.jpg
    32.8 KB · Views: 0

monnewbie3

Petty Officer 3rd Class
Joined
Sep 12, 2011
Messages
90
No Title

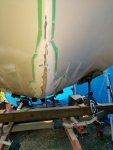
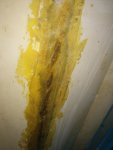
Grinded out the Damage and Layed up 4 Layers of glass (1st: 1.5oz CSM, 2nd: 1708 Biax, 3rd and 4th: 1.5oz CSM)
 

Attachments

  • photo208291.jpg
    photo208291.jpg
    39.2 KB · Views: 0
  • photo208292.jpg
    photo208292.jpg
    35.8 KB · Views: 0
  • photo208293.jpg
    photo208293.jpg
    31.1 KB · Views: 0
  • photo208294.jpg
    photo208294.jpg
    39.6 KB · Views: 0

monnewbie3

Petty Officer 3rd Class
Joined
Sep 12, 2011
Messages
90
No Title

Gel Coated... Color is off... But I'll be painting the boat next season
 

monnewbie3

Petty Officer 3rd Class
Joined
Sep 12, 2011
Messages
90
No Title
 

Attachments

  • photo208295.jpg
    photo208295.jpg
    48.5 KB · Views: 0
  • photo208296.jpg
    photo208296.jpg
    37.1 KB · Views: 0

monnewbie3

Petty Officer 3rd Class
Joined
Sep 12, 2011
Messages
90
No Title

started some rear repairs... these were deep... in one spot it took 8 layers of glass to bring it back, the damage was almost all the way through.
I didn't take the gel coat repair because of how awkward it was under the boat between the axle shaft and trailer.
 

Attachments

  • photo208298.jpg
    photo208298.jpg
    43.5 KB · Views: 0
  • photo208299.jpg
    photo208299.jpg
    46.2 KB · Views: 0
  • photo208300.jpg
    photo208300.jpg
    41 KB · Views: 0
  • photo208301.jpg
    photo208301.jpg
    39.4 KB · Views: 0
  • photo208302.jpg
    photo208302.jpg
    40.9 KB · Views: 0
  • photo208303.jpg
    photo208303.jpg
    31 KB · Views: 0
  • photo208304.jpg
    photo208304.jpg
    40.1 KB · Views: 0

monnewbie3

Petty Officer 3rd Class
Joined
Sep 12, 2011
Messages
90
No Title

Getting ready to put the top cap on, finishing up a few small things
 

Attachments

  • photo208305.jpg
    photo208305.jpg
    34.2 KB · Views: 0
  • photo208306.jpg
    photo208306.jpg
    29.9 KB · Views: 0
  • photo208307.jpg
    photo208307.jpg
    36.9 KB · Views: 0
  • photo208308.jpg
    photo208308.jpg
    29.8 KB · Views: 0

monnewbie3

Petty Officer 3rd Class
Joined
Sep 12, 2011
Messages
90
No Title

With the top cap on we installed the Keel Guard..
 

Attachments

  • photo208309.jpg
    photo208309.jpg
    20.3 KB · Views: 0
  • photo208310.jpg
    photo208310.jpg
    19.2 KB · Views: 0
  • photo208311.jpg
    photo208311.jpg
    23.2 KB · Views: 0
  • photo208312.jpg
    photo208312.jpg
    15.2 KB · Views: 0

monnewbie3

Petty Officer 3rd Class
Joined
Sep 12, 2011
Messages
90
No Title
 

Attachments

  • photo208314.jpg
    photo208314.jpg
    23.1 KB · Views: 0
  • photo208315.jpg
    photo208315.jpg
    17.5 KB · Views: 0

monnewbie3

Petty Officer 3rd Class
Joined
Sep 12, 2011
Messages
90
No Title

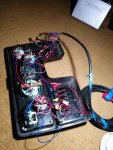
Finished up most of the electrical last night... and wired in some SeaSense water proof cabin lights. Matches the Keel guard of Course :p
 

Attachments

  • photo208316.jpg
    photo208316.jpg
    96 KB · Views: 0

monnewbie3

Petty Officer 3rd Class
Joined
Sep 12, 2011
Messages
90
No Title

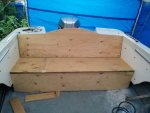
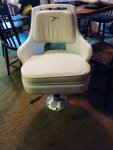
Got a little interior work done.. Repainted the front, built the back bench and picked up some front captain chairs.
 

Attachments

  • photo208699.jpg
    photo208699.jpg
    49.4 KB · Views: 0
  • photo208700.jpg
    photo208700.jpg
    36.3 KB · Views: 0
  • photo208701.jpg
    photo208701.jpg
    39.5 KB · Views: 0

Woodonglass

Supreme Mariner
Joined
Dec 29, 2009
Messages
25,928
Nice job on the Aft Seat. Will you be doing some Home Grown Upholstery on her??
 

monnewbie3

Petty Officer 3rd Class
Joined
Sep 12, 2011
Messages
90
Nice job on the Aft Seat. Will you be doing some Home Grown Upholstery on her??
Lol not on the aft seat, I don't think my upholstery skills are up to snuff :p I ended up buying 3 flip up boat seats that will be attached, the flat section you sit on was cut into 3rds, each seat bolted to one of the 3 pieces and "latched" into place. Each seat can slide out independantly to access storage under the bench. Were currently building a table that can slide into the middle section of the bench to hold water....;) I might be re upholstering the front ... Since its basically just wood boards with vinyl stapled down. -M
 

monnewbie3

Petty Officer 3rd Class
Joined
Sep 12, 2011
Messages
90
No Title

Installed most of the interior, and included some shots with the cabin lights on, last one is the bow. -M
 

Attachments

  • photo208836.jpeg
    photo208836.jpeg
    51.4 KB · Views: 0
  • photo208837.jpeg
    photo208837.jpeg
    32.5 KB · Views: 0
  • photo208838.jpeg
    photo208838.jpeg
    30.9 KB · Views: 0
  • photo208839.jpeg
    photo208839.jpeg
    41.7 KB · Views: 0
  • photo208840.jpeg
    photo208840.jpeg
    23.9 KB · Views: 0

Tnstratofam

Commander
Joined
Aug 18, 2013
Messages
2,679
Very nice job. I like the way you did the rear seating. I think you have given that Starcraft a new lease on life. I like the idea of the keel guard I may incorporate that into my resto when I get back to it. We don't plan on beaching much, but I like being prepared for anything. Again good job.
 
Top